How to paint eggs for Easter. Marble method of coloring eggs for Easter
Hello dear readers!
Ahead bright holiday- Easter. And according to tradition, Easter cakes are prepared in advance and eggs are colored. The two most basic attributes of this holiday. There is an article on my blog in which I describe the process. You can check it out.
But today we’ll talk about how you can paint eggs with your own hands at home.
Why are eggs painted for Easter?
Easter eggs and Easter cakes are the main symbols of the holiday. The tradition of dyeing eggs began with Mary Magdalene. IN Orthodox Church she is revered as a saint and myrrh-bearer who preached about the risen Christ in Rome. One day she came to the Roman Emperor Tiberius with a sermon.
And in ancient Rome it was customary to come to the emperor with a request only by bringing him something as a gift. Wealthier people brought gold. And those who could not afford it, brought something from the household.
And so, when Mary came, she brought an egg. It was white, as usual. And she said to the emperor: “Christ is Risen.” The Emperor, in turn, thought this was funny. And he said that he would believe it only when the egg turned red. This is what it sounded like: just as an egg is white and not red, so the dead do not rise again. And the egg immediately turned red.
The emperor was stunned and replied: “Truly risen!” So another tradition appeared, it comes to the house with these words.
How to paint eggs for Easter with your own hands?
There is a wide variety of coloring methods. First, I will analyze the classic and most common one. We will paint with husks from onions and beets. But we will improve it a little. We will get them not only red, but also with a pattern. This method is also good because we will use natural ingredients. In which no chemicals will be used.
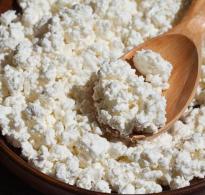
To do this we need onion peels, grated through coarse grater beets, a couple of parsley leaves and boiled eggs.
Take white eggs. The paint shows up better on them!
Painting process:
1. Let's start with beets. Take a small bowl and put the grated beets in it. Fill it with boiling water. Just a little bit.

2. Then add the eggs. They should sit for about 20 minutes. It all depends on the degree of coloring. If you want them to be brighter, then hold them a little longer. We leave it aside.

3. Now I’ll show you how to make patterns. Take a leaf of parsley, for example. Place it on the egg. To ensure that the sheet adheres well, moisten it. In this way we cover the egg on all sides.

3. Now we need an old sock or stocking. Better stockings. Naturally, it must be clean. In our case, I use a nylon stocking. Now you need to carefully put it on the egg with leaves. So that the parsley leaves do not fall off. And tie it or tie it with a thread. Place in a saucepan with onion skins.

4. Now pour boiling water. We put it on fire. You can also just put an egg, without a pattern.
The more you cook, the brighter the color will become.

5. Check the eggs that are in the beets. They turned out light red. Lay them out and wipe with a paper towel. And the stuck pieces of beets give a certain pattern.
To make eggs shine, you need to rub them vegetable oil. To do this, wet a paper towel with oil and rub it with a thin layer.

6. Once we have finished cooking in the husks, take out the eggs. Let cool. They can also be wiped with vegetable oil for shine. This is how they turned out.

Painted eggs: a simple and original way
The Easter holiday is always associated with spring, flowers, sun and great mood. And it’s not surprising, because there is something magical about this holiday. And you can decorate it with the help of originally painted eggs. Let's look at the entire dyeing procedure step by step.
First option
1. Prepare the paint in advance. We will use liquid dyes of three colors: red, yellow and blue. We breed as described in the instructions.

2. In order for the paint to dry efficiently and without streaking, you need to make a special stand. Let's make it simple. We need a sponge and needles. We stick the needles into the sponge in a circle, as shown in the figure. The circle should be of such a size that the egg does not fall through.

3. After hard-boiling the egg, dry it with a paper towel.
An important condition for high-quality staining is the maximum possible egg temperature. Those. so that it is hot. This will help fix the color better.

4. And blot the tip from below with a paper napkin to remove the resulting droplet. And then we put it on a stand so that the paint dries. It dries very quickly, because... the egg is still warm.

5. The next step is to repeat the exact same procedure, but only with yellow paint. We also lower the egg by 1/3, but on the other side.
At the intersection of red and yellow paint, orange is formed. We also place the egg on the stand,

6. And finally the third stage. In exactly the same way, but with the second unpainted side we lower it into blue exactly in the middle. And wait for 1-2 minutes. As a result, blue combined with red produces purple. And in combination with yellow it gives green. Thus we get rainbow egg, which consists of six colors with clear transitions.

Second option
Another easy way This is to make original lines on the egg. To do this, you don’t need ordinary electrical tape. We cut it into thin strips and gradually glue these strips tightly in a circle.
You need to double-check how you glued it to make sure no air gets under the tape. Otherwise, water will get in there and color the egg underneath.


Third option
I want to show you another original and at the same time simple way. One of my favorites. It's called marble chips. For this we need onion peels, a bandage and brilliant green.
1. First of all, using scissors, finely and variedly chop the husks. Or if it’s dry, chop it into pieces into different shapes with your hands.
The smaller the pieces, the smaller the pattern will be.

2. Cut the bandage into two wide strips. We lay it out so that the two strips are perpendicular to each other. It's like a cross. In the center of the strip we place an egg rolled in the husk. To make the husk stick better, you need to moisten the egg. And carefully roll it up.

3. Once rolled, roll it tightly. We twist it at the base with regular threads. We do all this in such a way that the bandage fits the egg as tightly as possible. To press the husk more tightly.


5. Then add a full tube of brilliant green to boiling water. The more green you pour, the richer the color will be.
And you mean very important point! The pan must be made of stainless steel so that it can be easily washed later.

6. At the end of this procedure, take out the eggs. Carefully cut the bandage itself at the base. We rinse. And the result is a very beautifully colored egg.

Making original Easter eggs with your own hands
Probably many will agree with me that painting eggs in monochromatic colors is kind of boring. Therefore, we will look at several ways to decorate and paint in an unusual way. If you like to creatively decorate something for the holiday, then you should like it.
For all methods, we will need egg dyes, which must be diluted according to the instructions.
Polka dots

To color polka dots, we need regular candle wax. All we need to do is draw circles on the egg with wax using a cotton swab.

Then let the wax cool. By the way, you can draw any pattern you like. Next, lower the egg into the paint can. But be careful, it shouldn't be hot. Once the paint has dried, you can remove the wax from the egg.
You can use a stand for drying paint, which we discussed above: a sponge with needles.
We do it with an elastic band

For the next method we will need rubber bands. Wrap the egg as you like. And then just dip it in the paint for a while. After the paint has dried, carefully remove the rubber bands.


Stripe patterns
For the next option you will need thin tape. Glue it to the surface of the egg. You can use both painted and unpainted. Dip it into the paint for about half a minute. Remove the tape from the dried egg.

Unusual pattern
In order to make such a drawing, you just need to add vegetable oil to the paint. And lower the egg for a few seconds. Then we take it out. As you can see, we received such divorces. Let dry completely.

Tricolor Rainbow
First we color the entire egg. Then we dip it on both sides. We have already discussed a similar method above.

Drawing in grains
For the next method we need rice. Pour it into a separate glass. Add a couple of drops of dye to it. And mix. You want the rice to be colored, but not wet. It is better to do this procedure in plastic container. Since you will need to add an egg, close the lid and shake everything together.

But I suggest you apply another color. Add another color to the same rice. This way you can combine different colors. Again, throw the egg into the container, close and shake. This is what we got in the end.

Bright multi-colored pattern “Wave”
Now I will show you the coolest and most favorite method. To color an egg this way, simply wrap it in a paper towel.

Apply a small amount of paint on top. We combine colors according to your taste. Leave the egg in the napkins for half a minute so that it is saturated with paint.

And then unfold the napkin. And the result is a wonderful drawing. This way you will definitely surprise your family and friends.


How to paint with natural dyes?
Easter eggs made from jelly
Well, together we’ve looked at more than 10 painting methods. And I hope I answered the question - How to paint Easter eggs with your own hands? But the most main idea This article is that you can give free rein to your imagination. All methods do not limit, but only give a chance to create and create masterpieces.
It seems like a simple dyeing procedure, but how many unusual and beautiful things can be done. Visual illustrations will help you with this.
Thank you for reading the article and for your attention. Like and like the article. Share information with friends. And I look forward to your comments below. Happy holiday, Happy Easter. Good luck to you!
April 16 – Easter. A holiday that is not complete without Easter cakes and, of course, decorated eggs. So that you can prepare for the celebration in advance, we offer you a few simple and original ways how to paint eggs for Easter.
Onion paint: grass pattern
What do you need?
- onion peel
- pan (preferably metal)
How to paint?
- Place onion peels in a saucepan. There should be quite a lot of it, ideally a full pan.
- Fill it with water, bring to a boil and cook for 30-60 minutes over low heat.
- After the time has passed, when the water turns dark red, set the pan aside and strain the husks.
- After this, place the eggs in the paint and cook for 10 minutes.
- If you want your easter eggs looked unusual, you can decorate them with herbs (dill, parsley, cilantro, etc.) and dried flowers. To do this, you need to secure fragments of plants slightly moistened in water with stocking capron or a bandage with threads. And only after that send them to cook.
Food coloring: spotted pattern

What do you need?
- two types of food coloring (at least)
- vinegar
- cotton swabs
- boiled eggs
How to paint?
- Dissolve two types of food coloring in 2 tbsp. spoons of vinegar. Then decide which color will be your main color and which color you will use to apply the pattern.
- Pour more water into the main color. In the second - 1 tbsp. l. Stir the dye well.
- Then dip the cooked ones in food coloring a little warm eggs(this way the paint will not spread).
- Using a different color, apply a pattern to the eggs. The easiest way is to point the dots. But we don’t limit your imagination to this. Use different shapes and patterns.
"Golden" Easter eggs

What do you need?
- boiled eggs
- egg white– 2 pcs.
- flat brushes – 2 pcs.
- gold leaf
- knife (blade)
- gloves
How to paint?
- Cut the gold leaf into small pieces with a knife or blade.
- Separate the egg white from the yolk of two eggs. Protein will replace your glue for gold leaf.
- Coat each boiled egg with white, but not too much. To work, use a flat brush.
- Then take a piece of gold leaf, place it on the egg white coated with egg white and attach it using a clean, slightly damp second brush.
- For convenience, paint only half of the egg and leave it so that the gold leaf is well attached. If there are gaps on the surface of the egg, apply an additional layer of gold leaf.
- 15 minutes after applying the last layer of sweat on the egg, gently polish it with a damp brush.
grain pattern

What you need:
- cereals (rice, millet, lentils, peas, etc.)
- confectionery powder
- beads
- candle (wax or paraffin)
- vegetable oil
How to do it?
- Light a candle, take pre-boiled eggs and use melted wax to apply a design on them. Try to keep the flames away from the eggs, as you don't want soot patterns.
- Place cereal, beads or confectionery powder on the wax while it is still wet.
- Once the designs on the Easter eggs have set, brush them with a brush or ear stick to give them a shiny finish.
How to Dye Easter Eggs Using Food and Seasonings

What do you need?
- turmeric – 2 tbsp. l.
- red cabbage – 1 pc.
- beets – 1 pc.
- vinegar
How to do it?
How else can you color eggs for Easter?
There are still many options left in our arsenal, but we will tell you about the simplest and not too expensive.
- Prepare several pans and required quantity eggs Pour water into one of them, 1 tbsp. l. bite (you don't need to use vinegar), add 2 tbsp. l. turmeric and put it on the fire, dropping a few eggs there. After 10-20 minutes, when the eggs acquire a yellowish tint, pull out the dyes and place them on a dry towel or on a plate. If you want the color to be more intense, leave the eggs in the solution overnight.
- Meanwhile, grate the beets and chop the red cabbage. Send both ingredients to cold water with vinegar and bring to a boil, adding a few eggs. If you want to get more bright color, leave the eggs overnight or at least for several hours in this solution. This way you will get pink (beets) and green (cabbage) colors.
Following this simple scheme, you can use tea or coffee, nettle, birch, and calendula leaves.
Fabric pattern

What do you need?
- pieces of fabric (scarves, ties)
- threads
- vinegar
How to do it?
- Cut the fabric into square pieces.
- Wrap the egg in fabric so that the right side is on the inside. Then secure it with threads and dip it in water with vinegar (3 tablespoons per liter).
- After the water boils, cook the dye for 10 minutes.
- After this, carefully remove the cloth from the egg and set it aside to cool.
In fact, there are about 20 ways to color eggs for Easter. We have chosen the most interesting, simple and harmless ones for you. And may your Easter eggs be bright and your thoughts pure!
Prepared by Tatiana Krysyuk
Painting variations chicken eggs a huge variety, but what remains unchanged is the process of preparing for coloring. We share some tips with you:
1. To prevent eggs from bursting during cooking, you need to remove them from the refrigerator a couple of hours before.
2. It is necessary to carefully wash all the eggs under running water. This way the paint will lie much smoother.
3. Boil the eggs in salted water, again, this will prevent the shell from cracking.
4. To clean eggs well, they need to be poured immediately after boiling. ice water until completely cooled.
5. Give colored eggs Vegetable oil will help give you a shiny look. You just need to dry the colored eggs and coat them with refined oil.
We are done with the preparation, now we can safely move on to the main painting. We invite you to use our simple ideas.
Classic way
Involves painting eggs in onion skins. This is the method our ancestors used.
1. We wash the husks (the more the better) under water and place them in a deep saucepan.
2. Add water to it and cook for about 40 minutes.
3. Turn off the heat and let the broth brew for a couple of hours.
4. Strain through a colander, removing all the husks.
5. Boil the prepared eggs. The cooking time depends on the color you want to get.
This process gives us solid-colored eggs; if you want to give them color imprints, you need to use nylon fabric and dried leaves. 
Or apply electrical tape desired drawing, boil in the husk. Get rid of the electrical tape (adhesive tape). The drawing is ready.
Decoupage Easter eggs
This method is for those who don’t want to bother with stickers and are used to doing everything themselves. We will need napkins with a pattern, boiled eggs and gelatin.
1. Dilute gelatin as indicated on the package.
2. Cut out the designs with thin scissors.
3. Apply the prepared design to the egg and use a brush to apply gelatin glue to the surface of the napkin. We start gluing from the center and move the brush to the edges. 
Before serving, eggs must be dried for 2 hours.
Gradient fill
The whole point is that each egg is a tone darker than the previous one. Prepare dyes and eggs.
1. Food colors dilute according to instructions.
2. Lower the first egg for 20 seconds.
3. With the rest of the eggs, we follow the previous method, only we increase the time of coloring each egg by 20 seconds (the first 20, the second 40, the third 60, etc.).
As a result, you should end up with a whole series of eggs that smoothly transitions from light to rich shades. 
If you have a negative attitude towards store-bought dyes, then use natural dyes.
Engraving
This unusual method will allow you to draw whatever you want. We stock up on colored eggs, a cutter, a pencil and patience.
1. The eggs must be thoroughly dried after painting.
2. Select the drawing you are interested in and transfer it to the shell with a pencil.
3. Using a cutter, carefully remove the paint from the shell, making sure that the egg does not break. 
The process is long and laborious, but it's worth it.
Space Easter eggs
Do you love space? Then this method is definitely for you. We will need acrylic paints, brush, dish sponge, toothbrush, white paint and water.
1. Cover the eggs with black paint in two layers.
2. Using a brush, apply various stains of dark blue and black-violet paints to the shell.
3. Take a sponge and dip it in dark colors, apply them to the egg with a sharp movement, then paint them brightly.
4. We dilute white paint with water, apply it to a toothbrush and spray it over the egg, giving the effect of stars. 
Attention!
After each layer, you need to dry the egg well.
Fabric pattern
The easiest way. We choose suitable colored silk and white cotton fabrics, threads, a needle, water, vinegar and white raw eggs.
1. Wrap the egg in a colored cloth, the front side should be from the inside.
2. To ensure that the drawing is not blurry, we sew it tightly together.
3. Wrap it in white fabric and stitch it again.
4. Mix water and vinegar (3 tbsp) in a saucepan, add eggs, cook for about 10-15 minutes after the water boils.
5. Cool the eggs in a natural way without resorting to cold water. 
Handsome and bright drawing provided for you.
Marble
You've probably heard of these Easter eggs? And we will tell you how to make them, only for this you will need: brilliant green and onion peels.
1. So, prepare the onion solution as written above.
2. Raw eggs wrap in onion skins, first grind it. We fix it with nylon fabric.
3. Cook. Halfway through the completed stage, add a spoonful of brilliant green to the water and cook until tender. 
A “marbled” egg will acquire a truly beautiful color if it is coated with vegetable oil.
Painting with rice
In fact, the option is very unusual. We can use rice, plastic cups and food coloring to give us an interesting texture and pattern.
Fill 1. 1/3 cup with rice.
2. Add 25-30 drops of dyes to it (if the paint is dry, then dilute it in a small amount of water).
3. Mix the contents of the glass thoroughly, evenly coloring the rice grains.
4. Boiled egg Add to the rice and gently shake several times. Leave it like this for five minutes. 
In this way, you can paint one egg several times, while changing the color of the paint.
Colorful palette
This method received this name for a reason. And you will find out why during the painting process. So, we will need: knitting threads (or floss) of different colors, vinegar and raw eggs.
1. We completely wrap each egg with colored threads.
2. Cook in water with vinegar added.
3. Transfer to a bowl and leave until completely cool.
4. Remove the threads. 
Beautiful, isn't it? What bright and original eggs we got.
Decorate with wax crayons
The name speaks for itself, we will need: wax crayons or crayons and eggs.
1. Boil the eggs.
2. We apply bright designs to the uncooled shell.
3. Cool. 
During drawing, the wax will begin to melt, thereby giving the egg an original design.
Culinary ideas
This option is the cheapest, because cereals are available in every home. And we will use: small grains (millet, egg, etc.) and wax candles.
1. Apply a design with hot wax to the finished eggs.
2. Quickly sprinkle this area with cereal.
3. Lubricate with refined oil. 
Eggs can be used either natural color or painted.
And in conclusion...
You can choose one idea from the proposed options and paint the eggs, but just think how delighted your guests will be if they see your festive table, beautifully decorated eggs. Spare no time and effort, because Easter comes only once a year, and make it unforgettable.
We invite you to watch a video in which you will learn a lot useful information on painting eggs for Easter.
You will need
- - eggs
- - onion peel
- - wax crayons
- - wax candle
- - food coloring
- - powdered sugar
- - shaving foam
- - electrical tape
- - pieces of nylon
- - parsley leaves
Instructions
Grandmother's method.
The most famous and simplest way to color eggs is using onion skins. The husk is poured with water and boiled. Then eggs are boiled in it. The “stronger” the dye solution, the brighter the color will be.
Natural decor.
To decorate eggs with prints, leaves of parsley or other plants are attached to them. They are wrapped tightly and boiled in an onion pot. To ensure that the leaves fit tightly enough during cooking, it is convenient to wrap them with pieces of nylon. For this purpose, buy and pre-wash the cheapest tights.

Patterns and geometric shapes.
Decorating eggs with patterns is also not difficult. You can make an egg with polka dots or a checkered pattern by gluing circles or strips with electrical tape. The same effect can be achieved if you paint over the figures with wax crayons. Just make them denser so that there are no unpainted spaces left. You can use crayons to make patterns. The eggs are then dipped into the dye. This method is only suitable for cold dyeing. Don’t chase variety – the simplicity and severity of the pattern emphasizes the author’s taste.

Noble marble.
Color the eggs a light shade. To do this, you can take a less concentrated dye or keep it in regular dye for a short time. Then add a little vegetable oil to the paint. Stir it well and use a fork to dip the eggs one by one. Smudges similar to marble pattern.

With the help of a candle.
For this method, only a wax candle is suitable. Light it and drop droplets of melted wax onto the surface of the shell. Then place the egg in a container with dye (the water in which the dye is diluted should be warm or cold). The procedure can be repeated several more times, changing dyes. Finally, the egg should be heated with a drop of wax over a napkin. The egg will turn out to be polka dots. While the drop of wax has not hardened, you can use the head of a pin to draw rays from it.

I offer you several ways to color Easter eggs.
Easter eggs are a significant attribute of Easter, along with and. We have already prepared all this and even one.
Today we will look at and prepare painted Easter eggs for the celebration.
There are probably a hundred or even more ways to dye eggs.
We will look at some of the most interesting and simple ones.
How to paint eggs for Easter. Coloring Easter eggs step by step with photos
First you need to prepare the eggs. This is very important for the eggs to be beautiful.
Menu:
How to prepare eggs for Easter painting
Preparation:

1. It is best to buy white eggs because they take paint better. Eggs must be washed thoroughly.
Usually the eggs are marked with a mark, date of release, and other things. This mark must be washed off, because it will show through any paint.
If it is not washed off with a sponge warm water, try with soda powder and, as a last resort, with table vinegar. This will not cause any harm to the egg, because we act on it in this way for a short time.
Do not press too hard on the egg. Since it is raw, it may crack. The egg must be washed thoroughly. Because only on a clean egg will the paint lie in an even layer.


3. And one more trick. A cotton pad should be moistened with alcohol (if you don’t have alcohol at home, use 9% table vinegar) and wipe the eggs with it. This is to remove grease stains from the eggs from your fingers. We process all the eggs in this way.
Don't forget! When processing eggs, they must be room temperature

4. Place the eggs in a saucepan and add a couple of tablespoons of salt to prevent the eggs from cracking during cooking. And fill it up cold water so that the eggs are completely covered.
By the way, can you tell old eggs from fresh ones? When we fill them with water, the old egg floats up and fresh egg remains lying on the bottom.

5. Let the eggs cook. We will cook on low heat. Of course we will boil it hard-boiled. After they boil, you need to cook for another 7-10 minutes if the eggs are store-bought. If the eggs are fresh country eggs, you need to cook them longer, after boiling for 13-15 minutes.
Don’t forget, when you take the boiled eggs out of the boiling water, be sure to dip them in ice water for a while, this is so that they can be cleaned better later. Just don't refrigerate it at all. The eggs should be warm when painting.
Well, we've cooked the eggs. Now let's move on to their coloring.

How to paint beautiful eggs for Easter

1. Take a hard-boiled egg, wipe it again with alcohol or vinegar and wrap it in a paper napkin or paper towel, do not try to wrap the egg evenly, just wrap it randomly, as if you were crumpling a napkin (do not press too hard, crush the egg).
Pour a little vinegar, as if to get wet, from all sides. Press the napkin (crimp) more tightly onto the egg.

2. Take blue dye and randomly drop it onto the egg. Let the dye spread a little.

3. Take another dye, yellow. Also, in a chaotic manner, apply it to the egg.

4. Take the third dye, ours is red, and just like the first two, apply it to the egg.

5. Squeeze the egg with your palms so that the napkin sticks well to the shell. In this case, the napkin turns out to be one-color, evenly colored.

6. Before painting the egg, we need to make a stand for it. We take an ordinary sponge, stick English needles into it the size of an egg and that’s it, our stand is ready.

7. Place our egg in a napkin with dyes on a stand and let it dry a little.

8. After a couple of minutes, the egg has dried, carefully remove the napkin from it, trying not to smear the paint.

We got such a rainbow colored egg. Place the egg on our homemade stand again and let it dry completely.

How to dye Easter eggs to make them multicolored

1. We will need small but deep plastic dishes. Pour a tablespoon of vinegar into each of them.

2. Pour the dye into each of the dishes, a little at first, and then you can adjust it after diluting the dyes with water.

3. Dilute the dyes with water. You don’t need a lot of water, about less than half. You will understand when you see what we will do.

4. Take an egg and dip it 1/3 into the dye. We hold it for about 2 minutes.

5. Take out the egg and blot a drop from below. We leave the egg to dry a little on our homemade stand. Since our egg is warm, it dries out quite quickly.

6. When the egg is dry, dip it into the next dye, again about 1/3, for 2 minutes. We take it out, also blot the droplet at the bottom and set it to dry.

7. Dip the remaining uncolored part of the egg into the third dye. We take it out, not forgetting to wipe the droplet from below, and set it to dry.

Here it is colorful egg we did it.

How to paint Easter eggs with polka dots

1. Prepare two paints in plastic cups, yellow and blue, a candle, cotton wool on sticks and an egg cup. If you have some paint left over from a previous painting, you can use it. We light a candle. we need melted wax.

2. Dip the egg completely into yellow dye. Let's let it lie there for a couple of minutes, take it out and put it on a stand to dry.

3. The egg has dried out. Take a cotton swab, dip it in the melted wax and randomly apply dots of wax onto the egg with the stick. You can come up with something of your own. Inscription, figures, stripes, etc.
4. Literally let the wax dry for 10-15 seconds and add the egg to the second paint. Ours is blue. You can take any one you like. Let the egg sit in the paint for 2 minutes.

5. Remove from the dye, place on a stand, and let dry. Basically the egg is ready. We can leave it like this.

6. If you want to remove wax from an egg, warm it up a little next to a candle, in no case above the egg, just next to it. The wax melts and can be easily removed with a napkin.

How to paint eggs for Easter with color transition
We will need an egg and dye of the same color.

1. Pour just a little dye into a plastic cup so that it only covers the tip of the egg a little more than a centimeter and lower the egg there vertically blunt end down. Leave it like this for 2 minutes.

2. Then use a spoon to add a little more coloring. Depending on how large the egg is and how many rings you want to make of different intensities of color on the egg, calculate how much paint you need to add. We added about 1 cm at a time. We also left it for a couple of minutes.

3. Add more dye and also leave for 2 minutes. And so on until we cover the entire egg, leaving the egg in the dye for 2 minutes after each layer.
After covering the egg completely with dye, let it stand for 2 minutes, remove it from the dye and place it on our stand to dry.
As we can see, all the stripes on the egg are visible. The egg turned out beautiful, with a gradually weakening tone of paint towards the top.

How to paint striped eggs for Easter

1. Pre-color the egg blue. Next we need electrical tape. Cut off 20-25 centimeters of electrical tape and cut the electrical tape lengthwise into narrow strips.

2. Place the tape on the egg in a spiral. You can stick it however you like. You can also make the strip of electrical tape any width you want. In this way we cover the entire egg. Press the tape firmly against the egg so that there are no smudges.

3. This is what we got, covered with electrical tape. We dip it in the pre-prepared red dye, as always, for a couple of minutes. We take out the egg, put it on a stand and let it dry.

4. Our egg has dried, remove the electrical tape. As you can see, there is a blue color left under the electrical tape.

We got this striped egg in a simple way.

Mosaic coloring Easter egg

1. We cut a lot of corners from electrical tape and now paste them onto the pre-painted yellow egg. We try to glue the corners in the shape of a mosaic. Between the corners we make a gap of approximately 2 millimeters. We lay the corners in random order.

2. This is the glued egg we got. Dip it in red dye to get a roughly orange color.

3. Remove from the dye and place on a stand to dry.

This is the egg we got. Now all that remains is to remove the electrical tape.

How to dye Easter eggs in onion skins
1. We will need onion peels, preferably from red and yellow onions. Eggs with already defatted shells. If you have not degreased them yet, wipe them with alcohol or vinegar. Squares of gauze measuring approximately 20 x 20 cm. Threads for tying gauze, a saucepan. There is a problem with the saucepan. After cooking onion skins, the pan is very difficult to wash, so choose a pan that is not needed or that you paint in every year. Or you will paint it.

2. For decoration, we will add various leaves and figures cut out of parchment so that the eggs are not so boring.
3. The husks need to be placed in a pan and mashed to crush. The size of the pan and the amount of peeling depends on how many eggs you want to dye. Fill the husk with water and put it on the stove to cook for 1-1.5 hours.
4. We begin to prepare the eggs. Take gauze, place a leaf on it, face up, carefully straighten all the ends of the leaf. Place an egg on a piece of paper. Carefully gather all the ends of the gauze into a pile and tighten it, pressing the leaf firmly against the egg. We twist the collected ends of the gauze into a tourniquet, then pull the leaf to the egg and tie it with threads.
5. We also make the following eggs. You can even lay out some composition of leaves on gauze. Place the egg in the center and tighten the gauze again. And here are the figures from parchment paper, it’s best to dip them in water so that they stick to the egg, and then put the egg in cheesecloth and also gently tighten.

6. Add salt to the boiling onion skins and place the eggs there.

7. Cover them all completely with husks and let them cook for 10-12 minutes over low heat. Remember that the eggs must be at room temperature, otherwise they will burst.

8. We take the eggs out of the husks and transfer them immediately into cold water to make them easier to clean later.

We cut off the gauze, rinse it with water and see how beautiful it is.
To make the eggs shiny, brush them with vegetable oil. The most convenient way to do this is by pouring a little oil onto cotton pads.
Well, the eggs are ready. They are perhaps not inferior in beauty to painted eggs.

Original DIY Easter eggs
We took:
- Eggs - 12 pcs.
- Water - 2 liters
- Vinegar - 2 or 3 tbsp.
- Silk fabric (with different patterns)
- Any white fabric
- Rubber bands

1. To color the eggs, we took unnecessary men's silk ties, of which we had a lot. If you don't have unnecessary ties, just take pieces of multi-colored silk.

2. We cut the fabric into squares. Take the egg and place it on the front side of the silk fabric.

3. Wrap tightly so that the fabric does not move around the egg. We twist the resulting tail of the fabric at the top, thus tightening the egg even tighter.

4. Place the same piece of white fabric on top of the colored fabric. We also curl the tail. We secure everything by putting an elastic band on the tail, twisting it several times. We do the same with all eggs.

5. When all the eggs are prepared, put them in a saucepan.

6. Fill with water, add vinegar and put on fire. After the water boils, cook for another 15 minutes. Turn down the heat so they don't jump around in the pan. If only they would slowly boil.

7. After 15 minutes, take out the eggs and place them on a dish. Leave on a plate until completely cooled.

8. When the eggs have cooled completely, remove the elastic bands and unfold the fabric. Look at the beauty that appears from under the fabric. In this way we unwrap all the eggs.

Here they are beautiful eggs we got it. Surprise your friends. Enjoy yourself.

Very beautiful Easter eggs

1. Take hard-boiled eggs, ordinary colored napkins and egg white. We tear the napkin into 4 parts. Separate the top colored layer from the napkins.

2. Dip the egg into the white and swirl to moisten the entire area of the egg. Place the egg on the wrong side of the napkin and wrap it. We tear off the excess napkin.

3. Dip the brush into the white and grease the egg on top, thus distributing the napkin evenly over the entire egg, while simultaneously pressing the napkin more tightly to the shell.

4. Everything is carefully distributed, the egg is ready. We make all the eggs in the same way. You can take different napkins. Accordingly, the eggs will be different.
Enjoy!
11. Video - 5 ways to decorate eggs for Easter in an original way