How to bake bread with rye sourdough. Whole grain wheat bread with rye sourdough in a bread machine
I regret that I learned very late that the bread sold in stores contains more harm than good.
Particularly dangerous thermophilic yeast or Saccharomycetes.
The technology for their preparation is monstrous and anti-natural. The production of baker's yeast is based on its propagation in liquid nutrient media.
Molasses is diluted with water, treated with bleach, acidified with sulfuric acid, etc.
This “pressed baker’s yeast” does not die even at a temperature of 300 degrees. Thermophilic yeast multiplies exponentially in the body and allows pathogenic microflora to actively live and multiply, inhibiting normal microflora, thanks to which they can be produced in the intestines proper nutrition and B vitamins, and essential amino acids.
The activity of all digestive organs is grossly disrupted: stomach, pancreas, gall bladder, liver, intestines.
Vitamins are insufficiently absorbed and synthesized, micro- and macroelements are not properly absorbed, and the most important of them is calcium.
Bread, yeast, cancer
Does thermophilic yeast affect health? Opinion of nutritionist Kovalkov
To restore the health of the nation, we need to return to baking bread with the help of yeast that exists in nature itself, in hops and malt.
Bread for hop starter contains all essential amino acids, carbohydrates, fiber, vitamins Bl, B7, PP; minerals: salts of sodium, potassium, phosphorus, iron, calcium, as well as trace elements: gold, cobalt, copper, which are involved in the formation of unique enzymes.
My recipe for yeast-free bread.
Leaven.

Don't be scared! The starter is prepared only once. This is a living substance.
And if you regularly feed it with dough, it will live for years. In the old days, sourdough bread was considered the main gift for newlyweds. In this way it was passed down from generation to generation.
Take 1 cup of hop cones (sold in pharmacies), add 2 cups of water and cook for 20-30 minutes. Leave until cool and strain.
Add a tablespoon of honey and flour (a mixture of rye and wheat in a ratio of 1:2) to the broth in such an amount to make a dough similar to the thickness of sour cream.
Cover the saucepan with a lid and place in a warm place for 5-8 hours.
It should be remembered that the starter will increase in volume by almost 4 times.
Ready starter stored in the refrigerator. Possible in plastic container, under a loose lid.
Homemade baking: fireweed sourdough for bread - in 24 hours!
A quick sourdough starter of excellent quality for bread. We do it on Koporye tea and dry apples http://zdravo.ucoz.ru/
A step-by-step recipe for making two types of sourdough for homemade bread.
Which one is better is up to you to decide!
Opara.
To do this, pour 3 glasses of warm water (+40 degrees) into a saucepan.
If you prefer, water can be replaced with chaga infusion or Koporye tea room temperature (secondary brewing is possible), add 3 tablespoons of sourdough (after adding any component, always mix the contents thoroughly), 2 tablespoons of jam (from plums, chokeberries, currants, apples...), 1 cup bran and about 4 cups flour (a mixture of rye and wheat itself) coarse in a 1:1 ratio).
You can add oatmeal, corn or buckwheat to wheat flour. Or a mixture of them.
There are many options! The ratio of mixtures to rye flour is the same - 1:1.

Place the dough in a warm place under the lid, wrapped in a towel. After 8 - 12 hours (depending on the temperature) it will be ready, foamy and risen.
Don’t forget to take 3 tablespoons from it and add them to the remaining starter. We do this every time. Our starter will never run out now!
Dough.

To the finished dough, add the following:
1 tablespoon sugar,
1.5 teaspoons table or sea salt, a tablespoon of coriander.
To choose from:
chopped dry orange or tangerine zest (tablespoon),
one crushed banana
pumpkin, flax or regular sunflower seeds.
You can use any chopped nuts. For bronchopulmonary diseases, low immunity and problems with thyroid gland- be sure to add 1 tablespoon of dry crushed cetraria to the dough.
If these components are not present, we do not add anything.
The bread will still be tasty and healthy due to the bran. Mix everything and add 3 - 4 tablespoons of unrefined sunflower or linseed oil. Mix again.
Now pour flour into the dough (mixture different types, about 3 cups) and knead a fairly stiff dough. As they used to say in the old days, you need to stir for a long time, until your pants are wet...
I bake bread in silicone molds. In order for future bread to be easily removed from the mold, it should be lightly sprinkled with flour. Divide the dough into molds by 1/2 volume and level the surface with a spoon moistened with warm water.
You can sprinkle the future loaf with cumin, sesame or coriander seeds.

Now place the forms with the dough on the wire rack and let the dough rise (30 - 40 minutes). During this time, preheat the oven to 200 degrees, with two red bricks or ceramic tiles placed on the bottom. When heated, they will give the effect of a Russian oven.
The bread will be ready in 1 - 1.5 hours from the start of baking.
When I became interested in how to bake bread without yeast, using self-grown sourdough, I started reading what they wrote about it on the Internet, and for a long time I couldn’t decide to try it, because I read a lot of positive things like “you can certainly try baking bread.” according to my recipe, but it’s unlikely you’ll succeed right away, since it’s very difficult and not everyone can do it” or “a lot of food went into the trash before I succeeded” or “I baked my 100th bread and only now it’s starting to vaguely resemble something edible" or "take a starter of 75.21 percent moisture, renewed at dawn after the full moon." Of course, I’m exaggerating, but I think many will understand me)))
Having encountered even one in a dozen recipes, such sentiments frighten most beginners and people either generally think that baking bread is something incomprehensible and do not dare, or take a long time to gather their courage, like me. And then I thought that humanity began to produce industrial yeast quite recently, and before that bread was baked with sourdough, and it’s hard to imagine that in some village, a simple woman with a bunch of children and a household, sat and calculated the percentage of moisture content of sourdough or something else. something like that. I realized that the process of baking bread is a natural and generally simple procedure that is accessible to any housewife.
Armed with this understanding, I overcame my fear, began to boldly try recipes that contained less abstruseness and intimidation, the bread immediately began to turn out tasty (yes, sometimes a little better, sometimes a little worse, but always tasty) and gradually I formed several of the simplest and popular recipes, which always turn out well for me if the main conditions are met: a living and healthy starter, sufficient heat to rise, aged right time, good kneading and the desire to feed your loved ones delicious and healthy bread.
At some stage, I was tired of telling my friends and others every time how and what to do, and I compiled a file in which I collected and systematized everything that I understood for myself about baking bread. I’m sharing this information with you, I hope it will be useful to someone.
LEAVEN
Sourdough is a substitute for industrial yeast. It needs to be grown, and then it can be stored for years, becoming stronger and stronger, you just need to feed it on time.
How to grow rye starter starter
It will take several days to grow the starter:
| 1 day | 50 gr rye flour+ 50 g of lukewarm water mixed in liter jar, cover with a lid or film (do not close tightly) and put in a cabinet for a day. |
| Day 2 | After standing for a day, the starter should ferment and increase in volume. Add 50 grams of rye flour and 50 grams of lukewarm water, mix, cover and return to the cupboard for a day. |
| Day 3 | The starter continues to ferment. We do the same as on the second day: 50 grams of flour + 50 grams of water |
| 4 day | Everything is the same as the third day. |
| 5 day | The starter is ready. It should be alive, bubbling, voluminous. In total we got about 400 grams of sourdough. From this amount you need to select 100 grams, put it in a jar, close the lid tightly and put it in the refrigerator. This will be the actual starter, from which each of your breads will then be fermented. The rest of the starter can now be used (see advice in recipe No. 1). |
How to handle the sourdough starter?
The starter starter sits quietly in the refrigerator. When you bake bread, take from the jar as much as you need according to the recipe. And immediately add flour and water into the jar (I add 25-50 grams of flour and 25-50 grams of water (25 or 50 depends on how much starter you used for the bread)), mix and put it back in the refrigerator - this is how you feed the starter. If you bake bread regularly, then you won’t have to do anything else with the starter. If you bake rarely, then you need to feed the starter once a week in any case. After the starter has been fed, after some time it will bubble and rise strongly, then calm down. It is necessary that the size of the jar is such that there will be room for lifting.
When dealing with sourdough, maximum care is important: clean dishes, hands, towels. You need to make sure that nothing gets into the leaven except flour and water.
It should look normal, with large bubbles during the active period, and small bubbles during the calm period. It should not be that the flour separates and the water separates. Make sure there is no mold!!! If the starter is very flaky or moldy, throw it away and make a new one. But if the starter is kept in order and fed on time, such troubles should not arise.
RECIPES OF WHEAT-RYE BREAD
Comments for all recipes
- Bread should only be baked in good mood and with good thoughts!
- Flour is different, so the amount of flour and water indicated in the recipes can be varied depending on the situation. How? - you need to feel it, it comes with experience, first you can do it strictly according to the recipe, and then analyze it and gradually it becomes clear whether changes are needed or not.
- In all recipes you need to take slightly warm water, slightly above room temperature, too warm or hot water may destroy the starter.
- Opara is the preliminary fermentation of part of the flour. The dough is actually the dough itself that will be baked.
- If the dough has stood for as long as it should, but for some reason you can’t immediately knead the dough, don’t worry - just put the dough in the refrigerator and knead the dough later.
- If according to the recipe it turns out that the dough itself needs a little less ready-made dough than what was turned out, then the remaining dough can simply be put in a jar in which the starter is stored.
- The dough must be well kneaded. You need to knead with your hands for at least 15-20 minutes. Since in all the recipes given the dough is sticky and not at all cool, you need to knead in a bowl and not on the table.
- The dough, kneaded and placed into molds, should rise to double in size. The rising time of the dough depends on the strength of the leaven and the room temperature. In the cold season, in order to rise better, it is better to place it either near the radiator, or on the table near the stove when something is being prepared.
- All the recipes below are designed for baking in molds. The most convenient form is a brick.
- If the bread falls off during baking, it means the dough has over-stood or was too liquid; over time, get used to it and this won’t happen.
- If the baked dough is too spongy, the dough was most likely too runny or poorly kneaded.
- Additive options: coriander or cumin (which contribute to better digestion of bread, you need to add a little of them, 1-2 teaspoons), pumpkin or sunflower seeds, flax seeds, sesame seeds, poppy seeds, raisins, bran (seeds), chopped nuts, cereals. Add all additives at the end of kneading the dough.
- Before putting the bread in the oven, brush it with water using a baking brush and immediately, before the water dries, sprinkle with sprinkles (cumin, sesame, poppy seeds).
- Place the bread in the oven carefully, without knocking, so as not to fall off. The oven must be preheated well in advance, bake at 200 0 for 40-50 minutes. But ovens are different, so you need to adapt to yours, this is important! The finished bread is golden brown; if you check with a splinter, it should be dry.
- The finished bread must be immediately removed from the pan, otherwise it will get soggy. Allow the bread to cool before cutting. If you start cutting while it’s hot, the dough will drag behind the knife and it will seem like the bread is damp. In general, rye bread tastes better when it has stood.
From specified quantity it turns out 1 large brick, weighing 700-750 grams.
| Opara | Rye flour - 150 gr Water - 150 gr |
|
| Dough | Dough - 300 gr White flour - 200 gr Rye flour - 130 gr Salt - 10 g vegetable oil - 1 tbsp Honey (or sugar) - 1 tablespoon Water - 200-230 g |
Advice:
When they were just making sourdough, after they had taken away required quantity for storage in the refrigerator, 300 grams left. These are the ones that can be used in this recipe as a dough (that is, take this starter and start preparing bread from the “Dough” stage). True, the leaven is not yet very mature, so for the first time you need to either add yeast, or be prepared in advance for the fact that the bread will take a long time to rise or may not turn out very well. It's not scary. Once the starter is mature, it will work well.
Recipe option No. 1 - with rye malt
| Opara | Rye flour - 150 gr Water - 150 gr Sourdough starter - 2 tablespoons |
Mix everything in a bowl, cover with a towel and leave room temperature at 16 o'clock. |
| Malt | Rye malt - 25 gr Water - 50 g |
|
| Dough | Dough - 300 gr Steamed malt (see above) White flour - 200 gr Rye flour - 105 gr Salt - 10 g vegetable oil - 1 tbsp Honey (or sugar) - 1 tablespoon Water - 150-180 g |
Mix everything, knead thoroughly. At the end of kneading, add a handful of additives (seeds, etc.) Grease the mold with oil and place the dough into it. Flatten with a wet hand as the dough will stick. Cover with a towel and place in a warm place to rise for 2-3 hours (until it doubles in size). When it’s ready, sprinkle with whatever you want and bake. |
Recipe No. 2
Compared to the first recipe, this bread is more rye (there is 2 times more rye flour than wheat). From the indicated quantity it turns out 2
large bricks, each weighing 850-900 grams.
| Opara | Rye flour - 300 gr Water - 500 ml Sourdough starter - 80 g |
|
| Dough | Dough - 800 gr White flour - 400 gr Rye flour - 300 gr Salt - 1 heaped tablespoon vegetable oil - 1 tbsp Honey (or sugar) - 1 tablespoon Water - 300-320 g |
Grease the mold with oil and place the dough into it. Flatten with a wet hand as the dough will stick. Cover with a towel and place in a warm place to rise for 2-3 hours (until it doubles in size). When it’s ready, sprinkle with whatever you want and bake. |
Recipe option No. 2 - with rye malt
It turns out delicious dark bread type "Borodinsky"
| Opara | Rye flour - 300 gr Water - 500 ml Sourdough starter - 80 g |
Mix everything in a bowl, cover with a towel and leave at room temperature for 10-12 hours. |
| Malt | Rye malt - 50 gr Water - 100 gr |
30 minutes before the start of kneading the dough, boil water, pour this boiling water over the malt and let it brew for 30 minutes. |
| Dough | Dough - 800 gr Steamed malt (see above) White flour - 400 gr Rye flour - 250 gr Salt - 1 heaped tablespoon vegetable oil - 1 tbsp Honey (or sugar) - 1 tablespoon Water - 200-220 g |
Mix everything, knead thoroughly. At the end of kneading, add 2 handfuls of additives (seeds, etc.) Grease the mold with oil and place the dough into it. Flatten with a wet hand as the dough will stick. Cover with a towel and place in a warm place to rise for 2-3 hours (until it doubles in size). When it’s ready, sprinkle with whatever you want and bake. |
Recipe No. 3
Unlike the first two recipes, this bread wheat flour more than rye. From the specified quantity you get 1 large brick, weighing 800-850 grams.
| Opara | Sourdough starter - 2 tablespoons White flour - 2 cups Water - 2 glasses |
|
| Dough | The whole dough (see above) White flour - 1-1.5 cups Rye flour - 1 cup Salt - 2 teaspoons Honey (or sugar) - 2 teaspoons vegetable oil - 1 tbsp |
Mix everything, knead thoroughly. At the end of kneading, add 1 handful of additives (seeds, etc.) Grease the mold with oil and place the dough into it. Flatten with a wet hand as the dough will stick. When it’s ready, sprinkle with whatever you want and bake. |
Recipe No. 4
Purely White bread, although the sourdough is rye, it will be lost there, and it will be white. From the specified quantity you get 1 large brick, weighing 800-850 grams.
| Opara | Sourdough starter - 2 tablespoons White flour - 2 cups Water - 2 glasses |
Mix everything in a bowl, cover with a towel and leave at room temperature for 12-14 hours. |
| Dough | The whole dough (see above) White flour - 2-2.5 cups Salt - 2 teaspoons Honey (or sugar) - 2 teaspoons vegetable oil - 1 tbsp |
Mix everything, knead thoroughly. Grease the mold with oil and place the dough into it. Flatten with a wet hand as the dough will stick. Cover with a towel and place in a warm place to rise for 2-4 hours (until it doubles in size). When it’s ready, sprinkle with whatever you want and bake. |
Add 200 grams of rye flour and mix. Cover the bowl with thick dough cling film and send to a warm place for 8-12 hours.
 During this time, the dough should fit well; many bubbles will form in the middle.
 Mix the suitable dough with 220 ml of warm water (until smooth).
 Add the remaining 280 grams of rye flour, add salt and sugar.


 The dough should rise, but not as well as with yeast. Bake the bread in an oven preheated to 220 degrees with steam (place a bowl of hot water) 15 minutes, then reduce the temperature to 180 degrees, remove the steam and bake the bread for about 1 hour. Let the delicious sourdough rye bread, cooked in the oven, cool slightly in the pan, remove and cool on a wire rack. The bread needs to be given time to “ripen” for another 10 hours. Now the bread can be cut and served.
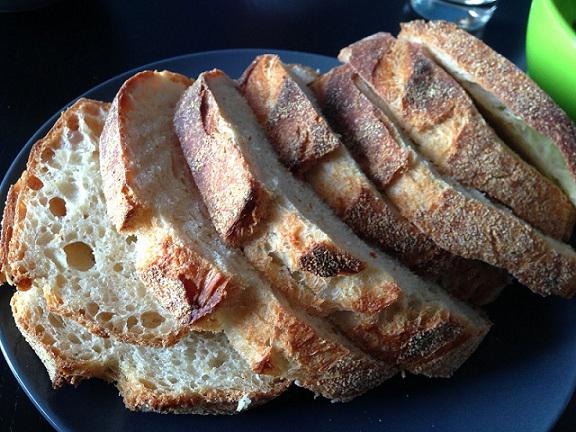
 The bread turns out very cool - with many holes in the pulp and a crispy crust.
  Enjoy your meal!
The bread turns out simply gorgeous!!! People have forgotten the taste of real bread. What we eat from stores is just ugly and has no taste, incredible taste, when bread can be eaten simply by itself, without adding it to soup or porridge.
In this recipe, I show the process of baking wheat sourdough bread in full and with all the stages. It may seem long and laborious. Not really! If you have a bread machine, this is 10 minutes maximum of your personal time. This wasted time consists of two processes:
- add 3 ingredients to the starter;
- After 1-1.5 hours, put the products into the bread maker.
But there will be a lot of photos so that a beginner can bake delicious bread the first time.
And of course one more thing: of course you should already have sourdough!!!
Stage No. 1 – revitalizing the sourdough
Since the starter is stored in the refrigerator, it needs to be revived before baking bread. To do this, take the starter from the refrigerator. I got the leaven from a friend who got it from the monastery. She's real drunk.

sourdough from the refrigerator
Pour it into a non-metallic container and add:
- 1 dessert spoon honey
You can add a spoonful of sugar, but honey has excellent fermentation properties, and this is what we need. BUT you will succeed with sugar too.

add a dessert spoon of honey
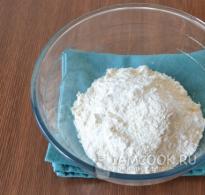
Add 5-6 tablespoons of RYE flour. You won't succeed with wheat flour. You will add wheat flour to the bread and it will be white, but you only need to add rye flour to the sourdough.

add rye flour
And lastly, pour 1 glass of warm water. The water should be warm, not hot.

pour a glass of warm water
Mix everything well with a wooden spoon. Why wooden? This is what was written in the recipe from the monastery and this is what I do. Apparently so as not to damage the bacteria...
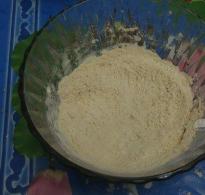
Now the starter should stand for 1-1.5 hours in a warm place. There is no need to place it specifically near the oven, just in a cool place. During this time it will ferment and rise a little. This is what it looks like after 1.5 hours. It may not be very visible in the photo, but it is so foamy.

ready-made starter
Stage No. 2 - placing products in the bread machine
Now that the starter is ready, put the ingredients in the bread machine.
For our bread you need:
- sourdough – 1 cup (250 grams),
- wheat flour – 4 cups (610 grams),
- warm water – 1 glass,
- deodorized sunflower oil – 2 tablespoons,
- salt – 1 teaspoon,
- sugar – 1 tablespoon.
Pour/pour all this into the bread machine and turn on the “bread baking” mode. I didn’t take a photo of the bookmark because it’s all simple and not very visible at the bottom of the bread pan.
After 3.5 hours we have ready bread. You see a hole at the bottom of the bread - this is from the bread machine knife. The weight of the finished bread is 750 grams. If you want a looser bread, add a little more starter – 1 cup + 1/4 cup….
The bread in the photo is not quite snow-white. This is because I added 3 cups of wheat flour and 1 cup of rye flour. I like this better. The bread fits perfectly, soft, fluffy and very tasty!!!
If you have any questions, write in the comments and I will definitely answer.

hop sourdough bread recipe
In the oven, many families make it a tradition to use only products on the table homemade. Homemade loaf will become daily tasty addition for main courses. The soup will seem more satisfying, and the sandwich will seem even tastier. How does the baking process happen?
Homemade sourdough bread in the oven: the reason for its popularity
The secret to the success of a homemade loaf lies in good sourdough. The dough should be placed exclusively on a healthy and strong fermentation product that is in its peak phase. If you plan to bake bread regularly, then you need to keep the starter in the house at all times. The quality of the loaf crumb and the taste sensations from eating it will instantly be spoiled by peroxidized or unripe sourdough. We can say that the beloved large pores in the crumb are 80% due to the high-quality, matured sourdough. The dough, of course, will arrive in any case, but success finished product largely depends on the quality of the source material. Cooking sourdough bread in the oven will be successful if you do not store the fermentation product in the refrigerator and “feed” it regularly.
Ingredients for cooking
In order to bake delicious homemade bread, we will need:
- Flour from whole grain- 100 g.
- Rye or wheat flour of the 2nd grade - 100 g.
- Mature sourdough - 30 g.
- Water - 1 glass.
The secret to good dough is any coarse dough, with bran or germ. In order for sourdough bread to come out great in the oven, it is important to avoid wheat flour premium, which is emasculated.
How to prepare the dough?
So, the flour should not be emasculated. It is better if half of the total quantity is of one variety, and the remaining part is of another. Housewives can combine different combinations, the quality of the bread will not suffer from this. First, beat the ripe sourdough into a fluffy foam, then add flour and mix everything thoroughly. It is necessary to maintain a sufficient amount of time for the mass to rise well. So, if you plan to bake in the morning, leave the dough in a warm place overnight. For evening cooking, you can make the batch before leaving for work in the morning. The complete preparation of the dough is influenced by temperature factors, as well as the grade of flour.

Ripening time for high-quality dough
To make the bread rise faster, housewives place the pan with the dough in a warm place on a low-heat stove or in an oven that maintains a temperature of no more than 32 degrees. Under these conditions, the bread rises completely in 6-8 hours. When there is no way to withstand such temperature regime and the dough arrives at a temperature of 22 degrees, its complete ripening will take place in 9 hours. If you adapt to compliance with the given conditions, then preparing delicious sourdough in the oven is as easy as shelling pears.
What should be the volume of the resulting mass at the first stage?
Few novice bakers know how many times the initial volume of dough increases. The dough should rise exactly 2 times. If at first it is difficult to navigate purely visually, you can use a container with measuring marks. In the future, everything will go intuitively. If the process seems quite complicated, you can try baking sourdough bread in the oven without dough.

Kneading dough
The second stage of the whole process begins. So, to prepare sourdough bread in the oven, let’s move on to the actual kneading. We take the following ingredients:
- Ready dough.
- Water in the amount of 1 glass.
- Bread flour - 450 g.
- - 0.5 teaspoon.
- Salt - 2 teaspoons.
Some people are interested in how to bake sourdough bread in the oven using raw yeast and is it possible to do without this component at all? If we take a compressed yeast product, then we will need approximately 5 g of it. First dissolve it in warm water. You can do without yeast at all. In this case, the period for complete proofing of the dough will increase slightly. Yeast only speeds up the rising process. As in the case of dough, ready mass should double its original size. Rye bread sourdough in the oven is made from rye flour, the process of preparing the dough is the same.

Step-by-step kneading process
You can use a cauldron or a bread maker as a vessel. First, pour a glass of water into the container, then tip the dough into the water, knead thoroughly. When will it work out? homogeneous mass, sift flour into the liquid. In order for sourdough bread to turn out perfect in the oven, the process of sifting through a sieve should not be skipped under any circumstances. Our grandmothers baked bread themselves and knew their craft, mastering it perfectly. Now all that remains is to add the yeast and make the first batch. Don't be alarmed if the dough is still runny, this is normal. If the batch is made using a special combine, there is a high probability that the entire composition will be wound onto the hooks. After the unit stops, the mass immediately drops. For sourdough to succeed in the oven, knead it long enough, about 8 minutes.

First breakup
Many bread makers have a bowl that covers plastic cover. Therefore, for pre-fermentation, you can leave the dough right there. The first proofing time is 50 minutes, during which the mass rises well. The swelling of the base and an increase in size are noticeable to the naked eye. After the required time has been maintained, you can proceed to the next stage of kneading, using salt and vegetable oil. To properly prepare sourdough bread in the oven, the recipe for which is given here, you need to stir the salt until completely absorbed, and only then pour in 2 tbsp. spoons of butter. The dough is ready when it completely leaves the sides and bottom of the bowl. The resulting bread mass looks quite impressive thanks to whole grain flour or bran flour.
The final stage of proofing
But that is not all. The resulting mass needs to sit a little longer before going to bake. Now you practically know how to cook sourdough bread in the oven, there are very few manipulations left. And if at first it may seem that this process is quite labor-intensive and time-consuming, then it is not so. Having filled your hand, you can later bring the dough kneading to automaticity. So, our bread mass needs another 20-30 minutes of rest, during which you can drink a cup of coffee, check your children’s homework, or watch the latest news. We will carry out the process of forming a loaf on a smooth surface, lightly dusted with flour, using a special scraper. For the final stage of proofing, a bowl or salad bowl covered with a layer of parchment paper is suitable.

Inventing a proofing cabinet
In the kitchen of an ordinary apartment, any dark, enclosed space can be used for the final proofing. A microwave works well, you just need to put a glass of boiling water inside. Sourdough bread in the oven, detailed description which you have carefully studied, will not turn out well baked unless cuts are made in a random order on the surface. But first, the future loaf is lightly sprinkled with flour. Experienced bakers use proofing under film. However, if the housewife takes up baking bread for the first time, it is better not to experiment.
Place the loaf in the preheated oven
From the moment the cuts are made, the bread should be placed in an oven preheated to 300 degrees. We will immediately reduce the temperature to 220 degrees. Of course, the oven must be turned on in advance. The baking container must have a lid. The workpiece itself is transferred there directly with the paper. To ensure rich, rather than dry, sourdough bread in the oven, the recipe recommends sprinkling the mixture with water several times before closing the lid. To do this, you can use a spray bottle. Baking time with lid - 15 minutes. Then remove the lid and leave in the oven until fully cooked.
Eating healthy and showing love to your family
No aroma can compare with the smell of freshly baked homemade bread. Household members will be confident in the absolute love of their mother and wife. Anyone who inhales the unsurpassed smell will be intoxicated by it. And when it comes to cutting the beautiful loaf, an elastic crumb with large pores will appear. Taste qualities received culinary masterpiece so excellent that the family will ask their hostess to bake homemade bread again and again. After this perfect taste not only a gourmet, but also a completely undemanding person will not want to return to the store option. Such delicious bread It's worth learning how to bake it.
The question arises: “Will the strong half of humanity be able to please their family, at least in their leisure time, with delicious aromatic bread?” Yes, men are great cooks, but they usually don’t like to tinker with dough, considering this process to be quite tedious. We believe that sourdough bread in the oven, the recipe for which is presented in this article, will become a specialty for housewives.
Alternative baking method
Now the reader is aware that sourdough in the oven, the recipe with photo has been studied. A logical question arises in itself: “Are there alternative ways baking?" Skilled bakers, honing their skills, experimenting, are in search best options to create this indispensable component on the table. Thus, many craftswomen have adapted a deep round tool for this task. Chinese frying pan with a convex bottom, called a wok. However, traditional, albeit more time-consuming, is baking in the oven on a stone. This method is similar to what our ancestors used when sending bread to