How to make a velvet cake. Technology for preparing cake cream
Chic birthday cake“Red Velvet” is a real decoration for the feast! Divine taste and incredible tenderness.
We offer a recipe for red velvet cake for making at home. Tender, very tasty, classic version With cheese cream.
For the test:
- flour - 330 gr
- sugar - 300 gr
- butter— 150 gr
- vegetable oil - 150 ml
- eggs - 3 pcs
- kefir – 270 ml
- red dye - 2 tsp.
- cocoa - 1 tbsp.
- baking powder - 1 tsp.
- soda - 1 tsp.
- salt - ¼ tsp.
- vanilla sugar- optional
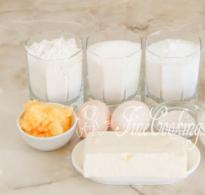
For cream:
- powdered sugar - 250 gr
- butter - 300 gr
- creamy soft cheese - 900 gr
- vanilla, chocolate, caramel - optional

Sift the bulk ingredients into a bowl suitable for the dough - flour, soda, cocoa and baking powder. I stir everything until smooth.

Using a mixer, mix the softened butter and sugar in a bowl. Then I add one egg at a time into this mixture. Mix each thoroughly. At this stage, add vanilla sugar and salt. Pour in vegetable oil in a thin stream, continuing to stir.

I pour two teaspoons of gel dye into kefir and stir. Now I begin to pour this red kefir into the mixer bowl alternately with flour. I continue to knead the dough at low speed.

The dough should turn out this rich, red color. The main thing is that it should be just as beautiful and red after baking. In this case we will have real cake Red velvet. My mold has a diameter of 22 cm. I cover the bottom and sides of the pan with parchment paper.

Baking takes 30-40 minutes. Temperature 180 degrees.
I will bake in two batches, half the dough each. If the mold is large, you can bake all the dough in one layer.
I'm getting it ready-made cake and check the readiness with a wooden skewer. I pierce it and make sure the skewer is clean.

I put this sponge cake on a wire rack to cool while the second layer is baked. I cool the second biscuit also on a wire rack. Now you need to wrap the cakes in film or a bag. Keep it in the refrigerator for at least two hours, or better yet 10 hours. After this, I cut each cake with a fishing line or a large, hot knife into two cakes.

To frost the biscuits and decorate the top of the cake, I will make a creamy cheese, so-called cream cheese.
According to recipes from different chefs and confectioners, we see that Red Velvet cake is made with this very cream. So today I will make this cream according to the classic recipe.
The butter should be left at room temperature 2-3 hours before cooking. Soft cheese, on the contrary, needs cold cheese.
Beat the butter, thawed until soft, with a mixer, adding powdered sugar in portions. The mixture should gradually turn white.

I also add vanilla extract and cold cream cheese in portions and beat until smooth. The longer we beat, the softer the cream becomes. Because cold cheese It heats up and becomes very soft.

If, when assembling the cake, the cream becomes very soft and “floats”, put it in the refrigerator for half an hour. You can do it directly in a pastry bag. Once set, continue leveling the cake.
If desired, you can add to the cream berry puree, for aroma and color.
I lightly trim and trim the edges of the cake layers. This crumb will be used for decoration. I grease the cake layers and sides with cream.

I sprinkle with cake crumbs. You can sprinkle the entire cake with crumbs, but I left the white center.
And a little drop of dye was added to the remaining cream. From pastry bag squeezed out pink roses, placing them tightly together in the middle of the cake.

Cooling down ready cake another five hours in the refrigerator. And here he is, our handsome boy! It is not only elegant and festive, but also surprisingly tasty. If you haven't made this cake yet, be sure to do it!
Recipe 2: Red velvet cake at home
The cake according to this recipe is not only beautiful, but also very tasty. The sponge cake is moist, light and flavorful, and the red velvet cake itself looks gorgeous.
For the biscuit:
- Flour - 340 g
- Sugar - 300 g
- Cocoa - 1 tbsp. spoon
- Salt - ¼ teaspoon
- Baking powder - 2 teaspoons
- Soda - 1 teaspoon
- Eggs - 3 pcs.
- Kefir 3.2% – 200 ml
- Cream 33% – 80 g
- Sunflower oil - 300 g
- Red food coloring (gel) - 2 teaspoons
For cream:
- Butter 82.5% - 100 g
- Powdered sugar - 100 g
- Cream cheese (Philadelphia) - 350 g

Sift all dry ingredients twice. (Be sure to pay attention to the expiration dates of the soda and baking powder, otherwise the cakes will not rise.)

Add all other ingredients for the crust to the dry ingredients. (To make the dough bright red, use gel rather than dry dye).

Beat the dough at medium speed until smooth, 4-5 minutes. Let the dough rest for 5 minutes.

Cover the bottom of a springform baking pan (20 cm in diameter) with parchment and grease the sides of the pan with butter. We will bake two biscuits, so we divide the dough into two equal parts, weighing 650 g. Alternately, place the dough in an oven preheated to 170 degrees for 20 minutes. We check the readiness of the cakes with a toothpick - it should be dry. (I don’t recommend baking in a slow cooker, because the biscuit turns out to have very large pores. It doesn’t look very nice when cut.)

Cool the finished biscuits completely.

Biscuits rise when baking, but we need even cake layers, so we cut off the top of both cake layers.

Grind the tops of the biscuits into crumbs (the crumb can be kneaded with your hands, and the hard crust can be crushed in a blender).

Let's start preparing the cream. Beat the softened butter with a mixer for 2-3 minutes at high speed. Then add powdered sugar and continue beating for another 1.5-2 minutes.

Mix whipped butter with chilled cream cheese.

Place the cream in a bag and cut off the corner. Pour the cream onto the bottom cake in a circle, stepping back 0.5 cm from the edge. Level the cream and cover with the second cake. Place a board on top and press lightly so that the cake is even.

Grease the top and sides of the cake with a thin layer of cream.

Sprinkle the cake with crumbs. Place the red velvet cake in the refrigerator for a couple of hours or overnight.

Homemade red velvet cake is ready. Bon appetit!

Recipe 3, step by step: how to make red velvet cake
The original American masterpiece is very easy to prepare at home, and the classic red velvet cake recipe is so simple that any housewife can handle it. Before making the red velvet cake, I slightly changed the recipe, since I couldn’t find buttermilk and mascarpone, replacing them with regular full-fat kefir and cottage cheese.
- Flour 300 g
- Granulated sugar 500 g
- Vegetable oil 1.5 tbsp.
- Butter 120 g
- Eggs 4 pcs.
- Full fat kefir 200 ml
- Cottage cheese 300 g
- Cocoa powder 50 g
- Baking powder or slaked soda 2 tsp.
- Red food coloring 2-3 tsp.

If you make a red velvet cake with beets, you can do without the dye, which is also indicated in the recipe. To do this, take about 200 grams of boiled beets and chop them with a fine grater or blender. Add two tablespoons lemon juice or vinegar. We put this paste into the dough.

You can also replace the dye with any chopped fresh red fruit: cherries, currants, raspberries. You just don’t need to add acid to them.
First, sift the flour and cocoa powder.
Separately mix all the dry ingredients (flour, baking powder, sugar and cocoa), separately the liquid ones (kefir, vegetable oil, dye and eggs).

Combine the contents of two bowls. Take a mixer and beat everything until smooth. You should get a paste-like mass of red color. If you use red velvet cake dye gel, the color will be richer.

Let the dough rest for half an hour. After this, we divide it into two equal parts. In a mold that we have greased and lined with parchment paper, place one part of the dough and place it in an oven heated to 180°.

After 35 minutes, check the degree of cooking with a toothpick by piercing the cake in the center with it. The biscuit is considered ready if the toothpick remains dry. If not, then bake for another 10-15 minutes. We take out the pan with the finished cake and let it cool slightly. After this, take out the cake.

We do the same with the second part of the dough. The biscuit will become juicy and soft if you wrap it in cling film and put it in the refrigerator for at least two hours.
The original red velvet cake cream should be made with mascarpone. We'll take it regular cottage cheese, put butter and sugar in it. Now, using a mixer, we will make it all smooth and homogeneous. For aroma, we can add a little vanilla.

How to decorate a red velvet cake at home?
For better impregnation The tops of the cakes need to be cut off. This is also necessary to ensure that the finished cake is smooth and beautiful. Trimmed biscuits can be lightly soaked in cherry syrup. This will make them even juicier.

Place most of the cream on one biscuit part. Place the second biscuit with the cut side on top and press lightly.

Spread the remaining cream on the sides. Sprinkle them with the crumbled tops of the cakes.

A beautiful decoration for a red velvet cake can be roses made from protein or butter cream with a cherry in the middle. You can sprinkle with coconut or remaining crumbs. You can also fill it with melted chocolate glaze or arrange fruit beautifully.
You can take twice as many ingredients and make two large biscuits, which you will need to cut in half. This will make a four-layer cake.
Or divide the dough into three layers. Once cooked, trim the sides lightly with a knife or use a smaller mold to cut out even circles. Assemble the cake, but do not grease the sides. Plant a large mastic flower on top. It will be a three-tiered miracle.

Recipe 4: original red velvet cake (with photo)
Recipe original cake red velvet with dye. To prepare it, I will use natural food coloring; it is not cheap, but it is not harmful to health. In general, I don’t recommend saving on such things; it will cost more when you have to fork out for pills. Thanks to his bright color, this dessert always attracts attention, so it is perfect for children's parties
- Flour – 2 cups
- Butter – 100 gr.
- Vanilla extract – 1 tsp.
- Vinegar – 1 tsp.
- Lemon juice – 1 tbsp.
- Cocoa powder – 2 tbsp.
- Eggs – 2 pcs.
- Kefir – 1 glass
- Sugar – 1 glass
- Dye (red) – 1 tbsp.
- Soda and salt - 1 tsp each.

Take a glass of kefir, mix it with 1 tbsp. lemon juice or vinegar. Let stand for 8-10 minutes. Kefir can be replaced with milk.

Add flour, cocoa powder and salt to an empty bowl. We use all ingredients of the highest quality.

Mix with a broom until smooth. Try to mix everything thoroughly so that there are no lumps left. I have done baking many times and there have been cases when the finished cake was cut, and there were bubbles with flour or cocoa.

In another bowl, beat the butter with a mixer for about 5 minutes.

Add half the sugar and continue stirring.

After 2 minutes, add the remaining amount of sugar without stopping the mixer.

Add the eggs, preferably doing this one at a time, starting with one egg, then whisking, then another, whisking again.

Add vanilla extract, this component will give the cake a special aroma. You can use vanillin, the result will be no worse, but in the original recipe only the extract is always used.

Add flour mixture. Mix all the ingredients.


Add red food coloring, the same one used in classic recipe.
Some people ask me, how to get natural food coloring from beets? Honestly, I don’t know, so if anyone has such information, please tell me and my visitors.

Mix everything thoroughly with a mixer.

Take a springform pan with a diameter of 23 cm and grease it with oil. Place baking paper on the bottom of the pan.

Quench soda with vinegar.

Add it to the dough and mix. Divide the dough into two parts, first bake one part and then the second.
This is how I cook at home, but if you have two identical molds, you can use them to make 2 biscuits at once. This will reduce your cooking time by at least 45 minutes.

Place the first part of the mixture in a baking dish.

Distribute it evenly over the entire plane.

Place in an oven preheated to 180 degrees for 25-30 minutes. When the cake is ready, remove it from the oven and let it sit for a while before removing it from the pan. It took me about 15 minutes.

After 15 minutes, the cake has cooled down a little, remove the baking paper from the workpiece and leave to cool until room temperature. In the meantime, I bake the second part of the dough according to the same pattern.

When all the parts are ready, we begin to coat the pie with cream. For decoration I use sour cream or butter cream. I also want to present you with a few recipes. different creams to choose from. You can use any, but I would recommend creamy.

Place the second part of the pie on top. We also coat it with cream on top.

You also need to coat the entire cake, on the sides. Smooth out the cream using a butter knife.

Decorate the cake with sponge cake crumbs, then it will take on a marvelous look.

Cut off small piece, to try what you got.

Recipe 5: American Red Velvet Cake (step by step)
Red velvet cake is a classic popular American cake ( original title Red Velvet). His distinctive feature- red sponge cakes smeared with white cream from cream cheese(cream cheese). It is prepared only on special occasions, on major holidays.
- flour - 340 grams;
- cocoa - 1 tbsp;
- salt - 0.25 tsp;
- granulated sugar - 300 grams;
- vanilla sugar - 2 tsp;
- cream cheese - 260 grams;
- baking soda - 1 tsp;
- baking powder - 2 tsp;
- kefir 1% - 280 ml;
- vegetable oil - 300;
- chicken eggs - 3 pcs;
- butter - 250 grams;
- red food coloring - 5 grams

Beat sugar + eggs well, 7-8 minutes.

The mixture will turn white and expand.

Add dye, I have dry red dye, 1 bag 5 grams. Beat for another 2 minutes with a mixer.

Add 1 teaspoon of soda to the kefir, wait until the reaction occurs and the kefir begins to foam a little.

Add vegetable oil and mix well.

Mix flour, cocoa, salt and baking powder.

Sift 1/3 of the flour into the beaten eggs and sugar, mix with a mixer at low speed, add another 1/3 of the flour, mix and another 1/3.

Now add half of the oil-kefir mixture, stir and add the rest.

The result is a homogeneous, thick dough.

You can see in the photo last stage preparing the dough and what its consistency is.

Divide the dough into 2 parts and bake 2 identical cakes. I baked it in a slow cooker, baking mode, for 40 minutes.

Can be in the oven at 170 degrees for 30 minutes. Check readiness with a toothpick; the dough should come out dry.

Cool both cake layers and chill for 1-2 hours in the refrigerator. At this time, I take out 250 grams of butter, cream cheese (), we will need this to grease the cake with white buttercream.
Beat butter with powdered sugar(100-150 grams) 10 minutes, add 2 tsp vanilla sugar and cream cheese 260 grams, mix until smooth.

Now let's start assembling the red velvet cake. It is necessary to cut off the top a little from the cakes (if they have risen strongly or unevenly during baking). Divide lengthwise to make 4 layers. Now we grease them with white butter cream, and also grease them with cream on top.

Gently level with a silicone spatula.

To decorate the cake I had candied cherries and red coconut flakes.

I made a heart stencil out of paper and poured it through coconut flakes and placed cherries around the edge.

Red velvet cake at home is ready.

Recipe 6: Buttermilk Red Velvet Cake (step by step photos)
Is there a celebration or holiday coming up? Do you want to shock your guests? I wouldn't refuse it. And I advise you! Where else will they see red cake? Only on your table! The Red Velvet cake came to us from America, and even though all sorts of different chefs argue about which part of the States it came from, we will start preparing this masterpiece in our kitchen!
For the test:
- Premium wheat flour 250 gr
- Baking powder 1 tsp
- Salt ½ tsp
- Cocoa powder - 15–20 g
- Butter 115 ha
- Granulated sugar 300 gr
- Chicken eggs 2 pcs
- Vanilla sugar 1 tsp
- Buttermilk 240 ml (you can make it yourself, see recipe)
- Red liquid food coloring 2 tbsp; pasta - ½ tsp
- Baking soda 1 tsp
- Apple cider vinegar 6% – 1 tsp to taste
For cream:
- Heavy cream 33% 400 ml
- Soft cream cheese 220 gr
- Mascarpone cheese 250 gr
- Vanilla sugar ¾ tsp
- Powdered sugar 110 gr
For buttermilk:
- Milk or kefir (3%) 240 ml
- Apple cider vinegar 6% or lemon juice 1 tbsp

Buttermilk is a butter dish, simply put. Previously, buttermilk was made from the liquid that remained after churning butter by adding special bacteria. Today you can make buttermilk at home from available products. Kefir or milk – 240 ml and a tablespoon apple cider vinegar or lemon juice. Stir and leave in the refrigerator for 10 minutes.

Sift flour and baking powder into a deep plate. Add salt and cocoa powder there. In a bowl, beat the butter with a mixer for 2 minutes, add sugar, vanilla sugar and continue to beat until fluffy and creamy. Then beat in the eggs one at a time and add coloring. Whisk well until the dye dissolves. When this mass is ready, slowly add flour and buttermilk. I recommend beating at low speed so as not to end up in flour. At the end, we extinguish the vinegar and add it to the dough.

The dough now needs to be divided into two equal parts. Preheat the oven to 175*, grease the pan with butter and cover it with paper. Pour some of the dough into the mold and place it on the middle shelf to bake for 30 minutes. When ready, remove and let cool for 10 minutes. Then remove from pan and cool completely on a wire rack. Then wrap the cake in film and put it in the refrigerator for an hour. We do the same with the second portion of dough. When the cakes have served their time in the refrigerator, you will need to take them out and carefully cut them in half with a sharp knife. This way we will have 4 ready-made cakes... red! While the cakes are baking and cooling, let's make the cream.

Our cream should be very light and soft. Therefore, for this purpose, the recipe contains two types of cheese: cream and the famous mascarpone (a cheese often used in bakeries). Here you need to beat them until smooth, then add powder and vanilla sugar. Mix thoroughly and you can add cream. Beat until thick and, most importantly, homogeneous cream.

We move our cakes towards us and begin to assemble the cake. Spread the cakes with cream and stack them on top of each other. Then spread cream around and decorate to taste. To decorate a cake with cream curls, there is no need to buy a professional culinary device, you can use a plastic bag: scrape the remaining cream into the bag, collect it in one corner and tie the edge of the bag. cut off the corner with cream with scissors and slowly squeeze it out to decorate.

For decoration, you can use culinary figurines, aromatic herbs basil, lavender, etc. They can be purchased in specialized stores. Serve on festive table with a mysterious smile! Bon appetit!
Recipe 7, simple: Red velvet cake with wine soaking
Red Velvet Cake is a cake that you will surprise your guests with. This is definitely a birthday cake. Bright, luxurious and velvety to the taste!
- Butter 120 gr.
- Sugar 300 gr.
- Egg 2 pcs.
- Cocoa 2 tbsp.
- Kefir 1 cup.
- Flour 250 gr.
- Salt ¼ tsp.
- Soda 1 tsp.
- Vinegar 1 tsp.
- Vanillin 1/3 tsp.
- Food coloring 4-6 tsp. (red)
- Baking powder 1 tsp.
- For cream: Powdered sugar 200 g
- Mascarpone cheese 300 gr.
- Curd cheese (slightly salted) 200 gr.
- Whipping cream 150 ml.
For impregnation:
- sugar 2 tbsp.
- Water 2 tbsp.
- Red sparkling wine 2 tbsp.

Add kefir gradually, one tsp at a time. add liquid food coloring. Stir thoroughly.

Add baking powder, salt, cocoa to the sifted flour. Mix.

Beat the softened butter, gradually adding sugar. Then beat in the eggs one at a time. Beat again.

Add vanillin (can be replaced with vanilla sugar - 1 sachet or vanilla essence 1 tsp)

Add flour and kefir alternately. Mix at medium speed with a mixer. The last thing should be flour. Stir until the mixture is homogeneous and without lumps. Quench the soda with vinegar and pour into the dough. Mix.

Grease a springform pan with butter and line with baking paper. Pour half of the dough into the mold and smooth it out.

Bake the first cake for 30-40 minutes at 180 degrees. Then bake the second cake. Check readiness with a wooden splinter.

Remove the finished cakes from the oven, cool slightly, remove from the mold and leave to cool on a wire rack to room temperature. It is better to let the cakes stand for 10-12 hours, wrapping them in cling film. It is best to bake the cakes in the evening and assemble the cake the next day.


Mix two types of chilled cheese with a mixer, gradually add powdered sugar. Then add cream. Beat. Place the cream in the refrigerator, covering it cling film. Prepare the cake impregnation: mix sugar and water, boil. Cool slightly and add sparkling wine. Mix.

Level the cakes with a knife and soak. Place the first cake on a plate and spread with a thick layer of cream. Cover the top with the second cake layer, also grease it with a thick layer of cream, not forgetting the sides. Place the cake in the refrigerator for 30 minutes. Then use a hot, dry knife to level the surface of the cake.

Next, decorate the cake at your discretion. You can simply sprinkle the surface with cake crumbs - it will look very impressive on the white surface of the cake. Or you can use mastic to sculpt various figures (hearts, flowers, bows).

Before serving, the cake should sit in the refrigerator for several hours. Tender, tasty, unusual cake`Red velvet` is ready. Can be served. Enjoy your tea!

This cake is iconic dessert all the sweet tooths of the world. It was created by unknown American chefs in the twentieth century. The original recipe for Red Velvet Cake will surprise you with its ease of preparation.
Red Velvet Cake Recipe
The combination of bright red cake layers and snow-white cream is a distinctive feature of the cake, which will never be confused with anything else. The juicy porous structure of the Red Velvet cake differs from other types in taste due to its unexpected chocolate aftertaste.
To famous dessert has not lost its reputation; products for it must be of high quality. But their quantity in the recipe is approximate and is selected individually for each production.
According to the red velvet cake recipe, for the dough, collect the following ingredients:
- Flour premium- 300–400 g.
- Sugar - 300 g.
- Cocoa - a tablespoon.
- Eggs - 3–4 (depending on size).
- Refined vegetable oil - 300 ml.
- Fermented milk products (combination heavy cream and sour cream or full-fat kefir) - 300 ml.
- Salt - a quarter of a teaspoon.
- Soda - a teaspoon (or if there is baking powder - two).
- Red gel dye - 2 tsp.
By the way, this cake originated at a time when there were no food colors yet - only natural products. And your original color Red velvet cake without dye was obtained thanks to a special variety of cocoa then available in America. Combined with soda and hot water it gave a red tint.
Today's chefs, who do not accept synthetic dyes, do not even have that type of cocoa. But they found a way out: add red beet juice to regular cocoa powder in combination with lemon and pomegranate. Only in this case they do not use soda - only baking powder.
The cream is prepared from the following products:
- Curd or cream cheese - 300–400 g.
- Butter - half a stick or a little more. You cannot replace it with spread or margarine.
- This cream can be made with whipped cream instead of butter. Prepare a glass and a half of cream.
- Powdered sugar - 100 g.
- Vanilla for scent.
This composition of the red velvet cream makes it stable and makes it possible to carefully process the vertical sides of the cake.
How to make red velvet cake
The process of making this cake is no different from others: you bake the cake layers, prepare the cream, assemble and decorate the product:

- For the dough, you can immediately collect all the ingredients and beat with a mixer. Or break it down into stages: collect everything liquid products and add soda and coloring to them, all dry separately with baking powder, then combine and also mix well with a mixer until smooth. The dough turns out more or less liquid.
- Divide it into two or three parts. Bake the cakes in a small springform pan, greased with butter.
- Oven temperature - 180 degrees. Baking time is 20–40 minutes. Check readiness with a wooden skewer. When pressed with your finger, the finished cake should spring back well. Be careful: if the dough is not baked enough, the cakes will fall off, and if you overcook them, they will not turn out juicy enough.
- Wrap the cooled cakes tightly with cling film so that there are no voids in which condensation can collect. Place in the refrigerator for several hours, at least two. This must be done to strengthen the structure of the biscuit, which cannot be cut immediately: it will become deformed or crumble.
- Prepare the cream depending on the selected ingredients. If with butter, then mix the curd cheese, butter and powdered sugar and beat for about five minutes. Remember: for the correct consistency, the cheese must be cold and the butter softened. You will achieve a snow-white color if you first beat the butter and sugar, and then add the cheese.
If you choose the option with cream, then beat it separately until fluffy (take the moment so that it does not turn out to be butter). In another bowl, mash the cream cheese with powdered sugar. Then add the cream in parts, stirring gently with a spoon.
The cream is sometimes made colored, for example, pink. To do this, add raspberry juice to it. If you don't mix it too much, it will end up with marble stains.

- Cut the cooled cakes with a long sharp knife or thread into two layers each. Get 4 or 6. If you are going to cover the sides of the cake with cream, do not cut off the ends, they will not be visible anyway. But, if you plan to build a bright red tower with white layers, cut the edges of the cakes very evenly, best of all - with a special metal culinary ring. In the original, this cake is built like a strict, even cylinder.
Dry the resulting trimmings in the oven and chop. Such a baby will become additional option cake decoration.

- Coat all the cakes with an even layer of cream, placing one on top of the other. Make the last layer even by smoothing it with a hot knife. You can leave it this way, but you can also coat the side of the cake with cream. If you want to sprinkle with red crumbs, cool the cake so that the cream does not spread, then apply the crumbs. As you can see, the external design of the cake varies. If you're a skilled cook, decorate the top with cream petals or flowers.
Master the preparation of an original cake with all the tricks, surprise your guests and join the large army of Red Velvet fans.
Red Velvet Cake (original recipe – Red Velvet Cake) is chocolate cake made from red sponge cake, covered with cream cheese cream, in some recipes curd cream or mascarpone cream. The red color of the biscuit in the cake is achieved by adding natural or artificial colors to the dough.
The history of red velvet cake originates in South American cuisine, and the name of the cake - Red Velvet Cake - still causes debate among culinary specialists about its origin. Some argue that "red" is related to the brown sugar used in the classic recipe ( brown sugar traditionally called red); although more often the name is associated with a sponge cake with a red hue and velvet structure.
Traditionally, the red hue in the original red velvet cake recipe came from a chemical reaction between cocoa powder, acetic acid and buttermilk (replaced with kefir in today's recipe) - because of this, Red Velvet cake was often called "Devil's food."
The fact is that cocoa contains anthocyanins - substances that give the red tint to some berries and vegetables - and exposure to vinegar and buttermilk made it possible to identify this natural dye. However, due to modern alkaline processing of cocoa, anthocyanins are neutralized, so in order to achieve a rich shade, red velvet cake layers must be added with coloring.
But the combination of soda with vinegar and kefir still gives red velvet cream cheese cake its famous airy, light velvety texture. At first glance, the cake recipe may seem somewhat complicated - the dry ingredients will have to be mixed separately from the liquid ones - but the result will be delicious cake from from vegetable oil.

DoughVed advises. Vegetable oil in the recipe can be replaced with butter - for the amount of products indicated in the cake recipe, 200 g of butter (softened or melted) will be enough.
What can I substitute for food coloring in Red Velvet?
Dye the Red Velveteen cake with artificial dyes or replace them with any natural red dyes, for example, beet juice(from boiled beet juice). Just keep in mind that not one natural dye will not give the cake such a rich shade as an artificial one. You can go the other way and do without dyes at all - it’s beautiful on its own.
Do I need to soak the cake?
In many recipes, red velvet sponge cake turns out to be quite dry, so it must be soaked, however today's recipe- not one of them: the sponge cake turns out moderately moist, so the Red Velvet Cake remains fresh for a long time.
How to decorate a velvet cake?
Can be used to decorate a cake biscuit crumbs(see recipe tips), nuts, confectionery topping, fruits, berries. For a special occasion, such as Valentine's Day, you can bake a red velvet heart-shaped cake; if you are making a cake with mastic or white chocolate glaze, it is better to reduce the amount of cake cream in the recipe.

Red Velvet Cake Recipe
20 minutes to prepare
1 hour to prepare
380 kcal per 100 g
Red Velvet Cake (Red Velvet, Red Velvet) is a delicious chocolate cake with snow-white cream cheese frosting that is easy to make at home.
Is Red Velveteen Cream Cheese Cake Delicious – Make a Cake at Home Using This Classic American recipe and see for yourself.
For the cakes
- wheat flour – 250 g;
- salt – 0.5 tsp;
- baking soda – 1.5 tsp;
- cocoa – 2 tbsp;
- vegetable oil – 250 ml + for greasing;
- brown sugar – 300 g;
- large chicken egg – 2 pcs.;
- red food coloring – 2 tbsp;
- vanillin – 1 tsp;
- freshly brewed coffee – 100 ml;
- kefir – 250 ml;
- white wine vinegar – 0.5 tbsp.
For cream
- butter – 200 g;
- powdered sugar – 400-450 g;
- cream cheese – 400 g.
Preparation
- Sift flour, salt, baking soda and cocoa into a large bowl.
- Separately, beat the sugar and vegetable oil using a mixer or food processor for several minutes, until white.
- Add eggs, one at a time, without stopping beating, as well as coloring and vanilla.
- Mix a third of the sifted flour into the egg-butter mixture.
- In a separate bowl, mix kefir with cooled coffee, add half to the dough, beat.
- Mix half of the remaining flour into the dough and continue beating.
- Combine the remaining kefir with vinegar and beat into the dough.
- Then pour the rest of the flour into the dough and beat thoroughly again.
- Grease three molds with a diameter of 20 cm with oil. From baking paper Cut out circles of the required diameter, line the bottom of the molds with them, and oil them.
- Divide the dough into molds and bake in an oven preheated to 180°C for about 35-40 minutes, check readiness with a toothpick.
- Remove from the oven and cool in the pans for 10 minutes.
- Turn the pans over onto a wire rack (suitable from the oven), remove the cakes and remove the paper. Leave until completely cool.
- To prepare the cream, cut the butter at room temperature into pieces and beat with a mixer for a couple of minutes until white and creamy.
- Sift the powdered sugar into the butter, adding it in three additions and continuing to whisk.
- Add a third of the cream cheese to the butter and beat for a couple of minutes. Make sure that the butter and sugar do not settle on the walls of the cup. We repeat the procedure two more times.
- Let's start assembling the cake. Place the first cake on a plate or cake pan and spread a few spoons of cream over it, not reaching 1-2 cm from the edge. We lay all three cake layers in this way.
- Cover the top and sides of the cake with the remaining cream.
- If the dough sticks to the sides, separate it from the pan using a knife. Or, to make it easier to remove the cakes, you can use springform pans.
- If the cakes have risen too much and do not press down while cooling on a wire rack, cut off the middle, chop and use the crumbs for decoration.
- It is important not to “beat” the cream while whipping, otherwise it will turn out too liquid and will be difficult to apply to the cake.
The red velvet cake recipe was invented in the USA. And then the unusual Red Velvet conquered the whole world. Bright and extravagant, it is distinguished by its luxurious design and delicate, airy taste.
The subtleties of creating a red velvet cake

The ingredients of Red Velvet Cake include sugar, butter, eggs, flour, soft cream cheese, and buttermilk. If the last component cannot be found, it is replaced with kefir, and the cheese with sour cream. All valuable properties the cake gets from the ingredients: it perfectly saturates and thanks to a large number Calcium in dairy products is good for bones and hair.
This is a filling and high-calorie biscuit. People with overweight and impaired glucose tolerance, it is not recommended to abuse it.
To give the cakes a rich scarlet color, use food coloring.. If you are not a fan of such additives, use beetroot juice or puree for the cake with the addition of a small amount of lemon juice or vinegar. Also, cherry, currant or raspberry syrup. There is no need to sour them.
Check the readiness of the baked cakes with a wooden toothpick. If the dough does not stick to it, you can remove the dessert from the oven.
It must be remembered that when baking, the edges of the cakes always become darker. Here they take on an ugly dirty brown color. They need to be trimmed, giving the treat an even shape. This is usually done with a special metal confectionery ring.
There is no need to throw away the remaining cakes. They should be crushed and layered with cream in vases. You will get two desserts at once.
How to cook perfect cream for red velvet cake? Eat a few culinary tricks:
- It is better to use curd cheese as a base. Creamy is more like processed cheese, it will not give the desired texture.
- The cheese should sit at least overnight in the refrigerator before beating. But butter, if it is in the recipe, on the contrary, melt at room temperature.
- Well whipped cream cheese can be used to cover the sides and top part dessert. It doesn't slip or leak. It is even possible to decorate the cake with cream roses and patterns.
- To achieve a perfectly white tone, you first need to beat butter or cream with powdered sugar. And then add cheese.
Makes the cream more fragrant vanilla powder.

How to decorate a red velvet cake? Sometimes crumbs from scraps are used for dusting, or slices of fruit are placed on top for dessert. But most often the contrast of cream and scarlet cakes is enough. To make this combination look more advantageous, the delicacy is served already cut. For a romantic date, you can decorate the “Red Velvet” cake as in the photo in the shape of a heart and attach a decoration in the form of Cupid’s arrow made of chocolate.
Simple and complex versions of “Red Velvet”
Melt-in-your-mouth desserts with a red base and boiled cream vary in recipe. Everyone can choose the ideal option for themselves.
Classic red velvet cake recipe

The original red velvet cake recipe calls for buttermilk. But if you can’t find it, you can take kefir. The taste will not suffer from this. By step by step recipe It’s easy to create a red velvet cake at home with a photo.
Ingredients:
- half a kilo of flour;
- four eggs;
- 2.5 cups sugar;
- the same amount soft cheese and 33 percent cream;
- a pinch of salt and soda;
- scarlet food coloring;
- 160 grams of powdered sugar;
- two dessert spoons of cocoa;
- one and a half glasses of kefir;
- 0.4 liters of vegetable oil;
- four pinches of baking powder.
Cooking method:

You need to coat all the cakes with this cream and decorate the top and, if desired, the sides. Then the dessert should “ripen” in the cold for three hours.
Video recipe for the classic Red Velvet cake:
Red Velvet Cheesecake

This homemade red velvet cake recipe is unusual in that it doesn't require an oven. Delicate cheesecake no baking required.
Ingredients:
- 380 grams coffee cookies;
- twice more cottage cheese;
- 220 grams of sweet cream butter;
- 150 ml milk;
- cup granulated sugar;
- half as much full fat sour cream;
- 20 grams of gelatin;
- a packet of vanillin;
- three large spoons of cocoa powder;
- scarlet food coloring.
Cooking method:
- Melt the butter over steam bath. Mix with crushed cookies and place the resulting mixture in the mold, cool.
- Pour water over the gelatin so that it swells.
- Beat cottage cheese, sour cream and cocoa with a mixer at low speed or by hand.
- Dissolve sugar and vanillin in milk, heat to a boil. Once the mixture has cooled slightly, add gelatin and stir until smooth. Put the dye there and curd mass, stir. You should get a scarlet creamy composition.
Remove the base from the refrigerator, pour the scarlet mixture on top and return it back to the cold for nine hours.
To ensure that the curd layer comes out even, you need to tap the filled mold on the countertop.
Red Velvet Cake with Beetroot

The step-by-step recipe for red velvet cake without dye with beetroot juice will delight connoisseurs of natural food.
Ingredients:
- 240 grams of flour;
- a teaspoon of cocoa;
- twice as much baking powder;
- half a glass of vegetable oil;
- a bag of vanilla powder;
- one and a half glasses of sugar;
- 240 ml milk;
- six eggs;
- beet;
- a third of a glass of kefir;
- the same amount of water;
- big spoon wine vinegar;
- 250 grams of soft cheese;
- 220 grams of sweet cream butter.
Cooking method:

This recipe is easy to make red velvet cake in the slow cooker. The shortbreads are cooked in the “Baking” mode for about three quarters of an hour. The baking time decreases in inverse proportion to the width of the appliance bowl. Then you need to finish baking the cake base in the “Warming” mode for another 20 minutes.
Velvet desserts from celebrities
Famous chefs and confectioners have slightly transformed the classic recipe for the delicacy. However appearance it remained unchanged.
Red Velvet Cake from Yulia Vysotskaya

Famous TV presenter in her recipe bright dessert I replaced the buttermilk with cream.
Ingredients:
- 350 grams of flour;
- four eggs;
- pair dessert spoons cocoa;
- one and a half glasses of granulated sugar;
- a couple of small spoons of baking powder;
- a pinch of salt and soda;
- 280 ml vegetable oil;
- 700 ml 33 percent cream;
- 170 grams of sour cream;
- the same amount of powdered sugar;
- half a kilogram of soft cheese;
- scarlet food coloring.
Cooking method:
- Combine sifted flour, cocoa, sugar, baking powder, soda, add salt. Beat in eggs and butter, sour cream and the same amount of cream. Color with food pigment and knead the reddish dough. He needs to stand for a quarter of an hour for the lactic acid to extinguish the soda.
- There should be enough dough for three cakes. Bake each for 20 minutes at 180 degrees in the oven. Cover with plastic and refrigerate for an hour and a half.
- To make the cream, combine whipped cream with powder and cheese.
Then you should layer the cakes with cream, grease the top and sides with it. The treat needs to stand in the cold for at least five hours.
Red Velvet Cake by Gordon Ramsay

How to do gorgeous cake“Red velvet”, knows the famous cook Gordon Ramsay. Why not use his ideas.
Ingredients:
- 580 grams of flour;
- two pinches of baking powder;
- a couple of large spoons of cocoa;
- scarlet food coloring;
- 330 grams of sugar;
- a pair of eggs;
- a packet of vanillin;
- 270 ml buttermilk (kefir);
- a pinch of soda;
- a drop of vinegar;
- 450 grams soft cheese;
- two packs of sweet cream butter;
- half a kilo of powdered sugar.
Cooking method:
- Mix flour with baking soda and baking powder.
- Beat half the sweet butter with sugar in a blender. Add eggs one at a time. Gently add vanilla powder and coloring and knead homogeneous mass in low speed mode.
- Pour into a bowl and alternately add buttermilk and flour. Knead the dough.
- Quench the baking soda with vinegar and stir into the dough.
- Grease the molds with butter and sprinkle with flour.
- Divide the dough into molds and place in the oven. Cook for about half an hour at 170 degrees.
- Combine the remaining oil with the powder with a mixer. Gradually add cheese while beating. The cream comes out soft and fluffy.
Cooled cakes need to be coated with cream. They also lubricate the top and sides of the treat.
Red Velvet Cakes by Andy Chef

The famous culinary specialist Andy Chef offers both classic and unusual way making dessert. These are cupcakes - small portioned cakes. Here is Andy Chef's recipe for red velvet cake with photos.
Ingredients:
- 300 grams of flour;
- a glass of granulated sugar;
- a pair of eggs;
- half a glass of milk;
- 60 grams of sweet cream butter.
- four large spoons olive oil;
- 40 grams of cocoa;
- for packaging vanillin and baking powder;
- scarlet food coloring.
Cooking method:

The cupcakes are topped with egg white cream or whipped cream and sprinkled with colorful confectionery shavings.
Bright and delicious dessert“Red velvet” will decorate the table at any celebration. It would also make a wonderful gift for a romantic anniversary.
I took it into my head to New Year bake “Red Velvet”: I tried it several times in a cafe and really love it rich taste and an unusual look. Endishef's recipe attracted me with its simplicity and spectacular results, so I took it as a basis. Especially for such an event I went to Ikea for springform for baking with a diameter of 22 cm (everywhere only large ones, 26 cm, are sold) and on Udelnaya - for food coloring red.
Before writing the list of ingredients, let me make it very clear important point: shown on Endishef's website tall cake from small shortcakes with a diameter of 14 cm (16 cm shape and trimming), like this:
The composition in the recipe is indicated precisely taking this size into account; the plate below stipulates that for a larger mold you need to increase the amount of ingredients by 2 or even 3 times. 
Expecting to get about 3 cakes of 2.5 cm each and having a mold of 22 cm in diameter, I boldly doubled the amount of ingredients according to the sign. This error 1, but I'll come back to this later.
Flour 680 g
- sugar 600 g
- cocoa 2 tbsp.
- salt 1/2 tsp.
- soda 2 tsp.
- baking powder 4 tsp.
- 6 eggs
- vegetable oil 600 g
- cream 300 g
- sour cream 260 g
- dye 4 tsp.
According to the recipe, without much dancing with a tambourine, I sequentially poured/poured all the ingredients into the pan and beat thoroughly with a blender. Error 2:
not thorough enough. I beat for a long time, but the volume of the dough was very large (almost 3 kg at the end), my blender is not suitable for such loads, so the color of the cakes at the end turned out to be uneven (although the dough in the pan seemed quite uniformly red). Following Endychef's advice, before cooking, I weighed the empty pan, then the pan with the dough, calculated the weight of the dough, divided it into three and began baking the cakes, measuring out a third at each batch. I greased the mold with butter and sprinkled it with flour, and put baking paper on the bottom of the mold: I recommend reading it on the same site, it helped me a lot during the course of the play.
Error 3: The baking time was strikingly different from that indicated on the website (20 minutes). I don't have much hot oven, but I first warmed it up properly to desired temperature, and yet - after 20 minutes it only slightly set, but inside it was completely liquid. After another 20 minutes, the toothpick still came out wet. As a result, baking the first cake until I was finally convinced that it was baked properly took 1 hour and 10 minutes. By the second cake, the oven had apparently completely started to heat up, and it took an hour, on the third - about 55 minutes. But still, I overexposed the cakes in the oven, and closer to the edges they were more brown than red (and the visual result in this cake is component is no less important than taste).
The cakes turned out impressive, even taking into account the fact that I was going to cut off the top. I was counting on 2.5 cm of thickness, as stated in the recipe, and it turned out to be quite 4-5. That is, you could get by with two or even one (if you don’t show off).
After cooling on the wire rack, I trimmed the cakes (the trimmings also went into use later). 
I made buttercream. It took me:
- curd cheese ~1 kg
- butter 350 g
- powdered sugar 300 g
Again, I took the author’s recipe calculations as a basis and tripled the original amount of ingredients, because... I baked a cake 22 cm in diameter and planned to cover it completely with cream. 
Error 4
:
The cream came out right next to each other. I made a fairly generous layer between the cakes and I had a little cream left for dessert, which I made from the scraps of the cakes, but in proportion to the amount of dough and cream, I would take 2/3 of the dough for the same amount of cream, so as not to save.
I really liked the taste of the cream! Combination of salty curd cheese and sweet powdered sugar on creamy base- it's very, very tasty. One minus - on the second day of standing in the refrigerator (and it is impossible to eat such a cake in 1 day), the cream began to “crack” - is there any way to combat this? Is the problem with the products or the application technique?
I assembled the cake again according to EndiChef’s instructions: I dripped a little cream onto the plate so that the bottom cake would not slip (this is brilliant!), and began squeezing the cream from the pastry syringe onto the top of the cake.

Second cake layer and second layer. I had an old-school syringe, I took it from my mother, I remember it as much as I remember myself. I need to buy myself something more modern.

I simply smeared the top layer of cream with a knife, like artistically; it wouldn’t have turned out perfectly even anyway. And here we come back to error 1: The cake turned out just HUGE. I suppose that if I had at least roughly estimated the total weight of the ingredients and Googled “3 kg cake,” I would not have been so surprised. At our wedding we had a 7 kilogram cake for 70-80 guests, but here it was 3 kg for a modest group of 5 adults and 1 child. After the New Year, we practically ate only it for three days.

In addition to the cake, I still had cake scraps and some cream, which I put in glasses for dessert.

I decorated the main cake with fresh raspberries and sprinkled it with powdered sugar - I was afraid I wouldn’t be able to handle the cream roses, and there wouldn’t be enough cream.

I’ll show you the cut, but I’m not very proud of it: you can see all the flaws in the cooking process - uneven color due to poorly mixed dough and brown dough around the edges, but it should be evenly red! But it’s okay, I still have an almost full tube of dye, we still have “Red Velvet” more than once, I’ll work on the technique. Well, either I’ll buy some pastry rings and trim the cakes on all sides, but that’s cheating.

The taste was excellent, everyone really liked it. I was afraid that with so much vegetable oil in the composition it would seem too greasy and that the oil would taste. I can say that in hot and warm cakes you can really feel it a little, but after a night in the refrigerator the taste completely disappeared, leaving only fluffy moist cakes. In general, it definitely makes sense to try again, given your mistakes.
Once again I’ll put them at the end of the post for greater clarity:
1. Pay attention to the amount of ingredients. If we take Endishef's recipe as a basis, then 1.5 servings of dough is more than enough for me. big cake or even one - for a regular one, you can simply bake one cake and cut it into two parts.
2. Beat the dough very thoroughly! If there is a lot of it, then divide it into two parts and beat separately, and then together again. But if you take into account point 1, there shouldn’t be much of a problem.
3. Take into account the features of the oven when baking cakes, check them more often with a toothpick. As soon as it comes out dry, don’t play it safe and take it out immediately.
4. Make cream with a reserve (that is, for 2 portions of dough, take not 3 portions of cream, as in the recipe, but 4, for 1 - 2, for 1.5 - 2).
Well, of course, I will be grateful for the advice from my senior comrades!)