A recipe for a delicious appetizer made from lard and garlic minced through a meat grinder at home with photos. Lard twisted with garlic through a meat grinder in Ukrainian: recipe
Lard with garlic through a meat grinder– one of the most popular lard snacks. In essence, this snack is nothing more than a sandwich paste, putty or putty made from lard, salt, garlic and black pepper. Lard with garlic through a meat grinder, prepared at home can be an excellent alternative butter, store sandwich spreads and mayonnaise. This appetizer is especially good with black rye and Borodino bread.
The recipe for lard with garlic through a meat grinder is so simple that literally anyone can repeat it. To prepare lard with garlic, you can use both salted and fresh lard. When using already salted lard, significantly less salt is added to the appetizer than when using fresh lard.
Since this appetizer is decades old, it used to be prepared with garlic through a meat grinder, but today you can grind all the ingredients in a blender. Regarding appearance snacks, then it can be white, yellow, red and green, depending on additional components. Classic lard with garlic through a meat grinder white, but if you add greens to the appetizer - wild garlic, dill, parsley, green onions, it will automatically turn green.
You can use paprika to give the snack a bright orange color. Unlike red pepper, paprika adds color to dishes without adding any heat. Well, and turmeric. With its help you can color your snack yellow.
Each of the snacks with one or another additive will be tasty in its own way. You eat and can’t stop eating, it’s not for nothing that lard is also jokingly called the Ukrainian drug. This is, indeed, very, very tasty, but we should not forget about its high calorie content. It's no secret that lard is a natural source of cholesterol, but in combination with garlic, it is much better absorbed, so unhealthy fats with the help of garlic they are neutralized to a greater extent.
Now let's look at how to cook lard with garlic through a meat grinder - step by step recipe with photo.
Ingredients:
- Lard - 500 gr.,
- Garlic - 1-2 heads,
- Ramson - 20 gr.,
- Salt - on the tip of a teaspoon,
- Black pepper - a pinch.
Lard with garlic through a meat grinder - recipe
The taste of the finished snack will primarily be influenced by the quality of the lard. Today you can find a lot of different information on the Internet about how to choose the right fresh and tasty lard, so I won’t focus on this point. To prepare this snack you need to select soft lard without a meat layer (this type of lard is best used for making bacon). If there are areas of meat on top of a piece of lard, they need to be cut off.
Cut off the skin of the lard with a sharp knife. To make it more convenient to grind it in a meat grinder, cut it into small pieces.

Prepare – Peel the garlic cloves.

In addition to garlic, you can also include wild garlic in the snack. It will add an additional garlic aroma to the lard, and also color the finished product a beautiful light green color. Fold the wild garlic into a bunch, cut lengthwise into strips.


Pass the prepared lard, garlic and wild garlic through a meat grinder.

Add salt and black pepper to the resulting snack ingredients.

Mix all the products in a bowl with a spoon or fork until the mixture is homogeneous in color and structure. As you can see in the photo, the mass of lard turned out to be a beautiful green color. Our appetizer is ready.

Transfer the lard and garlic through a meat grinder into a sterilized jar. It is also advisable to steam the lid. Salt, garlic and black pepper are natural preservatives, so the snack can be stored in the refrigerator for quite a long time - up to about three weeks, but in any case, it is always better to make it fresh rather than store it for a long time.
In addition, you can arrange it in the form of a sausage. To do this, place the snack on cling film in the form of a “log”. Wrap tightly cling film. Tie the ends with thread or a knot. Place in the freezer. After about 2-3 hours, the lard will freeze, and the appetizer can be beautifully spread on bread.
Bon appetit. I will be glad if this recipe for lard with garlic through a meat grinder you liked it and will find it useful.

Lard with garlic through a meat grinder. Photo


So much has been written about lard that, probably, so many songs have not been sung. There is no snack on the table more common than a piece of bacon. Snow-white, with a “slit”, you can receive guests with it and you won’t be ashamed to visit yourself. There are a great many options for preparing lard - rolls, salted with spices, smoked, boiled-smoked, baked and boiled in onion skins - lard is always delicious in any version. But there is one very easy, simple way of serving lard to the table, which, oddly enough, makes lard stand out in taste in the entire line of other recipes for preparing this wonderful product.
The thing is that lard, before cutting for the table, still remains... raw. This is hard to believe, it goes against the generally accepted canons of eating lard, but, nevertheless, the fact remains - raw lard tastes much more tender, softer than the salted version, the only thing is that you must be one hundred percent sure of the freshness of the meat and its integrity its implementer.
So how to cook lard in a new, unfamiliar way? It's very simple. Just so much that fat, being universal product on a quick fix, become even more versatile and much more delicious. All you have to do is freeze the white block. For this method of consumption, it is advisable to take parts of lard without meat inclusions, only clean lard and skin.
So, throw a nice piece of lard into the freezer and forget about it. When a couple of friends unexpectedly come to your place for a light dinner, take it out of the freezer and, first of all, slice it thinly. This is very important point— the lard must be sliced exactly thinly!
Take coarse salt, you should not take small ones - you will easily over-salt the lard. Salt the lard with a good pinch, avoiding excess salt.
Next comes the most important thing. Peel several large cloves of garlic and chop them in a garlic press, thoroughly coating the chopped lard with this paste, which by then will have melted a little. You can take a fine grater and grate the garlic directly on top of the lard.
Now take ground black pepper and sprinkle it thickly on the lard. Yours original snack ready - try it and, as they say, feel the difference!
Bon appetit!
Cooking lard in Ukrainian: the most delicious sandwich lard according to famous recipes.
For those who came to Gogol’s homeland, they know well that no best snack than a piece of black rye bread and delicious lard. The color of Ukraine implies rich borscht, dumplings with garlic and juicy delicious lard in all kinds of servings on the table. But as many people note, the most delicious recipe sala - crushed paste with garlic. In this article you will learn both simple and real recipe cooking lard in Ukrainian.
Ukrainian appetizer made from lard through a meat grinder: what is it called?
Like many dishes prepared in different regions, lard, minced with garlic, has hundreds of names, but as honored chefs tell us, the correct (established name) is sandwich lard.
This lard is very convenient to take with you on picnics, hunting, fishing, and traveling at any time of the year. It is convenient to transport, as it can be packed tightly into jars and containers. Quickly spread and eat deliciously.
Lard twisted with garlic through a meat grinder in Ukrainian: recipe
The simplest cooking recipe is so elementary that even a child can handle it, but if you want to feel all the aroma and taste of such lard, you will need to work hard!
To prepare we will need:
- 1 kg fresh lard
- 2 tbsp salt
- 6 cloves hot garlic
- Meat grinder and minimum time
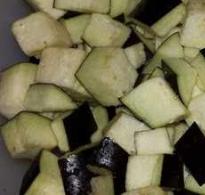
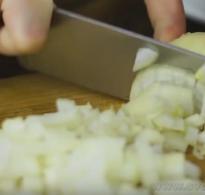
We peel the fat from the skin, cut it into cubes/strips and grind it through a meat grinder along with the garlic. Add salt, mix thoroughly and let it brew for a day.

And now it’s time for the real recipe for “pounded lard” that Ukrainian tourists love to eat:
- 0.5 kg of salted lard (after salting it should stand for at least a week)
- 3-4 cloves hot garlic
We remove the skin. We cut the lard into 4 parts, take one of them and cut it into as thin slices as possible, and then into thin strips. We take the largest and heaviest knife in the house and begin to “beat” the lard with the blade until homogeneous mass. During the beating process, lift the layer of lard and turn it over so that all the pieces are processed evenly.
Having turned it into a paste-like mass, move on to the remaining pieces. Having finished with the lard, squeeze out the cloves of garlic through a hand garlic press and use a knife on a cutting board to “drive” the garlic into the lard so that it releases juice and mixes into a single whole with the lard.
Now let's take rye bread and spread some crushed lard on a piece - try it and enjoy it! This process labor-intensive and is often abandoned in favor of mass production, but after trying this method, you are unlikely to want lard from a meat grinder.
Sandwich lard for spreading, minced with garlic and herbs: recipe
In order to prepare sandwich lard with herbs, it is important to maintain the proportions correctly. Typically, those who choose this recipe do not like spicy things and are more inclined to have a variety of tastes, so if you want to feel the spiciness, add garlic as in the previous recipe.
- 1 kg of salted lard or 1 kg of fresh lard and 2 tablespoons of salt;
- 3 cloves of garlic;
- Bunch: dill, parsley, cilantro and basil.
After removing the skin from the lard, grind everything in a meat grinder, mix additionally and serve immediately. Unlike previous recipes, this one is the most delicious freshly prepared.

Sandwich lard - spreadable pate, minced with garlic and dill: recipe
This recipe is good for strong drinks. It will become indispensable both at the table and during active recreation.
- 1 kg salted lard;
- 6-7 cloves of garlic;
- A pinch of freshly ground allspice;
- A bunch of dill.
Grind everything together with the skin in a meat grinder and additionally pass it through a blender until smooth. If desired, add additional salt and leave in glass jar“reach” a day in the refrigerator. Serve to the table.

Ukrainian appetizer of lard, lard, lard through a meat grinder with pepper and spices: recipe
And now an “exclusive” method of crushed lard in Western Ukrainian style.

We will need:
- 1 kg of exclusively fresh lard with streaks;
- 5-7 cloves of garlic (everyone likes it spicy);
- Bay leaf - 3 pcs;
- Black and allspice pepper 2 grains each;
- Dried herbs and spices (dill, parsley, parsnips, parsley root, celery, etc. to taste).
Place fresh lard in boiling water, add salt, pepper, and bay leaf. Cook over low heat (like cold) for 3 hours (until the broth turns yellow). Drain the water and grind the lard (or grind it in a meat grinder, whichever you prefer), season with garlic and dry spices, mix thoroughly, let it brew in the refrigerator for 2 hours to a week.
Video: Recipe: Lard SNACK with garlic (sandwich spread)
Sandwich lard, also popularly known as lard spread with garlic, is a popular snack in Ukraine. Sandwich lard has long migrated from Ukrainian cuisine into Russian and Belarusian and has become popular throughout the post-Soviet space.
Lard twisted with garlic is often used as a compliment in restaurants. Slavic cuisine. It is also served with Borodino bread for borscht. Sandwich lard is used not only as a spread for sandwiches, but also as a dressing for borscht and other vegetable soups.
Spreads can be prepared from salted or fresh lard. The only difference is that when you cook with fresh lard, you will have to let the lard sit in the refrigerator and soak in the salt and flavors of the spices for several hours.
Lard spread in Ukrainian
Ingredients:
- Salted lard – 300g.
- Ground black pepper - half a teaspoon
- Paprika - half a teaspoon
- Garlic - 4 cloves
- Fresh herbs – dill and/or parsley
How to prepare lard spread in Ukrainian?
Trim the skins and grind the lard in a meat grinder twice. Add crushed garlic, pepper, paprika and finely chopped fresh herbs. Spread on black bread. You can put fresh or pickled cucumber on top.
Ukrainian lard and garlic spread – great way satisfy your hunger. Try it yourself!
Lard sandwich snack bar
This lard spread is very spicy and aromatic.

Ingredients.
- Fresh lard – 300 g
- Salt – 1 teaspoon
- Garlic - 3 cloves
- Coriander (ground) – half a teaspoon
- pepper mixture - half a teaspoon
- paprika - a third of a teaspoon
- Mexican seasoning – 1 teaspoon
- Basil greens
- Green onions
- Dill greens
Preparation of lard spread:
Cut off the skin. Fresh lard pass through a meat grinder twice. Add all the spices and crushed garlic. Stir and add chopped fresh herbs. Mix again. The spread is not ready - the lard needs time to absorb the flavors. To do this, cover the container with the spread with cling film and put it in the refrigerator for a day.
Lard and garlic spread
This lard spread recipe is extremely simple. Preparation will not take you much time, and the result will certainly please you.

Ingredients:
- Fresh lard - 500 g;
- garlic - 1 head;
- black peppercorns - to taste;
- salt - to taste;
- dill - 0.5 bunch;
- hot pepper - 1 pod.
Preparation.
Remove the skin and cut the lard into pieces. Pass through a meat grinder twice. Add ground pepper, pressed garlic, salt, finely chopped dill and crushed hot pepper in a food processor. Mix everything thoroughly. Place the prepared lard and garlic spread in a sealed container in the refrigerator for a day.
The lard and garlic spread is ideal not only for making sandwiches, but also as a seasoning for soups for those who like spicy food. lard and garlic spread on bread is a classic of Ukrainian cuisine, and it’s good!
Lard spread with herbs and spices
This sandwich lard contains large number spices Add spices to taste. The combination itself is very successful, regardless of the proportions. This salted lard spread is the most flavorful of the recipes presented.
Ingredients:
- salted lard,
- dill,
- parsley,
- caraway,
- coriander,
- paprika,
- basil,
- ground red pepper,
- garlic
How to make lard spread?
Remove the skin from the lard and pass the lard through a meat grinder twice. Add garlic, passed through a press, all the spices and finely chopped herbs. Mix everything thoroughly.
Now you know how to make a spread on bread from lard. Pork lard spread with garlic - what could be better for quick snack. By making sandwich lard with garlic and putting it in the refrigerator, you will provide yourself with a delicious snack for quick hand at any time.
Classmates
Among the 16 countries that in their national cuisines lard has been prepared and consumed for a long time; Ukraine ranks only thirteenth in terms of frequency and regularity of use of this product. Therefore, the statement that lard is a culinary symbol of Ukraine has no basis in fact. But Ukrainians know how to cook and serve lard like nowhere else in the world.
- Classic way eating lard - with salt, pepper (red or black) and garlic. All this should be grated into the lard. Don't be afraid to overdo it: the lard itself will take as much as it needs.
1. Salo in Transcarpathian style
Cut the lard into pieces 7x15 cm. Roll each piece well in salt and refrigerate for 4 days. Scrape off all the salt with a knife, repeat the process with new salt and again stand for 4 days. Repeat the procedure several more times. After three weeks, remove all the salt again and rub the pieces of lard on all sides with a mixture of chopped garlic, black pepper and paprika (1x1x1). Wrap lard in food foil and put it in the refrigerator. After a day, lard can be consumed. For those who like spicy foods, it is recommended to add 1 teaspoon of hot red pepper to the paprika.

- When buying lard, pay attention to the peel - it should be yellow and without bristles.
2. Sandwich lard with garlic and pepper
Grind freshly cooled, even slightly frozen lard without the meat layer through a meat grinder, add salt and pepper to taste, add a few chopped garlic cloves and mix well. You can add ground nutmeg or curry. Before spreading on bread, it is advisable to let it sit for at least three hours. Goes better with red borscht. 
- When going to the market for lard, take matches or a toothpick with you. If the stick easily pierces the thickness of the lard, feel free to buy it.
3. Lard with wild garlic
Cut fresh lard into pieces big pieces, salt, pepper and let stand for 15-20 minutes at room temperature. Chop the dill, parsley and wild garlic, cut the garlic cloves into several pieces. Lard, herbs, garlic and a pinch ground pepper Grind in a blender to the consistency of green puree. Spread on fresh bread or on toast.
- Lard can come from a sow or a boar. The first one is tastier, but boar lard may not taste very good pleasant smell even after soaking and heat treatment.
4. Instant lard and vinegar snack
Cut fresh chilled lard into thin slices. Lightly sprinkle each piece with vinegar, salt and pepper and put a little chopped garlic on each piece. It is better to consume immediately, before the lard warms up and softens.

- There is an Institute of Pig Breeding in Poltava. In the courtyard of this institute there is a monument to a sow and piglets.
5. Speedy fat
Cut the lard into pieces, rub each with salt and garlic and fry on all sides in a frying pan. Place the pieces of lard in a saucepan, pour boiling water, close the lid tightly and refrigerate for 3-4 hours. Remove the cooled lard from the water and cut into thin slices. Store in the freezer. After freezing, lard becomes even tastier.

- The artist Pavel Bredyuk lives in the Chernihiv region, who paints pictures on the theme of lard. His works are presented in Chernigov, Kiev and Khmelnytsky museums, as well as in many private collections.
6. “Smoked” lard in a slow cooker
Cut 1 kg of lard into medium pieces and grate with chopped garlic, leave for an hour. Boil 1 liter of water in a multicooker bowl, add 100 g of salt, 1 tbsp. a spoonful of sugar, 4 buds of cloves, 5 peas of allspice, 5 bay leaves. Place 10 disposable black tea bags into boiling water and turn off the multicooker. After 5 min. Take out the tea bags and put the prepared lard into the brine. Turn on the multicooker in “quenching” mode for 1 hour 20 minutes. After the signal that it is ready, leave the lard in the brine for another 12 hours. Take it out, wipe it, put it in the freezer. After a few hours, the lard is ready to eat.

- With the current sedentary lifestyle, nutritionists recommend consuming 50 grams of lard per day to avoid gaining weight.
7. Lard in onion skins
Onion skins pour 1 liter of water from 1 kg of onion and bring to a boil, add 4-5 tablespoons of salt and let simmer for another 15 minutes. Place pieces of lard (preferably the underbelly) into the salt-onion solution. Cook for 25-30 minutes. after boiling. Turn off the heat and let the lard cool in the brine. Rub cold lard with a mixture of garlic and spices. Cool and cut before serving.

- Lard is an excellent natural choleretic agent. Therefore, doctors recommend eating more fat for those who have problems with gallbladder and in general everyone over 40.
8. Express lard
Cut the lard into slices and place loosely in a jar. Put crushed garlic there, add salt, black and red pepper. Pour boiling water over it, cover with a lid and wrap in a rough cloth or towel. When completely cool, place in the freezer for an hour.

- Lard no thicker than 4 centimeters - a clear sign that the pig was young. Too much thick lard, moreover, with yellow layers, indicates that the animal was old.
9. Lard roll
Thin lard, preferably with meat layer, salt, grate with crushed garlic, sprinkle with pepper, ground or chopped bay leaf. Wrap in a tight roll, tie with thread or baker's twine. Place the roll in a plastic bag, release the air, and tie tightly. Repeat the procedure three times - that is, you will need three packages in total. Place the bag in a saucepan with cold water, bring to a boil, cover and cook over low heat for 3 hours. Remove from water and cool in bags. When cool, put in the freezer for 2-3 hours.

- Raw lard helps dissolve carcinogens and remove them from the body. Therefore, it is advisable to consume small portions of lard daily for people who are at risk of cancer.