How to color eggs for Easter with natural dyes. Coloring eggs with red cabbage juice
Beautifully decorated boiled eggs- an integral attribute of such a great Orthodox holiday, Easter. Every housewife wants to decorate eggs in a special, exclusive way. This article will help both seasoned housewives and those who are still completely inexperienced in making Easter eggs truly beautiful and unique, without spending a lot of money and time.
Materials needed to color eggs with dyes
On the eve of Easter, markets and supermarkets have a large selection of food colorings for making easter eggs. So to color the eggs in the classic way using dyes, just buy it.
To color eggs with food coloring you will need:
- Eggs.
- A packet of dye in the desired color.
- Tablespoon.
- Vinegar – 2 tbsp.
- Sunflower oil – 1 tbsp.
The classic version of painting eggs using dyes
Having cooked necessary materials to work, paint the eggs step by step:
- Eggs room temperature pour in cold water and cook hard for 10-15 minutes.
- Pour cold water over the finished hot eggs and wait until they cool completely.
- While the eggs are cooling, start preparing the dye solution. Usually, the packets of purchased food colorings contain instructions for preparing the coloring solution.
- If it is not there, then you need to perform the following steps: pour the contents of the package into 0.2-0.5 liters of water, stir well. The color concentration depends on the volume of water used.
- Pour the coloring solution into a shallow, flat container.
- Treat eggs with vinegar before painting. Soak a small linen cloth in vinegar and wipe the shell of each egg. This is done to degrease the surface to be painted.
- Place ready-to-paint on a tablespoon dry egg and dip it into the prepared solution.
- We perform these actions with the number of eggs that you want to paint in the chosen color.
- The eggs should stand in the coloring solution for 5 minutes.
- Using a tablespoon, remove them from the solution and place them on a paper napkin to excess water glass
- After complete drying, rub the painted shell sunflower oil, this will give the egg shine, the color will become more saturated and will play in the sun.


An unusual way to paint eggs with dyes
For in an unusual way We prepare the eggs for painting in the same way as described above. We dilute a packet of food coloring in 100 g of water and perform the following steps:
- Pour the coloring liquid into a tall glass so that it covers the bottom by 2 fingers.
- Place the prepared egg there. It should be half immersed in the dye solution.
- Wait 3-5 minutes and add to the glass plain water until it completely covers the egg.
- After 5 minutes, take out the egg.
The Easter egg will turn out darker on one side, and on the other side the color will not be as saturated.


Painting eggs with dyes using electrical tape
The method is quite interesting. In addition to the above materials, you will need electrical tape.
- We cut the electrical tape into narrow strips.
- Wrap the prepared egg with electrical tape and a spiral.
- Dip it into a dye of the same color, for example yellow, and let it sit for 5 minutes.
- We take it out, let it dry, remove the electrical tape.
- We wind the electrical tape on the other side, overlapping the previous strips.
- Dip it into a dye solution of a different color, blue or green, and leave for another 5 minutes.
- Place on a napkin and wait until dry, remove the tape.
The result is an original Easter egg with multi-colored spirals. The vowel condition is that the first dye should be several tones lighter than the second.
You can also cut out various figures from electrical tape, stick them on and follow the steps described above. Such eggs will not yield to their originality.

Easter has its own customs and traditions, one of which is the painting of eggs. The article will be useful for both adults and children. Easter eggs are a symbol of the great holiday. Housewives treat coloring eggs with trepidation, and many strive to come up with new patterns.
The tradition of dyeing eggs for Easter
There are several versions of the origin of such a tradition.
Version 1.
When Jesus was resurrected, Mary Magdalene came to the emperor with the news. Since such a trip required a gift, she took with her white egg. She told the emperor “Christ is Risen.” The emperor did not believe such news and said that it was as improbable as an egg turning red. And miraculously the egg immediately turned red.
Version 2.
Chickens in Lent laid eggs non-stop. The owners were afraid that they would spoil. That's why we decided to paint fresh eggs in red.
Version 3.
When Jesus was a baby, colored eggs were a source of entertainment for him.
Which eggs should I paint for Easter?
It is customary to paint at Easter chicken eggs: Neither color nor size are important.
IMPORTANT: To ensure even coloring, wash the eggs thoroughly with vinegar and soap. Otherwise the paint will not apply evenly.
What colors are eggs painted for Easter?
Previously, eggs were only painted red.
Now on Easter you can meet the most various options egg painting:
- painting in one color: yellow, green, blue, orange. In fact, the color can be whatever is closest to your soul.
- painting in several colors: many patterns, designs

How to dye eggs red?
Dye eggs traditionally Red color will help:
- Food colorings
- Onion peel
- Beet. Boil the egg along with the whole beets. Cook until you get the desired color. You can just rub it boiled egg beet broth or grated beets

How to color eggs with onion skins?
- Take a saucepan filled to the top with onion skins
- Fill with water not to the very edge
- Let it cook for 45 minutes. Cooking time depends on the desired paint color
- Let the infusion cool
- Place the eggs in their shells and cook for 10-15 minutes after boiling.
- Cook until you see the desired color
IMPORTANT: The eggs must be completely submerged in water. Turn them over to ensure even coloring.

Food coloring for Easter eggs
Eggs can be colored with natural and non-natural food dyes.
WITH Not natural dyes everything is clear: you go to the store, buy food coloring of the desired color, dilute the dye in water, put an egg in the water with the dye until you get the desired color.
IMPORTANT: Coloring with such dyes usually gives a more uniform color. But this makes it feel unnatural.

WITH natural dye the question is more complicated. Many natural dyes can be used depending on the desired color of the final egg.
Yellow.
IN yellow Turmeric will help color the egg. Painting technique:
- Add 2 tbsp to 0.5 liters of water. turmeric, 1 tbsp. table vinegar
- Place eggs in water
- Cook until done

Pink color.
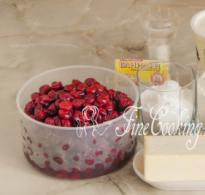
Gives pink color to eggs cranberry juice, in which boiled eggs lie until the desired color is obtained

Dark brown color.
Boil eggs in strong black tea.

Blue color.
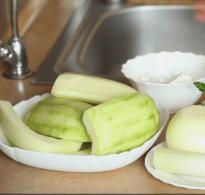
Red cabbage will help you get the blue color:
- Finely chop 2 heads of cabbage
- Pour 0.5 liters of water into the pan
- Add 6 tbsp to the water. table vinegar
- Fill the cabbage
- Leave to infuse overnight, stirring first
- In the morning, add boiled eggs to the infusion until the desired color is obtained.

Easter egg painting
Painting eggs will look equally good on both pre-painted eggs and natural-colored eggs.
Painting with permanent marker.
A simple way to paint Easter eggs for those who know how to draw.

Painting with paints.
For painting you only need paints and brush thin. You can use the simplest acrylic paints.
IMPORTANT: Using this method, you can decorate the egg with your child and paint it to your liking.

Painting with powdered sugar.
- Prepare powdered sugar
- Add as much water as needed until you get a thick, homogeneous mass.
- Apply the pattern with a pastry syringe filled with sugar mixture.
- Let the egg dry
Wax painting.
- For wax painting you will need wax crayons or wax paints
- Select the tool you will use to paint: knitting needle, needle, awl, copper wire
IMPORTANT: Copper wire will keep the wax hot for a long time, which will allow you to draw more lines at a time
- Heat the wax to 65 C
- Dip the tool in wax and apply the design

If you do not have the makings of an artist or cannot come up with the desired pattern, use stencils.
- Print the stencil
- Select paints and apply them to a sponge or brush
- Place the stencil on the egg
- Blot with a sponge or brush over the stencil
- Remove the stencil and dry the egg

How else can you paint eggs for Easter?
Colored floss threads.
Wrap the egg completely with different colored floss threads and hard boil the egg.

Beautiful napkins.
- Buy beautiful napkins with a pattern suitable for the holiday
- Cut out the elements you want to transfer to the egg
- Prepare gelatin according to package instructions
- Dissolve the gelatin granules by heating it
- Apply the cut out pattern to the boiled egg
- Using a brush, brush the prepared gelatin over the top.
- Align the pattern from the center to the edges

Paper.
- Cut out figures, stripes, patterns from paper
- Attach paper of your choice to the egg
- Wrap the egg tightly with nylon or gauze
- Dip in desired dye. If necessary, cook in dye.
- Wait until the egg is completely dry
- Removing the paper


Silk.
- Cut a piece of silk in the desired color
- Wrap an egg in it
- Wrap gauze or nylon on top and secure
- Pour water and 3 tbsp into a saucepan. vinegar
- Boil the wrapped eggs in water with vinegar for 20 minutes after boiling.

- Roll a wet egg in rice
- Wrap with gauze
- Dip in dye
- After staining, open the gauze and let dry

Marble effect.
First way.
- Choose two dyes that match in color (preferably light and dark)
- Paint an egg in one of them
- Pour the second into a bowl and add a few tbsp. vegetable oil(depending on the volume of water)
- Mix water with oil
- Dip the egg completely into the water once so as to catch as many fat bubbles in the water as possible.
- Blot with a napkin
- Let dry


Hello, dear readers. Today I want to tell and show you how to paint Easter eggs. We will paint at home, just like last year. This year I decided to try new natural colors, confirm or deny some recommendations and tips.
I won’t try everything, I just don’t need that many boiled eggs. And we will start with the well-known turmeric.
How to dye eggs with turmeric
For this we need turmeric. I bought turmeric at the market, from spice sellers. It costs approximately a little less than $0.5 per 40 grams. But your price may differ from ours.
I pour hot water, I have a small 0.5 liter saucepan, just enough for 4 large eggs, or 5 small ones. I take two teaspoons of turmeric, this will be enough to turn the eggs yellow. I mix everything well. It was not possible to completely dissolve the turmeric. In the recipes on the Internet, it was said that you need to strain, and as I understand it, this is for uniform coloring. I didn’t strain it; I also like combined colors.

I waited until the water cooled and put the eggs in there. Together with chicken eggs Today I will paint the quail ones too. I just bought two little baskets to take the kids to church for Easter and the little eggs would look really nice in the little basket.
Place on the stove, bring to a boil, and cook the eggs for 10 minutes. I also added a teaspoon of salt to the pan. Our eggs are fresh, so I will add salt when boiling the eggs. When the eggs have boiled for 10 minutes, I take them out and rinse them with cold water. The result was yellow eggs.
I want to warn you that turmeric stains not only the eggs, but also the pan. Stainless steel pan Maybe it will be easier to clean, but aluminum or enameled ones won’t. I tried the following method with beets.
How to dye eggs with beets

I tried two recipes for dyeing Easter eggs with beets. The first recipe is simple, take one beet, squeeze the juice through a juicer, and immerse already boiled eggs in the pure juice. In the photo on the right there is a boiled egg so you can see how the color will change.
In the center lies an egg that has been left in the juice for 30 minutes. As you can see in the photo, the color is barely noticeable; if the egg were not white, it probably would not be visible at all.
On the left is an egg that has lain for 3 hours in pure juice. This can already be considered a colored egg, although the color is not bright. I decided to try coloring eggs using the second recipe I found on the Internet. To do this, you had to take two beets, grate and boil them for 30 minutes.

I took one large beets, grated it, added freshly squeezed beet juice. I just didn’t put the pan too full on the stove; when it boils, foam rises and drenches both the pan and the stove. I boiled it for half an hour, added vinegar, and left it to cool.
I add eggs to the now cooled broth and let it cook, adding salt of course. You need to cook for 10 minutes. I personally didn’t really like what I got. The eggs were of course painted, but the color was a little uncelebratory. At the end of cooking the beets, they recommended adding a spoonful of vinegar, but apparently it was necessary to add vinegar with the eggs. Again I am convinced that it is best to trust recipes with photographs.
The following recipe was also taken without photographs, but I myself know that the shell walnuts stains when exposed to hot water.
How to Dye Easter Eggs with Walnut Shells
 The recipe is very simple, just like with onion skins, and the color turns out darker, not so bright. The eggs turn out brown. To do this, I took walnut shells, poured them into a saucepan, and boiled them for 30 minutes. After the broth has cooled, put the eggs in, bring to a boil and cook for 10 minutes.
After that, I took it out, washed it with cold water and the eggs were ready. What Elena and I liked about this recipe was that the eggs were not colored under the shell. The same eggs that were lying in the juice, their whites were partially colored.
I came up with the following recipe myself, two years ago, I just didn’t have the opportunity to try it.
How to dye Easter eggs with mulberries
For the past few years we have been coloring eggs with blueberry juice. And in the summer, when the children ate mulberries, I remembered Easter. Or rather, looking at the children’s hands, I thought that I could try coloring the eggs.

Here, too, I used two methods of painting eggs. The first one is in pure juice. I took mulberries frozen from the summer, defrosted them, and squeezed out the juice. From a glass of mulberries, you get 60 - 70 grams of pure juice. But this is quite enough to completely immerse the egg in the juice in a glass.
On the left in the photo, these are eggs colored in juice, and on the right in the photo, these are eggs that could not be colored with cherry juice, more on that below.
The second method of coloring, like with blueberries, is to boil the remaining cake after squeezing out the juice.

I poured the remaining cake with water and boiled the eggs in it. The color turns out a little darker than when we boiled the beets in a decoction. But lighter than when boiled in blueberries.
I read that you can color eggs with cherry branches. I decided to try coloring with cherry juice.
Is it possible to color eggs with cherry juice?
 Along with the mulberries, I also took out frozen cherries. Defrosted and squeezed the juice. Place the boiled eggs in Cherry juice. What happened next surprised me. While my hands became stained when doing push-ups, when I immersed myself in juice the reaction was the opposite. Take a look at the photo for yourself.
 The eggs were covered with some kind of film that was easily removed. Not only were the eggs uncolored, but all the spots had disappeared from the eggs. This is especially visible in quail eggs. They just turned white. So staining with cherry juice failed.
And here's what we got. Here, of course, not all the eggs were colored; this did not happen in one day, and the most unfortunate colors were sacrificed to our stomachs, and simply eaten.

But I don’t want to let you go with this. Last year we colored eggs with blueberries and onion skins. But it turned out very beautiful.
 You can see how else you can paint Easter eggs in the article “.”
I will even show you a photograph to attract your interest, although it will not convey the true color. And if you haven’t decided on an Easter recipe yet, then we already have 5 proven Easter recipes on our blog. All recipes can be viewed by clicking on the ““ tag.
Today, the choice of colors for Easter eggs is very large. But I absolutely don’t want to eat such an egg, much less give it to children. Whatever manufacturers write on their paint labels, I’m still horrified by the blue egg under the shell And I don't want to have a colorful stomach.That’s why I always paint eggs only with natural ecological dyes. It may not be so bright, but it’s safe, we already swallow chemicals every day, on such a day you can do without it. If you are of the same opinion, then these egg coloring tips are for you.
I came across ideas for ecological coloring of eggs on a Dutch blog several years ago, chose the products we had and decided to try it. Since then, in addition to painting eggs in onion skins, I have also painted them in other colors.
NaturealAndwithoutrare
Here is a list of natural dyes that will help you beautifully color eggs (mix the suggested products with a small amount of water, enough for cooking, and cook the eggs in a mixture of water, dye and a couple of tablespoons of vinegar for 20 minutes; eggs for coloring are best taken with white shells , it absorbs the dye more actively) and To prevent eggs from cracking during cooking, it is better to use eggs at room temperature, rather than ones you just took out of the refrigerator.
Red and pink color:
A strong infusion of Cardane will help give the Krashanka a red color. Place the eggs in this infusion and bring to a boil, then cook for 10 minutes. Hibiscus infusion is not the only way to color it red. And if you think that preparing fresh beetroot is easier than a strong infusion of hibiscus, you can dip already boiled eggs in beetroot juice for half an hour. If you reduce the time the dyes stay in the juice, you can achieve not only a red, but also a pink tint.


Orange color:
To give the paint an orange color, you will need carrot juice. As in the case of beets, already boiled eggs need to be placed in fresh carrot juice for half an hour. The intensity of the color will depend on the time of “soaking” the dye.


Yellow:
The yellow color will be given to the dye by the root of turmeric (saffron). You will need to dilute in hot water a few tablespoons of turmeric powder and, bringing the solution to a boil, leave on low heat for a few minutes. Let the broth cool and then boil the eggs in it. You can also prepare a coloring solution from the zest of lemons, oranges and young birch leaves.


Dark and light green color:
To color white shells green, you can use the juice of parsley, dill, basil and green pepper. But spinach will help you get an intense shade. These herbs need to be simmered over low heat for half an hour, then boil the eggs in the broth. The same can be done using a solution of brilliant green. The brilliant green solution must be diluted with water to the desired saturation and then the already boiled eggs should be placed in it.


Brown and golden color:
To get a brownish tint, you can boil eggs in strong coffee or onion skins, the more skins you collect, the more intense the color.


Blue color:
In order to get a blue tint, you need to finely chop red cabbage, pour boiled water and add 2 tablespoons of vinegar. When the solution acquires the shade you want, soak the already boiled eggs in it.


Purple:
The purple color of your paint will be given by a mixture of red and blue solutions. Eggs boiled with red onion skins can also acquire a purple tint.


Other natural food colors for eggs
The color of the eggs will change depending on how long you hold the eggs. A minimum of 30 minutes for a light color and a maximum of overnight for a deep color.


- Cinnamon, natural and instant coffee, black tea, walnut shells, brewed hibiscus/hibiscus for different shades of brown.
- Saffron, carrot tops and tops, citrus peels, celery and dill seeds, dandelion, tansy and goldenrod flowers, young poplar shoots, rhubarb leaves for different shades of yellow.
- Paprika and chili powder for shades of orange
- Violet flowers and pansies, blackberries, blackcurrants and blueberries for purple
- Fresh herbs, lightly sautéed spinach for green
- Strawberry and cranberry for a soft warm pink.Soak eggs in beetroot solution atroom temperature, 30 minutes.


Now you can prepare beautiful colored eggs from natural ingredients.
Wish you luck!
Hello, dear readers. Easter has already passed, and I just finished writing the article, and finally decided to show you how I painted eggs with natural dyes, or more precisely, natural ones. We have all been trying for a long time to stop using chemicals in our everyday lives. There are chemistry that are difficult to refuse, and there are chemistry that are completely replaceable. And when it comes to food, you need to be three times careful. Of course, I haven’t used paints for this for a long time. And this year I decided to start showing how you can do without chemical dyes when preparing for Easter, or rather, how to color eggs with natural dyes. I won’t show you everything at once, it will all be added to next year, but I can tell you.
Let's start from the very beginning classic recipe, this is the coloring of eggs using onion peel. Moreover, you can use both regular onions and blue ones. I took regular onion skins.  Moreover, even one solution can color eggs differently. But first, how to make a solution, or more correctly, a decoction of onion peels. We place the pre-collected husks in an old pan. Why to the old one? Because then it won’t be very easy for you to wash the pan.
In general, I made a decoction of onion peels from last evening and left it to brew overnight. I simmered it over low heat for about 15 minutes. You can do this right away. I just wanted to get a more saturated color, and the first color I have will not be uniform, but slightly disrupted by the uniform color. To do this, I loaded the eggs into the prepared solution along with the husks and boiled them.
Then I strained this solution from the husks and cooked the next batch in a pure broth. As you can see in the photo, the eggs have already turned out to be a uniform color.
I was too lazy to run to look for beautiful leaves, it was raining outside, so I could show you how else to make beautiful drawings on a boiled egg. And I’ll just tell you. Take it a raw egg and a beautiful leaf. At this time, parsley, gooseberries, and currants grow. It is small leaves that occupy no more than half the size of the egg, and ideally, of course, than fewer topics better.
The leaf should be smooth and beautiful. We wash the leaf and apply it to the egg, maybe several leaves in a circle. Then we take old oversized stockings and carefully press our leaves. We tie the stocking with a thread near the “nose” or “butt” of the egg, then the pattern will turn out beautiful. We are already cooking in the stocking. My mother made a whole line of these eggs. One stocking could contain up to 5-8 eggs.
But not only leaves can be used. You can take anything, such as rice or cereals, and you’ll get some pretty interesting patterns. But you don't need to take a lot of rice or cereal. When they stand at a distance from each other, then the drawing turns out more beautiful.
This year I decided to try painting blueberries for the first time. To do this, I bought and froze a glass of blueberries in the summer. 
Before painting, I took out and thawed the blueberries. Moreover, it is better to defrost it already in a plate. Because when defrosting, the blueberries have already released their juice. As you can see in the photo, I placed the blueberries in layers of cheesecloth and pressed them over a bowl. I poured the resulting solution into a glass.

I got half a glass of juice. We immerse already boiled eggs in this juice. I got two eggs into my glass. I left them for 20 minutes. As you can see in the photo, the egg turned out to be a light purple color. I already laid the next two eggs for 40 minutes, the color turned out darker.
Not only blueberry juice can be used. For example, you can also use the juice of cranberries, red beets, and red grapes. And the longer our egg lies in the juice, the richer the color will be. From cranberry or eggs will Pink colour. But you need natural juice, not from packages.
But I still have some cake left, a wringer so to speak. So, I decided to boil what was left after squeezing the blueberry juice.

And I first boiled a few eggs in a weak solution; I didn’t add all the cake at once. This is how the eggs turned out to be light black eggs with a greenish tint. The photo shows one egg on the right. Then I added the rest of the cake to the broth, which turned out to be very beautiful pearlescent eggs with a greenish tint, although this is not visible in the photograph.
But my experiments did not end there. I felt sorry for pouring out the blueberry juice, so I put the eggs already boiled in their husks there. I liked the result.
And now I want to show what happened this year with painting eggs with natural dyes.

Now let's look at the overview of colors from left to right. The first color is quite rich and dark purple, first boiled in onion skins, and then soaked in blueberry juice. The second ones are dyed in a decoction of blueberry cake, the top one in a weak solution. In the middle we have ones painted in pure blueberry juice. The top egg lay in the juice for 20 minutes, and the bottom two for 40 minutes.
The next ones are dyed in a decoction of onion peels along with the peels. And the ones on the far right side are colored in a decoction of filtered onion peels. Well, in the center, the most lazy option, this is putting a film on already boiled eggs. You put the film on the egg, put it in boiling water, and the work of art is ready. But you shouldn’t store eggs in film for a long time. The egg does not breathe and quickly disappears.
 Black tea- You can dye eggs in black tea. To do this, you need to boil our eggs in a strong brew of black tea. The eggs will turn out dark brown. And since low-grade teas also contain dyes, the eggs will be colored, so to speak, with a guarantee. The presence of the dye is clearly visible in the mug in which the tea was. These eggs are colored with two tablespoons of black tea per 800 grams of water. 13 eggs were painted. Moreover, both white and brown eggs. I didn't see any difference afterwards.
 Red beet decoction— I boiled these eggs along with grated red beets. For 10 eggs I grated one beet weighing 100 grams. Three eggs are colored, and one is raw for comparison. I won't do that again. IN boiled beets It doesn't turn out to be a very nice color. Then I'll try it in fresh beet juice.
Paint eggs with birch leaves It's also possible.  I've heard it for a long time, but only now decided to try it. I took the green ones birch leaves, approximately densely packed floor liter jar, and filled them with water. I put them on the fire, boiled them for 5 minutes and left them to steep for half an hour. Then I took the infusion and boiled the eggs for 10 minutes after boiling. Look what happened. From below painted eggs, but not on top. The photo does not show the true color, in the original they are a little yellow. Our kids even liked the color yellow. It is better to paint with turmeric, the color is more saturated.
And now a little theory, or how else you can color eggs with natural dyes. To fix the color, it is recommended to add a tablespoon of vinegar to the broth.
Turmeric – Using turmeric will result in yellow eggs. For this we need a few spoons of turmeric, or you can take one 20 gram bag, this will be enough. The more turmeric, the richer color. Add turmeric to a small amount of water and cook our eggs in this broth. You need to boil the eggs for about 10 minutes. But again, the color will depend on the time of boiling the eggs. The more, the richer. The amount of turmeric will also play a role; the more, the richer.
You can use rubber bands when coloring eggs. For example, rubber bands can be placed on an egg. When cooking, poorly worn rubber bands can fly off. The elastic bands must be worn straight so that they are not twisted. Then the pattern will be even. You can use rubber bands from a bicycle inner tube. To do this, cut the chamber into thin rings and place it on the egg.
Another secret to even paint on eggs. Before painting, the eggs must be washed with a sponge. There should be no debris or greasy stains on the eggs.
 If you suddenly want to bake Easter too, then on our blog you can find several different recipes. All our recipes with step by step photos. And even with video.
I think now you can color eggs with natural dyes. There's nothing complicated about it. But of course this takes time. And if you want to try other painting recipes, another article has been published on the blog. There are lighter colors here, as can be seen in the photo.