How to decorate a cake in winter when there are no berries. Berry carving
“It should look so that you immediately want to eat it” is the main rule in making cakes, which I can talk about endlessly. To say that I love them is an understatement, I just adore them! But sometimes when I look at oil roses and multi-colored mastic, the desire to eat disappears completely.
Decorating cakes at home
A holiday without a cake is not a holiday at all. Of course, each cake is beautiful in its own way, be it my mother’s “Napoleon” or the incomparable “Pani Valevskaya” from the local confectionery, but if it has an unappetizing appearance I don't want to try this dessert. But today you will learn how to surprise your guests with a magnificent, incredibly beautiful cake, without overpaying huge sums to the pastry chefs!
Editorial Semitsvetik will tell you about fashion trends in confectionery art. Believe me, butter cream long ago in the past best decoration for the cake - fresh berries, fruits and flowers. Minimum effort available ingredients- And regular sponge cake will become a luxurious cake.

© DepositPhotos
Original cake decoration

© DepositPhotos

© DepositPhotos

© DepositPhotos

© DepositPhotos


This familiar and beloved tangerine can be easily used in preparing delicious homemade desserts. This article will tell you the secrets of the simplest and unusual dishes using tangerine.
Mandarin is a sweet citrus with rich taste. This fruit is often associated with winter time years and New Year holidays. This happens because this particular season turns out to be fruitful for tangerines in warm countries.
But eating citrus fruits as they are can be quite boring. That is why resourceful housewives and cooks came up with many delicious desserts using tangerine: cakes, jellies, pastries, souffles, tarts, cheesecakes, pies and much more.
Delicate tangerine soufflé, perhaps, will be able to surprise and delight every guest. This is a French dessert with an incredibly soft and rich taste. The article offers you unusual recipe, where one of the ingredients is champagne ( sparkling wine). Prepare soufflé cake with tangerines Every housewife will be able to look for “complex” ingredients in stores without the need.
You will need:
- Tangerines– 0.5 kg. (it is advisable to choose sweet ones; sour ones can ruin the taste of the finished dessert).
- Butter– 150 g (fat content not less than 73%)
- Flour– 120-140 g (see consistency)
- Sugar– 1 cup (approximately 200-220 g, you can use less).
- Sour cream– 220-250 ml. (fat sour cream, 25-30%)
- Cream– 1 glass (fat, approximately 200-220 ml).
- Eggs— 3 pcs.
- Corn starch– 2 tbsp. with a slide (approximately 20-25 g).
- Champagne– 1 glass (220-250 ml. white, sweet or semi-sweet).
- Vanillin– 1 sachet (can be replaced with vanilla sugar).
- Gelatin– 2 tbsp. (10-12 years old)
- Baking powder– 1 tsp. (1 sachet)
- Salt– pinch
Preparing the crust for the soufflé cake:
- First you dry ingredients should be mixed. To do this, combine flour with a small amount of starch and baking powder in a bowl. You can also add vanillin or vanilla sugar there.
- In the microwave melt the butter, or leave it in advance room temperature so that it becomes soft.
- Divide the sugar into 3 parts and mix two of them with melted butter. The ingredients are thoroughly mixed until homogeneous mass, you can use a mixer.
- After this, the mass should be gradually add eggs 1 pc. and mix the mixture thoroughly each time.
- After all the eggs have been added, add a pinch of salt to the mixture.
- Now it’s time to mix the mixture with the “dry” ingredients and mix everything thoroughly again.
- Pre-heat your oven to low temperature. 180-190 degrees.
- Prepare a baking pan for the crust. You will need a special silicone or metal mold. It is lubricated with a small amount of oil.
- The resulting dough should be carefully poured into a mold and baked for 20 minutes. You can check the readiness of the cake with a match or toothpick.
- Be sure to let the crust cool before preparing the soufflé itself, otherwise the dish will be ruined.
Preparing the soufflé for the cake:
- Prepare tangerine syrup. To do this, they should be peeled and divided into small slices. The slices are placed in a saucepan or cooking ladle, covered with sugar (here, focus on your taste and preferred sweetness of the syrup, 100 g of sugar is enough). The mixture should be brought to a boil, boiled for a minute and allowed to cool).
- Pour gelatin into a bowl and fill it with champagne. The cooled tangerine syrup should be immediately added to the same mass (all liquid from tangerine jam without pulp). Let the mixture swell for about half an hour.
- Prepare the base for the soufflé. To do this, mix cream and sugar. It is best to beat them with a mixer. After kneading, add gelatin mass and mix everything thoroughly again.
- If you have some tangerines left, you can use a few slices for more than just decoration. finished cake, but also for filling. Mass for put the soufflé in the refrigerator, so that it “grabs” a little, but does not freeze.
- Pour the thickened mixture directly onto the cake and place the pan with the mixture in the refrigerator to completely harden. After the soufflé has hardened, the cake can be decorated with tangerine slices, other fruits, powdered sugar or the remaining syrup.
 A piece of souffle cake with tangerines
 Chocolate cake with tangerines: recipe, photo, dish decoration
Chocolate cake with sweet citruses is delicate dessert with a rich taste of cocoa and tangerines. This dessert will be delicious treat for guests on any occasion.
You will need:
- Flour– 1 glass (220-230 g, high grade, necessarily sifted).
- Eggs– 3 pcs.
- Sour cream– 1 glass (200-220 g, fat 25-30%)
- Sugar– 1 cup (240-250 g, you can add less).
- Salt– 1 pinch
- Milk or cream– 50-60 ml. (plus 5 g thickener for cream).
- Cocoa– 4-5 tbsp.
- Oil (any vegetable)– 30-40 ml.
- Water– 0.5 cups (100-120 ml boiling water)
- Sweet tangerines– 3-4 pcs.
Preparation:
- The eggs should be separated and beaten separately. First the whites with sugar and only then all together, adding the yolk one at a time.
- Without ceasing to beat the mass, gradually add milk and vegetable oil , add a pinch of salt.
- Small portions add cocoa without ceasing to beat the mass.
- In the same way keep adding flour, preferably sifted. Mix the mixture thoroughly.
- In the same way, quickly pour in boiling water and, without stopping the mixer, continue mixing the ingredients.
- The dough will be very liquid, but that's how it should be.
- For baking, it is best to use a silicone mold, lightly grease it with oil. Pour the “liquid” dough into the mold and put it in the oven. The oven temperature should be 190-200 degrees. The biscuit is baked approximately 30-40 minutes, check with a toothpick or match.
- The cream is very simple: mix full fat sour cream and thickener, add your preferred amount of sugar (to taste).
- Leave the baked biscuit to cool, since the cream will “float” on hot cakes.
- Cut the tangerine slices into pieces, sprinkle with sugar and boil. Leave to cool and thicken.
- The baked and cooled biscuit should be cut into three layers. The first layer is smeared with sour cream and covered with cake. The second cake is covered with tangerine syrup with pulp, The top is covered again with cake.
- If you have any left sour cream, you can grease the top of the cake with it and decorate with slices of fresh tangerines.

 Delicious chocolate cake with tangerines
 Jelly cake with tangerines: recipe and photo
You will need:
- Gelatin– 2 small bags or 1 large (40 g required in total).
- Water– 2 glasses (clean, 500-600 ml.)
- Egg– 3 pcs.
- Sour cream– 3 cups (850-900 g high fat content)
- Sugar– 2 glasses (400-500 g)
- Flour– 1 glass (220-250 g)
- Tangerines– 1 kg. (choose sweet ones)
- Vanillin or vanilla sugar– 1 sachet
- Soda– 5 g (tsp)
- Water– 3 glasses (clean, cold)
Preparation:
- Gelatin should be poured into a separate bowl and filled with all the water to swell. The gelatin should be left in this state for about an hour.
- All eggs should be beaten(at first only whites, and then gradually adding 1 yolk at a time). You should add sugar and soda to the same mass, which you first quench with lemon juice or vinegar.
- Add 150 g of sour cream to the egg mixture(0.5 cups) and all the flour in small portions, pre-sifted. Knead enough batter .
- Bake a biscuit from the resulting dough. The dough should be poured into the mold and placed in the oven for half an hour, provided that the temperature does not exceed 180-190 degrees.
- While the cake is baking, cut the tangerines in a convenient way: into rings or slices.
- You can use any sour cream in the recipe, but fatty sour cream will have a richer taste. Beat sour cream (700-800 g) together with all the sugar, add gelatin and vanillin, mix thoroughly.
- Be sure to cool the baked biscuit
- Choose big and deep form for hardening the gelatin cake. Place citrus slices or rings beautifully in it.
- Cut the baked biscuit into cubes and add them to the citrus fruits.
- Pour sour cream over all ingredients. Place the mold in the refrigerator until completely frozen.

 Gelatin cake with tangerines
 New Year's cake with tangerines and kiwi: recipe and photo
You will need it for the biscuit:
- Flour - 1 glass ( premium, be sure to sift)
- Sugar– 1 glass (maybe a little less, but not less than 100 g).
- Egg– 4 pcs. (large)
- Salt– pinch (any)
IMPORTANT: This simple biscuit is very easy to prepare. The whites are beaten very thoroughly with a pinch of salt. Salt is needed so that the eggs give a fluffy foam. Gradually stir in all the sugar, then the yolks one at a time and only then the flour. Bake the sponge cake in the mold at a temperature of no more than 180-190 degrees.
Prepare the buttercream:
- You will need approximately 500 ml. heavy cream, how fattier cream, the tastier the cream will be.
- Perfect fit cream 30% fat.
- Beat the cream with a mixer or blender to a stable foam, gradually mix in powdered sugar.
- You will need it from 50 to 100 g of powder, depending on the preferred sweetness of the cream.
Folding the cake:
- Cut the biscuit into two or three layers
- Peel the kiwi and tangerines, cut into rings or half rings.
- Grease layers of cake layers butter cream and place slices of fruit along with it.
- Grease the top of the cake with the remaining cream and decorate it with fruit.

 Cake with tangerines and kiwi
 Curd cake with tangerines: recipe and photo
You will need it for the cake dough:
- Flour– 0.5 cups (exactly 125 g)
- Egg– 6 pcs. (large)
- Sugar– 1 glass (200-220 g, focus on your preferred sweetness).
- Vanillin– 1 sachet
- Tangerine or lemon zest– 1 tbsp.
- Baking powder– 1 sachet
- Corn starch (potato)– 50 g.
You will need for the cream:
- Cottage cheese (or curd mass) – 400-500 g.
- Yogurt– 100-120 g. (fat)
- Tangerines– 0.5 kg. (sweet)
- Heavy cream (20-30%)– 1 glass (220-250 ml.)
- Gelatin– 1 sachet (approximately 20 g)
- Powdered sugar– 5-6 tbsp.
- Vanillin– 1 sachet
Preparation:
- Fill the gelatin packet in advance cold water(see instructions on the bag) and leave to swell.
- Eggs, as in previous recipes, must be separate and beat the whites first, and then gradually add the yolks.
- Beat the egg mixture with half the sugar
- Add vanillin and zest to the egg mixture
- Flour should sift through a sieve with starch and baking powder and only then add in small parts to the egg mass, mixing thoroughly.
- From the resulting dough (sufficiently liquid), bake a sponge cake at a temperature of 180-190 degrees. Bake no more 25-30 minutes, check readiness with a toothpick.
- The baked biscuit must be left to cool completely.
- The curd mass or cottage cheese ground through a sieve should be mixed with yogurt and powdered sugar.
- The swollen gelatin should be heated in a water bath until it becomes liquid. Mix the cream with gelatin and mix thoroughly.
- Add cottage cheese to the gelatin mass
- Cut two layers from the biscuit
- Tangerines should be peeled and cut into rings or left in slices.
- The biscuit layer should be decorated with tangerine slices, grease curd cream, add tangerine again.
- Cover the top of the cake with another layer of sponge cake and leave it to harden in the refrigerator right in the mold.

 Curd cake with tangerines
 How to beautifully decorate a cake with tangerines, kiwi, banana, chocolate?
Bright juicy fruits with a rich taste can serve as an excellent decor for simple and festive cakes. You can lay out fruits randomly, but you can pursue some special pattern. Also fruit cake topper You can cover them with a gelatin layer to “fix” them and give the dessert a glossy shine.
Cake decor with fruits:
 Original cake decor with tangerines and oranges
  Cake with tangerine decor
 Cake decorated with tangerine rings
 Cake with fruits, truffles and marshmallows
 Cake decor with tangerine pulp
 Original cake decor with tangerines
 Cake decorated with fruits
  Festive cake decorated with tangerines, fruits, berries
 Cake with fresh fruits and berries
 Kiwi cake decor
 Cake decor with bananas and blueberries
 Tangerines in caramel: recipe
This treat is very sweet and juicy at the same time. Tangerines in caramel will become a highlight on your table.
You will need:
- Tangerines – 1 kg.
- Cognac – 50 ml. (glass)
- Sugar – 500-600 g.
- Water – 1 glass
Preparation:
- Tangerines should be peeled and removed.
- Heat sugar and water in a saucepan, add cognac
- Dip the tangerines into the boiling syrup and remove the syrup from the heat.
- Keep the tangerines in the syrup until they cool completely.
- Caramelized tangerines can be decorated with powdered sugar before serving.

 Tangerines in caramel
 Tangerines in chocolate: recipe and photo
Tangerines in chocolate– an excellent appetizer for wines, champagne and even cognac. It is very easy to prepare such a dish using. But, if you do not have such a device, you can use a simple saucepan and stove.
Melt the chocolate on steam bath (this way it won’t burn) and alternately dip the tangerine slices on skewers into it. Place tangerines on a sheet food paper and let them cool completely. Cooled chocolate slices easily come off the paper; they can be placed in the refrigerator to “harden” as quickly as possible.

 Tangerines in chocolate
 Canned tangerines, compote: recipe
To prepare canned tangerines, you can use citrus fruits directly with the leaves.
For preservation you will need:
- Tangerines– 1 kg (sweet, approximately 10 pcs.)
- Sugar– 400-500 g.
- Carnation– several pieces. for spicy aroma
- Cinnamon– 1-2 sticks or 1 tsp. ground
- Ginger– a little grated root (can be omitted if desired).
- Clean water– 1 liter.
Preparation:
- Water is poured into a saucepan, mixed with sugar and spices, and brought to a boil.
- Tangerines should be washed and pierced through several times with a skewer or toothpick.
- Place all the tangerines into the boiling syrup and wait until it boils again, then reduce the heat.
- Boil the tangerines over low heat for about an hour and only then close them in the usual way.

 Canned tangerines
 For the compote you will need:
- Tangerines– 0.5 kg (sweet, if you use sour, add more sugar).
- Sugar– 300-400 g.
- Water - 2.5 l.
Preparation:
- Boil the water
- Peel tangerines and remove excess membranes
- Place tangerine slices in boiling water
- Add sugar
- Cook the compote for 15 minutes over low heat, then cover with a lid and let it brew.
 Mandarin compote
 Tangerines in sugar syrup: a recipe for the winter
You will need:
- Tangerines– 0.5 kg. (sweet)
- Sugar– 300 g.
- Water— 1 liter
- Cinnamon– 1-2 sticks
Preparation:
- Place sugar in a saucepan
- Add water to sugar and cinnamon sticks
- Place on low heat until completely dissolved.
- Dip tangerine slices or whole peeled tangerines into boiling syrup.
- Roll the resulting mass into jars
 Tangerines in syrup
 Salad with persimmons and tangerines: recipe
This salad can be safely served as a dessert, because the fruits (persimmon and tangerine) have a pleasant sweet taste.
You will need:
- Persimmon– 1 pc. (large, elastic, Sharon variety)
- Tangerines– 2 pcs. sweet and large
- Honey– 2 tbsp.
- Butter– 10 g (approx.)
- Cheese "Dor Blue"- 100-150 g (can be replaced with any other).
- mint leaves– several pieces.
- Any berries as desired(strawberries, blueberries, raspberries) – a handful.
Preparation:
- Tangerines are peeled and excess films, divided into slices, and the slices are cut in half.
- The persimmon is cut into cubes and placed in a serving dish along with the tangerine.
- Crumble Dor Blue cheese over the fruit.
- All ingredients are poured with a sauce made from liquid honey and melted in the microwave butter.
- Top the salad with fresh mint leaves
Video: “An incredibly delicious fruit salad of tangerine, apple, kiwi and persimmon. Fast and easy"
Decorating cakes is an interesting, but labor-intensive section of cooking. The easy way make the treat colorful and tasty - decorate it with fruits and berries. Even the most common fruits - apples, bananas, oranges - will make a successful decor. Exotic fruits They will make the dessert even more appetizing, and the berries will complement the taste of the cream and highlight its sweetness. Don't forget about the benefits of fresh fruits.

Berry decorations
Dark berries look impressive on a lush mass white cream. Whipped cream is used protein cream, custard, with condensed milk.

To decorate with protein cream with berries you will need:
- 4 eggs (whites);
- 1 cup powdered sugar;
- 1 stick of butter;
- 2 tbsp. l. lemon juice.

Recipe:
- Separate the whites from the yolks, cool and pour into a dry bowl.
- Now beat them with a mixer at medium speed, gradually adding powdered sugar.
- When the mixture reaches the consistency of light foam, place it on water bath and heat for about 4 minutes until the powder is completely dissolved.
- Combine the heated whites with soft oil And lemon juice, beat again until fluffy.
- Cover the cake layers, top and sides with cream. By using pastry bag With curly nozzles, it’s quite easy to form beautiful edges in the form of waves.
- All that remains is to decorate the cake with berries. Raspberries, blueberries, blackberries, lingonberries, and strawberries are used most often. Cherries, including cocktail cherries, soaked in sugar syrup are also suitable, but they must first be pitted.
- Place the berries randomly or collect them in a thoughtful composition.
- If the cake is multi-layered, good idea- mix berries with cream and use as filling.

A cake decorated with grapes, both green and black, looks elegant. A pattern is formed from the berries or a scattering is laid out. Large grapes are placed both on top and in the layer. If you “drown” them in cream, then when cutting the dessert, guests will experience a pleasant surprise. Grapes are combined with strawberries, kiwi, lemon.
Advice
Fresh frozen berries are also suitable for decorating the cake, for example, blackberries, cranberries, raspberries, black currants.
Strawberries and cream
This tandem is a win-win option thanks to the unsurpassed combination of taste and color.

To decorate the cake with strawberries and cream, it is better to whip them yourself.
You will need:
- 400 ml heavy cream;
- 6 tbsp. l. powdered sugar.
Recipe:
- Cool the cream and whip. Lush peaks will only be obtained from a fatty product, so you need to scoop up the fat from the walls of the pack with a spoon and add it to the total mass.
- Place the bowl and whisk in the freezer for 5 minutes before whisking.
- You should start whipping at medium speed, gradually increasing the speed.
- After 2-3 minutes, introduce the powder.
- When steep peaks appear, stop, as the cream can easily be beaten into butter. On average, it takes 10 minutes to prepare the cream.

Strawberries with chocolate
Another way to create a memorable cake decoration. Gentle pink berries look great on a dark background. To make the decor perfect, the most large berries strawberries It is not necessary to remove the stalk.

You will need:
- bar of chocolate;
- a little milk;
- nuts - optional;
- 8-10 large strawberries.
Recipe:
- Melt the chocolate in a water bath. If it turns out too thick, add a little milk and stir until smooth.
- Spread chocolate over the top and sides of the cake.
- Dip the strawberry nose into hot chocolate.
- Place the berries in a circle closer to the edge of the cake.
- Grind the nuts on a grater. Using the resulting nut dust, draw wavy paths on the chocolate.
- Finish the design with beautiful chocolate curls, which are obtained by grinding on a coarse grater.

Advice
Strawberries go well with both dark, milk or white chocolate.
Fruits in jelly
Using fruit jelly to create high multilayer cakes. A regular sponge cake is suitable for the base. You can place a layer between the cake and the gelled fruit thick cream, soufflé or fruit jam.

You will need:
- sliding form;
- gelatin - 1 pack;
- 1 tbsp. l. Sahara;
- 1 tsp. lemon juice;
- 0.5 tbsp. water.
How to cook:
- Pour gelatin warm water and leave to swell.
- After 15 minutes, place the mixture in a water bath and wait until the gelatin is completely dissolved.
- After boiling, immediately remove the mixture from heat and add sugar and lemon juice.
- Place the cake in a sliding pan with high sides. Cut the fruits in advance and arrange them beautifully.
- Pour the warm jelly onto the fruit in a thin stream from the center to the edge of the composition, or gently brush the fruit using a brush.
- Place the cake in the refrigerator until the gelatin has completely hardened.
- To make colored jelly, dyes need to be added while boiling the gelatin, but in small quantities: if the jelly is too dark, the fruit will be lost. Instead of water, it is allowed to take colored berry fruit drinks, it will come ready-made jelly delicate shade. An option for adding gelatin is cream or yogurt. They should be added in small portions after the gelatin has cooled and mixed thoroughly.

Advice
Do not gel citrus fruits, pineapple and kiwi: they may not harden. The acids released by these fruits prevent the gelatin from setting.
Jelly can be purchased at candy store. It is specially designed for pouring fruit. You need to act quickly, such a mass hardens instantly.
Fruit roses: the secret of creation
To decorate a cake with flower-shaped fruits, you need to prepare sugar syrup. Thin plastics of apple and peach are best suited for creating buds. This method is ideal if you want to decorate the cake with oranges. Citrus gives a lot of juice fresh, and after cooking in syrup it becomes soft and manageable.

Ingredients:
- 1 apple;
- 1 peach;
- 1 orange;
- 1 glass of sugar;
- 1 glass of water.

Recipe step by step:
- Cut the apple, orange and peach into thin slices.
- Mix sugar with water and bring to a boil.
- Dip the fruit pieces into the syrup.
- Twist one piece of plastic into a tube, place the second one on top of it and continue twisting. In this way, roses of the desired size are formed. Optimal quantity fruit slices - 4-6.
- Place on the cake and secure with a toothpick for stability.
- Lay out the leaves in small strips green apple, placed skin side up.
Combination of fruits, berries, creams, interesting ideas and additives
Tips for combining and placing fruits and berries:
- Even chaotically arranged fruits and berries look beautiful on a lush layer of cream.
- Small fruit fragments are laid out along the edges, and large ones in the center.
- Kiwi circles are used to frame the composition. They are placed overlapping.
- An interesting option: do not mix the fruits, but arrange them sectionally in the form of triangles, the vertices of which are in the center of the cake.
- A composition of fruits and berries can be placed in the center of the cake, or a wreath can be formed along the edge of the confectionery product.
- To decorate with bananas, the fruits are peeled and cut into slices. They are placed in a dense layer and covered with thin strips of chocolate. As an addition - grated nuts, small sweet berries (for example, blueberries).
- Raspberries go well with blackberries, and kiwi goes well with berries.
- The best cream for fruits is custard, protein, butter.
- Slices of red grapefruit and lime look impressive next to oranges.
- If the cream turns out to be too sweet, the cake is decorated with berries and sour fruits. This will balance the taste of the dessert.
- It’s quite possible to place fruit on the sides of the cake. For this you will need a sticky cream. Banana slices and apple slices hold up best.
- Various shapes are cut out of thick plastic apples: hearts, stars, etc. You will need special food-grade cutters or devices for cutting out cookie dough.
- The edges of the cake are masked with thick cream: protein, custard, butter. The sides are formed from long cookies ("Children's" is suitable). Wafer rolls are used for the same purpose.
- Whole large berries are combined with soft chocolates.
- Delicate ensemble - raspberries, blueberries and macaroon cookies. The treat is selected by color.
- In front of the room large pieces they are dipped in melted chocolate or syrup, and then in confectionery sprinkles or coconut flakes.
- Fresh mint leaves are a good addition to fruit.
- Tangerines are used for decoration in the form of slices, oranges - circles or their halves. Citrus fruits are peeled not only from the peel and seeds, but also from the white fibers between the pulp. If the pattern is not made from whole slices, then the pulp should be freed from the film.

What to consider when creating a fruit decoration: tricks and tips
Not all housewives have much experience working with volumetric fruit decorations. You need to choose the right cream, carefully cut and arrange the pieces.

To prevent your work from going down the drain because of some little thing, check out this collection of useful tips:
- Not all fruits and berries are suitable for decoration due to the abundance of juice. Excess liquid will ruin the entire painting. Such fruits and berries include lemon, lime, persimmon, watermelon, melon, gooseberry. But if these fruits are quite elastic, then why not find a use for them in confectionery? Juicy fruits and berries are suitable for layering cakes, their juice will nourish the dryish sponge cake. Citrus fruits often use zest. By the way, canned fruits are rarely used to decorate cakes, since they also contain a lot of juice.
- Before buying fruit, you need to make sure that your guests are not allergic to any of them. Most often, oranges and kiwi cause a negative reaction.
- Don't forget to remove the seeds from cherries, citrus fruits, and grapes.
- Everyone has noticed that after peeling the apple, it begins to quickly darken. On a birthday cake, such pieces can spoil the overall impression of the confectionery masterpiece. To keep the apple pulp clean, sprinkle it with lemon juice.
- There should be no spots or cracks on the fruit. It is better not to use overripe fruits.
- To prevent cakes decorated with fruit from falling apart, leave 2-3 cm from the decor to the edge of the cake.
- In order for each guest to enjoy the cake decor, portions are calculated in advance and the dessert is divided into segments. Then the decoration elements are arranged symmetrically.
- To prevent frozen berries from losing their shape, they need to be thawed gradually. First, the fruits are moved from the freezer to the top shelf of the refrigerator, and after a few hours they are removed and brought to room temperature.
- Using a pastry bag with a thin nozzle, designs are created directly on berries and fruits. Strawberries and raspberries are covered with strips of chocolate.
- Idea: place toothpicks with berries on the pear halves, dark chocolate draw eyes. You will get a funny hedgehog.

No matter how difficult it may be to compete with venerable confectioners in cake design, homemade cakes have been, are and will be a favorite at family holidays. A homemade fruit decoration will be aesthetically pleasing in any case, even if you simply place the slices on top of the cream, and the flavor of the cake will be imbued with good mood and love for loved ones, and this is the main component of success.


Store confectionery cannot be compared with the delicious aromatic homemade cakes. In preparation birthday cake One of the main stages is its design. But not everyone knows how to decorate a cake beautifully at home. In fact, you don’t need to have any skills to do this. experienced pastry chef. Homemade cake, decorated with soul and love, can in many ways surpass any store-bought one! Just try not to copy the design options that you saw in the store, but come up with your own unique design. So, let's find out what products and skills you may need to add beauty to your cakes yourself!
Cream decorations For many years they have not lost their popularity among housewives and confectioners. Roses, leaves, cream borders are unsurpassed classics that allow you to decorate a cake beautifully. However, before you get down to business, you need to decide which cream you should give preference to and what equipment you need to stock up on.
Choosing cream for decoration
The cream must be non-flowing and non-settling.
Therefore, the most suitable and frequently used are butter and meringue, which hold their shape well. And you can prepare them in the following ways.
Decorate the cake with buttercream
Beat 100 gr. softened butter with a mixer until fluffy. Then carefully add 5 tbsp. l. condensed milk (can be boiled), whisking continuously. The cream should be smooth and fluffy.
Options for decorating cakes with butter cream:

Preparation of meringues and examples of decoration
5 egg whites beat with a mixer into a strong foam. Continuing to beat, add 250 gr. Sahara. This should be done gradually, 1-2 spoons at a time. Set the mixer to medium speed and beat for at least 10-12 minutes until a thick, dense, fluffy mass is obtained.
Preheat the oven to 100 degrees. Line a baking sheet with parchment paper and lightly grease with oil. Using a spoon or pastry syringe, place ready mass onto a baking sheet and place it in the oven. The time after which the meringue will be completely ready is determined depending on its size and shape. On average, it may take about 1.5 hours.
A few examples of decorating cakes with delicious meringues:

Cakes with such decoration look truly solemn, but they need to be stored exclusively in the refrigerator. And their shelf life is very short due to the use of oil and eggs.
What tools, molds and attachments will be needed
The tools for decorating cakes with cream are quite simple - these are pastry syringes (or bags) with nozzles of various shapes. Thanks to the attachments, it is possible to draw such beautiful curly curls, flowers, leaves and stems.

It doesn’t matter if you don’t have such devices in your kitchen arsenal. Thanks to an ordinary paper cornet, it will be possible to do without them.
To make it, you only need a blank album sheet. It must be rolled up and the tip cut off (evenly or at an angle). The cornet must be held firmly in your hands, not allowing it to unfold. Fill the cornet with cream, wrap it up top part and, squeezing it, decorate the cake as you imagine.

Principles and interesting ideas
Depending on the shape of the cut of the cornet or the shape of the nozzle of the pastry syringe, you can draw both even stripes and all sorts of leaf-flowers on the cake. If you move your hand quickly and quickly back and forth, the strip of cream will turn out wavy, reminiscent of ruffles.
It’s not boring to decorate a cake with cream if you use dyes. It can be either ready-made food coloring or natural:
- divorced in warm water saffron will give yellow color;
- freshly squeezed beetroot, cherry or cranberry juice– red color;
- carrot or orange juice – orange color;
- spinach juice – green;
- cocoa powder or freeze-dried coffee - chocolate color.
Learn how to decorate a cake beautifully with fondant
An excellent alternative to cream jewelry can be confectionery mastic. Its consistency is very similar to plasticine. Therefore, if you know how to sculpt beautifully, you can recreate anything from it: from all kinds of flowers to animal figures and various objects.
The main difference between mastic and cream is that it can be wrapped cling film and store in the refrigerator for up to 3 months.
How to make mastic with your own hands
You can buy mastic ready-made in a specialized store, or you can prepare it yourself, which will be even better. There are several ways to prepare it:
Milk mastic
Want something interesting?
You will need to take in equal quantities:
- milk powder;
- condensed milk;
- powdered sugar.
Mix all the ingredients and knead them into an elastic dough.
That's it, the mass is ready for modeling! You can start creating. If you want to make the mastic multi-colored, the same food colors as for the cream are suitable for this.
Marshmallow mastic
To prepare it, white chewing marshmallows are used. The color of the finished mastic can be left as is, white, or painted.
Melt a handful of marshmallows in the microwave or in a water bath. Add a little food coloring (optional) and some added water citric acid(or milk). To ready-made mastic turns out more plastic, add a piece of butter. Add sifted powdered sugar into the resulting mass in small portions and potato starch(in proportion 1:3). Stir thoroughly before adding more powder and starch.
When the mastic becomes viscous and easily comes off the walls of the vessel, transfer it to a table strewn with powder. Knead in the same way as dough, adding powdered sugar, but do not overdo it. After about 10 minutes the mastic will become very plastic and will stop sticking to your hands. That's it, you can consider it ready to sculpt decorations for your cake.

Rules for working with this material
Mastic is a somewhat whimsical material for creativity. In air it dries quickly and hardens. Therefore, do not forget to wrap it in a plastic bag while working. You also need to roll out the mastic cling film, while sprinkling it with powdered sugar.
To decorate a cake with fondant, do not sculpt elements that are too voluminous - they may simply crack. Floral arrangements with leaves, frills and ruffles, small figures of animals or people, and other objects that you can create will look much better.
Here are a few interesting options decorations for inspiration:

Original cake decoration with fruits
Decorating a cake with fruits and berries is perhaps the most inexpensive, simple and beautiful way, which many housewives have long been using to aesthetically pamper their household. They can go like fresh fruit, and frozen.
Simple fruit and berry combinations
You can use one type of berry (for example, raspberries or strawberries) in combination with fresh mint leaves, or make a fruit and berry mix from multi-colored fruits (kiwi, bananas, strawberries, cherries, etc.).
The cream goes perfectly with strawberries and chocolate icing.
The exotic fruit design looks amazing. Place them on the finished cooled cake, creating a beautiful composition. Dilute store-bought jelly or regular gelatin in water (there should be much less water than indicated in the instructions). Using a wide brush, carefully apply the mixture to the fruit and place the cake in the refrigerator. After half an hour, repeat the procedure. This way the fruit will look juicier and the structure will not fall apart.

Artsy fruit crafts
For those who are ready for more sophisticated ways of decorating a cake, we suggest mastering apple roses. Of course, creating them will require some free time and skill, but we are sure that you will be able to do it!
So, first, let's prepare sugar syrup. To do this you need to take 1 tbsp. sugar for 1 tbsp. water and boil well. If you want to give the roses a certain color, add a little food coloring to the syrup. Then cut the apple into thin semicircular petals and boil in syrup for low heat to plasticity.
Remove the syrup from the heat and begin rolling the rose. Roll the first petal into a tube, and twist the rest on top until you get a flower. Turn the ends of the slices slightly outward so that the rose looks like it is in bloom.

Chocolate cake decoration
A special treat is decorating a chocolate cake with chocolate. Actually options chocolate decoration there are a huge variety. All of them are perfect and original in their own way. The choice is yours!
The easiest and fastest way to decorate a cake chocolate chips. To do this, you just need to grate the chocolate on a coarse or fine grater. But there is also a more interesting and unusual way get the shavings: put the chocolate bar in a warm place for a while, and then cut thin shavings from the bar with a knife. They will immediately begin to curl up. Place these curls on a plate and place them in the refrigerator. Sprinkle them randomly over the cake once they are completely set.

Openwork chocolate is a more sophisticated option for decorating a cake. Such jewelry looks so chic that it’s hard to believe how easy it is to make.
Melt the chocolate bar over low heat, stirring constantly, or use microwave. You should not heat the chocolate in a water bath, otherwise drops of condensation will mix with it, which we absolutely do not want.

While it's melting, parchment paper draw whatever your heart desires. These can be patterns, hearts, flowers, snowflakes, etc. Then scoop up some more hot chocolate with a confectionery syringe or place it in a plastic bag in which you will need to cut a tiny hole. Trace your drawings on parchment along the outline.
This must be done carefully, but quickly, because the chocolate hardens almost instantly.
The design turns out to be very fragile, so we recommend making several spare patterns. When finished, place your sketches in the refrigerator until completely frozen. After this, very carefully separate the openwork ornaments and transfer them to the cake.
Ready-made templates for openwork chocolate curls, which you can simply print out and outline with chocolate:

Chocolate leaves on the cake look impressive, and special effort they are not required in terms of manufacturing. To create them you will need leaves from any tree (leaves can help out in winter indoor plants). They need to be thoroughly washed and dried. Then apply melted chocolate evenly over them with a brush. Chocolate leaves will look more realistic if the chocolate is applied to the back of the leaf - the part with the veins. Once hardened, carefully separate the real leaves from the chocolate ones.

As you can see, decorating a cake with chocolate is quick and not at all difficult. Creative approach and a little imagination can create incredible things!

Fantasizing over a children's cake
To decorate children's cake For the upcoming holiday, you will need special sophistication. After all, it should turn out not only beautiful, but also certainly childish! The following materials are good for decoration:
- bright mastic from which you can make cartoon characters or funny figures;
- various fruits;
- sweets;
- jelly or marmalade;
- multi-colored confectionery powder used to decorate Easter cakes.
What’s remarkable is that for children, the appearance of the cake is even more important than its taste.. Therefore, to make the child happy, try to decorate the cake, taking into account his preferences and interests. Boys are usually delighted with cakes in the shape of a car or robot, girls are partial to Barbie dolls. And cartoon characters are a mutual favorite topic.

Other simple and interesting ways to decorate
You can decorate the cake with your own hands in other simple, but no less enchanting ways:
- Drizzle chocolate or colored frosting over the top and sides of the cake;
- Use ready-made chocolate figures;
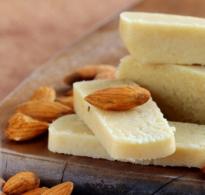
- Cores walnuts or almonds can be arranged in an original way, depicting a border and flowers;
- The combination of chocolate and whipped cream looks unsurpassed;
- To prevent fruits from losing their appearance, first dip them in transparent jelly;
- One more great idea regarding how to easily decorate a cake: make a unique stencil! To do this, on a sheet of paper with a diameter slightly larger than the cake itself, cut out an arbitrary ornament that you like. Hold the stencil over the cake and sprinkle powder on it if the cake is covered with chocolate icing, or cocoa if it is covered with white cream;
- The sides of the cake can be decorated with cream stripes or chocolate shards;
- It looks great around the cake with a picket fence made of wafer rolls or long cookies;
- You can simply grease the sides with cream and sprinkle them with cookie or nut crumbs.
As you can see, decorating cakes gives a lot of scope to your imagination. Don't be afraid to create, create unique masterpieces and share your ideas and their implementation in the comments!
Fruit cakes or shortcakes, decorated fruit and berry filling have recently become very popular due to the fact that many began to watch their figure and consume light low calorie desserts. Such sweet and light delicacies include fruit and berry cakes, where the filling is dominated by jelly and fresh berries and fruits. These cakes are incredibly tasty and appetizing. To prepare not only a tasty, but beautiful and neat dessert from baked cakes and fruit and berry decorations, you should know the basics of preserving the shape of fresh garden gifts.
How to gel berries and fruits on a cake
The idea of decorating a cake with fruits and berries is interesting and wonderful, but how to properly decorate the cakes with the sweet and sour gifts of summer so that they keep their shape and do not drip off the cake over time. The cakes soaked in juicy cream have a beautiful and original look, if their decor retains its shape and original brightness, freshness and durability. To make pies, cheesecakes and cakes look appetizing, you need to gel fruits and berries with colorless jelly. It's easy to prepare, you don't need to study for it long time confectionery skills.
What products are needed for gelling
- gelatin - 1 p;
- sugar - 1 tbsp;
- boiled water - half a glass;
- lemon juice - 1 tsp.
What does the process of making jelly for a cake look like?
Pour gelatin with warm water and leave for a while to swell. After which it should be placed on the burner that is on, stirring continuously, and bring until completely dissolved and to a boil. Remove and immediately mix with lemon juice and sugar. While the jelly has not hardened, they need to coat the berries and fruits on the cake using a pastry brush. You can also fill the berries completely with colorless jelly and put them in the refrigerator to harden. The product can be tinted upon request food coloring. This should be done during cooking; alternatively, you can make colored jelly from colored berry juices and fruit drinks.
Secrets of gelling
Experienced confectioners, before pouring jelly liquid into the cake, apply a thin layer of apple or other jam on it and roll it into foil around the circumference of the product so that the jelly does not spill out, but holds its shape. Read more about how to do this, brush the cake with a thin layer of jam, pour a little jelly, then add fruits and berries as intended and again pour the jelly to the very top. As a result, decorate the frozen layer of berries around the perimeter with whipped cream, if necessary. You can also separately coat the fruits with jelly, one at a time on a tray, to give them a stable shape. Afterwards, use the berry and fruit preparations for decoration; they will not lose their shape and will look freshly picked, which will certainly make the delicacy very beautiful.
Don’t get carried away with dyes; a very dense coloring of the jelly will cover all the berries and they will not be visible.
Do not mix concentrated freshly brewed gelatin with cold solutions, otherwise the product will deteriorate.
If you decide to add yogurt or cream to the jelly, do it in small portions, gradually stirring into the squeezed, cooled gelatin.