Harvesting cucumbers for the winter under a nylon cover. The best recipes for winter preparations under a nylon cover
Every family has signature recipes. And these pickles under a nylon lid are ours family recipe. I remember very well how we went to visit my grandmother. Early in the morning they picked cucumbers in the garden. Immediately it was necessary to soak them in a large balia under a nut. While the cucumbers were soaking in water, I ran around and collected cherry and currant leaves. My childhood task is to put an equal number of leaves into jars. Then she just as carefully counted the cloves of garlic and pieces of horseradish leaves. Do you now understand why I later went to math school? :) I was definitely fine with the score.
I have already revealed to you the first secret of pickled cucumbers. Soak fresh cucumbers in cold water. Second secret - aromatic spices. We have not had our own vegetable garden, cherries and currant bushes for a long time. But buying a beautiful “bouquet” for preservation is not difficult now. Cherry and currant leaves. But we have cherries under our house, far from the roads. And I replaced the currant leaves a couple of times with oak leaves collected in the forest.
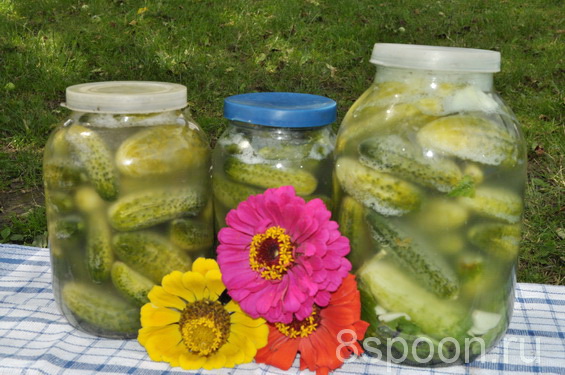
These cucumbers are stored in the cellar. Perhaps this is their only disadvantage in apartment conditions. But in winter they are incredibly crispy and aromatic. I immediately remember summer, grandma, a cozy courtyard... A plate of fresh mashed potatoes with cutlet and crispy cucumber.
Yes, you will have to wait until winter for such a delicacy. But if you want to crunch some cucumbers with puree in the coming days, make quick lightly salted cucumbers.
For a 3 liter jar:
- cucumbers, preferably straight from the garden 75 grams of salt (small faceted glass)
- horseradish leaf
- dill inflorescence (I take a directly dried bush)
- leaves of black currant, cherry, oak (I was given the task of putting 5 pieces in each jar, it’s a pity now I have nowhere to take leaves)
- parsley
- at least 3 large cloves of garlic (I use 5)
- 3-4 pcs bay leaf
- 10 black peppercorns
All spices are “by eye”, the more the better. more fragrant in winter there will be cucumbers.
The number of cucumbers is so much. how much will fit in 3 liters? bottle.
Preparation:


Bon appetit!
These pickled cucumbers taste like barrel cucumbers, they are moderately salted, with a slight sourness. Recipe in three-liter jars It’s not at all complicated, tight nylon lids are used, and pickles are prepared in several stages. So crispy winter preparation ideal for cooking delicious pickle, Olivier salad, Vinaigrette. Many people will appreciate them as a snack with vodka; in combination with herring and black bread, it’s a win-win option.
Choose small ones for pickling fresh cucumbers with pimples, they should be hard. We do not cut the tails. The most common rock salt is used. Vinegar is not used in the recipe.
In this recipe we use cold method pickling cucumbers under a nylon lid for the winter.
Taste Info Cucumbers for the winter
Ingredients for 6 three-liter jars:
- Fresh, dense ground cucumbers (medium size) – 10 kg;
- salt (not iodized) – 200 g;
- filtered water – 10 l;
- fresh and dry dill – 1 bunch;
- bay leaf – 10 pcs.;
- garlic – 10-15 cloves.

How to cook pickles under a nylon lid for the winter
Before you start canning, you need to do a number of preparatory work, namely: prepare the jars and lids (wash and sterilize) and wash the cucumbers (carefully and carefully), peel the garlic and rinse the dill. Leave clean cucumbers in water for several hours, this will make them even crispier. In the meantime, the vegetables are taking water procedures, you can cook cold brine. To do this, into the water room temperature you need to add rock salt and stir until completely dissolved.

Place fresh dill and some chopped stems on the bottom of a 3-liter jar dried herbs and cloves of garlic.

For this recipe There is no need to dry the cucumbers, but you can simply drain the water in which the vegetables have been sitting for several hours and begin immediately placing them in a jar. Trim the tails as desired, it doesn't really matter. Try to lay them tightly, one to one.

Be sure to place the filled jar in a deep container (bowl or plate) and fill the cucumbers with brine to the very top, cover with a lid. For the cooking process, which is obtained by fermentation, remove the jar for 2 days in a shaded place.

During this time, the cucumbers will acquire that unique “barrel” taste. The main work is done and the brine is no longer needed. It should be drained into the sink and the vegetables should be washed several times. Top with more fresh dill, garlic and bay leaf. Fill with clean water.

The final stage of this preservation is sealing the jar. To do this, fill the nylon cap hot water for 1-2 minutes, so the plastic will become more elastic and pliable. Then you need to act quickly. Remove the lid from the boiling water with tongs and shake excess water and close the jar of cucumbers tightly. Sometimes it doesn’t work out the first time, so you have to do all the steps with the lid again.

All that remains is to check whether our container is tightly sealed and whether air is getting into it; to do this, simply turn the jar upside down. Water should not leak out from under the lid, which will mean complete sealing. Put the preparations for the winter in a cool, dark place.
In about 10-14 days, our pickles under the nylon lid will be completely ready for use.

Cooking tips:
This recipe has several cooking variations.
- In one version, the brine is not drained, but simply covered with a nylon lid and that’s it. The downside of this recipe is that more often this product becomes acidic and the cucumbers turn into mush. Although, if you pick the right vegetables, medium size, not overripe, remove the pickled cucumbers in the cold in time, you can achieve excellent results and get delicious “barrel cucumbers”.

- In another version, the brine is poured into a saucepan and boiled for 1 minute, then the boiling marinade is poured into jars and immediately closed. This prevents the cucumbers from going sour, but there is a risk of overcooking and ultimately losing that amazing crunch.
- In addition to dill, you can put currant, cherry, and horseradish leaves in the jar. This will add density and crunch to the cucumbers.

Of course, it’s convenient to roll up jars with a key or screw them metal lids, But! There is nothing more reliable than nylon “thick” lids! The lid won’t move even a micron away from the jar, it’s been verified. My mother covered the blanks with such lids for many years, and now I follow her example. Try it too, it’s simple and very reliable.
To prepare cucumbers under a nylon lid for the winter, we take cucumbers, garlic, horseradish leaves, raspberries, currants, and cherries. You can add horseradish root, hot pepper to taste. I like to add black and allspice peas, cloves, dill umbrella.
Fry the jars over steam (or sterilize them in another way convenient for you), place leaves, garlic and spices on the bottom.

Place the cucumbers tightly in a jar; you can put leaves, peppers, and garlic on top, follow your taste.

I’ll deviate from the recipe and suggest you add cherry tomatoes to the cucumbers, it will not only be beautiful, but also tasty!

I have been using these nylon lids for many years.

After filling the jars, pour boiling water over them and leave for 10 minutes, covering them with lids.

Pour the water into a kettle or saucepan, add salt and sugar, and bring to a boil. Fill the jars again. The lids need to be kept in boiling water for 15 seconds, carefully removed and using a towel (so as not to get burned), close the jars with them, after dripping 70% vinegar on them.

As the lids cool down, they fit very tightly to the jars, this prevents air from penetrating into the workpieces. In winter, not everyone can remove these lids, but there is an easy way: heat a small saucepan of water, lay a towel, and place the hot saucepan on the lid. After a minute, you can easily remove the nylon lid from the jar. In the meantime, turn the jars over onto their lids and cover until cool.

Cucumbers prepared for the winter nylon covers They turn out crispy, tender, and very tasty! Try it and you won't be disappointed!

Bon appetit!

Lids for preservation
Screw-on lids are a paradise for the housewife who has despaired of handling the seamer when canning with simple lids with an insertable rubber band.
Seaming machines often break down and then do not close at all or are unable to crimp the lid and attach it to the glass of the jar very tightly. If the jar is not closed tightly, the products will deteriorate. And this is so offensive! So much work in a hot, stuffy kitchen, so many products, and suddenly it turns out that the jars are swollen (that is, the lids on them) or have completely fallen off.
Therefore, in order not to be unnecessarily upset, you need to either buy a reliable seaming machine for lids, or switch to twist-off screw caps.
Jars with a screw neck, closed with twist-off lids, are the most common containers in which we buy mushrooms, jam, compotes, canned tomatoes, lecho, gherkins, ketchups in glass jars, mussels, some types of cheese, sun-dried tomatoes in oil, juices and baby food. Twist-off technology is also used for capping medicines, and for beer caps.

Twist-off caps come in different sizes
How the screw cap works
A hot lid heated over steam or in hot water at a temperature of no more than 60 C, it is screwed on and fits tightly to the glass of the jar.
The polymer coating on the inside of the lid, which acts as a gasket (sealant), softens in heat and allows you to close the jar with the lid as tightly as possible, without gaps. As it cools, the top of the lid is pulled inward (a slight click is heard) and a dry vacuum effect is created inside the jar.
Rules for using twist-off caps
Do not tighten more than the thread allows, do not overtighten. Otherwise, you will break the lid.
You need to install the cover, getting into the thread, and screw it on these rails. Otherwise, cracks will form and mold may appear in canned food.
Close canned food with a lid immediately after filling the jars.
Do not overfill jars. The jars should be filled with contents as much as possible, but not reach 1 cm to the edge of the jar.
How to Store Screw-Lid Jars
Most canned foods can be stored with screw-on lids in a warm (but not hot), dry, and well-ventilated area. Do not expose canned food to sudden temperature fluctuations to avoid condensation.
However, if you can preserve jam with a small amount of sugar or compotes without sugar, or make other preparations that require more careful storage, they should be stored at lower temperatures (in the refrigerator or in the basement).
Before storing jars, jars with hot contents must be cooled to room temperature and checked for leaks (turn the jar upside down and see if the rim of the lid is wet).
Shelf life of canned food in sealed screw-neck jars screw caps, is 6 months or more.
Lifespan of screw caps
Twistable, screw-on lids - reusable. If you handle them carefully and do not clean off the varnish and the polymer inner layer of the lid with a hard sponge, the lid will last 4-5 years.
If the cover is rusty, it is not suitable for further use.
How to tell if canned food with a screw cap is edible
When you open the can for the first time, you hear loud bang- this means that the canned food has not fermented or swelled.
If you notice that the lid on the jar is swollen, the canned food is spoiled, it is poison, you cannot eat it.
How to open the lid
Screw caps can be opened by applying force and turning it in the opposite direction, or you can use a special opener for twist-off caps (they are sold in all hardware stores with a large assortment of products).
Which way to turn the lid
To close the screw cap, you need to twist it clockwise. To open, you need to unscrew the cap counterclockwise.
The lid does not open - what to do?
If the lid does not want to unscrew or you do not have enough strength, you should first try to cover the lid with a cloth or towel (so that your hands do not slip) and turn the lid.
If the technique is unsuccessful and the jar is still tightly closed, you need to take a burning match and slightly heat the lid from below with a flame (under the rim, around the jar). Just 1 match is enough, it’s quick, you won’t even burn your fingers. The lid will expand when heated and open (well, not by itself, of course, turn the heated lid).

Different types of lids: plastic (including nylon, translucent), plastic drain lid (with holes) and twist-off lids
Is it possible to replace simple preservation lids with screw-on lids?
Yes, you can preserve all types of salads, compotes, cucumbers, tomatoes or mushrooms in marinade under screw caps. That is, use them to tighten all the workpieces that were previously rolled up with simple tin lids.
Twist-off lids come in different sizes internal coating(more or less resistant to chemical influences). And if you have very much in the bank sour product(sour fruit compote, sour juice or marinade), then you better take the lids with a generous layer of varnish to protect the lid from interaction with acids.

Plain iron, plastic and twist caps
In addition, jams and preserves can also be covered with plastic - nylon covers, placing a circle of white paper soaked in vodka or alcohol under the lid (on top of the jam). The paper soaked in alcohol will collect mold on itself (if it suddenly appears) and you can throw away the damaged paper by placing a new piece of paper on the jam.
When we lived in a hostel during my student years, I was lucky to try many different salty and canned cucumbers: all the girls brought their mother’s preparations, and then treated each other.
So, everything is learned by comparison, and I like cold-process pickles the most. The only drawback of these cucumbers is that they need to be stored in a cold basement or refrigerator, so they are not very suitable for city apartments.
Pickled cucumbers make the most delicious vinaigrette, they can be eaten simply as an appetizer with.
Even though we live in an apartment, I make 2-3 jars of these cucumbers and store them in the refrigerator. This summer, my daughter and I were visiting our grandmother and we all picked cucumbers together. The recipe for pickled cucumbers for the winter is very simple, you will see for yourself by reading the article to the end.
I offer you a recipe for pickled cucumbers, according to which my grandmother has been making them for decades. The recipe is proven, the cucumbers turn out crispy and not too salty, and can be stored in the cellar for up to 2 years.
To pickle cucumbers, you will need any jars and nylon (plastic) lids. I don’t recommend using metal screw caps, as they rust (both inside and outside...)
So, to pickle cucumbers we need the following:
- cucumbers
- Clean and dry 1 liter, 2 liter or 3 liter jars
- Nylon covers
- Horseradish leaves
- Dill umbrellas
- Black peppercorns
- Peeled garlic
- Chilli pepper
- Dry mustard
- Oak leaf (for crunchiness of cucumbers)
For the brine:
- 1 liter of cold running water
- 2 heaped tablespoons (60g).
Preparation:
If you can put less salt in it, then the lack of salt in pickled cucumbers can contribute to the development of bacteria. As a result, cucumbers may become soft and not tasty.
Soak the cucumbers in cold water for 3-5 hours (or better for 5-8, especially if these are store-bought cucumbers). This must be done so that the cucumbers get the missing water, otherwise they will get it from the brine and there may not be any left in the jar. Rinse the cucumbers under running water. The ends of the cucumbers do not need to be trimmed.

Wash jars and lids. (I do not sterilize or dry them in this recipe. But if you pour boiling water over the jars and lids, that will only be a plus).
Arrange the cucumbers, evenly layering with herbs.

Don't forget about garlic, chili pepper and dry mustard. For 3 liter jar you need about 5-6 cloves of garlic, 1 chili pepper and 1 teaspoon of dry mustard.
Dissolve 2 heaped tablespoons in a separate container coarse salt in 1 liter of water (for a 3 liter jar it takes about 1.5 liters and 3 tablespoons of salt).
Stir well and let sit. Usually coarse salt produces a sediment. I don't pour it into a jar. Fill the jars to the very top. Cover with regular plastic lids and place in a cool place.
Check periodically (every 3-5 days) and make sure that the cucumbers are covered with brine, otherwise, if this is not done, cucumbers without brine may become soft and mold will form.
Sometimes you have to add brine (until the foam is completely displaced from the jar and the edge of the neck, i.e. to the very edge of the jar, brine - at the rate of 1 liter of water - 2 tablespoons of salt).
The cucumbers will ferment. This is fine. They may become cloudy and foam, but then the brine will lighten over time and the foam will go away.