Homemade wine - recipe. Small tricks for making wine at home and useful tips for making it
Home winemaking in the vastness of our Motherland is a fairly common thing. Many have dachas where berries and fruits grow, some have a private house with their own garden. And the abundance of the harvest is sometimes such that there is literally nowhere to put the fruits. So our people (especially the older generation) prefer to prepare them. Such skillful preparations (so that fruits and berries do not disappear) include homemade wine. The recipe for its preparation is quite simple. The main thing here is adherence to certain technologies and cooking tips that have been developed over decades, and a sufficient amount of raw materials. And they manage to do it Home wine without yeast from almost any berries and fruits, sometimes even mixing them as part of the wort. Let's try it too?
Equipment
Any, even the simplest homemade wine recipe begins with preparing equipment for fermentation. If you already have it, then good, if not, then we’ll select it. First of all, we need a container so that the wort ferments well in it, so to speak, in comfortable conditions.
Fermentation vessels
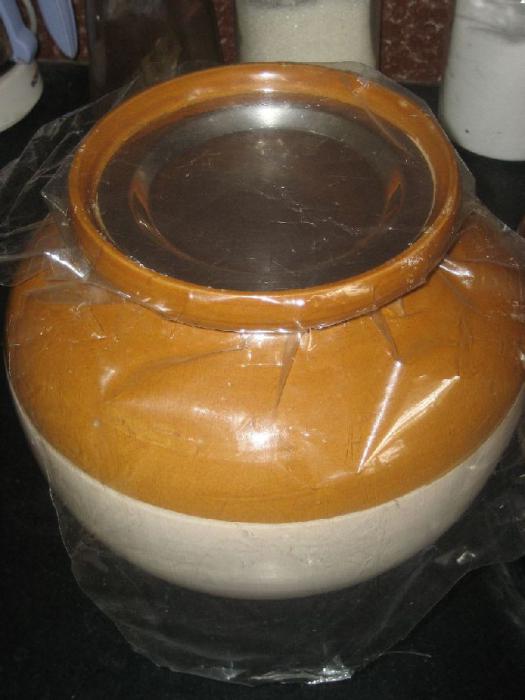
Many people who constantly make homemade wine on their own (a recipe, and more than one, will be given below) advise under no circumstances to take metal utensils. An exception may be an enamel pan, which is necessary in some cases for boiling wort. Generations of experience show that a glass container or wooden barrel is best suited for the fermentation process. With the advent of food-grade plastic, some winemakers began to use containers made from it, and they say that this is also good. Moreover, wooden barrel or a large glass bottle in urban areas is quite difficult to get.
But a plastic container (for example, for drinking water) - as easy as pie. The dishes should be of fairly impressive volume and with a narrow neck if possible. By the way, and stir future drink you need a wooden or, as a last resort, a plastic spoon. In addition to the container, we will need to make a water seal so that excess air does not enter the fermenting wine. Making such a thing is very simple - the Internet is full of descriptions.
We seal the neck tightly (some people cover it, for example, with plasticine or putty) and remove a plastic tube from it (can be used for a dropper). We insert the tube into a jar of water standing at some distance, and the water seal is ready. This is, of course, the most primitive option. There are both homemade and branded ones, which you can also purchase if you don’t trust the “old-fashioned” methods.

Raw materials for wine

Fruit and berry
Well, now we should move directly to how to make homemade wine. The recipe uses a mixture of fruits and berries growing in the garden as raw materials. The result is an ordinary fruit and berry wine, not too strong and moderately sweet.
Preparing the pulp
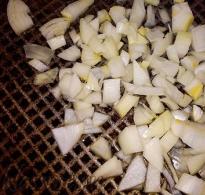
Pulp is a preliminary product for making homemade wine. The recipe for its preparation is simple. We divide the available fruits and berries into hard and soft. Cut hard ones (for example, apples and pears) into slices and remove seeds and seeds. Then, using a meat grinder or blender, prepare a mixture that is as homogeneous as possible. Remove the seeds from soft berries and crush them. Then, in order to get maximum juice, we subject the pulp to heat treatment. Big enamel pan pour the pulp and add water 15% of the weight of the fruit. Heat to 60 degrees and, stirring at this temperature, hold for 30 minutes. This is the first method. Second: in order not to heat the pulp, you need to put it in a warm place to ferment for 2 days. And you can start making juice.

Getting juice from pulp
It is best to use a press, even if it is a homemade, small one. For these purposes, you also need a linen bag that fits the size of the press container. We put the fruit pulp, previously prepared, into a bag and under a press, squeezing out the liquid. When the juice stops flowing into the appropriate container, remove the pulp and transfer it back to the enamel pan, adding 10% water by weight. Let it sit for several hours, stir and repeat the operation with the press. Then it is recommended to filter the juice obtained in this way additionally, since it may contain small pieces pulp.
Adding sugar and water

Fermentation
The process itself has been described many times in the relevant literature, so we will not dwell on it in detail. Usually it is carried out for 20 days at the appropriate temperature. We use natural yeast that lives on the berries. But if fermentation has not started after a few days, then you can add a little special wine (worse - ordinary bread). Otherwise the wort will sour.
From currants
Making currant wine at home is quite simple. For 3 kilograms of black currants you need to take 3 kilograms of sugar, 5 liters of water. We sort the berries, but do not wash them, grind them in a blender, mix them with sugar and water and pour them into a bottle. Proven method: put a medical glove on the neck, wrap the bottle in a black sun bag and leave to ferment (temperature 20-24 degrees). When the glove rises, you need to carefully pierce one of its fingers with a needle. Currant wine at home is ready in three months. Drain and bottle, place in the refrigerator, and then store in a cool, dark place. Wine strength is 10-14 degrees.
Homemade strawberry wine
It is prepared in much the same way as from currants. For 3 kg of berries we take 2 kilograms of sugar and 3 liters of water. You can add a small handful of raisins to enhance fermentation. Homemade strawberry wine is ready on average in a month and a half, but it would be better to keep it for another couple of months to ripen. Then its taste will improve.

Homemade mulberry wine recipe
Everything looks simple here too. We use the option with a medical glove. For 2 kg of berries we take 1.5 kg of sugar and 5 liters of water. Add a handful of raisins and 5 grams citric acid. Otherwise, the cooking process remains unchanged.
Wine made from grapes is the oldest and noblest drink. Properly prepared and consumed in certain doses, it performs healing functions, heals our body, rejuvenates, fills us with strength and energy, removes free radicals and toxins. Wine helps with bronchitis and pneumonia, tuberculosis and many other serious ailments. Therefore, it is not only possible to drink it, but it is necessary - the conclusion of doctors is clear.
Homemade wine
Naturally, it’s easier than ever to go to the store and buy a bottle of red, pink or white that you like. However, the best drink is considered to be one made with one's own hands. So we will tell you how to do it. Where does the process begin, what stages does it go through? Which varieties are best to use to produce the drink? How to make it, what container to take for fermentation and what to store it in finished product? In a word, you will learn in sufficient detail how to do it. The main thing is to follow the recommendations exactly, and everything will work out great for you!
Choosing grapes

Let us note right away: there are no special restrictions in the selection of berry varieties for the production of the drink. This means that whatever vine grows in you, harvest it from. But if you follow the advice of professionals on how to make wine from grapes, then juice from Isabella, Kapshun, Muscat, Lydia, Aligote, Buzoika, Moldova and other southern varieties is better. The main thing is that the grapes are well ripened, ripe and sweet. The bunches should be collected before frosts and rains, so that they are dry and the berries do not gain excess moisture and lose their sweetness. In addition, they can be damaged by wasps and birds. These are some simple initial recommendations on how to make wine from grapes!
Recipe No. 1 (for a small amount of grapes)
There are several technologies for preparing the drink. Much depends on the amount of raw materials and their grade. It is usually recommended to make it with additional sugar and a starter made from natural yeast. The process should begin with preparing the grapes. Carefully sort the brushes, remove debris, leaves, remove damaged elements, etc.
Ideally, it is better to pick all the berries from the bunches. But, of course, this process is labor-intensive and painstaking. Especially if you have more than ten kilograms of grapes. If you use a special press, pass the selected berries through it. Or grind using a mashed potato masher. Or you can use the famous method of the hero of the movie “The Taming of the Shrew” with Celentano in leading role and crush it with your feet, and to the music.
When the berries turn into puree, you can start making homemade wine from grapes. Recipes advise transferring the mass into a glass or enamel bowl and heating to 60 degrees (use a thermometer so as not to overheat, otherwise the wine will not taste the same). Then let the puree cool, squeeze thoroughly through cheesecloth to obtain clear juice. If it seems sour, pour in sugar syrup(100 grams of sugar per half liter of water), stir and add the starter. How to make wine from grapes next: place the container with the juice in a warm place so that the product ferments for about 2 months. Try again, add sugar if necessary, stir until completely dissolved. Pour carefully so that the sediment remains at the bottom, the finished wine into bottles, store it in a cool place. How to make wine from grapes according to the second recipe - read on.
Homemade grape wine - recipe No. 2

Sort the harvested crop, separate the berries from the branches. Place them in a deep bowl. Using a wooden or porcelain pestle, crush the fruits into homogeneous mass. You don't have to choose the bones. How to make wine from grapes based berry puree: sprinkle it with sugar and for fermentation, put it in a dark place for a week cool place. Cover the container with a linen rag. After the specified time has passed, strain the wine through several layers of gauze, bottle it and store it in the cellar. Serve it to meat dishes. Using this recipe, it’s good to make homemade wine from dark grape varieties.
Along the way, take note of one more piece of advice. There should be no pungent, foreign odors in the room intended for wine production: they are actively absorbed by the future drink. In general, the ideal containers for making and storing wine are oak barrels, enamel pots and buckets, and glass bottles.
Sharing secrets

Secret one: why does wine from grapes (prepared at home) taste better if you separate the berries from the branches? Firstly, in this way you can carefully sort out the raw materials, remove the berries covered with tsvilya, overripe, spoiled berries. This means that you receive a preliminary guarantee that the final product is noble drink- it won’t spoil either.
Secondly, if the berries are crushed along with the twigs, the wine will be bitter and overly tart. Those. no longer the same High Quality, which one you expect. Thirdly, how to make wine from grapes so that it turns out excellent? Prepared berries should be immediately released into juice. After all, the fermentation process begins quite quickly in picked fruits. And it is impossible for him to find the grapes intact. This should be done either with a press or manually. You can also use a juicer, but this is not the best option. For 4-5 days, let the juice stand in a warm place along with the pomace so that it “plays out” and infuses. Then strain, bottle and send for fermentation. This completes the first stage of wine preparation.
To ensure the juice ferments properly

If you don't have oak barrels, you can ferment the drink in glass bottles with a volume of 5-10 liters. Fill them about two-thirds full. There must be free space in the vessels for the secreted carbon dioxide. When the bottles are filled, they need to be sealed. And to avoid air getting in, fill the edges of the plugs with sealing wax, seal them with plasticine or dough. Just be sure to make holes in them and insert flexible tubes (for example, from droppers) through which the gas will escape out. Dip the free end of the tube into a bowl or cup of water. Another option for making simple wine from grapes is to put ordinary balls on the necks of the bottles. Just don't forget to pierce them with a thick pin!
When juice turns to wine

The next - second - stage of turning grape juice into the drink of the gods is fermentation. It takes from one and a half to 2-3 months. Containers with liquid should be placed in a cool place, such as a cellar. The temperature there should be no higher than 5 degrees. You should often monitor how actively carbon dioxide is released from the bottles. Wash the vessels where the tubes are placed periodically and change the water. If the gas comes out weakly, check the tightness of the plugs. Otherwise, air will get into the wine and it will degenerate into vinegar. Usually in home winemaking The production of the drink begins at the end of September - October. Therefore, it will be completely ready for the New Year’s celebrations!
The final stage
When the wine in the bottles stops playing, becomes clean and transparent in appearance, and the sediment settles to the bottom, it can be strained again, poured into plastic bottles and drink to festive table. Its strength is about 5 degrees, according to taste qualities it corresponds to dry. However, if you like sweeter drinks, the resulting product should be “improved.” To do this, pour all or part of the wine (only without sediment) into one container. Then add 150 g of sugar for each liter of liquid (less can be done, depending on your taste). Dissolve it completely, rinse well the bottles in which the wine was previously, and pour it again, seal it and leave it to “finish playing.” The process will be completed in a month, when bubbles stop settling on the walls of the jars. The strength of the drink is 10-13 degrees. Pour into bottles, store in a cool place and drink to your health.
How pleasant it is to spend an evening at home in the company of loved ones with a glass of good wine. Especially when it is made by yourself. If you, your friends or relatives grow grapes on your property, we recommend making wine from them. We will help you with this - below is the best step by step recipe how to make homemade wine from grapes.
We do not recommend using berries purchased in the store. The fact is that natural process grape fermentation occurs thanks to natural yeast contained on its surface. If you wash the berries, the yeast will be washed off and you won’t succeed. Remember, you cannot wash grapes. For the same reason, it is very important that there is no rain and sunny weather for at least 2-3 days before harvesting. In the case of purchased grapes, you can never be sure what kind of processing they went through before they hit the shelf.
We provide a simple recipe on how to cook good wine independently from high-quality and proven products.
Classic wine recipe
The recipe consists of only two ingredients – grapes and sugar. Any variety of white or red grape that fully ripens in your region will do. The preparation, namely the amount of sugar added to the drink, will depend on how sweet the berries of a particular variety are. If the berries are very sour (so much so that your cheekbones are sour), you can also add a little water, but this is in extreme cases.
1. Grape harvest

First, to make homemade wine from grapes, you need to pick the grapes directly from the vine when they are fully ripe. It is better not to pick up berries from the ground, as the characteristic earthy flavor may transfer into homemade wine.
Please note that overripe berries (which have begun to ferment on the branch) and unripe ones cannot be used to make wine. Therefore, after harvesting, carefully sort it out, removing leaves, branches, overripe and underripe berries. If you do not plan to start making the drink right away (the berries can be stored for two days), then before you make wine from the grapes, you will have to sort them out again.
2. Berry processing
Now you need to pour the berries into a clean plastic basin, wooden barrel or enamel pan (leaving a quarter of the volume empty) and crush them. Doing so better with your hands or a wooden pestle (popularly known as a masher). As a result, you get juice and pulp - the pulp, skin and seeds of the grapes remaining after squeezing.

3. Start of fermentation
In order for our raw materials to begin to ferment, it must be covered with a cloth and stored in a warm, dark place for 3-4 days. Optimal temperature while from 17 to 27 degrees Celsius. After 8–20 hours, the fermentation process will begin, and the pulp will float to the surface. To avoid juice souring, stir the contents of the container once or twice a day.
4. Juice separation
After the specified time, you can drain the juice. This is done like this: first collect the floating pulp from the surface and put it in a separate container. The remaining must must be filtered several times (2-3 will be enough) through cheesecloth to remove the remaining grapes and saturate the drink with oxygen. You can also squeeze the juice out of the remaining pulp through cheesecloth, and then throw it away, it has already done its job.

We recommend tasting the juice at this step. If it turns out to be very sour (such that it makes your cheekbones cramp), you can add a little water, but not more than 0.5 liters per 1 liter of drink. Just keep in mind that sugar will be added later, which will lower the acidity, and water will reduce the quality grape wine. Therefore, add water only in extreme cases.
Pour over grape juice into a fermentation container - a large glass bottle or jar. You can also use a food-grade plastic canister. Remember, about a third of the volume of dishes used should remain unfilled.
5. Installation of a water seal
To avoid the interaction of young wine with oxygen, as well as to remove carbon dioxide formed during the fermentation process, it is necessary to install a water seal on the bottle (jar, canister).
The most common design of a water seal is a plug with an inserted tube to which one end of the hose is connected. The second end is lowered into a jar of water. You can observe the fermentation process in the form of characteristic gurgles.
Of course, you can make a water seal yourself if you have the appropriate elements, but we recommend installing a device purchased in a store. It is sold separately or together with a fermentation vessel.
In addition, a rubber medical glove can be used as a water seal; a small hole must first be made in one of the fingers with a needle.
6. Active fermentation
For an active fermentation process, it is necessary to ensure a suitable temperature - from 17 to 22 degrees Celsius for white grapes or 21 to 28 degrees Celsius for red. Do not allow the temperature to drop below 16 degrees Celsius, as well as sudden temperature changes. Otherwise, fermentation may stop prematurely. The container should be in a dark place or covered with a thick cloth.
7. Adding sugar
As practice shows, 2 percent sugar in wine must increases the strength ready drink by 1 degree. If you don’t add sugar at all, the wine will be less strong by no more than 10 degrees. And if you add, then the maximum possible strength is 14 degrees, at higher alcohol concentrations wine yeast die and the fermentation process stops.

You can add sugar after 2-3 days of active fermentation. Try the juice, if it is sour, add sugar at the rate of 50 grams per 1 liter. To do this, we recommend pouring a liter of juice into a separate container and adding required amount sugar, mix well until the crystals are completely dissolved and pour into the main bottle.
Repeat the procedure approximately once every 5–7 days. After 2-3 weeks, you will notice that the sugar content of the drink practically does not decrease, this means that sugar has stopped being processed into alcohol and this amount is already enough.
8. Transferring wine, separating sediment
Typically, a complete fermentation cycle lasts from 1 to 2 months, depending on temperature conditions and wort fermentation activity. Moreover, if fermentation continues 50 days after installing the water seal, it is better to drain the contents fermentation tank from the sediment into a clean container. Use a thin hose for this, be careful not to damage the sediment. Re-install the water seal on the new container and allow the wine to ferment.

Young wine should be drained if the water in the jar does not gurgle for more than one day (in the case of a water seal), or if the glove has sank and deflated, and the juice has become lighter in color and sediment has formed. We do this immediately. If this is not done, the young wine may begin to taste bitter, as dead yeast fungi precipitate, the long presence of which in the drink negatively affects its taste and smell.
Before pouring young wine into another container, you need to move it to a higher place. In this case, a slight agitation of the contents will occur, so you must wait until the solids have completely settled, and only then start draining. The technology is as follows: insert one end of a thin elastic tube or hose into a filled vessel, and the other end into an empty fermentation container located at a lower level (on the floor). Be careful that the tube does not touch the sediment and is at some distance from it (several centimeters), otherwise it will transfer along with the liquid contents, and we do not need this.
9. Adjustment of taste and strength
Active fermentation has already completed by this step, so the added sugar will not be processed into alcohol, but it can be used to adjust the taste of the final product. Focus on your taste preferences, while maximum amount sugar that can be added - 250 grams per 1 liter of wine. We do this by pouring a small amount of liquid into a separate container. Then dissolve the sugar there and pour the syrup into the main bottle, as in step 7.
Also you can do fortified wine by adding vodka or diluted alcohol to it after fermentation, but not more than 15% of the total volume of the resulting drink. This method of adjusting the recipe helps better storage wine, but the taste will change a little, not for the better. Therefore, this option is not for everyone. By the way, some people call fortified wine cocktail wine, as it goes well with juice.
10. Exposure

So, we fermented the grape juice, separated the sediment, adjusted the sweetness and strength, now the wine must be aged to saturate and form the final taste. Homemade grape wine it is necessary to age for at least one and a half (for white grapes) or two (for red) months, maximum – a year. Further aging will not affect the organoleptic properties of the drink in any way, so it makes no sense.
Pour the new wine into a clean glassware. These could be cans or bottles. The drink must be topped up so that no air remains in the container being used after it is clogged. After this, put the bottles or jars in a cool, dark place - a basement or cellar - to age at a temperature of 5 to 20 degrees Celsius.
As sediment settles, the drink must be poured into other containers, as described in step 8. In this case, if you do everything correctly, the wine will lighten and reduce its turbidity.
11. Filling and storage
It is easy to determine the readiness of alcohol - when the sediment stops falling, homemade wine from grapes is ready. Its strength will be from 11 to 13 degrees. Of course, if you did not secure it in step 9. For further storage, the wine must be poured into glass bottles, tightly capped and stored in a cool place.
12. Consumption

When we make wine from grapes at home, it usually tastes a little different from store-bought, and may also be a little cloudy, this should not scare you. You can drink homemade wine in pure form, or you can add ice cubes or juice (for example, cherry). Experiment, look for the ideal combination of flavors and proportions, then you will get the most delicious wine.
If you have your own recipes or additions to ours, share them with other readers of the site in the comments.
Red, white, pink; grape and fruit; dry, semi-sweet and fortified. With a subtle aroma or a pronounced bouquet. Cheering the soul and invigorating the body... It's all about him, about wine. Not a single feast is complete without it; it is served with cold and hot dishes, for dessert and as an aperitif.
the site tells you how to prepare this delicious drink home, and shares small, but important secrets winemaking
- Do not take spoiled berries and fruits to make wine - one moldy or rotten fruit is enough to “ruin” all your work and all the wine raw materials. Be sure to sort through grapes, cherries, currants, etc., separating what is unsuitable for winemaking.
- Wine categorically does not accept metal (with the exception of an enamel pan at the first stage of preparation), so you even need to stir it with a wooden or, in extreme cases, a plastic spoon. The same applies to the container in which the drink will “ripen”. It is best to place and age wine in glass or wooden barrels.
- Grapes and other fruits or berries that you will use for winemaking do not need to be washed. Bacteria “live” on their skins, which will play the role of natural fruit yeast. It is thanks to them that the fermentation process begins.
- All stages of winemaking must be carefully controlled and the recipe followed exactly, otherwise the result will not be wine, but bad vinegar. In addition, winemakers recommend scrupulously monitoring the temperature at which the drink is prepared - the fermentation process will not begin in a cool room.
- Without adding water or sugar, wine is made only from very sweet and juicy grape varieties. For all other berries and fruits, add additional liquid and granulated sugar necessarily, otherwise fermentation will not proceed.
Homemade wine recipes
Red semi-dry wine from grapes
In order to make wine at home, you will have to tinker, but if you follow the technology, you will get a natural aromatic drink beautiful rich color.
Ingredients (for 3 liters of finished wine):
- Dark grapes – 5 kg,
- Sugar – 1.5 kg.
Preparation:
Sort the grapes, separating them from the branches and removing spoiled and bruised berries. Crush the grapes in portions with your hands in any non-metallic container, pour the juice into an enamel pan, and place the pulp in a glass or wooden container with a wide neck.
Heat the grape juice slightly and dissolve 750 g of sugar in it, pour the resulting syrup over the squeezed berries. Cover with gauze and place in a dark, warm (21-23 degrees) place for 5 days. Twice a day, morning and evening, mix everything with a wooden spoon with a long handle.
After the appointed time, express grape must through gauze and a plastic colander into clean jar, squeeze out the pulp and pour the released juice into the same container. Add the remaining 750 grams of sugar and stir.
Place the jar of wine under the water seal - make a hole in the plastic lid and pass a plastic or special rubber tube through it: lower one end into the grape must, the other into a container with water. The tube must be tightly connected to the jar so that no air gets into the wine. For this you can use regular stationery tape.
Place the structure in a place that is not very lit, keeping the same temperature regime(about 22 degrees). Leave for 21 days. If, after this period, bubbles continue to appear in the jar, keep the wine until they completely disappear.
After this, filter the wine, carefully pour it into another container so as not to disturb the sediment formed at the bottom, and carefully seal it. Let stand for another month, this time in a cool place. During this time, pour the wine into a clean jar three times (once every 10 days), again avoiding any sediment.
Then put the wine in the refrigerator or basement for at least another 30 days. In general, the longer this drink is infused, the tastier it becomes.
Recipe option: the grape pomace remaining after preparing the must can be used again. Dilute in 2.5 liters of warm boiled water 1 kg of sugar and pour this syrup grape pomace. Then repeat the process as for the first batch of wine. This drink will turn out a little weaker, but will still be tasty.
How to make homemade wine: tips and recipes
Recommendations: the water seal can (but is not advisable) be replaced with an ordinary thin rubber glove, in which a small hole is pierced in the middle finger. In this case, pull the glove over the can and carefully secure it with an elastic band or tape.
Also, keep an eye on the fermentation process. If nothing happens within three to four days after installing the water seal or glove, that is, if no bubbles appear in the jar (or the glove does not inflate), then you need to move the container with wine to a warmer place.
Cherry wine
Cherry wine is rich, slightly viscous, with a pronounced taste. It goes well with many cheeses and biscuits, so it is good to serve with dessert.
How to make homemade wine: tips and recipes
Ingredients (per three liter jar):
- Cherry – 2 kg,
- Sugar – 500 g,
- Water – 750 ml.
Preparation:
Sort through, but do not wash. Pour it into a jar and mash it with a wooden masher, cover the container with a cotton cloth. Soak for 4 days at a temperature of 23-24 degrees. Stir three times a day. On the fifth day, squeeze the juice from the berries through cheesecloth into another jar and add 310 grams of sugar dissolved in 750 ml of warm water. Mix and place under a water seal.
After 4 days, pour some wine through the stopper tube, stir 70 grams of sugar in it and pour it back into the jar. Reinstall the water seal. Repeat this procedure on the 7th and 10th days, adding 60 g of granulated sugar each time.
After the fermentation process is complete (after bubbles stop appearing in the jar), keep the wine under the seal for another 3 weeks. Then pour it over glass bottles, carefully seal and put in a cool place, placing in an upright position. A month later the wine is ready.