How to cut herring without pits. How to clean herring from bones - Best tips
Many people, including me, love dishes with herring, but few people like the painstaking and long process of deboning fish. For some, this task becomes overwhelming after the first time, and they simply refuse to deal with herring, depriving themselves of the pleasure of tasty and healthy dishes.
New Year's herring under a fur coat is the central dish of almost every table. And here, too, there are some nuances: the salad must have boneless fish.

You can always buy ready-made fillets in the store, but store-bought fillets are usually generously covered in marinade with harmful additives. Still, it’s better to learn how to marinate it yourself.

With this amazing life hack, you no longer have to spend a lot of time peeling your favorite herring. Now it will be ready in a couple of seconds!
How to cut a herring
Cutting process

Now you know too how to quickly cut a herring. We hope everything works out for you. Fish marinated with your own hands is much cheaper and tastier than store-bought fish. Try cooking fish and see for yourself!
Nikolai Laduba loves to spend time actively and goes hiking. He is a big fan of science fiction. Nikolai's son is only 7 years old, but he shares his father's hobbies: what could be better than cozying up and watching the Star Trek series with the whole family? Our author approaches all issues in detail, as evidenced by the quality of his articles. Nikolai's favorite book is “The Black Prince” by Iris Murdoch.
Many people love herring, despite many minor shortcomings (yes, yes, I’m talking about numerous bones). But here's to cutting delicious fish Few people like it. It's long, dirty, tedious... I suggest you forget about this problem forever! I’ll tell you how to peel herring quickly and without bones, so that it turns out beautifully, neatly, and appetizingly.
Basic rules:
- When cleaning salted (smoked) fish, it is advisable to use a separate cutting board. Wood fibers quickly absorb fat and blood, which promotes the growth of bacteria. In addition, after the herring the smell of the board will be, to put it mildly, unappetizing. Plastic boards are less susceptible to diffusion, but still become unusable. Cling film and clean paper will help protect the board from fishy smell. Newspapers are not suitable for these purposes. I don’t know exactly what is added to printing ink, but there is clearly no benefit from its contact with food. After cleaning, roll up the paper along with the bones and giblets. The board will remain almost clean, no unpleasant odor, greasy stains. Just rinse it with a drop of detergent.
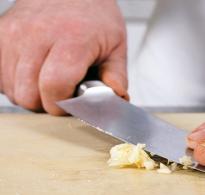
- A sharp knife is the key quick cleaning herring and even, neat fillet.
- To get rid of a specific odor from your hands, pour lemon juice (diluted with table vinegar) on them. Washing in beer also helps (50-70 ml is enough). Grated potatoes, distributed over the surface of the palms and between the fingers, will also help eliminate the obsessive “aroma”.
- It is advisable to have a roll of thick paper napkins on hand to periodically wipe the knife and hands.
- It is convenient to remove small bones with special tweezers.
How to clean salted (fresh) herring so that you get a smooth fillet, absolutely boneless
A reliable method when accuracy is of paramount importance. By and large, almost everyone cleans fish this way, sometimes with some additions and changes.
You will need:
Cutting order:
|
Remove the fish from the brine and rinse. Clean the carcass (if necessary) so that transparent scales do not fall on the finished fillet. Dry with napkins. |
 |
|
To remove the head and at the same time take out most of the insides, make a cut about 3 cm deep from the side of the ridge, as shown in the photo. When the spinal bone is cut, gently pull your head forward. |
 |
|
It will easily move away from the abdominal part and the giblets will follow it. Dispose of waste in the trash. |
 |
|
Spread the belly open in one clear motion. Remove the milk or caviar (depending on your luck). They are edible and tasty. Place them in a herring bowl, cover with film, and hide in the refrigerator. |
 |
|
Place the sharp part of the knife blade perpendicular to the fish. Scrape off any remaining innards along with the black film. At the same stage, cut off the halves of the bellies. This part of the carcass is edible, but not for everyone. Clean it and put it in the herring bin along with the fillet or throw it away. By the way, to preserve the integrity of the abdomen, remove the remaining entrails through top part fish when you take out the ridge. |
 |
|
Remove the spinal fin. Make 2 parallel shallow cuts close to it. Remove the fin with your fingers. |
 |
|
Cut off the tail. |
 |
|
Cut the herring along the back, cutting through the skin and fish flesh almost to the spine. Remove the skin by lifting it in the abdominal area, pulling it towards the back, as if lifting it up. This will cause less damage to the outside of the fillet. |
 |
|
The critical stage is separating the backbone along with large bones from the fillet. Take the herring with both hands. Turn her belly towards you. Use your thumbs to feel the ridge from the inside, and with the rest - from the outside. Carefully separate the herring halves so that the bones remain on one fillet. Don't rush, don't make sudden movements. Lightly press the ridge on the inside, and on the outside, slowly sort through the bones, trying to remove them from the fish. After separating the first half, remove the seeds from the second. If everything went according to plan, there will be no more than 4-6 large bones left in the herring. For small ones, remove them with tweezers. |
 |
|
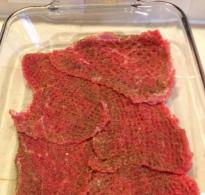
Use the finished herring fillet for its intended purpose: cut it or serve it whole in a herring bowl, roll it into a roll, finely chop it into a “Fur Fur Coat”. |
 |
When you need to quickly peel a lot of herring and accuracy is not important

When preparing “Herring under a fur coat,” you can neglect the aesthetic appearance of the fillet. The main thing is that it is boneless. This method is also suitable for quick cleaning. large quantity fish, for example, for a large-scale feast. By the way, it is advisable to put on an apron before cutting.
Take:
We clean the herring in one confident movement:
|
Wash and dry the fish using napkins. Cut off the head. Leave the tail. Open the belly and remove the giblets. Remove the skin. Cut out the fins. |
 |
|
Take the herring by the tail. Take one half of the ponytail with the fingertips of your left hand, the other half with your right. Push the carcass forward and up so that it makes a “sun” and spreads towards you. As soon as the fish is in its original position (head down), smoothly pull the tips of the tail in different directions. |
 |
|
The herring will break in half. You will get 1 “clean” half without bones. All that remains is to remove the ridge from the second part and do the final “cleaning”. If necessary, cut off the belly (it will remain intact, since the herring is torn along the lateral line, and not at the top and bottom). If you cut the fish along the belly and back, you will get 4 fillets without large seeds. You know what to do with small ones. |
 |
|
The herring is ready for serving (further cooking). |
 |
New Year's herring under a fur coat is the central dish of almost every table. And here, too, there are some nuances: the salad must have boneless fish.
You can always buy ready-made fillets in the store, but store-bought fillets are usually generously covered in marinade with harmful additives. Still, it’s better to learn how to marinate it yourself. 
WILL BE NEEDED
herring
cutting board
sharp knife
gloves for those who don't like specific smell fish on hands
First of all, wash the herring thoroughly under running water.  Then use a sharp knife to separate the head from the carcass. Cut the belly of the fish from the head to the tail. Get rid of the insides. If you are lucky and have caviar in your belly, you can use it for sandwiches. They turn out very tasty.
  Rinse the gutted herring again with running water. Now you have to remove the skin from the carcass. To do this, first make a deep cut along the ridge, from the head to the tail.
  Remove the dorsal fin immediately. And then, carefully picking up the edge of the skin with the tip of a knife, remove it from top to bottom.
  Now the most important thing! Divide the tail into two parts. Firmly grasp the herring by the tail with both hands, one part of the tail in one hand, the other in the other. While holding the fish in this way, wrap the herring around the tail, and a small tear will appear near the tail.
  Carefully, slowly, slowly, continue to separate the herring, while all, even very small, bones will remain on the part where the back is. All that remains is to cut off the tail and separate the spine along with most of the bones from the back. Check the finished parts of the fillet. Remove any remaining seeds from them. An ordinary table fork will help you with this.
  Place the tines of a fork under the remaining side bones of the herring, pull them towards you and remove. If you do this carefully, there will be no bones left.
  After removing the bones, the fillets can be cut into portions or used for salad.
How to quickly clean herring from bones? Surely this question interested every housewife who has ever cooked a famous meal or made any aromatic snack, where only gentle fish fillet. Today we will look at several proven methods that will help you answer the question.
How to properly clean herring?
In order to carry out this procedure, you will need to make every effort. After all, it will be quite unpleasant to eat a salad that literally “crunches” on your teeth.
So, we present to your attention traditional way how to quickly peel a herring with minimal losses fish fillet.
Stage one
First you need to wash the purchased product under running cold water. Next, be sure to gut all the insides of the fish. To do this, the belly of the herring must be cut from the tail to the very head, and then with your fingers you need to pry up the veins and pull them together. It is recommended to do this under water. After all, this way you will not stain your own clothes and will not splash parts of the fish around the kitchen, protecting the room from the unpleasant odor that is inherent in this ingredient.
Stage two

After the product has completely lost its insides, including the thin black film, you can safely proceed to tightening the skin. However, before this, the head of the herring must be cut off. Next, you need to run a sharp knife along the back, or rather along the ridge - from the very base to the tail. Having carried out this action, you need to pry the skin and gently pull it off. It is worth noting that if you purchased a fresh product, this element will be removed quickly and without any effort.
Stage three
Every housewife should know how to quickly clean herring. After all, such information can always be useful during preparation. festive table. Thus, having deprived the fish of its entrails, head and skin, the next stage of processing should begin. And it consists of taking the river product by the tail, which consists of two feathers, and pulling them strongly in different directions, thereby tearing the herring in half. With this action, the fish diverges exactly along the midline.
Stage four
After the herring is divided, you should have 2 fish elements. One of them consists of the dorsal part of the ridge and ribs, and the other consists of half a tail and a couple of pieces of the abdomen. As for the second element of the fillet, it is completely ready, since it does not contain bones. From the first half, you need to separate the meat from the ridge and remove the ribs with your fingers or using tweezers.
The second method of cutting salted fish
You can also learn how to quickly peel herring from this part of the article.
Stage one
As in the first case, you need to wash the fish well in cold water, and then completely cut the belly and carefully remove all the insides. At the same time, it is recommended to check whether the purchased product contains caviar, because you can also make tasty and aromatic sandwiches from it.

Stage two
After surface processing of the fish, it is necessary to cut off the head and run the knife twice along the entire back. In this case, the ridge should separate from the meat on both sides. Next, the cuts must be continued so that salty product broke into 3 parts, namely a skeleton with ribs and two fillets.
Stage four
To finish, you need to lay the fish skin side down, make cuts from the tail side between the meat and the skin, and then, holding last element, run the knife from the end of the fish to its head. At the same time kitchen appliance must be held at a very small angle to the plane of the table. After this, you need to remove all the bones from the meat using tweezers.
How to peel a herring in one motion?
Few people believe this, but experienced chefs They really clean the fish in just one motion. Strictly observing all the steps described below for such processing, and you will learn this culinary skill.
Herring processing process
The purchased fish must be washed well, and then all internal elements must be removed and the head cut off. Next, you need to run a sharp knife shallowly along the back and with both hands grab the herring by its tail (by 2 feathers at once). After this, the product should be turned over on itself (so that the fish does a kind of backflip), and then with a sharp and strong movement, pull the fins in opposite directions. As a result, you will get two elements: skin with a clean fillet and a backbone with bones, as well as some meat. It must be separated with your hands on both sides, as a result of which you will be left with a clean fish skeleton and the same fillet.

Now you know how to quickly clean herring from the bones. It is worth especially noting that all of the above methods are suitable for processing not only salted fish, but also fresh product. Moreover, these methods are also effective against other fish species.
Having decided to treat her family or guests to salted herring, the housewife will wonder how to clean it. Herring is not served to the table uncleaned. You can make delicious cold appetizers from salted fish: salad under a fur coat, mincemeat, rolls, or just eat with boiled potatoes, cutting into pieces and watering sunflower oil. Before preparing any dish from herring, you have to remove the bones and often remove the skin.
Preparation
For cleaning salted fish, it is better to have a separate cutting board, but you can wrap a regular one cling film and work on it. You cannot clean fish on newspaper, as the paint sticks to the product and, consequently, to the stomach. Medical gloves will help protect your hands from unpleasant odors.
To work you will need:
- sharpened knife;
- tweezers;
- cellophane bag.
Cleaning Methods
There are several ways to clean salted herring.
For beginner housewives
The fish is removed only from the bones, leaving the skin. This is how the herring is prepared for serving as cold snack, cutting it into pieces and sprinkling with chopped fresh or pickled onions or greens.
- The fish is gutted, washed, and the head and caudal fin are cut off.
- The thumb is placed next to the dorsal fin and buried 2-3 cm into the back.
- The finger is moved to the tail and the carcass is divided into halves.
- The ridge is removed by hand.
- Small bones are pulled out with tweezers.
In one motion
This is how herring is cut in the Far East when there is a lot of fish to process. First, the carcass is gutted and the head is separated. Then:
- The fish is taken by both hands by the caudal fin.
- They wave their hands so that the carcass makes one revolution.
- Hands spread to the sides.
- In one hand there will be two halves of a clean fillet, in the other - the back with all the bones.
- The ridge along with large bones is removed from the back by hand.
The result is three pieces of pure flesh: the back and two fillets.