How to dye eggs for Easter in a stylish, fashionable way without store-bought dyes. How to paint eggs with acrylic paints
It goes back to ancient times, when in the last, most strict week of Great Lent, on Maundy Thursday, Christians carefully cleaned the house and prepared treats for the holiday Happy Easter- Easter cakes, Easter cakes and eggs, which symbolized the beginning of a new life. The first food for Easter was often an Easter egg.
Everyone remembers the religious basis of this tradition, but many have begun to forget that the point of the process of coloring eggs is also for children, along with adults, to join in preparing the holiday, to be around and listen to the stories.
The minutes spent with children creating are absolutely priceless, so it makes sense to put aside any business and enjoy the joint process and the result obtained. There are many ways to color eggs, everyone chooses the one that guarantees best result depending on the presence or absence of artistic talent. We will try to help those who can only draw a house and offer some ideas to talented artists.

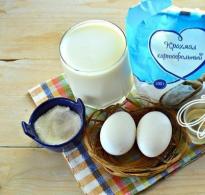
Regardless of the chosen method, eggs need to be prepared for painting - remove from the refrigerator an hour before work, wash thoroughly and dry (for acrylic).
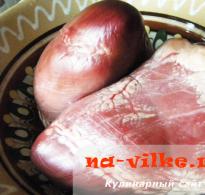
The most accessible, traditional and never-failing method is a decoction of the husks. To prepare a rich broth, there should be a lot of husks, ideally a full pan (it’s better to take a metal or dark one inside). Pour water over the husks, bring to a boil and cook over low heat for 30-40 minutes, then cool and strain. Many people put eggs directly into a pan with the husks; it’s a question of the number of eggs and the size of the pan - many eggs will not physically fit in a medium container with the husks.

You can place eggs in the prepared solution right away, but it’s more interesting to make them unique by decorating natural decor. Use leaves and dried flowers or as decoration. Place the selected decor on the egg, wrap it in a piece of nylon tights or golf, pressing tightly and secure with rubber bands. Boil the eggs in the onion solution for 7-9 minutes, transfer to a cold one. Grate the finished colored eggs carefully using a paper napkin to give them shine.

This is one of the simplest methods, but there is a possibility of paint getting on the egg white (it’s even better not to eat it), so you need to pre-boil the eggs as carefully as possible. As a rule, the method of painting for all dyes is the same - dilute dry paint with water (each in a separate container), add and omit. Keep them in dyes until you achieve the desired shade.

This method can also be improved - dip the eggs not entirely, but in parts, then into another paint to create multi-colored, bright abstract designs. Or stick patterns, stripes, and speckles onto eggs using paper tape, and then dip them in dye.
For this method Remnants of floss threads are suitable, with which you need to wrap the eggs in random order. Carefully place the eggs in cold water, bring to a boil and cook for 8-10 minutes, transfer to cold water, let cool and remove the threads.

Unusual egg colors can be obtained by using old men's ties or scarves. It is necessary to wrap the eggs in fabric so that the front side is inside, secure with threads or rubber bands. Pour water into a saucepan, add vinegar (3 tablespoons per liter) and cook the eggs for 10 minutes after boiling. Cool, remove the cloth.

Of natural dyes, a solution that is strongly brewed and boiled is often used. Eggs painted using one of the proposed methods are called paints, and those on which drawings are applied using brushes - Easter eggs. Eggs are painted not only with paints, but also with wax crayons, permanent markers and felt-tip pens for children's creativity.

Having a little bit of artistic talent, a set of food paints, thin brushes and a desire to create, you can create a masterpiece with your own hands. For convenience, place pre-boiled eggs in stands and apply the desired designs using tubes of paint. Let each color dry, then flip the eggs over and continue on the other side.

How to paint eggs with acrylic paints
The principle of working with acrylic is the same as in the previous method, you just need to remember that the eggs must be absolutely whole to avoid paint getting inside.
For very diligent creative craftsmen there is great way Use your skills to decorate eggs using legumes, cereals and grains. Any small bulk products are suitable for this purpose - , and , etc. If wooden or plastic blanks are used, then it is best to glue the decor with PVA glue, and if chicken eggs, then it is more useful to cook a paste - liquid jelly from and (you can use). Coat the egg with glue in parts and apply patterns using tweezers.

Most quick way for decorating Easter eggs - thermal stickers, which are also very convenient because you can use them to pack eggs that are slightly cracked during cooking. You need to boil the eggs, pack them in thermal stickers, boil water and lower the eggs one at a time for a few seconds. It is convenient to use a slotted spoon, a spoon with holes, or a small metal sieve so that the water drains and does not burn.

Another modern way to paint eggs - paint them with varnish. But simply painting with varnish is not interesting, so we suggest painting them with varnish using water. To do this, you need to drop a drop of different varnishes into a glass of water. Use a toothpick to make patterns out of varnish. Immerse the egg in water and assemble the entire pattern onto the egg. It is better to do this with gloves. Dry with a hairdryer. Since the varnish can penetrate the shell, we recommend painting eggs this way purely for decoration, that is, after removing the contents of the egg, piercing a hole in the shell with a syringe.

To summarize, we will say that the imagination of our housewives has no limits, therefore lace and buttons, and napkins for decoupage and vegetable oil for a “marble” effect. The main thing is to paint eggs with pleasure, in good mood and with faith in a bright holiday.

And you can find out recipes for making Easter cake and Easter in ours.
“A creative person is a grief in the family,” I sometimes like to joke. But seriously, when you need to paint something, re-glue it, clear up the slush and mess - this is all, of course, for me. It’s nonsense that after such creative experiments you have to clean your apartment for 24 hours; the main thing is the result and personal joy.
For obvious reasons, I couldn’t miss the pre-Easter commotion and preparations. Moreover, for me this is something more than just store-bought cakes and bright stickers of the same type. This is a memory of my wonderful grandma, who began to prepare for the holiday, it seems, from the beginning of spring.
She did this with great love and on an industrial scale familiar to our large family. If you were baking Easter cakes, you would need a carriage and a small cart; if you were painting eggs, you would end up with a huge bowl that could only be lifted with two hands.
On the eve of Easter, washed and ironed homespun towels were laid on the floor in her room. She chased everyone out of the kitchen and when the Easter cakes were ready, she carried them into the room with outstretched arms, solemnly, like newborn babies. She laid each golden brown cake on a towel, and then looked at it for a long time, gasped, groaned and smiled.
She and I painted eggs with onion skins. Later, with bright store-bought dyes.
“The darker ones are hard-boiled, and the light ones are soft-boiled,” she shared with me an important secret.
I always chose those with liquid yolk and devoured them on both cheeks with divinely tasty and aromatic pastries.
Grandma has been gone for a long time, but every year, in memory of her, I collect my holiday basket. I mentally consult, in the hope that she, of course, would appreciate my efforts and smile approvingly.
“This Easter, everything will be natural,” I say at home. – I’m tired of store-bought paints that are “eye-catching” and stickers that you then tear off almost with your teeth.
I look through a bunch of links on the Internet and not a single one makes me happy. Shreds, leaf patterns, stripes, elastic bands - everything is wrong. I want something simple, real and at the same time stylish. As always, foreign bloggers come to the rescue: soft blue colors, gray ones like sea pebbles, brown ones like coffee beans. Most authors have long abandoned chemicals and with great success use their grandmother’s recipes for painting eggs, which we have begun to forget about. After all, if you think about it, you don’t need to go anywhere, all the colors are at your fingertips. We open the refrigerator and there we find: half a head of red cabbage, beets in the bottom tray. On the spice shelf there is turmeric, curry, ground coffee. I went through different methods of coloring and chose those that seemed the most unusual and interesting. I only had to buy oak bark and tea from Sudanese rose(hibiscus), dry nettle. They are easy to find at your nearest pharmacy and supermarket.
Let's write down what we need:
- Red cabbage.
- Sudanese rose tea (hibiscus)
- Packaging of oak bark.
- Turmeric
- Dry nettle.
- Eggs (it is better to buy white ones, they color faster and the dyes appear brighter on them).
What colors do we expect to receive:
- The cabbage should give us a soft blue hue, and if left longer, a bright blue hue.
- Sudanese rose is an interesting and deep slate purple (at shorter exposures – the color of sea pebbles).
- Oak bark is brown.
- Turmeric is naturally yellow (nice and soft, without the bright store-bought hue).
- Dry nettle is a beautiful khaki shade.
For greater clarity, I decided to divide the coloring process into stages. I'll tell you more about each one. Everything is done as simply as possible and I guarantee that even such crooked creators like me will succeed.
Preparing eggs for painting.

Eggs must be washed. This is necessary not only for hygiene and safety reasons, but above all, to remove the protective film from the shell, which will prevent the dye from laying evenly. Blue factory seals are easily washed off with regular baking soda. Pour it onto a sponge, rub it a little and rinse warm water. Wipe the eggs dry (a paper kitchen towel works well for this) and place them in a tray.
It is better to take non-metal containers for coloring.

Sources on the Internet claim that the metal may oxidize and this will somehow affect the coloring. I decided not to risk it and chose washed and dried plastic containers from under the pickles. We buy them often and love them very much. A couple of old ceramic cups also came in handy. In theory, they should wash off easily, the dyes are natural, but I decided not to risk it.
The pan for preparing decoctions took the one in which I had recently burned buckwheat, could not wash it and planned to throw it away.

On the Internet you will find a million and one ways to prepare such a coloring broth, but I did everything the old way grandma's recipe: I poured 2-3 large handfuls of dye into the pan, filled it with water, added generous amounts of salt (so that the eggs would not crack), and added the eggs. The liquid should cover them. It is better to take a small saucepan so that the cooking process goes faster. We wait until the broth with eggs boils and then count down the time, depending on what degree of readiness you want to achieve.
Crib :
- Soft-boiled eggs – 2-4 minutes.
- To get a yolk with a liquid core - 4-8 minutes (in fact, 7 minutes of boiling is the ideal time for boiling eggs).
- Very hard-boiled – 8-10 minutes.
When the eggs “boil” for the allotted time, transfer them to a container prepared for coloring and fill with broth. You can strain it first to make the color more uniform, but I didn’t do that. I like the texture and “marbling” that turned out in the end. The broth should completely cover the eggs! Otherwise you will end up with weird and unsightly unpainted areas. It's important not to forget! Add 2-3 tablespoons of vinegar to the broth so that the dye sticks better and does not stain your fingers after dyeing.

Sudanese rose (hibiscus) is sold in almost every supermarket. Apparently, this tea is not particularly popular (but in vain, it has a pleasant sourness and in the summer, when cold, with ice, it quenches thirst very well), so you will have to look for it on the lowest shelves. Cost - up to 100 rubles. I would like to note that rose petals are very photogenic and can be useful to you as an interesting decoration for food photographs.

I bought dried nettles in this form at the supermarket. It turns out that the trend of using natural dyes is becoming quite popular.

Umm... There was nothing else in the pack. Only this bag of dry grass. I could just as easily buy a pack of nettles at the pharmacy and it would cost half as much.

I also bought a dozen quail eggs to see how they would look after dyeing. I really like it easter decor using these spotted crumbs.

The beauty of natural dyes is that they can all be used later. For example, turmeric is an essential ingredient in oriental rice. For the decoction you need to take 2-3 heaped tablespoons.

The deep brown tint that results when used oak bark, you can get it by preparing a very strong coffee decoction. But I felt sorry for translating coffee for such a task.

It is not necessary to finely chop the cabbage. You will still cook it for a long time and then insist.

I couldn’t resist and took one egg out of the cabbage broth literally an hour later. The result was a very beautiful and delicate blue color.

This is what an egg looks like after staining in a decoction of Sudanese rose. The photo, unfortunately, does not convey the beautiful gray-blue tint.

This is the Easter still life I created. I bought a wreath for decoration at a nearby flower shop. Price - from 200 to 250 rubles.

This is what quail eggs look like after dyeing.
My observations:
— The more coloring ingredient, the richer the decoction. If you want to get soft, pastel colors that are now in fashion, you should take this into account.
— The eggs should be left in the broth for 2-3 hours. It all depends on your desire and imagination. You can put the bowls with the broth in the refrigerator overnight and get richer and brighter colors.
“There won’t be any color or even shade right away!” Don't be scared! The eggs will be white. Coloring takes time. We don’t use chemicals that act instantly.
— Red cabbage colors eggs the fastest. Within an hour they become soft blue. You can experiment and get a gradient coloring by removing a couple of eggs from the broth every few hours. You will get one color, but a different tone. Looks great!
- Eggs that have been removed from the broth do not need to be grated! Just blot carefully with a paper towel or napkin! Natural dyes are very easy to wash off. The egg must dry naturally. This will give the dye time to set. But! This property can be used creatively. If you want vintage distressed paint, you can rub a little harder in some places and it will look like it's scratched. It looks stylish and unusual.
I decided not to limit myself to this coloring method and picked up a lot of interesting ideas that are easy to implement so you can show off your stylish Easter decor afterwards.

This is what the gradient coloring I was talking about looks like.

A brush, golden (or any other) acrylic paint and you get very beautiful spotted eggs.

Everything is simple here! A waterproof marker and your imagination will help.

Stylish geometry and graphics.

For those who are good at decoupage.


Fashionable natural shades


Or you can simply choose eggs that are contrasting in color and size, wash them and admire their natural beauty without dyeing.

Hello, dear friends! As I already wrote in a recent article, Easter is coming inexorably. Every year it shifts quite significantly, but you still shouldn’t miss it anyway.
How to prepare for this holiday? You can make interesting gifts, bake delicious themed dishes and invite your family and friends to visit.
But how to surprise them? Of course, the main symbol of Easter is colored eggs. But how to color eggs? And with what?
I decided to dig around on the Internet about this topic and see what was offered. different sources. I was surprised to discover that there are quite a few methods of painting, but often, as they say, the authors of articles “pour from empty to empty” - they spray the same method on several to obtain the desired volume. In this case, attention is mainly paid to classic options colors (which we will definitely take a look at).
But I want something new, fresh, unusual! So, I present to you thirty master classes and ideas for coloring and decorating eggs with the most in different ways, ranging from classic to the most extravagant.
How to dry eggs?
Before starting master classes, you need to decide where and how you will store the unfinished results of your creativity? It’s very easy to smear the design if you just place the egg on a flat surface. There are several options:
- Use containers to store eggs. The pattern will be less blurred in them.
- Take foam rubber and toothpicks. Insert the toothpicks into the foam rubber at such a distance that you can place your creation inside.
- Buy special stands. You can build them yourself. For example, make a cardboard ring in which you will place the egg after painting.

- Natural ways
- Food colors
- Markers
- Paints
- Fabric and thread
- Other ways
How to paint eggs with your own hands for Easter: master classes
I myself am still just preparing for total Easter coloring I’ve tried a couple of methods so far, I’ll share my findings further.
Natural ways
In the meantime, keep a very valuable plaque, which depicts most of the most simple options decorating eggs with the most natural dyes at home. All of them require vinegar - add one tablespoon of it to a saucepan of water.

Presented here:
- Coffee. You can also use tea, since it is much more accessible and you don’t have to grind anything. It turns out a beautiful brown shade.
- Beet. My favorite color is pink or raspberry, it all depends on the soaking time. It is recommended to soak for 8 hours.
- Carrot. A bright festive color will be given to you by carrots, from which you will need to squeeze the juice, and then boil the eggs in the resulting solution.
- Spinach. A somewhat unexpected way for our latitudes, isn’t it?) You will need spinach if you want to get a delicate green color.
- Cabbage. To get blue eggs, take a couple of heads of cabbage red cabbage, chop finely and mix with 500 ml of water. Leave the eggs here for 8 hours, covering the top with film.
- Turmeric. But she will give sunny yellow. Pre-grind the turmeric (you should get 2-3 tablespoons) and cook until boiling, then cool and place the eggs there.
All the main nuances are presented in this wonderful hand-drawn instruction, which I have long ago stored in my hamster bins. Very useful thing during Easter
They completely forgot about onion skins! But she is the most classic dye. It couldn't be more classic. For it, take onion peels in the desired volume (for the brightest shade, they recommend peeling from four onions per glass of water). Boil the water for about half an hour, and then lower the eggs into it for a few minutes.
Advice: for a beautiful floral-grass pattern, place the eggs in nylon “bags” with blades of grass, flowers, etc. inside. The result will be an interesting drawing.

It is not necessary to make exactly plant-like traces. You can wrap the eggs with threads and glue paper patterns.
Food colors
In general, when purchasing any food coloring, it should contain instructions that allow you to correctly carry out the coloring procedure. If this suddenly does not happen, then:
- Add vinegar to the water and bring to a boil. Leave for half an hour.
- Then the eggs can be boiled in this solution (not for long) or lowered into the already cooled solution.
However, there are some tricks that will allow you to stand out from others. For example, if you paste round stickers in the form of a “polka dot” pattern before painting, you will end up with an unusual and very stylish egg.

Or maybe you want a richness of colors? Then feel free to take gold leaf (it’s not that expensive, by the way, if you know right places;)). Paint first and then wrap the egg in a piece of gold foil and brush lightly with a brush. This creates an interesting marble effect.

Advice. If you want to achieve something beautiful marble effect, then you can do this: paint the egg a light color, and then dip it in water with dark color, in which vegetable oil will be present (in small drops, about two teaspoons per 500 milliliters).
Minions
A favorite of children and adults alike, they are very easy to construct using yellow and blue dyes, as well as many small toy eyes and a felt-tip pen. To do this, the egg needs to be dipped only halfway in the dye and dried. Glue eyes on the yellow part and draw funny faces. The child is happy

Drawing with a permanent marker
One of the most quick ideas. All you need is a permanent marker (one or more) and your imagination. Specks, lines, numbers, mysterious patterns - you will get minimalistic, but very stylish eggs. True, I think it’s not worth leaving these for a long time so that they can be eaten. Still a marker...

Metallic markers are also on sale now - a suitable accessory for Easter. The design is more delicate than when using regular colors.

Simplicity and cuteness
Have white chicken eggs ever reminded you of a funny Hello Kitty? Try making one like in the photo. Little girls will be especially happy - they will love the cute design. For additional decoration, use small flowers, bows, buttons and whatever else you have on hand.

We use paints
What would we do without them? You can use watercolors or acrylic paints. In the second case, you don’t have to worry about moisture getting on the surface - acrylic dyes are not afraid of this. They do not have a strong odor and do not penetrate deeply.

Don't want to bother with time-consuming painting? Then take the bubble wrap and paint it properly. All you have to do is roll the egg on the surface of the film and you will get a speckled egg

Let's move on to less traditional ways coloring.
Using fabric
For me, these methods became a kind of discovery. For example, there is an option for where to put old ties. To do this, however, they must be made of real silk.
The method is as follows: take a tie, wrap it tightly with fabric and then thread on top (you can use cotton fabric). Take a little more vinegar than before (about three spoons). Boil the eggs for 10 minutes after boiling, cool and very carefully separate the fabric. An incredible beauty comes out

Here is an option with a silk scarf and fabric. In general, do not throw away silk scraps - they can come in handy in the most unexpected situations.

On the theme of fabric and bow decoration: take the lace and wrap it tightly around the eggs. The recipe remains the same, but the patterns turn out great!

Thread decor
You can wrap your creations with threads not only to form beautiful patterns, but also use them as a complete decorative element. To do this, take PVA and coat the surface as you move the thread, which you lay out in a spiral.

Groats in progress
Why does an egg need to be painted? After all, you can simply cover it with grains! Take anything - rice, peas, buckwheat, sesame seeds and much more. You can completely roll the product in one type of grain, or you can sprinkle it in strips, as in the photo.

Confectionery topping
Again, you need to properly coat the surface with glue (you can use PVA) and sprinkle sprinkles on top of it. Balls, stars, and just long strips of sweet material will come in handy.

Dragon eggs
Yes, not the best easter idea, but it also has a place to be. For these you will need round sequins and glue. You can take a different route - take an artificial foam egg and a lot of buttons. All that remains is to stick them in circles to get the effect of scales.
I recommend using options with rhinestones, “scales” and so on either for empty shells or for artificial fake eggs, since it will be a shame to scrape off all these decorations later.
Advice. How to blow an egg out of its shell? There are two ways:
- Pierce the egg with an awl on both sides. Take a saucer and simply blow out the contents of the egg. Blow carefully so as not to damage the shell.
- Pierce the egg on one side. Take the syringe and use it to extract the contents.

Pieces of glass and rhinestones
To decorate eggs, both artificial and natural, square pieces of glass or rhinestones will help you. Looks very impressive and festive

Compromise option
A great idea for those who don’t want to spend a lot of time fiddling around, but still want to decorate. And not artificial eggs, but the most natural ones. For each instance you will need several small rhinestones, which you can glue in any order. PVA is useful for gluing.

Quilling
It seems to me that this method is also for the ordinary easter egg It will do, but it would be a shame to spoil it. Or you can take an artificial form, as in the master class.

And here, perhaps, the most exotic way of all - painting... with nail polish.
Painting eggshells with nail polish
My friends, just the shell without the contents if you don’t want to get poisoned. I decided to experiment on eggs with their contents and realized that even after lying for a short time, they are saturated with the smell of varnish so much that they are edible in best case scenario only the yolk remains.
However, if you just want to get a beautiful shell or surface, then take note. Incredibly simple way.
Prepare nail polish (preferably several colors), a container of water (not used for cooking) and the shell itself. Pour the varnish over the surface of the water, drawing the patterns that you want to see later. Take only fresh, undiluted varnishes that have not expired, otherwise the result will not be thin. beautiful layer, but thick lines and cakes.
The covering area should be approximately equal to the surface area of the egg to again get a beautiful effect.

Carefully lower the egg into the pan, submerging it completely in water. It will immediately become covered with an interesting pattern.

This is what I “drew” for the second egg. First I dripped pink varnish, and then green. As a result, green “dispersed” pink.

I took the eggs not white, but brown, so the result was not very bright.

At the same time I painted a plastic honey jar. I didn’t take into account some of the features, so here and there there were patches of varnish left:_D In general, this method of painting is suitable not only for shells - here you can also use small decorative jars and dip your nails (although you will have to scrub your fingers later, but the result is worth it :) )

But this is what others get by divorcing more varnishes and using white egg color as a base. As soon as people don't fantasize!
 Other ways
Suddenly I remembered that I had not told about all the options I knew. What else can you use to color eggs for Easter:
- Zelenka. It’s best to use it this way: wrap the eggs in gauze, into which you put grains of rice, leaves, pieces of paper, etc. Tie tightly. Now place them in a saucepan with cold water and cook until boiling, then a few more minutes.
- Paper decorations. These are all kinds of bunny ears, eyes, and handmade coasters. The decorating options here are almost limitless.
- Glitter. Coat the surface with PVA glue or paste, and then sprinkle it liberally with glitter, shaking off excess.
- Iron-on adhesives. Before Easter they are sold in almost all stores. All you need to do is pull a sticker onto an already boiled egg and quickly lower it into boiling water. I must say, it doesn’t always work out well - you have to experiment with stickers from different manufacturers.
- Pencils + watercolor. Use a pencil to draw an image on the surface. Dilute the watercolor in water (the thicker the better) and drop the product into it. Didn't like the effect? Wash off the dye and try again.
Finally, I have prepared for you an interesting video with a very in a simple way decor, in which it is very easy to achieve the effect of “cosmic” coloring:
Well, what do you think of the painting methods? But I'm sure I forgot something. Maybe you can tell me in the comments? I will be very grateful, as well as other readers who look at the blog. In the future, I will definitely share with you my painting results, don’t miss it
Don't forget to subscribe to updates so you don't miss new interesting articles! And I say goodbye to you.
Share with your friends on Facebook!
Click " Like"and receive best posts on Facebook!
Previously, acrylic paint was only available to professional artists. Now you can easily buy it in any stationery store- sets with different effects for children's creativity are presented in a large assortment. Many people like acrylic because it is easy to apply, dries quickly and has virtually no odor, and after drying it cannot be washed off. On the eve of Easter, housewives are wondering whether they can paint eggs with these wonderful colors. I described in detail how to paint eggs with acrylic paints and attach step by step photo. Look how else. 
- chicken eggs,
- acrylic paints with metallic effect,
- brushes with artificial bristles and bristle bristles.
Recipe with photos step by step:

1. Let’s make a reservation right away: acrylic is not food product, and paint eggs with it the way we are used to painting with regular ones. food coloring(that is, for a long time and entirely) is strictly prohibited. The most that can be done is spectacular details, for example, drawing stains or small decorations. 
2. To paint the eggs we will use the dry brush technique. As the name suggests, the brush should not be wet for this purpose. Lightly dip a dry brush into the paint. Then, running your finger or other object over the brush, spray the acrylic onto the egg. The result is spots similar to those that nature “paints” on quail eggs. For better effect It is better to use contrasting colors of eggs and paint. 
3. Using the same technique, we make stripes - apply paint to dry bristles and sweep over the surface strictly once and in one direction. 
4. Dry the eggs on a stand or secured in a glass. They turn out very beautiful
According to church tradition, eggs need to be painted the day before. Easter, on Maundy Thursday, the day when it is customary to clean the house, bathe and get a haircut. And it is pysanka or krashanka that is a talisman and the best Easter gift for friends and family. That is why the question of how to paint eggs should be given maximum attention.
- To make the paint go on more evenly, wipe the eggs with alcohol before boiling.
- To prevent the eggs from bursting during cooking, add a few tablespoons of salt to the water.
- To make the eggs easier to peel, after boiling, dip them in cold water for a couple of minutes.
- If there are children in the house, avoid chemical dyes, choose only natural ones - beet juice, onion peels, etc. After all, dyes can penetrate into the middle of the egg and enter the child’s body.
- If you want Easter eggs to shine after dyeing, rub them with vegetable oil.
SO:
- Dyeing eggs using onion skins is the most famous and easiest way. We prepare the “paint” like this: boil for about half an hour large number husks, set aside and let the broth brew. Then put it there raw eggs and boil until done. If you want a darker color, it means more husk; if you want a lighter color, take less husk.
- If you boil raw eggs with spinach or nettles, they will turn out green, depending on the concentration of the herb. Although, they say, it all depends on the case, and it may not turn out to be a very beautiful color.
- You can get yellow eggs by boiling them in turmeric. You can get purple eggs if you dye them with violets. You need to take violet flowers and fill them hot water, let the solution brew and soak the eggs in it overnight. If you add a little to the water lemon juice, the color will be lavender.
- If you cook with the shell walnut, the eggs will turn out light beige or brown.
- Pink color can be obtained using cranberry juice. We do this: squeeze out the juice, boil eggs in it, leave overnight.
- Blue eggs or blue stains on them can be obtained by rubbing already boiled eggs with red cabbage leaves.
- Boil eggs in ground coffee and you will get beige or brown colored eggs.
- Speckled eggs are easy to make like this: roll a wet egg in rice, buckwheat or other cereal. Wrap it tightly in gauze, tie it tightly, cook it in any dye. You will get a cute and unusual egg.
- To get an abstract design on the eggs, wrap them in onion peels and gauze, boil them in the peels or any dye. You will get a streaky egg.
- Take parsley and dill leaves, wrap an egg in them, put the egg in a stocking and boil in onion skins. You will get an egg with a beautiful pattern.
- “Silk” dyeing is a fashionable way to dye Easter eggs these days, although it is not entirely harmless. We take white raw eggs, wrap them in pieces of natural silk, for example, cut old ties for this. Then secure with thread or other fabric. Cook by adding vinegar.
- Put some rubber bands on the egg and paint it with dye. You will get an egg in stripes.
- White patterns can be applied to paint using powdered sugar. Take a glass of powdered sugar and add a little water to make the mixture very thick. Using a pastry syringe, apply a pattern to the boiled and colored eggs.
- You will get a real pysanka if you work a little with wax. Take an already boiled egg and a burning candle. Using a match we draw a picture. Then dip the egg into the paint, but not hot, otherwise the wax will melt. Unpainted areas are painted, and thanks to the wax, a pattern remains on the egg. Then carefully scratch off the wax or heat it slightly onto the candles and wash it off.
- Scratched eggs are obtained if you apply any pattern to the paint using a needle or other sharp object.
- You can also decorate eggs with decorative elements. For example, using thin paper strips using the quilling technique.
- Using acrylic paints you can make speckled eggs. Just take the paints, dilute them to liquid consistency and using a toothbrush, sprinkle on the boiled eggs placed in stands. Let the paint dry and the eggs are ready. So it turns out that the eggs are decorated, and the minimum amount of harmful paint is used.
- See how beautifully you can decorate eggs using Easter icing sprinkles. It turns out that it can be useful not only on Easter cakes and Easter cakes. Take a boiled egg, a tube of glue, a bag of colorful sprinkles - and off you go!
- You can also color the eggs using children's harmless water-based markers. Or using the same paints. For this you will need paints and a thin brush. To make the drawing neat, first draw a pencil sketch on the boiled egg.
- How do you like the idea of knitting a real costume for an Easter egg? All kinds of chickens, kittens, sheep, or, for example, such a cool bunny.
Write in the comments about your methods and observations, it will be interesting)