Plov Ferghana recipe. Ferghana pilaf
We prepare everything in advance so as not to rush around the kitchen later, and not to inadvertently crush the cat. Yes! Did you forget to put on the tubiteika? Without a skullcap, the correct pilaf will not work. So, have you seen a shaman without a tambourine or a policeman without a holster? No? That's what I didn't see.
Ingredients: lamb - 1 kg, tail fat (preferably fat tail fat) - 300 gr, can be replaced with oil in the same volume, rice - 1 kg, carrots - 800 gr, onions - 3 heads, garlic - 2 heads, capsicum - 1 pod , barberry, zira, salt.
Let's start with rice. A lot depends on rice, in pilaf, and we won’t put anything there. The search for “devzira” in local markets was crowned with success. I managed to buy a “chungara”.
Chungara- one of the subspecies of devzira, Uzbek rice grown in the Ferghana Valley. This rice is grown in the area around the cities of Kokand and Rishtan. It is absolutely white, has an elongated shape characteristic of devzira. It is usually aged for only a few months, it absorbs water very quickly, while growing in size. And it does not absorb fat and oil very much, in comparison with other types of devzira, due to which the pilaf turns out to be unusually light.
So fig. We carefully sort it out so that small pebbles do not spoil the holiday later. Rinse under cold water until the water is no longer cloudy. Soak the rice in plenty of warm salted water. If the rice is not soaked, it will absorb a lot of oil and the pilaf will turn out to be “heavy”. And do we need it?

Let's cut the rest of the ingredients. Cut the carrot into strips, onion into half rings. Let's move on to the meat. I managed to buy a piece of shoulder blade with a bone. We disassemble the meat with a very sharp knife, simultaneously removing the veins and films. We cut the pulp from the stone and cut it into cubes of 1.5-2 cm. The stone will also come in handy for us, it will add color to the zirvak, but more on that later. We leave a few pieces of larger pulp, 8-10 centimeters long and 2-3 centimeters thick. Sprinkle them with salt and set aside. I didn’t beat them with a knife, they looked very smart. By the way, last time I took pieces from the neck, and as a result, I liked them more. Fat from the tail, cut into cubes of half a centimeter. Everything is ready, you can proceed to the sacrament.

In a well-heated cauldron, put pieces of bacon and melt the fat out of them. It is important not to stir them, otherwise they will start to burn and the melted lard will be cloudy or even black. Which we don't need at all. Let's put the pieces of bacon in a whole hill, level them with a slotted spoon, and as soon as they turn golden on one side, turn them all over at once, because by that time they will be sintered among themselves.
Now, as Stalik teaches, the cracklings must be caught, salted and sprinkled with finely chopped onions, and then eaten with a hot cake - "otherwise the pilaf will not work." The ritual is like this. No wonder I told you about the skullcap and the tambourine. With what else they should be eaten, or rather, what they should be washed down with, you know as well as I do. This is how we will do it. The advice of respected people should be heeded.
If you cook in oil, then it must be properly calcined to get rid of extraneous odors. We heat the oil until smoke appears, and carefully, so as not to burn ourselves, lower a small peeled onion into it with a slotted spoon. Fry it until black and discard.

It's time to fry the bone and large pieces of meat. We lower the bone into the cauldron, it becomes golden right before our eyes. Brown it well on all sides. We take it out. Fry the meat very quickly, literally a few seconds on each side. We catch the fried meat with a slotted spoon and put it on a plate, next to the bone. If relatives come to the smell, we drive them away from the meat with a slotted spoon. But you can treat cracklings. It's a sin to hide such splendor from people.

Let's wait a bit for the melted fat (or oil) to warm up again and lower the onion into it. We do not put out the fire. Fry the onion until golden brown, stirring it from time to time. Onions should be fried until there is no moisture left in it at all. This is very noticeable in a couple. As soon as it is gone, then the onion is ready and you can lower the pieces of meat into the cauldron.

Fry the meat with onions, stirring occasionally. It will brown quite quickly. But if the onion is not properly fried, and juice remains in it, the meat will not be fried and will not be ruddy, but will be boiled and stewed. Fry, stir, fry more.

It's time to put in the carrots. Put it in an even layer and after a few minutes mix with meat and onions. Fry everything together for 15-20 minutes, depending on the stove and cauldron. Stir gently from time to time so as not to damage the carrots, which are already becoming quite soft.

Add hot water to the cauldron so that it covers everything with the top, about one finger. We take the garlic, with whole heads, having previously peeled them from the husk and carefully place them in the center, carefully digging out a place for them. We return the bone and large pieces of meat, fried earlier, to the cauldron.
After everything boils, reduce the fire to medium. Throw in a handful of barberries. We do not close the cauldron, but continue cooking for about half an hour or a little more. During this time, the broth will boil down, and the zirvak (this is what we got) will acquire a beautiful rich color, and our lamb bone will play an important role in this. Add salt to zirvak, about a tablespoon. Have you forgotten that our rice is soaked in salted water? Don't oversalt. We put a pod or two hot peppers. Sprinkle with zira, rubbing it a little between your fingers.

We drain the water from the rice so that it does not run up the sink. Using a slotted spoon, put the rice in a cauldron. We level it over the entire surface and pour boiling water over it. Pour boiling water through a slotted spoon so that the water does not wash away the rice cover. Rice should be completely covered with water. It is better not to add water, it can be added later than poured immediately.
We make the fire to the maximum, it is necessary that it boils as soon as possible and over the entire surface, you can even cover it with a lid for a minute! If only it boiled, so much so that
oil floated to the top, and then, in the process of cooking rice and evaporating water, it fell
through rice, enveloping each grain of rice, then there will be pilaf, and not sticky porridge with meat!
That's how it boiled, let's reduce the fire a little. We cook. If necessary, level the rice with a slotted spoon, carefully, from the edges to the center, since in the middle it will most likely cook faster. If all the water has “gone”, and the rice is still hard and crunchy on the teeth, then water must be added. But only a little.

If you still managed to “drown” the pilaf, then you need to make holes in the rice layer with the handle of a slotted spoon, and move the rice along the edges of the cauldron with the same slotted spoon. Then the excess water will boil away faster. Let's try rice. If it's almost ready, it's time to move on to the final part.
Sprinkle rice with zira (I also added a little saffron) and tightly close the lid. If the lid is not tight, wrap a towel around it. If you have a gas stove, the main thing is not to start a fire. We make the fire under the cauldron at the very minimum and do not approach it for 30 minutes.

At this time, you can do away with the cracklings, if they are left, and start shakarop. “What other shakarop-makarop?” - you ask. And I'll tell you which one. Shakarop - so in the Ferghana Valley they call a salad of tomatoes and onions. They must be very finely chopped and mixed. It is best to cut them on weight, with a very sharp knife, moving it towards you and cutting off layer by layer, so that they are as thin as possible. Can you imagine how much juice this salad will give? And if the tomatoes and onions are good, then this juice will be quite sweet. That's where the name comes from. “Shakar” - sweet, “op” or “ob” - water.
It's time. It's time to open the cauldron and the main thing in this seemingly simple matter is not to be scalded. Since steam will escape from under the lid, like a genie from a bottle. First of all, dig up the garlic and peppers and set them aside. We dig not just carefully, but very carefully. For if the peppers fall apart, you will have to look for companions among the remnants of the “fire-eaters” tribe. And they, you know, one or two and miscalculated.

Mix everything thoroughly, shaking with a slotted spoon from side to side. Set aside large pieces of meat and bone. We spread the pilaf in a slide on a large warmed dish. Place the garlic on top of the pyramid. Now decorate it with pepper and pieces of meat.
We shift the skullcap to the back of the head and carried the pilaf to the table, saying: “groin-groin-groin!”. I know that "groin-groin-groin" can have an indecent meaning, but in this case, it means complete satisfaction with the process and the result. Good luck to you!
To be continued…
Today I will share with you step-by-step recipe for cooking pilaf in Ferghana. In Uzbekistan it is called Fargonacha kovurma palov or Fargonacha osh palov. Whatever we call it, the recipe is the same. And so, Ferghana pilaf is a classic version of preparing delicious Uzbek pilaf. Ferghana pilaf very popular in the Tashkent region, as in the Ferghana Valley. In teahouses, they usually use the Fergana pilaf recipe for making pilaf.
The recipe for pilaf in Ferghana.
Ingredients:
- Rice - 1 kg (it is desirable to use devzira, but other varieties can be used, except for small varieties of rice).
- Fat tail fat - 350 (you can even vegetable oil).
- Lamb pulp - 1 kg.
- Onion - 5 - 7 pcs.
- Carrots - 0.5 - 1 kg.
- Salt.
- Garlic - a couple of heads.
- Seasonings (zira (cumin), pepper, barberry, coriander).
Instructions for cooking Ferghana pilaf.
You can use beef for Ferghana pilaf. But for pilaf in Fergana, lamb is usually used. Clean all the ingredients and be sure to wash in clean water.Step 1. We heat the cauldron at maximum heat.
Step 2. Cut the fat tail fat and the mode into cubes and put the chopped fat tail fat in a well-heated cauldron. We need to flush it out. As the fat is rendered, we quickly collect the roasts with a slotted spoon. You can slightly salt these roasts and eat them with Uzbek flatbread with onions and herbs. Usually these roasts are served separately. Kurdyuk roasts are very tasty.
If you do not have fat tail fat, you can use vegetable oil for your pilaf. Step 3. We take chopped onions in half rings in advance and put them in a cauldron. Fry the onion until it turns red-golden in color. When frying onions, the lid of the cauldron must be open so that the moisture in the onion evaporates and does not remain in the cauldron.
Step 4. Now put the meat in the cauldron. The meat will need to be cut into cubes in advance. Fry the meat with onions and mix occasionally. Be careful when frying the meat, make sure that a golden crust forms. But if you notice that the onion burns out, then immediately proceed to the next step. From how the onion in the cauldron will look after frying, the color of pilaf will become the same. Therefore, if you like whitish pilaf, then you will need to put the meat in early and fry them together.
Step 5. Now we take carrots. Carrots should also be cut into strips in advance. Let's put the carrots in the pot. We will fry all the ingredients in a cauldron together and mix occasionally. We fry everything for about 8-10 minutes. Once the carrots are soft, we can move on to the next step.
Step 6. Now add boiled water to the cauldron so that the water at the level of the entire contents in the cauldron covers 1.5 centimeters.
Now we have prepared zirvak pilaf. Step 7. Add our seasonings to our zirvak: add zira, pepper, barberry, coriander.
Step 8. When the zirvak boils, add salt, and also turn off the fire. Within 60 minutes, zirvak should boil over low heat, and leave the lid of the cauldron open.
Step 9. Let's taste our zirvak. If there is not enough salt, then add salt to taste.
Step 10. Now put the garlic in the center of the contents of the cauldron.
Step 11. First, rinse the rice in running water 3 times, put it in a cauldron and evenly distribute the rice on top of the zirvak.
Step 12 After leveling the rice, immediately add boiled water. The water level above the rice should be up to about 1 knuckle of the index finger. To prevent the water from washing away the rice, take a slotted spoon and carefully pour the water into the cauldron. Do not immediately pour out a lot of water. Added a little water, check with your index finger. If the water level almost touches the first knuckle of your index finger, you can stop adding water. If you are cooking pilaf for the first time, then try to generally add water, the level of which is 2-3 millimeters less than the 1st joint of the index finger. And the second time you cook pilaf, you will already know exactly how much water is required for your pilaf.
Step 13 Now we need the contents of the cauldron to boil, so let's add fire. You should get a violent boil in the cauldron.
Attention! Do not mix rice with other ingredients in the cauldron.
Step 14. Make a few holes before the day of the cauldron over rice so that all the water has evaporated. When all the water has evaporated, take the rice for a sample from the cauldron. If the rice is still crunchy on the teeth, then you need to add a little water. If your rice is crunchy, add water. See step 12. It says how to carefully add water.
Step 15. The water has evaporated and the rice is not crunchy, which means we can reduce the fire under the cauldron to the very minimum. Sprinkle zira over rice, and collect rice in a slide. We do everything carefully with a slotted spoon. We take from the edge of the cauldron and lightly collect the rice in a slide. If you have a wooden stick, make holes to the bottom of the cauldron in several places on the rice. Now we can close the lid of the cauldron and leave for 20 - 25 minutes at minimum heat so that the pilaf is completely ready.
Step 16. Now open the lid and gently loosen the rice. And at the same time we take out the garlic and pepper from the cauldron and put them in a separate plate.
Step 17 Thoroughly mix all the ingredients in a cauldron and serve. First, put the rice with the rest of the ingredients on a plate, and put the meat, pepper and garlic on top. For a salad, you can make a cucumber and tomato salad. Our Ferghana plov is ready. Enjoy your meal!
In principle, this dinner should have been one of the first, since pilaf is one of those dishes that I am ready to eat almost every day. I love pilaf incredibly and cook it quite often according to one recipe or another.
But only recently I finally got the “right” cauldron for cooking pilaf on a conventional gas stove and could, with a calm soul, start shooting the process of preparing this finger-licking dish.
So, a huge cast-iron Asian cauldron is placed on the burner, the rice is washed, the meat and carrots are chopped, and the spices are waiting for their turn, exuding aroma throughout the kitchen ...
To prepare Ferghana pilaf, we need:
- about 1.5 kilograms of lamb meat on the bone (because I don’t really like lamb, I cook pilaf with pork for myself, using ribs and a shoulder blade)
- 3 cups of rice (it must first be washed well and poured with water for several hours)
- 3-4 carrots and 2 onions
- 2-3 heads of garlic and the same number of hot pepper pods;
- fat (in the original - fat tail, but I use the usual, pork) and good vegetable oil;
- zira, turmeric and paprika (only zira is present in the classic Fergana recipe, but for some time now I have been adding the last two spices to pilaf);
- salt and water.
Ingredients are given based on a 6 liter cauldron. Cooking time is about 3 hours. 
A huge plus of the Asian cauldron is its shape - spherical inside, with a small bottom area on the outside and a strong expansion towards the top. Thanks to this form, you can use a strong fire, respectively, and the cooking process is very fast. Naturally, we are talking about some, so to speak, "special" dishes.
Sorry, got distracted. So, put the cauldron on a strong fire, cut the fat into cubes and place it in the cauldron. Within a few minutes, we melt the fat from the fat, stirring the cracklings from time to time, preventing them from burning. Then the cracklings should be removed, and approximately the same amount of vegetable oil should be added to the resulting fat.

After waiting quite a bit until the temperature of the fat mixture becomes high, we pour coarsely chopped onions into the cauldron.

Because the fire is strong, and the oil is very hot, the onion in it should literally boil, frying in a minute. Here it is - the action of a specific form of a cauldron. At the same time, there should be so much fat in the cauldron that the onion literally floats in it.

Do not forget to mix the onion, controlling the degree of roasting and "goldenness".

To fry the onion to the desired state, just a minute and a half is enough. Then the bones are placed in the cauldron, which are lightly fried for several minutes. After that, we take them out and lay the meat cut into pieces for frying.
Due to the fact that everything happens very quickly, I recommend cutting everything BEFORE the cooking process so that nothing burns or you do not have to remove the cauldron from the fire for a while.

Fry the meat until golden brown. Again, it's only a matter of minutes.

After the meat has acquired the desired crust, it is the turn of carrots, cut into strips. Mix it with meat and fry for a few minutes. During this time, carrots manage to release a lot of juice, and the roasting process smoothly transforms into a stewing process over high heat.

And now it's time for spices. Zira. The incredible smell and taste of pilaf largely depends on it. Sprinkle it with carrots with meat and onions.

At the same time, I add some turmeric and pieces of dry paprika..

We mix everything in a cauldron, return the bones to the cauldron, lay whole heads of garlic and hot pepper pods ..

And now we add water to the cauldron. Enough to cover everything previously laid. The resulting mixture is called zirvak. By the way, at the same time, add salt.

We cover the cauldron with a lid and leave the zirvak to stew for an hour. Already at this stage, having tasted it, we can correct the taste of the future pilaf. If everything up to this point is done correctly, the taste of zirvak should amaze you.

The hour has passed. We remove the lid from the cauldron, and the time comes for rice ... As I said at the beginning, it must be washed well in advance and poured with water for a couple of hours. Before laying rice, garlic and hot peppers must be removed from the cauldron, set aside on a separate dish. We still need them.

We fall asleep rice in zirvak.

Our task is to wait until not a drop of water remains in the pilaf. To do this, in the process of extinguishing, you can periodically make holes deep into the bottom, giving the water the opportunity to evaporate. To check whether there is still water in the pilaf, it is enough to pat its surface with a spatula. Champs - there is water, the sound is deaf - no more ..
Until the water has evaporated, do not cover the pilaf with a lid.

At the moment when it became clear that the water was gone, add a little more zira to the pilaf (if the first bookmark was for taste, now for flavor)

We return the garlic and hot peppers back and cover the pilaf with a lid, leaving it to simmer on the lowest heat for 30-40 minutes ...

At the end, before serving, the last little procedure remains - to straighten the pilaf. To do this, lift small portions of pilaf with a spatula and shake them over the cauldron. So our dish will be crumbly and lively ..

Three hours behind, the kitchen is filled with incredible aromas, your stomach growls, and the guests impatiently tap their spoons on the table...
Ferghana pilaf is ready.

It is enough just to put it on a large dish, garnished with garlic and hot pepper ...

Bon appetit!
See also: ... (42 photos) and ... (20 photos)
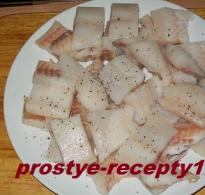
So, let's heat the cauldron and put in it the fat tail cut into cubes 2x2 cm.
When the fat tail becomes golden, take out the cracklings and throw in the oil, heated to a bluish haze, chopped onion as you like. You need very little onion, just to flavor the oil!
P.S. The melted fat tail should be put on a plate, salt, finely chop the onion (preferably white) and you get a great appetizer for vodka! Just eat it while it's warm.))

When the onion has become transparent and golden, spread the meat along the walls of the cauldron so that it warms up before getting to the onion.

Mix the meat with onions, add spices and fry for about 10 minutes, stirring occasionally.

Pour the carrots cut into cubes into the cauldron, sprinkle it with salt on top.

As soon as the grains of salt have turned into droplets, mix thoroughly. Simmer until a long stick of carrots becomes "sluggish".
P.S. It is better to cut the carrot the day before so that it dries. Then it absorbs all the aromas better.

Mixing thoroughly, fry for several minutes;

Add COLD water so that the carrots with meat are covered by about 1 cm and simmer with a slight gurgle for about 35 minutes. This is called zirvak - the basis of pilaf! Zirvak should remain transparent, then it will be better absorbed into the rice.

Soak the rice for about 30-40 minutes. I have rice "devzira", red, but you can take any that has the least amount of starch.
Devzira becomes more transparent during soaking and subsequent washing.

We check the zirvak for salt, put the rice in the zirvak, level it and pour it with 1-1.5 cm of BOILING WATER.
And cook on medium heat for about 25-30 minutes WITHOUT MIXING.
You can make holes with a long stick.
To check readiness, tap the pilaf with a slotted spoon. If the sound is deaf, then the pilaf is ready, if it is squelching, then there is moisture left below and it needs to be covered and then simmered for another 10 minutes on a tiny fire.

make a well on top of the rice, add another mix of spices and mix your pilaf thoroughly.
Bon appetit!))

Before you cook pilaf according to this recipe, I advise you to read and feel this
The other day I looked at various resources for recipes for cooking pilaf. As a person who has probably cooked this dish more than one hundred times, I can only shrug my shoulders and offer to cook “natural pilaf”. More precisely - Uzbek pilaf. And even more precisely, the Ferghana version of the Uzbek pilaf, which is “more natural” in nature simply does not exist (I will refrain from a lengthy ethnographic and culinary reference).
Of course, as soon as I give a set of products that is really accessible to the average city dweller, there will immediately be “apologists for the classics”: they say, cottonseed oil is not used, red carrots are used instead of yellow ones, pilaf is made not on a fire, but on a stove, and so on. However, for those who really want to cook a real pilaf, I will say: do not listen to the "apologists". Pilaf is a dish that forgives liberties in insignificant trifles. But he does not forgive fundamental miscalculations. One of these fundamental components of pilaf is the fact that pilaf is a living organism, and not male, but female, requiring, therefore, an appropriate attitude towards itself.
Armed with a serious understanding of this circumstance (a little lower I will explain its essence clearly), we can safely get down to business.
To begin with, I propose to cook pilaf based on small proportions of products. With such pilaf, it will be possible to feed 5-6 people to the dump and not make almost a single fundamental mistake when preparing it. Later, if desired, the proportions can be increased and, with the experience that has come, cook pilaf for at least 20 people, at least 100.
So, for a “small” pilaf we need:
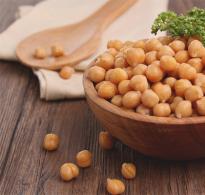
1. A kilogram of rice, preferably hard varieties. For example, devzira rice, which is now available on almost any market for 200-250 rubles per kilo (photo will be placed below), or its varieties, like chungara. Or - other varieties of rice that have proven themselves in Central Asian pilafs - laser, alanga, basmati, etc. I want to remind once again what I have said more than once: the choice of rice for pilaf must be approached very carefully, not only considering that this is the main component of the dish, but also the fact that the dish itself is relatively laborious in terms of time and technological costs. You need it - with a lot of effort, to experience disappointment at the finish line just because you bought any rice in any station shop? I think no.
2. Approximately a kilogram of well-fed lamb, of which a third is bones, two-thirds is meat. By the way, I’ll add that the talk that pilaf is prepared exclusively from lamb is nothing more than talk. And leisurely. Especially when you consider the undeniable dominance of rice in this dish. However, the lamb in it is the most preferred meat.
3. 100 grams of lamb fat, better than fat tail fat, although it (for lack of) can be replaced with fat cut from other parts of the carcass. It is strongly necessary to avoid the use of lard - because of its pronounced "foreign" and, to put it mildly, not the best taste.
4. A kilogram of red juicy carrots. There is a yellow one (which I doubt) - very good.
5. Three medium onion heads.
6. Two heads of garlic.
7. 150 grams of vegetable oil (refined).
8. MANDATORY: one and a half to two teaspoons of zira (cumin). Without it, do not even take the pilaf.
9. 1-2 whole chili peppers (optional)
10. Salt to taste.
11. As an option, you can use several grains of dry barberry, but it has absolutely no effect on the taste of the future pilaf.
Since I have a gas stove, I will cook pilaf in a cast-iron cauldron, traditional for cooking this dish, although the use of other utensils is not forbidden. It depends on the conditions that you have - whether it is a fire, gas or electric stove. From the "tool" you need a slotted spoon. A spatula or, especially a spoon, is not only inconvenient, but harmful at certain stages.
So, first of all, we do 100% preparation of products for pilaf - there will be no time to engage in cutting during frying.
1. Separate the meat from the bones and cut into small, as for goulash, pieces. We don't throw away the bones.
2. Cut the lard into small cubes - about a centimeter by a centimeter.
3. Cut the onion into thin rings.
4. Carrots (we do not scrape the skin, but cut it off) cut into thin strips, manually, without resorting to the help of any kitchen devices. Sometimes, to decorate pilaf, one or two whole carrots are added to chopped carrots, which are fried according to a slightly different algorithm than the main one.
Since there are sometimes misunderstandings with "average", that is, mostly carrots sold on our shelves (during heat treatment, it crumbles and ceases to keep its shape), I began to practice such a trick. I sprinkle chopped carrots with lemon juice, add a few pinches of granulated sugar, mix and leave to "lie down" for 15-20 minutes. Thus, it acquires much greater resistance to temperatures and does not fall apart. True, as observations have shown, this applies only to some varieties of imported carrots.
5. Remove the rhizome from the garlic and remove the skin, exposing the teeth.
We strive to put all products (except rice and spices) on one wide plate, without mixing, so that they are at hand.
Cooking rice. This is what devzira rice looks like while it is still in pollen.

And this is how it looks after washing in several waters. Rice should be washed and sorted to remove stones at least two hours before cooking pilaf in order to keep it in lightly salted water. This greatly improves the properties of rice. But it should be warned that after washing, the rice must be left soaked in water, it will crack in the air and during cooking the pilaf will turn into porridge ...

So, everything is prepared, we begin to properly warm the dishes.

Pour 150-200 grams of vegetable oil into the cauldron and heat the oil to such an extent that the circle of onion thrown into it turns red in a few seconds. Once the oil has warmed up, dip the lamb fat into it. But you can do the opposite - first melt the fat and, removing it, pour the butter into the melted fat. The second method is convenient in that fats can be dosed more accurately. Provided, of course, that it was possible to “try on” both the dishes and the rice used well enough, since different varieties of rice have different ability to absorb fats.
There is no need to melt fat into the smoke, keeping in mind its main purpose, which, of course, is not to add its share of fats, but to flavor the vegetable oil.

As soon as the fat becomes golden, we catch it and transfer it to a separate plate - it will no longer be needed for pilaf. We lower the bones into the hot oil, stirring them intensively. Add a pinch of salt and a pinch of cumin. ATTENTION! We remember one important thing: the color of the future pilaf largely determines the degree of roasting of the bones. The correct degree of roasting is the persistent brown color of the meat remaining on the bones.

Now it's time for the bow. It should also be fried with vigorous stirring. Its readiness is also determined by color: the onion should turn golden.

As soon as the onion is golden, we send the chopped mutton pulp to the cauldron and mix.

Fry the meat carefully. We don't need it to be covered with a crust. It is quite enough to burn him with oil (in time - no more than 7-10 minutes).

As soon as the meat has reached the specified condition, we launch the carrots cut into strips into the cauldron, immediately mixing it thoroughly with the rest of the ingredients.

As a rule, with intensive stirring, carrots reach the state we need in 10 minutes. Well softened, it signals the beginning of a new stage - pouring warm water into a cauldron and becoming an important component of pilaf - sauce, which is scientifically called zirvak.

It is very important not to make a mistake with water - it is better not to add it than to overfill it. Usually I pour water by eye, but this time I used measuring utensils, pouring 1.2 liters into the indicated volume of products. Further showed that I hit exactly the right amount. I recommend that you pour no more than a liter, since the rest can be added when laying rice. The water level from frying along the top edge should be about a centimeter and a half.

Now we wait for the zirvak to boil and, as soon as this happens, put garlic and capsicum in it (ATTENTION! The pepper must be ABSOLUTELY whole so that there are no leaks. Otherwise, you will have to eat pilaf accompanied by a fire brigade). We reduce the fire, achieve a slight even boil, watching how the zirvak is gaining color right before our eyes.

After 30 minutes of low boiling of zirvak, we try it for salt and straighten it so that it tastes a bit salty. Then we take out the bones, garlic, pepper with a slotted spoon on a separate plate so that they do not interfere with us. We increase the temperature under the cauldron and carefully transfer the rice into it with a slotted spoon, from which the water has previously been drained.

First, we level the rice, ensuring a uniform boil of zirvak around the entire circumference of the cauldron, if necessary (if the pilaf is cooked on the stove, turning the cauldron around the circumference.

There comes that crucial moment when pilaf slowly turns into a living organism. It is undesirable to mix rice with other contents of pilaf, at the same time, in order to ensure subsequent friability and run characteristic of pilaf, it should be very gently stroked with a slotted spoon, as if transferring its own electricity through it to rice. It is better to start stroking from the edges.

Gradually, with concentric movements, we get to the middle and also slowly follow back, while the rice intensively absorbs the protruding sauce. Often, for its more uniform welding, it is useful to collect rice from the edges of the cauldron to the middle and back.

You can even build a kind of girlish breasts of the first number out of rice and gently caress each “breast” with a slotted spoon as if the “breast” is real, and the slotted spoon is your hand. It won't hurt the rice.

Attention, this is very important!
As the zirvak decreases (absorbed by rice), it is necessary to consistently reduce the temperature under the cauldron in order to avoid burning vegetables and meat. This should be done carefully so that, on the one hand, the process of absorption of zirvak by rice is not completely “drowned out”, on the other hand, it is not allowed to burn. In a word, it will be necessary to choose a certain golden temperature "midpoint".
Picking up the rice from the edges to the middle, we make a characteristic bulge and continue stroking it with a slotted spoon for at least a minute, without making sudden movements.

Another important moment comes - tasting the readiness of rice. For the sample, we take a few grains of rice, delving a couple of sentiments into the rice layer. Ready rice, if you crack it, should be elastic, but not hard inside. If the slightest hardness is found, pour no more than a glass of hot water onto the surface of the rice, level the hillock and again collect the rice from the edge to the middle, giving the water the opportunity to fall inside. After that, we dig a “hole” in the middle of the rice layer, carefully return the bones, garlic and capsicum cooked in zirvak there, add one and a half to two teaspoons of zira ...

... and just as carefully lay the whole thing with rice, returning the pilaf to its original spherical shape, not forgetting to stroke this shape well.


If pilaf is cooked on an electric stove, leave the minimum temperature under the cauldron. If on gas, turn off the minimum fire 10 minutes after closing the lid. If on a fire, we remove everything, up to smoldering embers, so that the pilaf reaches only on the internal heat of the hearth. And for at least 25 minutes we do not touch anything and let the pilaf ripen completely. In the meantime, finely chop a couple of tomatoes, cut the onion into rings and wash the onion several times in cold water. Then we add it to the tomatoes, lightly salt, pepper (only red pepper) and mix well (the video procedure for preparing this salad that goes well with pilaf can be viewed here).

We open the pilaf that has reached readiness, take out the pepper, garlic and seeds, putting them on a separate plate, and mix the pilaf itself well with a slotted spoon. Then we spread it on a large dish in a slide, put the bones, garlic heads and peppers on top, and decorate the perimeter with a prepared onion and tomato salad, as shown in the picture. Here, in fact, that's all.

1. The dishes in which you are going to cook pilaf must be very well warmed up before pouring oil into it. A good warm-up prevents such an unpleasant thing as burning meat or vegetables after the rice is cooked. Of course, when setting rice for aging, it is necessary to observe the temperature regime indicated in the recipe. To be honest, the relationship between well-heated dishes and the fact that vegetables do not burn in the future is not entirely clear to me. But it exists and, of course, was not invented by me.
2. When pilaf is cooked on an electric or gas stove, it happens that the rice is cooked unevenly. For the finished dish, this is also a very unpleasant thing. To prevent this from happening, rice needs to be stirred from time to time (at the stage when zirvak boils), but mix very carefully, trying not to "raise" meat and vegetables to the surface. The mixing algorithm is approximately the following: first, the surface of the rice needs to be leveled, then, using a slotted spoon like a spatula, scoop the rice from the edges of the dish to the middle (in a circle), level it again and repeat the operation after a while. And so - at least three or four times. If the bones are involved in the preparation of pilaf, it is better to take them out before laying the rice and return them to the pilaf before setting the rice for cooking.
3.Before you put the rice on heat (that is, cover it tightly with a lid or a suitable dish), you need to make sure that the moisture has completely evaporated. This check is best done before the rice is piled up. To do this, keeping a temperature under the dishes that can create a boil, but excludes burning, in a layer of rice, you need to make several holes with a stick or the handle of a wooden spoon to the very bottom of the dish so that liquid collects in the holes. If it is transparent, therefore, it is fat without moisture residues and rice can be collected on a hill and put on a rack. If the liquid is cloudy, then there is still moisture in the fat and it must be evaporated. The excess and even the presence of moisture in the rice, which is almost cooked and become elastic, in the process of curing the rice, let's say, will "digest" it and violate the overall consistency of the future pilaf. To remove excess moisture, I repeat, should be provided that the rice is almost cooked.
4. Often errors in the proportions of oil (fats) in relation to other products in the preparation of pilaf lead to the fact that the pilaf is either "dry" or extremely fatty. It is very difficult to "calculate" the exact amount of fat with insufficient experience, especially when you consider that different rice varieties have different moisture and fat absorption coefficients. Therefore, I advise, especially if hard varieties of rice are used, to add fat a little more than the base values, since excess fat can always be removed during the cooking process, but it is almost impossible to make up for its lack. A more or less clear "picture" in terms of the optimal ratio of fat to other products is given by the final stage of preparing pilaf - the stage of preparing rice for aging. To do this, the surface of the rice must be leveled and make sure that the surface is dry, without fat. Then, in the very middle of the surface, use a tablespoon to make a hole - about a centimeter and a half deep. If the bottom of the hole is slightly filled with fat, the optimal amount of oil is chosen; if there is no fat, the pilaf will turn out to be “dry” and this error will need to be taken into account for the future. If there is a clear overkill with fat and it comes to the surface of the rice layer, you should arm yourself with a scoop and, pushing the rice layer in the middle, try to grab the excess fat with the scoop and remove it.
Well-cooked pilaf is not bad in itself and the next day - after warming up. And yet he is a little "not the same" as the day before. Recently, I managed to peep a way, as if returning yesterday's pilaf to its original taste and aroma. I liked this method and I applied it already on my "yesterday's pilaf". Try it if you can.
Do it like this (based on one serving). First, half the average onion head is finely chopped.

The part of the pilaf that needs to be heated is transferred to a frying pan, the onion is mixed with the pilaf and the dish is heated for several minutes over intense heat (with gentle stirring). Then the temperature is reduced to a minimum, the dishes are tightly covered with a lid and left for 15 minutes.

The second half of the onion can be used on a small salad with "participation" of tomatoes. That's the whole way.