Outline of a lesson in appliqué, modeling (middle group) on the topic: Summary "Introduction to salt dough." Summary of a lesson on artistic modeling from salt dough "Candlestick"
Svetlana Zheleznichenko
Outline open class"Crafts from salt dough"
Subject classes: "Making crafts from salt dough Hedgehog» .
Form classes: occupation - fantasy.
Type classes: combined.
Methodological equipment: drawings of animals, technological map.
Equipment and materials: pencils, paints, brushes, salty dough.
Target: introduce students to the features of modeling from salted test; develop logical abilities and comparative skills of students; cultivate diligence and accuracy; encourage independence and creativity to work; apply health-saving technologies.
Educational: to promote the acquisition of skills in generalizing and analyzing material, identifying the main elements that are most characteristic of various representatives of the animal, the ability to combine them with others, creating fantastic images.
Educational: contribute to the formation of an ecological and moral culture of the child’s personality.
Developmental: create conditions for developing children’s interest in living nature, developing creativity and imagination.
1. Organizational part: greetings; checking children's workplace and tools; repetition of safety rules when working with salt dough and working tools.
2. Main part.
Reinforcing the material covered.
Working with cards.
In today's lesson we will sculpt from test. Look carefully at the figures, think and tell me what parts the first carrot figurine consists of? What techniques were used to perform the torso? Name the techniques that were used when sculpting the bun? Look at the two pictures, how are they different? What is their feature? (The upper figures are three-dimensional, the lower ones are flat).
Themed physical education session.
Hammer-hamster-hamster
(I. p. - stand, hands on the belt, turn to the right, left for each word.)
Striped barrel.
(I. p. - basic stance, arms extended along the body -
For each syllable, tilt to the right, the right hand slides down the body and leg. On the second syllable, tilt to the left, the left hand slides down, the right hand up.)
Khomka gets up early.
(I.p. arms up, stretch, stand on tiptoes.)
He washes his neck.
(Massage the neck with their hands.)
Rubs ears.
(Rub your ears with your hands.)
The hamster is cleaning the hut.
(For each syllable, move your hands from right to left - imitation of sweeping with a broom.)
And goes out to charge. (They march.)
One, two, three, four, five,
Khomka wants to become strong.
(On a word "once" arms extended to the sides, on the word "two" bend at the elbow towards the shoulders, to the word "three" arms straighten, etc.)
Well done guys, you will turn out to be a cheerful, strong hamster.
3. Practical part.
Learning new material.
Creative task. Execution salt dough crafts"Hedgehog". Children must come up with a name for their animal.
Execution Sequence crafts:
Roll into a ball. Place it on the table and press it with your hand.
Pull out on one side pinch the dough to make a head with a spout.
Take matches and break each one in half. Stick matches into the dough will be needles.
Stick two matches with their heads facing outward in place of the eyes, one in place of the nose. Dry the toy on a board, paint the hedgehog when dry.
Breathing exercise
Imagine that you have a piece of cotton wool in your palm. What is his weight? Let's blow on him! Exercise "Blow away the cotton wool" 4-5 times.
4. Final part.
Exhibition of children's works. Children's comments. Self-analysis of works. Analysis of works by the teacher.
Publications on the topic:
First, prepare the dough, take a glass of “Extra” salt, a glass of flour and half a glass of water. The dough should be elastic. All the dough is ready.
 Notes on artistic and aesthetic development (sculpting) for children preschool age"Treat for toys made from salt dough."
Summary of the modeling lesson “Bread, bakery products” (from salt dough) for children 6–7 years old Goal: To teach children to think about the content of their work based on personal experience. Objectives: Educational: Teach children to think about content.
Summary of a lesson on modeling from salt dough “Basket with roses - a gift for mom” Modeling from salt dough: “Basket with roses, a gift for mom.” Goal: Creating conditions for the manifestation of children's creative activity through.
Children love to sculpt with salt dough. It does not stick to your hands and is very soft to the touch. I make the modeling dough with my own hands just before.
Children love to sculpt all kinds of animals from plasticine, but, unfortunately, such magnificent statues are very short-lived. To do.
Lesson summary on the topic:
« Salt dough. Modeling. Valentine"
Introduction
Miracles from salt dough.
Salt dough - recipes and modeling methods are different and multivariate, since sculpting from salt dough is a great pleasure and joy! And that’s why almost every master creates his own own recipe. And also the name of his technique - testoplasty, hospitable, bioceramics, flour.
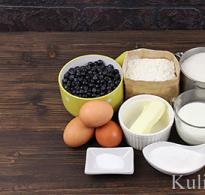
Universal recipe salt dough : 2 cups flour; You can add dry starch to the flour without going beyond the norm of two glasses. For example, 1.5 cups flour + 1/2 tbsp. starch. With the addition of starch, the dough will become more elastic. This dough makes thin parts especially well, for example, flower petals.), 1 glass of salt, 1 half glass of water, approximately 180 g, you can add 2 tablespoons. spoons of PVA glue. Instead of water, you can cook a starch paste.
Mix all ingredients. Knead the dough until the mass becomes homogeneous And elastic If the dough turns out watery, then you can knead it further, adding a little flour until it becomes elastic.
Water can be replaced with starch jelly, then the mass will be much more plastic. Kissel do this:
Dissolve one tablespoon of starch in 1/2 cup of cold water. Heat another 1 cup of water in a small saucepan until it boils. Pour the starch solution into boiling water, stirring. When the contents of the pan thicken and become transparent, turn off the heat. Let the jelly cool and pour it into the flour and salt mixture instead of water.
Methods for coloring salt dough. You can tint salt dough food coloring, watercolor or gouache. You can color it when preparing the dough, introducing the dye during kneading, and the actual finished product - on the surface.
An excellent chocolate color is obtained by adding cocoa. You can experiment with other natural dyes - soot, beet juice, carrot juice, ocher, etc. You can brown a salt dough product in the oven to natural color.
When tinting, you must take into account that after drying the color will become less saturated, but if you cover the craft with varnish, it will become brighter again. What varnish can I use? Acrylic and artistic are very good. It is also possible to use ordinary water-based construction materials for breathable surfaces, i.e. for parquet or wood.
Features and methods of preparing salt dough. There are a few things you can't do with salt dough. So, for example, you cannot add pancake flour (or flour with any other additives) to the salted dough, since the figures will rise like good dough for pies and will crack.
Also, you cannot add iodized salt; large inclusions do not dissolve, and subsequently the dough is not homogeneous - it turns into grains. Likewise, rock salt should not be added without first dissolving it.
About the water. So, in the test it is best to use very cold water; be sure to add 50 ml in parts after each addition, knead (due to the fact that for different flours, different amounts of water may be needed).
Salt is first mixed with flour, and only then in ready mass pour water.
Salt dough is stored in a plastic bag or tightly closed container. It is better to take salted dough out of a plastic bag in small pieces, since lumps of dough quickly become crusty and when rolled out or molded, these dry crusts spoil the appearance.
And one more thing, if the figures are thick (more than 7 mm), then after the first stage, you need to take out the excess dough from the back side (The drawing is in Khananova’s book, on the page in the books).
The dough may be too soft. Then proceed as follows: mix a tablespoon of flour with a tablespoon of salt at the bottom of a bowl. Press the ball of dough into this mixture and then scrunch it up. Do this until the dough becomes more dense.
You can sculpt or cut out figures directly on a baking sheet. The baking sheet should first be moistened with water; in this case, bubbles will not form between the product and the surface of the baking sheet, therefore, the surface of the product will be smooth and stable.
Everything that falls off is simply wonderful and, most importantly, it is glued invisibly with PVA glue.
Swelling or cracking of salt dough crafts occurs in three cases:
If the flour is chosen incorrectly. For greater strength, you can add it to the dough rye flour(the color will be warmer and there should be no cracking) (for example, a glass of regular + a glass of rye, 1 to 1), 50 gr. starch - also gives the dough elasticity and prevents it from cracking. You can also add PVA glue, since it also gives plasticity and prevents the dough from rising.
If drying is not carried out correctly (see next section)
If cracking occurs after painting, this means that the product has not completely dried (the product continues to dry and the air has to go somewhere), so the surface of the paint or varnish is cracking. Take your time to paint or varnish the product, so as not to regret it later and not to redo it.
Frequently asked question: how to dry salt dough? It is best to air dry natural conditions, but this takes a long time (complete drying can take a week or more - especially if the humidity during drying is high - since salt draws out moisture), so you can dry it in the oven, following a few rules.
The oven should be at minimum temperature
It’s good if drying is done with the oven lid slightly open
Products must not be placed in hot oven immediately, heating should occur gradually. Just like taking the product out of the oven, it is better if it cools gradually instead of with the oven
It is ideal to dry in several stages: let it dry on one side for an hour, turn the craft over, and dry on the reverse side. I also take breaks between drying, it dries in the oven for an hour - it dries on its own for a day - then again for an hour and a half in the oven on the reverse side.
The drying time for a salt dough product depends on the thickness of the product itself. And also on the manufacturing recipe used. So, dough containing butter, cream, etc. dries much longer than dough without oil-containing additives.
To avoid cracking of the product, you can dry it in three to four stages, in the oven at the very minimum and always with the lid open for about an hour and a half, then a break of two to three hours, or overnight, the craft dries itself, and then again Turn the oven on low with the lid open.
During natural and oven drying, the craft must be rotated at each stage of drying, i.e. It dries with the front side for an hour, rests, at the next stage it is turned over and dries with the back side.
Lesson objectives:
teach techniques for modeling from colored dough;
learn to use templates and tools;
develop aesthetic taste;
introduce children to the properties of salt dough;
develop coordination of movements and muscles of the hands and fingers;
accuracy in work;
independence;
creative attitude to work;
foster a work culture.
Educational:
Educational:
Educational:
Materials and tools:
For students: modeling tools, ballpoint pen refill, flour, water, salt dough, cloves, cardboard, oilcloth, hand cloth.
For the teacher: sample finished product, templates, salt dough for demonstrating modeling techniques, technological map of the sequence of manufacturing the product.
Progress of the lesson
| Lesson stages | |
| IOrganizational part (1 minute) | Greetings. Student organization. Checking readiness for class. |
| IIIntroductory part (5-7 minutes) 1. Conversation “Valentine's Day”. 2. Announcing the topic of the lesson. 3. Demonstration of the finished product. | Gifts for Valentine's Day. Various types valentines. |
| IIIMain part (10 minutes) 1. Analysis of product samples. 2. Tools for work. 3. Organization of the workplace. 4. Collective drawing up of a work plan. | material: salt dough; the valentine is cut out according to a template from dough rolled into a flat cake; a relief pattern is applied along the edge of the heart using a ballpoint pen; leaves are sculpted separately and relief is applied; an apple is sculpted, cloves are used for the center; the parts are connected to each other with water; After the valentine has dried, it can be varnished. Tools: rolling pin, stack, ballpoint pen refill. When working, use oilcloth, cardboard, and a hand cloth. Work plan: roll out the dough 1 cm thick; cut out a heart according to the template; make a relief design with a ballpoint pen; prepare leaf parts and apple; arrangement and connection of parts on a valentine; |
| IVPractical work (20 minutes) 1.Introductory instructions on preparing a valentine card. 3.Instruction on the preparation of parts. 4.Independent work. 5.Registration of work. 6.Analysis of the best works. | Pay attention to the organization of the workplace. Pay attention to common mistakes. |
| VFinal part (2-3 minutes) 1. Cleaning the workplace. 2.Analysis of the group’s work. | Remove the remaining dough, wash the tools and oilcloth, put the tools and templates in a box. |
Lesson summary for modeling salt dough. Topic: “Seal on an ice floe.”
Program content.
1. Teach children to create an image of an animal.
2. Strengthen the ability to work with salt dough, consolidate the techniques of rolling, pulling, flattening, and thoroughly smooth the surface.
3. Develop figurative perception and representation, imagination, fine motor skills of the hands.
4. Foster independence, creativity, accuracy in work, and the ability to finish what you start.
Materials: illustrations with seals on an ice floe, a seal toy, salted dough, boards, stacks, napkins, black peppercorns for the eyes, toothbrush bristles.
Preliminary work: reading fiction, looking at illustrations, watching presentations, didactic games, drawing.
Progress of the lesson:
Guys! Before our lesson begins, let's stand in a circle and hold hands. How nice it is to hold hands. Smile at each other. In the last lesson we talked about the inhabitants of Lake Ladoga and Lake Baikal.
So many words are dedicated to these wonderful lakes.
I love my land
Native Karelia
I love her nature beauty
And Ladoga with deep water...
And these lines are dedicated to Baikal.
I love my land
I love its nature
Gray Baikal
With clear water...
Oh, guys, I think I heard some plaintive sounds. Well, of course, here is the one who made these sounds. (A seal toy appears)
- Look, she has tears in her eyes. What happened?
Guys, the seal is in trouble. The cold wind of Ladoga and Baikal turned her cubs into pebbles. Let's help the seal and with the warmth of our little hands, with our love for nature we will help the seals return to their mother.
-Let's look at the seal.
- What body parts does the seal have? (children's answers)
- The head has a cone-shaped body, there are 2 flippers and a tail that serves as a rudder, 2 black eyes and a mustache.
- These are the seals we are going to sculpt now. (Show finished work)
- And now, I’ll show you how to sculpt a seal:
Showing how to do the job:
The first stage: you need to take the whole piece, pinch off a little dough for the fins.
(Put a small piece aside). From a large piece, roll the body into a cone shape using straight movements.
The next stage of work: using a stack, we make an incision, with the index finger and thumb we give the tail the desired shape (pinch it). From the dough that is left, we will make 2 flippers (roll 2 small thick sausages, flatten them, using a stick we will make scars on the flippers and tail) and connect them to the body; cheeks (2 small balls), eyes (2 peas) and antennae (bristles).
- The seal is ready. Do you remember how I made the seal?
Let's repeat the steps of the work.
Finger gymnastics:
You and I made a snowball (circular movements along the left palm)
We drove along the path.
Round, strong and cold (movement of palms up, down)
Made of snowflakes, dense, dense.
They crushed it with their fingers (turn it with their fingers)
And the palm was changed.
It rotates in your hands (on the other palm)
We really like him.
Now let's play hide and seek (we hide it in our fist)
Where's the snow?
Find a friend (we open).
- Independent work of children.
Fizminutka:
1, 2, 3, 4, 5 – we can count everything.
Once! Rise, stretch,
Two! Bend over, straighten up,
Three! Three claps of your hands,
Three nods of the head.
Four - arms wider,
Five - wave your arms,
Six - sit down at your desk.
Well, well, now let's get to work.
(children perform work to musical accompaniment)
- Now, take your seal chicks in your palms and lightly blow on them, warming them with the warmth of your breath.
- Look, they came to life from the warmth of your breath, from your kindness, and
look at the seal’s mother, her tears have disappeared and she is very glad that we all returned her babies back to her
- Children, you and I know a poem about a seal. Let's read it.
Once upon a time in snowy snowdrifts,
In the den, the hole is icy.
A tender seal was born,
The seal has a cold time,
And the seal caressed my son,
I fed him milk
And she licked him tenderly,
With his rough tongue.
Goal: To study the technology of making a decorative candlestick from salt dough. Create conditions for students to develop creative abilities in practical activities.
- Learn how to make decorative candlesticks from salt dough.
- Develop creative abilities.
- Develop the ability to overcome difficulties.
- Cultivate tolerance, the ability to listen to others, and the ability to work harmoniously in a team.
Form of lesson: conversation, game, practical work.
Lesson time: 40 minutes.
Visualization, logistics: figurines and photographs of cats, photographs of souvenirs, paintings made from salt dough. A candlestick in the shape of a cat (sample), oilcloth, salt dough, candles (tea candles in a sleeve), glasses of water, brushes.
For the “Kotofey” competition: 2 rubber balls, a basket or a cardboard box.
Progress of the lesson
Stage 1. Organizational and preparatory.
Hello guys! I am very glad to meet you and hope that you are in a great mood. Let's smile at each other. Today's activity is unusual.
I will ask you questions, and you will answer them, but only all together, in unison. Let's see how friendly you guys are. Agreed?
- Do you like to play?
- Can you solve riddles?
Then guess the riddles:
Even on an iron roof
He walks quietly, quieter than a mouse.
Will go hunting at night
And how he sees everything during the day.
Often sleeps, and after sleep
She washes herself.
(Cat)
He arched his back,
Meowed.
Who is this?
Stretched sweetly -
That's the whole mystery.
(Cat)
Well done. It's all about cats.
The cat is a mythical and magical animal. It is no coincidence that there was a cat cult in Ancient Egypt. She was revered as a deity and represented with joy.
In Rus' for a long time There was a custom to first let a cat into a new house, and then the owners to enter. It was believed that this is how a cat brings happiness to the house.
In Japan, almost every home has a figurine of a cat with a raised paw, which is believed to bring happiness.
The Chinese also believe that it helps a person and protects his home from evil spirits.
Cats can heal their owner by taking him away negative energy. In a family where a cat lives, the energy atmosphere is better.
And a toy cat gives its owner intuition.

The topic of our lesson: “Making a cat candlestick.”
What is a candlestick?
A candlestick is a stand for a candle.
Candlesticks come in copper, silver and bronze. Candlesticks can not only be bought in a store, but also made with your own hands. Clay and salt dough make beautiful and interesting candlesticks. They can decorate any interior, and candles in candlesticks create a special atmosphere of mystery in the house.
I suggest you make a candlestick from salt dough.
Stage 2. Basic.
First we'll play a little. We will hold a competition called “Kotofey”.
For this I need 2 commands (Children are independently divided into two teams.) Come up with names for your teams. I will give you balls, and you will take turns throwing them into the basket, each hit will bring the team 1 magic point, that is, the opposite team needs to be turned into “Kotofey”. The winner will be the team that quickly turns its opponents into “Kotofeev” (1 point = one letter of the word). “Kotofey” will have to fulfill the wish of the winners - to meow three times in unison. (Competition in progress)
While you are recovering from the competition, I will tell you a little about the history of testoplasty. I'll give you a recipe for making salt dough.
IN ancient times people made bread cakes from flour and water and baked them on hot stones.
The ancient Egyptians, 5,000 years ago, baked a variety of different varieties bread
And in Europe in ancient times, figured bread was made from yeast dough and only with your hands, without auxiliary materials.
But not only bread was baked from dough.
The ancient Incas sculpted sacrificial figures of people and animals from dough. The Chinese are puppets. Decorative items were very popular.
In Russia, since ancient times, there has been a custom of sculpting bread figurines for the amusement of yourself and your children.
In the Czech Republic, Slovakia, and Poland, entire paintings were made from dough.
Dough crafts ancient tradition, but even today salt dough is a very popular material for modeling.
I would like to introduce you to a wonderful and kind material - salt dough. A few words about the properties of salt dough. Dough is a material accessible to everyone. It can be prepared for future use and stored in the refrigerator for several days. Salt dough is plastic, does not stain your hands and does not melt. The dough can be colored by adding colors to the water when kneading, or you can color the finished dried product. After firing or drying, such products harden and can be stored for a long time.
The salt dough recipe is simple: 2 cups flour, 1 cup fine salt, 1 glass of water. The main thing is to knead and knead well until the dough becomes elastic.
An important point: when kneading the dough, think about something pleasant, good, and the dough will absorb the kind and gentle touch of your hands.
Let's remember how to sculpt from salt dough.
They sculpt from dough almost the same way as from plasticine or clay. The balls are rolled just like from plasticine in your palms or on a table. If the ball does not work out, you need to knead the dough again and roll it again. But the sausage stick is made differently. Only on the table. And in addition to the usual movements, they also perform clamps along the entire length of the part. They rolled it, squeezed it with their fingers along the entire length, rolled it again, and so on until the part was the required length and thickness. If you just roll the sausage, it will fall apart.
Water is used to attach one piece of dough to another. When you make an applique out of paper, you know that you can’t use too much glue. Also here, if you take a lot of water, the dough will soften and stick to your hands. Therefore, carefully lower the brush into the water and lubricate only the area to which we will glue the other part.
You've had a little rest, now let's get to work.
Let's do a warm-up for our hands to prepare them for work. Let's do the exercises:
1. “A bear climbs a tree” (move your fingers up the pencil).
2. “Fist-palm” (one hand is clenched into a fist, the other is open and vice versa).
3. “Making fire” (rub palm with palm).
We repeated how to work with salt dough, let's start making a candlestick.
Practical part:
1. Take big piece dough and roll into a ball, and make a carrot from the ball. This will be the body of the cat.
2. Take the candle and gently press it into the body.
4. Style the ponytail (as you like). Attach it to the body using water.
5. Take two identical pieces of dough, roll into balls - these are paws, glue them to the body, make cuts (form claws).
6. Roll into a ball for the head. Pull and shape the ears.
7. Next we work on the muzzle. Roll two balls, flatten them and glue them onto the face - these are the cheeks. Roll the ball into a nose and glue it just above the cheeks. Attach the eyes. For the eyes you can use cloves.
8. Decorate the cat with a mustache. Insert fishing line into the cheeks, 3 pieces at a time. in each.
9. Our cat candlestick is ready. We leave it to dry.


Stage 3. Control.
Tell me guys
- What material did we work with today?
- How does dough differ from other modeling materials?
- What new things have you learned about him?
- What should be the mood when kneading dough?
- Did you enjoy what you did today?
(Children's answers)
Stage 4. Final.
Guys, look at what wonderful candlesticks we made from salt dough. We all did the same work, sculpted from the same material. But the cats turned out different. This suggests that we are all different with our own characters, habits, characteristics, and each of us puts a piece of our soul into our work. This is what makes handmade souvenirs so good.
Well done everyone. Thanks for the work.
Stage 5. Informational.
At the next lesson we will paint the finished works, so bring paints, brushes and don’t forget your skillful hands. Goodbye.

Literature used
- Antipova M.A. “Salt dough. Unusual crafts and decorations. Beautiful things with your own hands”, Rostov-on-Don, Valdis Publishing House, 2008.
- Chayanova G.N. “Salt dough for beginners”, M., LLC “Drofa-Plus”, 2005.
- Chibrikova O.V. “Gifts for the holidays. We do it ourselves”, M., “Eksmo”, 2006.
Ulyana Akhmatova
Goals and objectives:
continue to strengthen skills in working with salt dough on a flat surface.
roll out the layer, use the template (fish cut out of thick cardboard);
work in a stack;
cultivate neatness;
develop creativity and imagination.
Materials and equipment:
Salt dough(we prepare in advance), cardboard covered with foil (we work on it), stacks, rolling pins, oilcloths, product sample, fish templates (you can have 2-3 different ones, children choose as they wish), helpers tools: cutting molds (we used small cookie cutters), caps from felt-tip pens, pastry wheels, etc., cups of water, brushes.
NOTE: IT IS NECESSARY TO WET EVERY PART WITH WATER WHEN GLINDING (otherwise they may fall off when dry) !
Be sure to review the safety rules.
Educator:
Guys, guess the riddle:
Look, the house is standing - it’s filled to the brim with water.
Without windows, but not gloomy, transparent on four sides.
The residents of this house are all skilled swimmers.
V.: - Have you guessed who we are talking about? (children's answers - Pisces).
Well done! Today you and I will sculpt fish, but not simple. And you will decorate it however you want. The teacher draws attention to the board (there are samples of fish on the board, printed pictures must be in color): Look how different and beautiful fish you may succeed.
V.: - To create such a beautiful surface, you can use a wide variety of available materials. funds: stacks, felt-tip pen cap, buttons, molds. A regular cap leaves an imprint in the form of a circle, and on the reverse side - a beautiful snowflake. Can be stuck on the body small fish figures, balls, you can mold them yourself, it will also turn out very beautiful.
(The work is performed sequentially according to technological maps together with the teacher)
1. Take a piece roll the dough into a ball, flatten it and roll out the layer (on foil).
2. Attach the template and carefully cut it out using a stack fish(The teacher helps children who find it difficult to complete the task)
3. Smooth the edges using a stack or a damp brush.
4. Make two holes on top for the rope with the back of the brush. Using a stack, we make a border with light pressure between the head and torso.
5. Make eyes by rolling balls from test.
6. Glue balls of smaller diameter onto larger ones.
7. Downside press the brushes onto the balls, making pupils.
8. Using a cap, apply scales to the surface of our relief. If anyone wants to decorate their fish, you can make small balls from test and glue them to the body fish; you can use cutters to cut out different shapes and decorate them fish. Don't forget to wet each part with water.
9. Roll out a thin sausage from test, glue the mouth fish.
10. We make an impression on the tail, pressing the lines.
11. The fish are ready! All that remains is to dry it.
Dry for about a week or more.
Summing up classes:
Analysis of works.
V.: - Guys, our work has come to an end. class. Look how wonderful you got the fish.
Well done! On the next class We will paint the fish with gouache, cover them with varnish and tie strings so that you can hang them on the wall.


Publications on the topic:
Summary of educational activities for modeling from salt dough of the group “Friends for Bunny” Abstract of the educational activity for modeling from salt dough of the group ZPR-2 “Sun” “Friends for the Bunny” Topic: “Friends for the Bunny” Purpose: To create interest.
Modeling from salt dough on the theme of Dymkovo and Filimonovskaya toy Integration of educational areas: artistic and aesthetic development.
Goal: Creation volumetric crafts from salt dough and their decorative design according to plan. Objectives: educational: Teach children modular.
Program content: - Teach children to create an image of animals (sculpt from salt dough) - Develop a sense of shape, proportions, eye control, consistency.
Summary of a lesson on modeling from salt dough in the second junior group “Radiant Sun” Summary of a lesson on modeling salt dough in 2 younger group on the topic “Radiant Sun” Compiled by: teacher of MADOU No. 1 in Kyzyl Kosheleva.
Scientists have proven that the development of logical thinking, coherent speech, memory and attention is closely related to the development of fine motor skills and coordination.