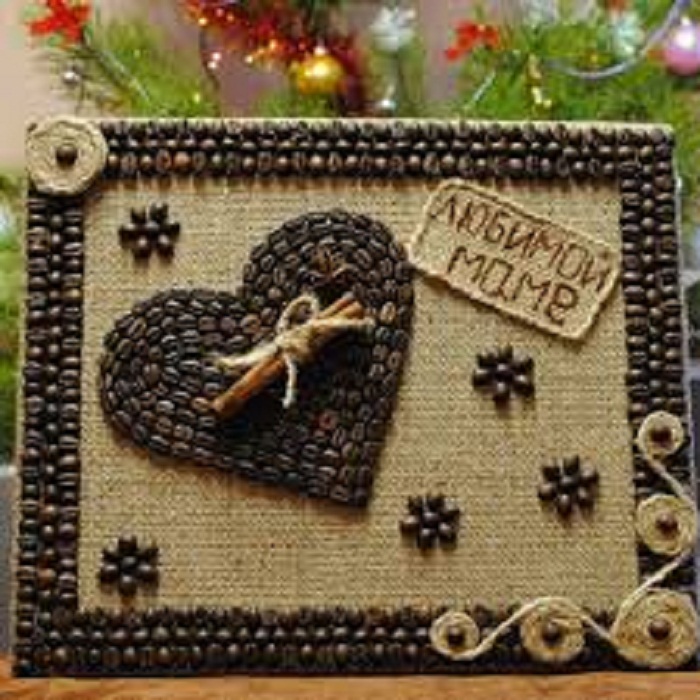
Templates for paintings made from coffee beans. Crafts and paintings made from ground coffee - a hobby with an invigorating aroma
Naturally, every housewife who spends most of her time in the kitchen strives to create a cozy and relaxed atmosphere around her. After all, this is where the whole family gathers for dinner after a working day. Here you can have intimate conversations with friends on long, quiet evenings.
I really want to add a touch of individuality and uniqueness to the room, to make it different from others.
Today we want to tell you how, without spending any money, you can create paintings for the kitchen with your own hands. Photos in any interior will look stylish and organic. And everything you need for this will probably be at your fingertips.
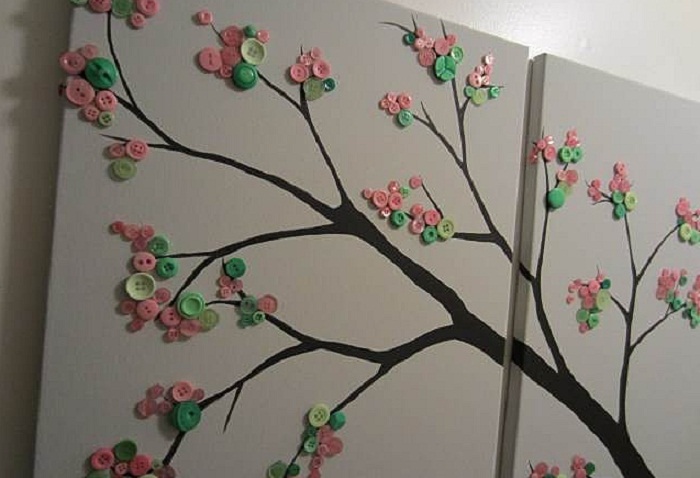
Decor items made in the style of a culinary theme are relevant for the kitchen, so we will use coffee beans, pasta, and all kinds of cereals.
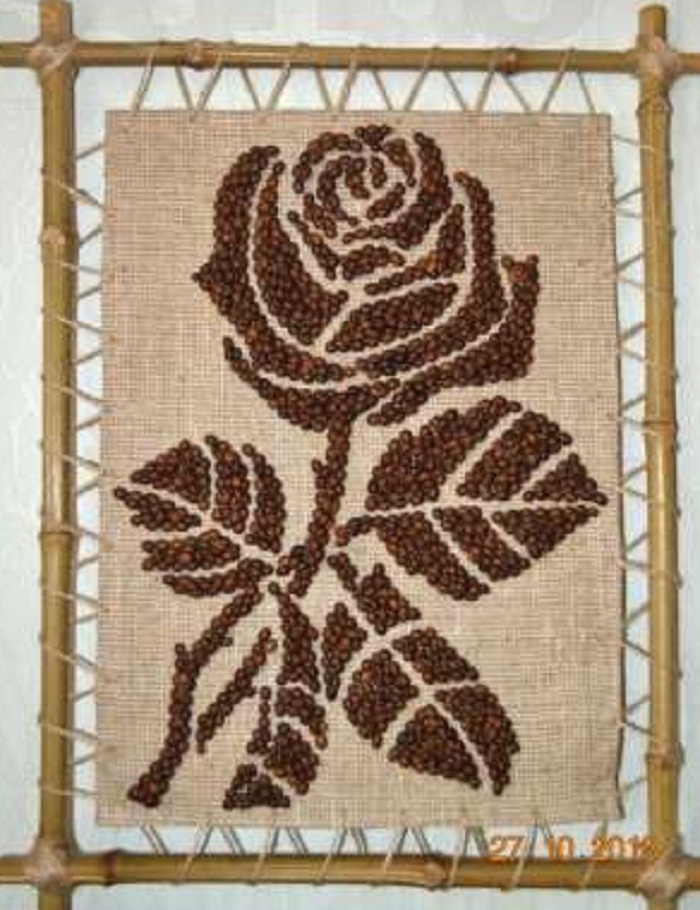
Coffee in pictures is stylish and unusual

There is hardly a person who does not like coffee. And if you have a pack of Arabica coffee in your kitchen, you can start making the picture right now.

In addition to coffee beans you will need:
- Warp. It could be burlap, coarse linen, salt dough, rolled into a layer or even a sheet of thick cardboard.
- Glue. It's good if you have a hot glue gun. However, you should not despair if it is missing, PVA or Moment gel will do just fine. All of them will allow you to obtain reliable adhesion of materials and even after several years, your painting will be like new without any fallen fragments.
- If you know how to draw, then of course you can easily sketch a sketch of the future composition with a pencil by hand. However, if artistic painting is not your thing, then it is better to copy or print the image you like in advance. Try to keep the size of the painting no smaller than the size of a landscape sheet, otherwise the composition will turn out compressed and cluttered.
- Frame. Of course, a picture framed looks much more effective and presentable than without it. But what to use for this is up to you. You can assemble a lattice using bamboo rods and stretch the canvas on it.

Or take a regular plastic frame and decorate it with textiles used in the kitchen interior. However, a wooden frame painted with dark brown paint will look just right.

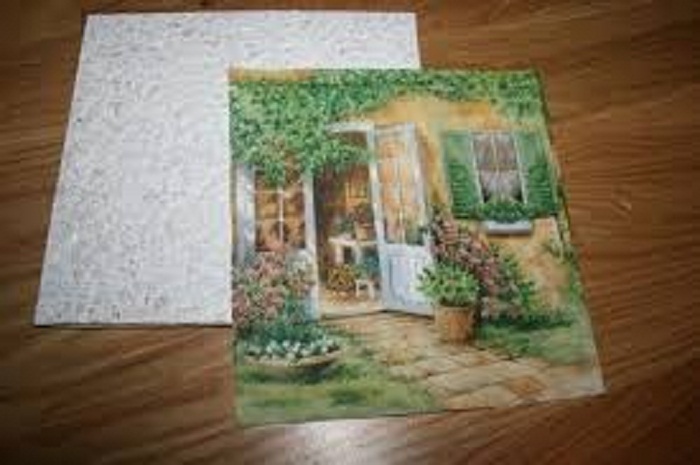
Transfer the design to fabric or paper.
First lay out the coffee beans along the drawn lines without smearing them with glue. After all, it may happen that in some places the drawing does not converge and it will need to be corrected.
When you have worked out all the shortcomings, you can safely start gluing the grains.
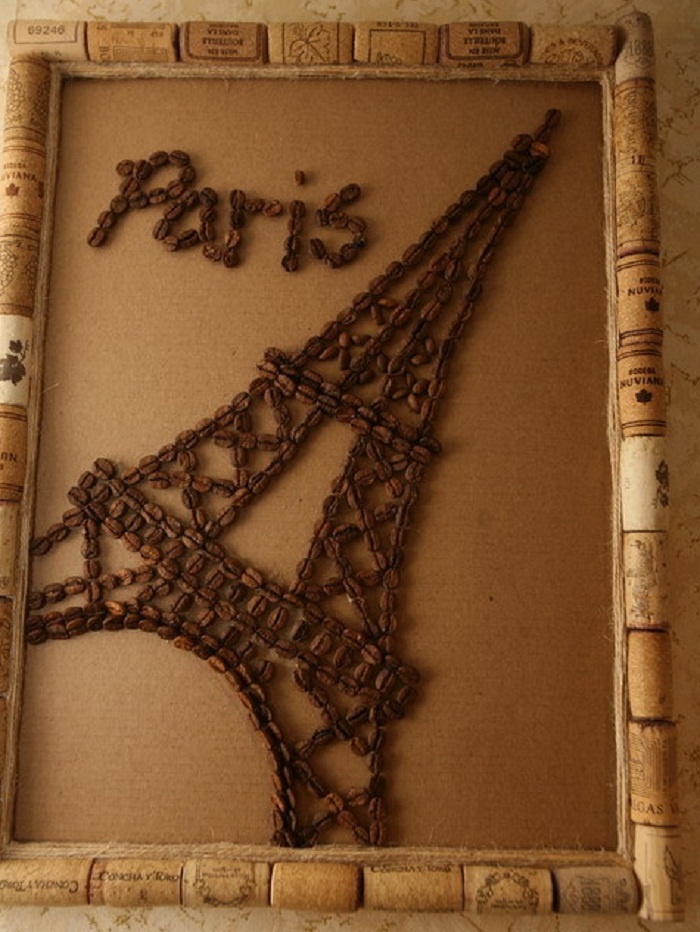
Once the last piece is attached and the glue has dried, you can insert the composition into the frame and enjoy the fruits of your labor.
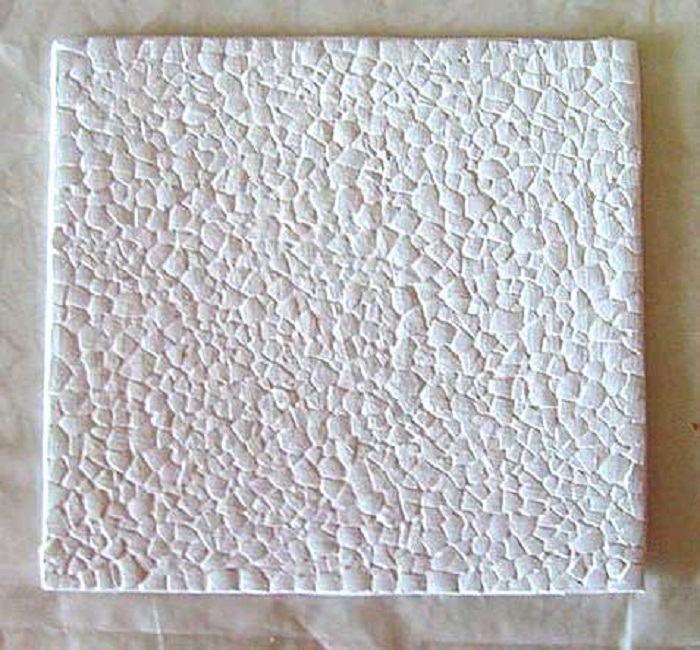
Ground coffee is refined and refined

Pictures for the kitchen can be made not only from coffee beans; ground coffee looks no worse. And some argue that compositions from ground coffee They are distinguished by sophistication and sophistication and look much more noble.
To make them you will need:
- Canvas or paper.
- Glue.
- Drawing template.
- Stationery knife.
- Frame.
Operating procedure:
Draw or copy the image you like.

Use a utility knife to cut out the gaps in the drawing. Try to do this as carefully as possible so that all cut lines are smooth.
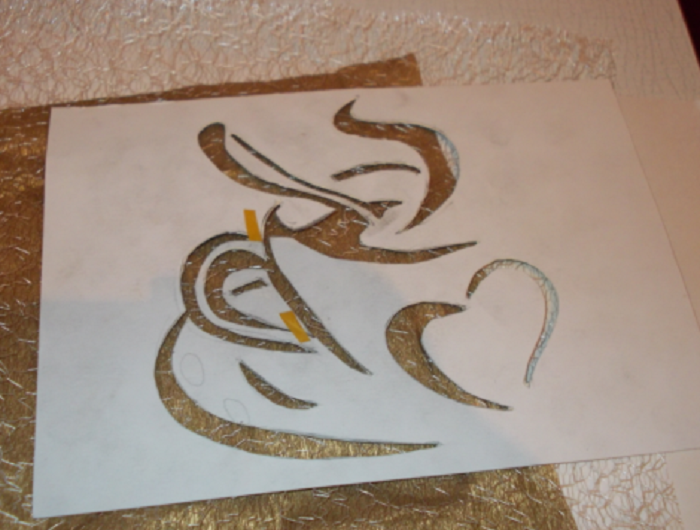
In this case, it is much better to first insert the canvas into the frame and only then begin to design the drawing. To prevent coffee powder from spilling during the fixing process.
Attach the template to the canvas and secure it with pins or masking tape. Fill the gaps with PVA glue and sprinkle generously with ground coffee.

Wait for the glue to dry and remove the template. All that remains is to hang the picture in its permanent place.

Don't be afraid to experiment, combine coffee beans with a variety of spices and kitchen appliances. And soon you will become the owner of a single copy of a unique designer painting.


Pasta as decoration

In a similar way, you can make pasta paintings.


Today you can find pasta of the most bizarre shapes on sale. You can purchase colored products or paint them yourself at home.

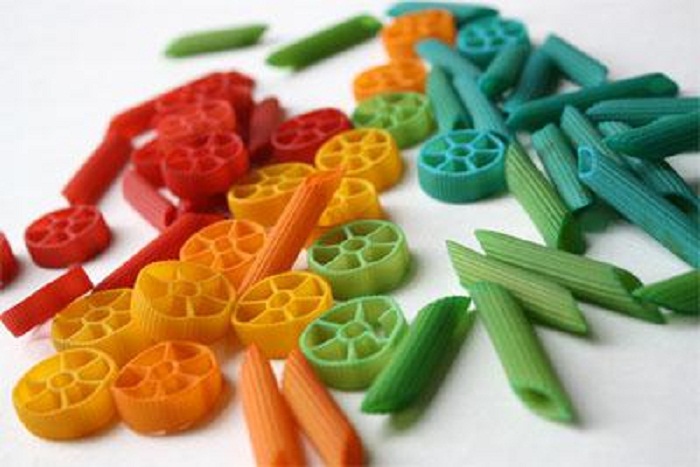
It all depends on personal preferences; the picture can be made bright and colorful, or, on the contrary, consistent in the same color scheme.
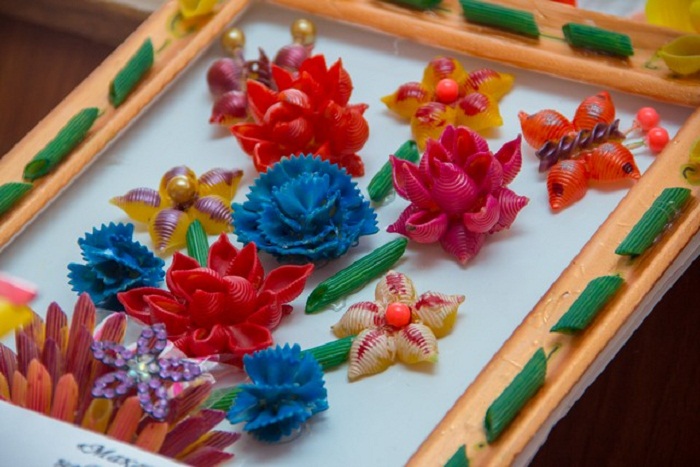


In the case of pasta, the great thing is that they can act not only as a compositional spot. Combining several different forms, you can make an unusual openwork frame or base.

Second life of eggshell

If you like mosaic paintings, we suggest you consider a few from the shell chicken eggs. Surprisingly, such material, unsightly at first glance, can become a real masterpiece after passing through the hands of a master.


And if you think that only a talented artist can make such a picture, we will hasten to dissuade you. Such crafts are made by children in arts and crafts studios. Therefore, with some patience, accuracy and perseverance, you will probably be able to create a similar picture for your kitchen.

First of all, you need to decide on the color scheme. If you prefer pastel shades, then unpainted shells will do just fine. But if you are a lover of everything bright, catchy and colorful, then you should paint it.

If you do not want the painting to have an unpleasant specific aroma, separate a thin film from the inside of the shell.

Draw the outlines of the future composition on thick cardboard. Lubricate each area of the design with PVA glue and lay out pieces of shells.

The work is long and painstaking. It is very important that the distances between the fragments are the same, this way it will be possible to achieve a uniform texture.

Egg decoupage
For those who do not have excessive perseverance, we suggest you master the technique of unusual decoupage.
Prepare for work:
- Napkins.
- Transparent file.
- Plywood base or plate.
- PVA glue.
- A brush.
- Varnish for decoupage.
- Eggshell.
Operating procedure:
Cover the plywood base with a layer of glue and place a layer of shell on the surface.
Separate the top layer from the napkin.
To avoid difficulties when smoothing the napkin over the shell, it is better to use the lazy decoupage method using a file. To do this, lay out the drawing on a transparent file, back side up. Pour water on top and smooth out any wrinkles with a brush.
Now attach the napkin to the prepared egg preparation, film side up. Press gently from above; it is most convenient to simply run a rag over the surface of the file from the center to the edges. Then carefully remove the file.

Dilute PVA glue with water in a 1:1 ratio and brush the entire napkin from the front side with a brush.


Dry well and varnish.


We hope you were able to choose an idea for decorating your kitchen. And soon a new painting will appear on the wall of your house, which will surely delight you. Perhaps it will help you discover your artistic talents, and in the future you will be able to boast of many interesting original works.
If you don't have much time to master complex crafts, try mastering paintings and crafts using ground coffee. It's simple, flavorful, exciting and very beautiful!
Everyone knows that you can create coffee, but few have heard that ground coffee is used as a material for creativity. Meanwhile, fragrant powder Great for complementing other types of needlework, decorating figures made from coffee beans and for independent use. We have no doubt that you will like crafts and paintings made from ground coffee; even a girl who has never had a penchant for coffee can draw them with her own hands.
![]()
Who invented drawing coffee and who needs it
Unfortunately, it is unknown who came up with the idea of painting with coffee powder. But this hobby can be put on a par with painting with salt and creating paintings from bulk materials. Perhaps the first coffee painting gave the world a coffee lover who did not like the taste of a new type of coffee, and he decided to dispose of the product this way in an original way. However, the world is gradually conquering this fragrant art. Some cities already host drawing competitions, and at crafts fairs it’s easy to buy a painting or panel.
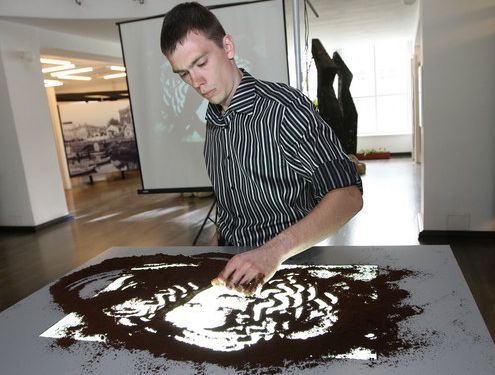
Who is this hobby suitable for? We can safely say that everyone! There are practically no costs, little time is spent, and the result almost always lives up to expectations! For example, it takes several days to create a butterfly on a napkin, but creating a coffee masterpiece will take less than an hour!
Paintings from ground coffee: features of the technique and first steps
For drawing you don’t need to buy, which we have already told about to readers who are passionate about this an invigorating drink. The cheapest finely ground product recommended by the manufacturer for brewing in a cup or Turk will do just fine.
You won’t need brushes to create masterpieces, but you will need to find a drawing stencil, for which a children’s coloring book or the outlines of images on the Internet will be quite suitable. Carefully cut out the image so that after filling the internal space, you get a recognizable and desired motif. To start, take something simple: a butterfly, a leaf, a flower.


Funny bear

As a basis for the picture, you can take a board, thick cardboard, glass, or plywood. Select white wallpaper or suitable paper and paste the background onto the base. After this, carefully transfer the stencil onto the paper and cover the places that need to be painted with PVA glue.
Then everything is simple - sprinkle coffee on the glued areas, let the masterpiece dry and blow off the remains. If desired, the picture can be supplemented with whole coffee beans, rhinestones, beads and other suitable elements.
Crafts made from ground coffee - simple and aromatic
Having mastered the simple technique of drawing pictures with ground coffee, you can move on to more complex crafts. Feel free to create panels on fabric, decorate napkins with spectacular designs, decorate dishes, bottles, vases, flower pots, candlesticks, and boxes. Always choose a clear adhesive that is suitable for the base material.
Coffee powder can be used for decoration easter eggs(real and decorative), topiary balls, which are much easier to make than covering the base with grains, creating stylish valentines and much more.
Panel on fabric
If nothing comes of drawing and decorating figures, don’t despair. You will definitely get aromatic crafts from ground coffee if you use this delicious raw material to fill miniature soft toys and aromatherapy pillows. Also this healthy ingredient can be used in cream making. As a last resort, you can always recycle coffee powder in the bathroom by preparing coffee with it. effective scrub for the body.
Be sure to check it out and choose another hobby for your soul!
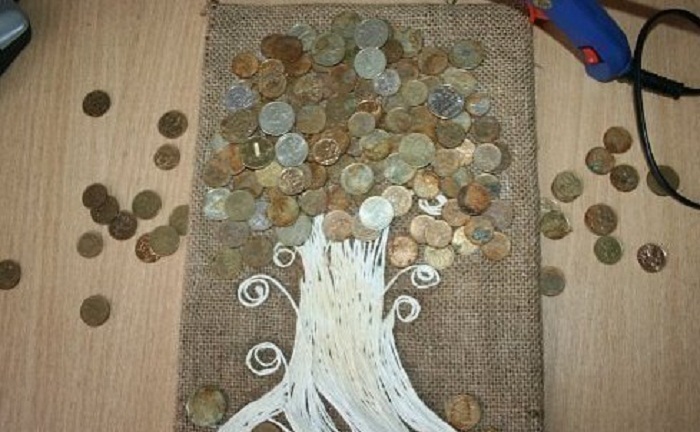
Coffee is considered one of the most famous drinks the world, and its smell is the most recognizable. Today, the popularity of coffee beans is not only in the feeling of vigor that they can give us after taking aromatic drink, but also that from these small elements you can make an extraordinary picture. A coffee panel will not only decorate your room, but will also become a source of an extraordinary coffee aroma. If you follow our instructions, do DIY coffee panel very simple.
Materials for making coffee panels:
- base for adhesive coffee beans(V in this case this is a bottle);
- coffee beans;
- ground coffee;
- frame;
- glue;
- cardboard;
- scotch;
- gouache;
- brush;
-decorative fittings
1. The bottom of the bottle is cut off, then the neck, and the remaining part must be cut in half, and only one half must be used in your craft.

2. Using the shape of this part, cut out a piece of cardboard that matches the shape of the cup. Make a saucer for this cup from cardboard. We attach cardboard to the plastic, and then cover the resulting “cup” with masking tape. This is done so that the grains stick firmly to the cup.

3. Paint the cup with brown gouache so that gaps are not visible when the coffee is glued to it.
4. Now the main work is gluing coffee beans to this brown mug. This process is quite lengthy and labor-intensive. However, you need to approach it very responsibly so that no grain sticks past or protrudes beyond the edges of the cup. In addition, it is important to select the grains well and use only perfectly smooth grains.
Using the same principle, a saucer is glued with grains.
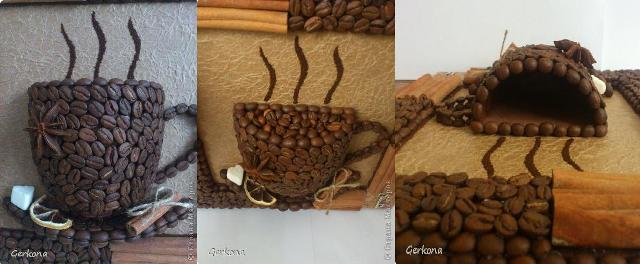
5. Next, we glue burlap to the base of the picture, and a cup and saucer sits on it with hot glue.
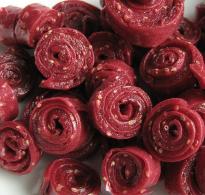
6. Now show your creativity to make the panel unique. A cinnamon stick wrapped in torn thread, a piece of lemon or orange zest, zest roses and much more looks beautiful on such a panel!

7. All that remains is to decorate the panel with ground coffee to create a coffee aroma. Sprinkle some coffee on the glue and make the desired pattern out of it.
Coffee bean panel ready. It can be used for the interior of a kitchen or cottage, and can also be presented as
Coffee connoisseurs have a special flair for any manifestation of aromas that are inherent in the beans. Many people love this drink and use it with pleasure. Find instant coffee and coffee beans are not a problem at all. It is difficult to imagine that this drink was once unknown and considered in short supply. The situation has changed; the variety of varieties and varieties will surprise even an inveterate coffee lover. Today we will conduct a master class on DIY crafts from coffee beans.
In this article we will talk about what crafts can be made from coffee beans simply and quickly, without any effort at all. special effort and enjoying the process of making them. After all, now coffee is widespread not only in culinary affairs, it is used in beauty salons, added to masks and scrubs for the skin. The army of fans of crafts made from coffee beans is constantly growing and therefore, it is necessary to describe in more detail the crafts made from coffee beans with your own hands.
![]()
Perhaps one of the most common gift crafts is topiary made from coffee beans. It is simple to make, does not require a lot of effort and energy, but is perfect for a birthday gift or just for interior decoration.

To make wood from coffee beans you need to have:
- coffee beans
- flower pot
- accessories for decorating the product
- stones to weigh down the pot
- earth for decoration
- any stick (you can take a strong tree branch from the street)
- foam base for the crown.
You will use these tools when making crafts from coffee beans. As you can see, there is nothing unusual. All components are available.
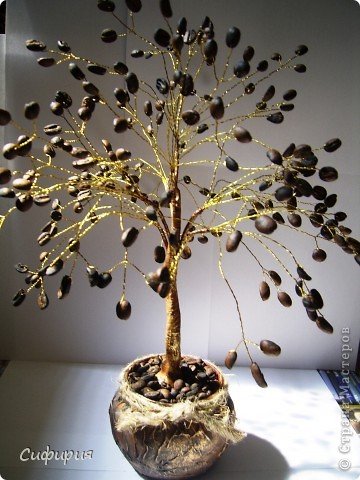
Step-by-step master class on making topiary from coffee beans:
- Attach the base to the stick. Check the strength of the structure.
- Using glue, construct a crown from coffee beans.
- When the crown is ready, firmly root the tree in the pot. First, secure the stones to the bottom, then sprinkle with earth.
- Complement with accessories.
Your coffee bean topiary is ready. Decorate your interior with this product and enjoy the wonderful aroma of coffee!
One of decorative crafts is a cup and saucer from which coffee beans are pouring out. She fascinates with her unusual presentation and at the same time, it pleases with its originality and smell.
From this article you will not only learn how to make such a decoration for your home, but also see photos and videos on this topic.
To make a craft in the form of a cup and saucer you need:
- cup
- saucer
- coffee beans
- wire.
Wire is required for the mug's weightless effect. The main idea of this product is to achieve unusual lightness and surprise others. The mug should hover over the cup, as if accidentally spilling coffee beans onto it.
Step by step instructions:
- Clean the mug and cup from excess dirt.
- From the wire you create a figure in the form of the letter “G”, where the upward blow is 5 cm, and the bottom is twisted into a ring. In the future, your cup will rest on the ring.
- Using glue, attach the wire to the cup with the ring facing down first. After top part to the mug. Wait for the glue to dry. If your glue has an instant action property, then proceed to the next step.
- Attach the grains with glue inside the mug, to the bottom of the cup and to the base of the wire. If this action causes you discomfort, then tightly wrap the wire with a cloth, or better yet, glue it. And then glue the grains onto the fabric.
- Decorate with accessories if desired.
The master class on making crafts from coffee beans with your own hands has come to an end. Your coffee bean craft is ready. Enjoy it!
Coffee drinks are always associated with vivacity and freshness. No wonder they say that a mug of coffee in the morning lifts your spirits and helps you wake up. And these properties of coffee beans are far from fiction.
The 19th century was a period of further spread of coffee. In this regard, a truly epoch-making event was the opening on November 17, 1869 of the shortest waterway between the ports of the Atlantic and Indian Oceans - the Suez Canal. This made it possible to reduce the route and time of cargo delivery from Asia to Europe by 8-15 thousand kilometers.

Although, coffee is like wild culture originates from Africa, but its cultivated Arabica variety began to be introduced into East African countries only at the end of the 19th century. In Kenya, this business was carried out by British settlers since 1878, in the former German East Africa (today's Tanzania) - since 1891 by German colonists. In 1887, the French founded the first coffee plantation in Vietnam, and in 1896 the British planted the first coffee trees in distant Australia.
Thus, by the beginning of the 20th century, coffee began to be cultivated on four of the seven continents:
- Australia;
- Asia;
- Africa;
- South America.
It has become mankind's favorite drink and has become one of the most prestigious products on the international market.

As we have already seen, coffee is not just a drink to lift your spirits. It can be made from huge amount beautiful and fragrant handmade products.
You can find out all the details from the video by following the links below: