How to make butter from cream at home. Homemade butter: recipe from milk, how to make from sour cream, benefits and harms
Natural butter, without the addition of vegetable fats, emulsifiers and other additives, is almost impossible to find. Many people are now asking the question: “How to test butter for naturalness at home?” If you still want the real thing homemade butter, you can cook it yourself. Homemade butter will be slightly different from store bought. Due to the fact that there are no emulsifiers in homemade oil, it is harder. There may also be more water in the butter, as it is difficult to completely extract at home. When stored for a long time, it begins to taste bitter, since it contains no preservatives. Typically, most butter is stored in the freezer. To make butter at home you need only natural cream. You need to whip the cream using a blender. You will also need some cold water to rinse the butter from the buttermilk. We hope you enjoy our this dairy product!
Ingredients for making homemade butter
Step-by-step preparation of homemade butter with photos

Use butter to make sandwiches, add to porridge and other dishes. Bon appetit
It is difficult to imagine a modern kitchen without butter; it is used in many dishes, not to mention a variety of sandwiches. Most housewives use a store-bought product, but you can make butter at home.
How to make butter from cream
Let's start with a classic and fairly simple recipe, for which you only need one ingredient - heavy cream (1.2-1.3 l).
How to cook:
- First of all, prepare the cream and a mixer (ideally a stationary one).
The cream should not be cold, so prepare it in advance, let it sit for half an hour at room temperature, and only then start cooking.
- Pour the product into the mixer bowl and cover (in several layers) with cling film. Cut a hole for the mixer blades.
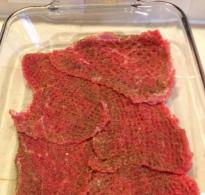
- Turn on the device and beat the mixture for about ten minutes. Don't set it to high speed right away, do it gradually. First, the mixture should become like foam, and then turn into a dense mass with yellowish splashes. When it looks like this, it means there is not much time left, beat for about 3-5 more minutes until the liquid (buttermilk) separates. The device can be turned off.
- Take a large colander and line it with gauze (you can use two layers).
- Pour the contents of the bowl into a colander (place a bowl underneath; buttermilk may be useful for baking). Wait until all the liquid has drained, this may take some time (5-10 minutes).
- Stir the mixture well until it becomes homogeneous.
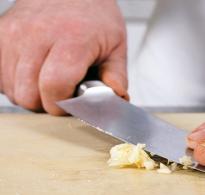
- Add spices to taste. Transfer to a convenient storage container and place in the refrigerator.
How to make butter from sour cream

Sometimes they use sour cream rather than cream to make butter, and it also turns out very tasty.
Ingredients:
- Salt - to taste;
- Pepper - to taste;
- Sour cream – 1 liter (homemade is best).
Preparation:
- Prepare everything you need. The sour cream should be fresh from the refrigerator.
- Place it in a bowl and start whisking it with a whisk (you can use a spoon).
- When the mixture begins to change color and consistency (it becomes grainy and yellowish), then it’s time to put the whisk aside and knead the mixture with your hands.
- The mixture should separate into a liquid and a fatty homogeneous mixture; when this happens, you need to drain the liquid into a separate bowl and rinse the future oil with water.
- Season the finished product with spices, place it in a convenient container, for example, a small plastic tray, and place it in the refrigerator.
Melted butter

Here is another option for delicious butter. To prepare, you will need oil made according to one of the above recipes or purchased in a store.
How to cook:
- Simply transfer the freshly prepared homemade butter into a saucepan, cut the store-bought butter into small pieces.
- Place in a water bath. It is best to simmer the product over very low heat, so it will not burn.
- Soon a kind of foam will begin to collect on top; it needs to be collected in a separate bowl.
- When the mixture stops foaming, you can turn off the heat and strain the contents. That's it, the oil is ready.
- We recommend using the collected foam for dumplings or dumplings.
Food processor instead of butter churn

Over the years, the process of making butter has become much easier; now you don’t need to spend a lot of time on a butter churn, just turn on the food processor and it will do almost all the work. To prepare butter in a food processor, all you need is desire, a food processor and high-fat cream.
How to cook:
- Pour the cream into the bowl. Add your favorite spices and salt to them. Dill and garlic will also come in handy. Mix well.
- Turn on the device and beat the mixture. Usually whisking takes 5 to 10 minutes. You will notice changes in color and also in the operation of the combine - it will start to run louder.
- When you see the above changes, you should turn off the device and taste the mixture. If it is already oil, then the job is done.
- Drain the buttermilk. Place the resulting oil in cheesecloth and squeeze thoroughly, then place in a convenient storage container and place in the refrigerator.
How to shape homemade butter

It's quite difficult to make homemade butter as perfect as store-bought butter, but you can try. The first option is to pour it into a small plastic tray, cool it in the refrigerator, and then carefully remove it, you will get an even square. You can also use a patterned mold, but keep in mind that it is much more difficult to remove the product from it than from a regular one.
To make the product as smooth as possible and free from excess buttermilk, place it in a bowl (slightly larger than the contents) and toss it up, the surface will immediately become smoother.
What are the benefits of butter?

Surely, you have heard a lot about the beneficial properties of butter. The most important thing is vitamin A. This is one of the most important vitamins that our body needs. It is worth noting that all oils are devoid of it, with the exception of butter. Among other things, it is useful for colds, as well as diseases of the kidneys and gastrointestinal tract. Of course, we should not forget that moderation is important in everything; you should not eat a lot of butter, especially at one meal.
That's all for now, be sure to prepare your butter at home. You will succeed, the main thing is to believe in yourself and follow our advice. Bon appetit!
Homemade butter evokes an association with childhood; you will never forget that delicate taste of a piece of butter. Involuntarily, everyone remembers the painfully familiar wooden tub of sour cream. Everyone who keeps cows and goats asks the question: “How to make homemade butter?”
Homemade butter from cream
Homemade oil is, first of all, a natural product that you will not find on store shelves. Manufacturers can make high-quality oil, but they are not prohibited from adding dyes, preservatives, emulsifiers and other substances.
You can make butter from cream at home in 10 minutes without any effort. To prepare a healthy product you will need 300 ml of cream, the output will be approximately 80-100 grams of butter. Let's look at the recipe step by step:
- Preparation of ingredients. Skim the cream from homemade full-fat milk using a mini ladle or a regular tablespoon. Pour the cream into a half-liter jar, but the cream should occupy no more than two-thirds of the container. Close the jar.
- Forming a piece. Start whipping the butter: to do this, turn the container over so that the liquid inside hits the bottom and the lid alternately. The whipping process takes up to 10 minutes; the procedure must be stopped when pieces of butter form on the glass. The result should be a piece of creamy product.
- Oil washing. Drain the jar and rinse the oil with cold water until the water runs clear.
- Lightly salt the butter, wrap it in foil and put it in the refrigerator - this will keep it longer.
Please note: skim milk should be at room temperature. If you whip warm cream, the butter will turn out liquid; cold cream, in turn, will whip for a long time.
Problems with self-cooking
When whipping butter at home, you may encounter the following problems:
- Sour taste. If the butter does not taste fresh, there is only one reason - the milk was over-seasoned before collecting the cream;
- Soft butter. Incorrect cream temperature selected;
- Liquid is released. The salt has not been pressed out well or the salt has been absorbed unevenly.
Advice! Buttermilk is ideal for baking or making ricotta cheese.
Butter churn to the rescue
Not everyone can beat a natural product on their own, but butter in a churn is a win-win option. To prepare you will need:
- Cream. The main ingredient that needs to be kept cool for several days, but not more than 72 hours.
- Separator. Using this device, cream is separated from milk; it can be used either manually or automatically.
- Churn. Homemade butter in a churn turns out elastic, tasty and tender.
Separate the cream from the milk using a separator, let it settle, then pour it into the churn and turn it on. In half an hour the oil will be ready. After whipping, it is not recommended to immediately take out the butter; you need to leave it for a few minutes so that the buttermilk has time to drain. It is better to wash the resulting product with milk so that the taste is not lost.
The container for sealing must be dry and clean, rubbed inside with salt. For long-term storage, melt the butter in a cast-iron bowl and skim off the resulting foam with a wooden spoon. When the oil becomes transparent, this is the final sign of readiness.
Goat milk butter
Many goat farmers ask the question: “How to make butter from goat milk.” It's no secret that not everyone succeeds in churning butter from goat milk. The problem is that it sits for a long time and it is difficult to get sour cream from it. Experienced goat breeders have developed a beating method against all odds.
First, after milking, boil the milk well, put it in a cool place, and after two days the cream should form, from which the butter should be whipped.
In our online store there is a butter churn, which you can buy at an attractive price on favorable terms. When we are asked the question: “How to make butter?”, we confidently answer “very simple, if you have a butter churn at hand.” Placing an order is completed in a few clicks, delivery is carried out in any convenient way. You will also find other interesting products here.
If you make butter from fresh cream, the buttermilk left after churning will be sweet. If the cream is no longer so fresh, but old, it will be sour.
Butter
Both types of buttermilk are used to prepare different types of bread products, muffins, some soups and fruit drinks.
The quality - taste, color, smell of cream - depends, first of all, on the cow's pasture. Milk can be very sweet or unsweetened, and its taste can change throughout the year - we noticed from the neighbor’s cow, whose milk we always take. :-)
Whatever milk you use to make homemade unsalted butter, it will always turn out great. It would be good, fresh milk, but what taste it has is not so important here. :-)
In India, butter is still churned almost the same way as thousands of years ago. Fill a large clay pot halfway with aged cream collected over several days. Then, using a special device (it consists of sticks and ropes fastened together), a wooden whorl is manually rotated, due to which the grains of oil are knocked together into flakes. Today, a food processor has greatly simplified the process of churning butter. You can quickly whip up one or two liters of cream in one go.
Churn.
If you only have homemade milk (and not ready-made cream), you will have to first get the cream, and then the butter. The cream forms by itself, rising to the surface of the milk, which should be carefully collected with a spoon or slotted spoon. But before infusing the milk, you need to strain and cool it, and then pour it into a wide container. And then you can beat the butter by hand or using a mixer or blender.
Another great invention - separator: cutting off heavy cream from milk. We haven’t tried using it yet, but we’re looking into it. It makes the process of extracting cream from milk very easy. .
The milk in the separator (cream separator) is poured into the drum, which begins to spin. Under the influence of inertia, the liquid is pressed against the walls, displacing fat towards the center. The cream collects in the middle of the drum, and the skim milk collects near the walls. Thus, the two products are separated from each other, flowing out through their own tubes. With the help of a separator, excess liquid is removed and only the oil remains, but if you beat it manually, you will also have to infuse and squeeze to drain the excess liquid, and this is a long process.
There are also separators for oil - they are similar in principle to cream separators. Only fluid is removed, and the fat rolls in the separator until it forms an oil lump.
An old grandmother's method is to churn butter using a simple device called a butter churn. First, churning - continuously moving the pestle up and down. Then pour the contents into a bowl of cold water.
Butter mold.
We collect the oil that has floated to the surface with a large wooden spoon and place it tightly in a special wooden mold with a tricky bottom. Cover the mold with a lid and place it overnight in the cold in the glacier, in the basement. In the morning, take out a block of butter with an unusually delicate taste. :-)
Wood for churn and molding is best used birch. The oil will be fragrant and store well. Probably, molding can be done from birch bark.
Cooking this way is perhaps the best thing - hand churning gives the butter something that no mixer can give.
Cooking time for butter in a food processor or mixer: about 10-20 minutes.
Yield: 570-800 g of butter from 1 liter of cream.
Melted butter
Take cream cooled to about 15°C. Insert the metal whipping attachment into a food processor, pour in the cream, close and turn on. As you churn, the cream becomes thicker and thicker, and eventually grains of butter begin to separate. Add ice water (about 125 ml) and crushed ice (a couple of cubes) - this will help the butter churn into large lumps.
Drain the buttermilk and use your hands to squeeze the whey out of the butter. Rinse the cleaned lump of butter under running very cold water and place it for storage in a container with a tight-fitting lid.
If you want, you can make salted butter: add regular salt or seasoned salt for flavor. The butter can be stored in the freezer, unopened, for up to three months. Or you can melt it - make ghee - then it can be stored for six months even in the room.
Instead of a food processor, you can use an electric mixer or mixer. A grandmother in a neighboring village who keeps goats (the milk is rich and very tasty) does it quite simply: she collects the cream in a jar, then closes it with a lid and shakes the jar in her hands for several minutes. The oil is excellent. :-) So goat milk also produces excellent butter.
Butter is the most valuable food product. The main types of butter contain 81,582.5% milk fat and no more than 16% water, in which a small amount of proteins, carbohydrates and mineral salts are dissolved. The high taste and structure of butter ensure its good digestibility (up to 98.5%). The high calorie content (6.6-7.5 kcal per 1 g) and the content of vitamins A and D determine the value of butter as a food product. However, it contains relatively few polyunsaturated fatty acids (no more than 5%), therefore, with a balanced diet, it is necessary to combine it with liquid vegetable oils
WikiHow works like a wiki, which means that many of our articles are written by multiple authors. During the creation of this article, 50 people, including anonymously, worked to edit and improve it.
Number of sources used in this article: . You will find a list of them at the bottom of the page.
Homemade butter tastes noticeably better than commercially produced butter, and it only takes 20 minutes of work to make. To give the butter a special flavor, which it does not naturally acquire in all regions, add fermented milk bacterial cultures to the cream to make it more sour.
Ingredients
Heavy cream
Bacteria for buttermilk extraction, yoghurt or mesophilic cultures (optional)
Salt (optional)
Finely chopped herbs, garlic or honey (optional)
Steps
Part 1
Preparing the cream- Do not use cream with added sugar.
- The cream's fat percentage will tell you how much butter you can get from it. It is recommended to take cream with at least 35% fat content.
- To find local sellers of fresh natural cream, you can try looking for advertisements in local newspapers and notice boards.
-
If you will be using an electric mixer, chill the large mixing bowl as well as the container of water. A cold bowl will keep the butter from melting. A second cool container of water may also be helpful at this stage, especially if the tap water comes out warm.
Pour the cream into a bowl. Do not fill the bowl to the brim as the cream will expand to include air bubbles before it turns into butter.
Add bacterial cultures to the cream to enhance the flavor and make the butter easier to whip (optional). If you skip this step, you will end up with “sweet butter,” which is what is sold in the vast majority of cases in stores. If you want to give the butter a more pronounced taste, which it has in continental Europe, add some lactic acid bacteria to the cream to create "sour butter". Lactic acid bacteria accelerate the breakdown of fat and liquid, which reduces the time of churning the butter.
Let the bacteria-inoculated cream sit at room temperature. If you have added fermented milk cultures to the cream, leave it at room temperature for 12-72 hours, checking its condition every few hours. Cream that has begun to sour will become a little thicker, foamier, and acquire a sour or pungent odor.
Part 2
Extracting butter from cream-
Whip the cream. If you have a butter churn, rotate the crank for about 5-10 minutes. A high-quality butter churn will whip cream into butter quite easily and effectively. If you have an electric mixer, use the whisk attachment and run the mixer on low to prevent splattering. Otherwise, seal the cream in a glass jar and shake it. If a mixer usually whips cream in 3-10 minutes, then shaking in a jar produces butter in about 10-20 minutes.
- To speed up the extraction of oil by shaking, first add a small clean glass ball to the jar.
- If your mixer only has one speed, cover the bowl of cream with cling film to prevent splatters from flying around.
-
Watch how the cream changes consistency. During the whipping process, the cream will go through several stages.
- At first they will become foamy or slightly thicker.
- Then the cream will begin to hold its soft peak shape. When you remove the cream from the mixer, there will be a slight rise on its surface with a sloping top. It is at this moment that you can increase the rotation speed of the mixer.
- The whipped cream will then form an elastic texture.
- Next, the cream will become grainy and take on a very pale yellowish tint. Reduce the speed of the appliance before the cream starts to separate to prevent splashing.
- Eventually, there will be a sudden splitting of the cream into butter and buttermilk.
-
Drain the resulting buttermilk into a separate container and save it for use in other recipes. Continue to knead the butter and drain the liquid as it appears. Stop creaming the butter when the mixture looks and tastes like butter, or when the liquid stops coming out of it.
-
Start by getting fresh heavy cream. Heavy whipping cream has the highest fat percentage, making it easier to successfully turn it into butter. To give your homemade butter a unique flavor that store-bought butter lacks, try purchasing fresh, raw cream at your local farmer's market. If this is not possible, among the remaining options, the best taste will be butter from long-term pasteurization cream (for 30 minutes at a temperature of 63-65 ° C), followed by butter from short-term pasteurization cream (for 15-20 seconds at a temperature of 72-75 °C) and the last one will be butter made from ultra-pasteurized cream (instant heating to 85-90°C without holding).