Make a cream cake decoration with a syringe. Recipes that are acceptable for decorating any cakes with a piping bag
Cream for decorating a cake, prepared according to the necessary rules and recommendations, will make a homemade dessert a spectacular and worthy addition to a festive feast. With it, you can not only beautifully decorate the delicacy, but also mask the flaws that formed during the baking of the cakes.
How to make cream for decorating a cake?
To make a long-lasting cake decorating cream, it is important to follow a good recipe and know some of the intricacies of technology. Almost any filling option can be thickened and used to decorate cakes.
- Sour cream or cottage cheese cream for decorating a cake keeps its shape well if you add a special thickening powder to its composition. It will be difficult to make roses from it, but a minimal beautiful design is very possible.
- Protein cream is the most demanding in preparation, therefore it is necessary to make it taking into account all the recommendations. He is the most malleable in creating all kinds of shapes.
- Cream cheese always turns out thick and dense, but Philadelphia and mascarpone are not available to everyone. You can use any cream cheese that you can find in the store.
- The recipe for a successful cream for decorating a cake can actually be created on any basis by adding good oil to the composition, thickening with gelatin or a special powder.

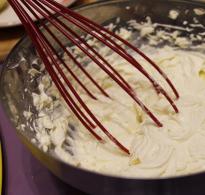
Wet meringue is the perfect protein cream for decorating a cake. You need to take responsibility for the preparation of ingredients. Separate the proteins, carefully making sure that particles of the yolk or shell do not get into the total mass. The cream is whipped, adding powder gradually, and it is recommended to use a purchased sweetener, do not grind it yourself.
Ingredients:
- squirrels - 5 pcs.;
- powder - 400 g;
- lemon juice - 1 tsp
Cooking
- Proteins use room temperature. Start whipping, adding powder.
- Put in a water bath, wait for the powder to dissolve, without ceasing to beat.
- Continuing the stroke of the device, remove from heat, pour in the lemon juice and beat until firm, smooth peaks.
- Use this cream immediately to decorate the cake.

For decorating a cake, it is very easy to prepare, does not require complex ingredients and holds its shape perfectly. All kinds of figures are excellently obtained from it, it is important to use it very chilled. The finished cream should be lush, light, smooth and shiny.
Ingredients:
- oil 82.5% - 400 g;
- powder - 2 tbsp.;
- milk - ½ tbsp.
Cooking
- Beat soft butter with sugar until light in mass at low speed of the mixer.
- Pour in milk at high speed.
- Refrigerate before use.

This cream recipe for decorating a cake with a pastry bag will do. Charlotte, in the classic version, is not very dense, rather, on the contrary, it is light, delicate, therefore it will be difficult to make flowers and other figures from it. To thicken the cream, brew the mass a little longer and add more butter. Desserts are decorated with heavily chilled cream.
Ingredients:
- yolks - 5 pcs.;
- powder - 200 g;
- milk - 150 ml;
- oil 82.5% - 250 g.
Cooking
- Bring milk and sugar to a boil.
- Grind the yolks, add a thin stream to hot milk, beat the mass with a mixer. Bring to a boil over low heat.
- Cool the cream to room temperature.
- Beat soft butter until white fluffy mass.
- Pour the gradually cooled milk base into the oil base, continuing the mixer.
- to decorate the cake should be smooth, shiny and airy.

This cake decorating cream recipe is more like thick icing or ganache. As it cools, it becomes thick and dense. When making it, you need to take into account that the more chocolate contains cocoa beans, the better and faster the cream will thicken. Cream is needed as fat as possible 33-35% or special confectionery.
Ingredients:
- dark chocolate - 200 g;
- confectionery cream - 120 ml;
- powder - 70 g.
Cooking
- In a saucepan, warm the cream with powder, do not boil.
- Throw the broken chocolate into the liquid mass, mix well until the pieces dissolve.
- Chocolate cream for decorating the cake is used chilled.

To avoid difficulties and prepare the perfect one, use confectionery cream or vegetable. They are perfectly whipped, do not delaminate, are easy to color and flavor. So that the mass does not come out too cloying, you can add a small pinch of citric acid, it will balance the taste well.
Ingredients:
- cream 33-35% - 400 ml;
- powder - 150 g;
- citric acid - a small pinch.
Cooking
- Whip the chilled cream until fluffy, sprinkling powder and lemon.
- Beat on high speed until stiff peaks.
- Use this cake decorating cream right away.

Dense and smooth for decorating a cake, it has long established itself in the design of biscuit desserts. It does not impregnate cakes well, but it will cope with the design of homemade treats perfectly. Its taste is not sugary at all, the consistency is always smooth, it lends itself well to coloring.
Ingredients:
- cream 35% - 100 ml;
- mascarpone - 250 g;
- powder - 50 g.
Cooking
- The chilled cream is whipped to peaks.
- Pour in the powder.
- Continuing the course of the corollas, mascarpone is introduced.
- Beat and apply cream cheese to decorate the cake immediately.

The whitest cream for decorating a cake is cottage cheese. It comes out dense, keeps its shape well, but for its preparation you need a smooth, smooth curd mass without any grains. The use of crystalline sugar is not recommended, it melts during whipping and the mass becomes less dense. Use purchased powdered sugar, starch is often added to its composition, it will have a beneficial effect on the quality of the finished cream.
Ingredients:
- curd mass - 500 g;
- powder - 150 g;
- oil 82.5% - 150 g.
Cooking
- Beat the butter until white, adding powder.
- Enter the curd mass, beat until fluffy.
- Use the cream completely chilled.

An ideal thick cream for decorating a cake is marshmallow. It is not at all difficult to prepare, and if you need to create a relief pattern on a confectionery product, this is the best recipe. He is able to transform even the most modest dessert, complementing the delicacy with an original look and delicious taste. Two ingredients are enough to make it - marshmallows and butter.
Ingredients:
- marshmallows - 10 halves;
- oil 82.5% - 150 g.
Cooking
- Melt marshmallows in a water bath and in a microwave oven.
- Beat marshmallow mass, adding oil.
- The cream hardens instantly!

Armed with a good and suitable recipe, decorating cakes with cream at home will not seem such an overwhelming task. You can make a dessert without special equipment.
- Protein cream keeps its shape well, so the most beautiful figures work out of it. Passing a special burner over the surface of the cake, you will get an excellent decor in the form of caramel meringue.
- To decorate the cake with butter cream, you will need a pastry bag or a syringe. All kinds of spatulas will help to effectively decorate the sides of the cake.
- Cream cheese is perfect for decorating bare cakes. Looks especially good with chocolate and red biscuits.
- Charlotte cream is suitable for decorating simple flowers and decorating the sides of the cake.
- To decorate the cake with chocolate cream, you can use a thick cream or ganache in the process, which is used to smooth the surface or form smudges.
- Thick curd cream keeps its shape perfectly and will fit both for a layer of cakes and for a spectacular dessert design.
- Marshmallow cream is prepared easier than any other, while it keeps its shape perfectly and freezes instantly. Using different nozzles for a pastry bag, you can decorate your homemade product in an unusual way.


Original ideas for decorating a cake with cream

Beautiful option for decorating the cake with cream

Interesting ideas for decorating a cake with buttercream


Beautiful cream cake decoration


Cream cheese for decorating a cake - the best way to decorate a dessert

Mascarpone cream for decorating the cake keeps its shape well

Beautiful cake decorated with cream cheese


Light cream charlotte for cake decoration

Delicious and thick cream for a beautiful cake decoration


Cream ganache for a beautiful cake decoration

How to decorate a cake with chocolate cream in an original way?

An unusual option for decorating a cake with chocolate cream


A good way to decorate a cake is to decorate with curd cream

Thick curd cream for cake decoration


Beautiful cake decorated with marshmallow cream

Original cake decoration with marshmallow cream

From a syringe. Recipes for such delicacies may include various components. The main thing is that they take the shape given to them well and keep it after a slight cooling.
Cream Jewelry: Detailed Cooking Recipes
There is nothing tastier than homemade cake. Made with love and delicious smelling pastries are sure to decorate any holiday table. But to make a homemade cake really beautiful, you should try quite hard. After all, this requires separately preparing the cream, and then correctly applying it to the surface of the formed dessert.
Classic Butter Cream
Surely, many housewives know how to make a classic cream for decorating cakes from a syringe. As a rule, it includes the following components:
- butter as fresh as possible - about 200 g;
- powdered sugar (you can just fine sugar) - 8 large spoons.
The process of making buttercream
Oil cream for a syringe is surprisingly quick and easy to make. To begin with, you should remove it from the refrigerator in advance and wait for it to completely soften. Next, the oil must be placed in a blender and beat strongly (at the highest speed), gradually adding powder or sugar.
As a result of the described actions, you should get a lush and airy cream for decorating cakes from a syringe. By the way, it is also suitable as a base for mastic.

If you need to get a multi-colored cream, then it should first be divided into parts, and then mixed with food coloring. In the absence of such, you can use chocolate icing, carrot or beetroot juice, etc.
Making protein cream
To decorate cakes from a syringe, it holds its shape worse than oil. But if you try, then with such a mass you can originally decorate the side parts of the dessert, as well as make a relief edging.
So, we need:
- egg whites - from 4 large eggs;
- fine sugar - a full glass (a little more can be);
- lemon juice - a couple of drops.
Food preparation
It is made as simply and easily as oil. First, carefully separate the egg whites from the yolks, and then place them in the refrigerator for a while. After ¼ hour, the product must be removed, put into a deep bowl, pre-lubricated with lemon juice, and start beating. This procedure can be carried out in three different ways:

The first option is the most reliable. With a hand whisk, you can make a fairly fluffy and stable protein mass that will hold its shape well. However, the main disadvantage of this method is that during the beating of proteins, great physical effort is required.
As for the mixer and blender, you can also get stable foam with them. Although for this you will need quite powerful devices with a large number of revolutions per minute.
Cooking method
After the egg whites are cooled, they should immediately start whipping. It is recommended to do this quickly. Periodically, sugar must be added to the product. Moreover, the more it is, the more magnificent and stable the cream will turn out.
It should be especially noted that for the preparation of the protein mass, it is required to use granulated sugar, and not powder. After all, the last ingredient melts quickly and makes the cream more liquid, which is not at all suitable for decorating a cake.
for cake
If you decide to make a chocolate cake, then ganache will serve well as its decoration. To prepare such an unusual cream, you should purchase:

cooking ganache
To make chocolate cream to decorate a homemade dessert, pour heavy cream into a large bowl, and then heat it up to high, but do not bring to a boil. Next, to the dairy product, you need to put chocolate and butter broken into slices. It is recommended to heat these components until they completely melt. In conclusion, the resulting mixture should be removed from the stove, cool and refrigerate for 4 hours (preferably overnight).
After the specified time has passed, the cream must be removed, kept at room temperature for about 10 minutes, and then proceed to decorate the homemade dessert.
Receptions and techniques in decorating cakes
There are many tricks and techniques with which you can decorate any dessert. The most popular among modern housewives is the culinary syringe. It is very easy to use and not expensive. To use it to decorate a homemade cake, you just need to fill the container with the selected cream (oil, protein, chocolate, etc.), and then squeeze the formed treat onto the surface. If you need to get an original drawing (for example, flowers, petals, etc.), then you can use special nozzles that are usually included in the kit.
As you can see, decorating a cake with the help is quite easy. But if you need to cover the dessert with more complex figures, then for this we recommend using not cream, but mastic or protein caramel. Making them at home is easy and simple. To do this, you just need to strictly follow all the requirements of the recipe and have a creative imagination.

Summing up
Now you know which creams are suitable for decorating a homemade cake or pastries beautifully. If you do not have a syringe available, then you can use regular office paper instead. A bag of small sizes should be made from it, and then the tip of the desired thickness and shape should be cut off. With such a device, you will definitely get the same original desserts as with a special confectionery syringe.
The first step is to prepare the cream itself and paint it in the desired colors. For our butter cream, it was necessary to beat 250 grams of soft butter until white, then in portions, without stopping the mixer, add three cups of sifted powdered sugar and pour in a couple of tablespoons of milk.
After coloring portions of the cream, distribute them into pastry bags, and if there are no pastry bags, then simple tight zip-lock bags will do.
The selected confectionery product, whether it be a cake, a cake, a cupcake or a cookie, is also covered with a layer of cream, chocolate or sugar icing in a contrasting color with respect to the chosen decor.
When all the preparatory operations are completed, you can begin to practice. You should not expect a special variety from decor without special nozzles, but it is quite possible to reproduce classic flowers and cream petals.
For the first tiny flowers, tuck the tip of the piping bag and cut the fold vertically.

With the end of the bag perpendicular to the surface of the area to be decorated, begin to deposit small portions of the cream, rotating the dessert so that the petals overlap each other, uniting into a whole flower. Dispense portions of the cream quickly and interrupt them with sharp movements. In the center of the flower, drip a little cream of a different color or put a round candy, imitating the receptacle.

Such chrysanthemums are not more difficult, but take more time. Cut off the corner of the pastry bag as shown in the diagram.

Place the bag cut side down at a 45 degree angle to the surface. Dispense a small amount of cream, and then jerk the bag back.

Now the most classic cream decor is roses. They are the easiest to make. The end of the bag is folded and cut in the same way as in the first case, but instead of cuts on both sides, it is necessary to make them on four sides, re-straightening and again folding the end in the other direction. The cuts must be as uniform as possible.

Hold the bag perpendicular and rotate the object to be decorated until you get the desired bud size. Having reached the center of the bud, lift the bag up with a sharp movement.

Modern pastry bags presented in the Tortlandia online store are highly durable and practical. For those who do not want to spend time washing tools from the cream, disposable bags have been created. Reusable products can be washed and reused.
A variety of nozzles allows you to create exquisite patterns of various sizes. To decorate a confectionery product with roses, you will need:
- pastry bag,
- round small nozzle,
- nozzle with a flat tip.
How to choose a pastry bag nozzle
Only 5-6 nozzles of different shapes and sizes allow you to create a variety of cream flowers. A confectioner who decorates cakes can be recommended to purchase:
- round nozzles- small and medium (large ones are used to shape eclairs, profiteroles and choux buns);
- flat nozzles- with the help of small ones it is convenient to create chrysanthemum petals, medium and large ones are suitable for decorating cakes with peonies and roses.
How to make cream for decorating a cake
The best option is an oil cream. It is easy to cook, it easily takes the desired shape, while holding it well.
To prepare butter cream, you need to take:
- 250 g butter,
- 3 cups powdered sugar
- 1-2 tablespoons of milk
- food coloring (if necessary).
The listed ingredients are whipped with a mixer, at medium speed, for 5 minutes. It is useful to remember that at room temperature the oil cream is more plastic, has a pleasant sheen, but easily loses its relief shape and floats. The cooled cream has a matte tint, is denser and holds its shape well.
To make the confection bright, use several pastry bags, filling them with cream of different shades. Contrasting colors look best.
Making cream roses

To start decorating the cake, you need to put on the selected nozzle and fill the pastry bag with cream. It is recommended to hold the nozzle with your left hand, and squeeze the cream out of the bag with your right.
The principle of creating a rose is as follows: the central part is made using a round nozzle - this is a small “column” of cream that will surround the petals. Next, the nozzle is changed to a flat one and the cream is gently squeezed out in a circular motion, creating a petal. The petals are longitudinal and overlap. To create a beautiful symmetrical flower, it is convenient to place the cake on a rotating confectionery circle and rotate the product as you extrude the petals.

There is another method of applying a pattern from a cream. You can take a square piece of biscuit according to the size of the future flower. The cream is squeezed onto the surface of the biscuit until a rose is obtained. The biscuit with a cream flower should be placed in the refrigerator for several minutes to harden, then remove the decoration with a fork and move it onto the cake.
Little tricks
When choosing a pastry bag for decorating cakes with cream roses, you need to pay attention to the following details.
- Tightness. The cream is squeezed out of the bag under pressure. This means that if the openings of the textile are too large, the cream will penetrate through them. If the bag is made of a polymeric material, the cream may leak out through the fastener or loose connection between the bag and the tip. Therefore, it is important to check the tightness of the product.
- Shape and volume . The most convenient is the conical model, which expands upward. This allows you to quickly spread the contents into the bag with a tablespoon.
There are many confectionery products that are hard to imagine without cream decorations. Cakes, pastries, meringues, cookies, profiteroles, cupcakes without intricate cream patterns are boring and look very unappetizing, even if they have an amazing taste and tempting aroma.
In order for your culinary masterpieces to amaze your family and guests not only with a delicious taste, but also with an aesthetic appearance, you just need to master the technique of decorating pastries with cream. To do this, you need to get special tools - a pastry syringe or a bag with nozzles, without which no pastry chef can do.
You can freely buy these factory-made tools, or you can make your own piping bag, as it is quite simple. The ability to make such a design using improvised materials can be useful to you if you preferred to use a syringe, and your faithful kitchen assistant suddenly failed, and there is no time or too expensive to restore it.
A homemade device in an emergency will simply save the day.
After all, it can be made in a matter of minutes from a plastic bag or thick paper. True, it will be disposable, but it will not need to be washed, and you can fill it with almost any creamy mixture.
If desired, you can make a confectionery woven bag for reusable use. It will be stronger and more spacious. It is very convenient to use products made of water-repellent fabric-based materials. Such devices will need to be washed thoroughly, and cotton ones can be boiled and ironed for disinfection.
- plastic bag
- paper bag
- fabric bag
- Plastic bottle nozzles
- Tips for beginner confectioners
- Reviews and comments
To make it, you only need a bag (preferably made of thick polyethylene, for example, from milk, or with a zip fastener) and scissors. Fill the bag with cream, cut off a corner of a suitable size (the thickness of the strip of squeezed cream will depend on this) and proceed to the artistic decoration of baking.
paper bag
For such a simple device, you only need a piece of baking paper, wax paper or parchment paper of a suitable size. The process of making it is as follows: cut a square or triangle out of paper and fold it into a cone shape.
There should be no gaps between the layers of paper into which the cream can seep. Bend the edges of the base of the cone to fix the structure. After that, fill it with cream and cut off a corner. On thick paper, you can cut out the curly edge of the corner. He can partially replace the nozzle.
You can also make a pastry bag with do-it-yourself nozzles. To do this, cut off the neck of an ordinary plastic bottle, stepping back a few millimeters below the thread, and fix it on the bag with adhesive tape (on the outside).
Advance the cream to the nozzle and, by directing the flow of cream, decorate the dessert.
fabric bag
You can buy it ready-made, but it’s easy to sew a pastry bag with your own hands. When choosing a fabric, check that it is easy to wash. It is better to choose white, but if you want to sew a product from colored material, make sure that it does not shed. Dense teak is perfect - it is durable, natural, and can be disinfected using high temperatures.

Cut out a triangle (isosceles) from the fabric, sew 2 sides, the top of which is cut to the size of the nozzles on which you will put it on. Process (tuck) the seams along the edge of the cone. The seams along the structure should be on the outside so that they do not need to be washed off the cream.
Plastic bottle nozzles
Using caps from plastic bottles, you can make a variety of curly nozzles for any bag to which the neck of the same bottle is attached. To do this, in addition to the mentioned capacity, you need to arm yourself with a knife with a sharp end and a marker.
Draw the outline of the proposed hole on the lid, then cut the figure exactly along the outline with a knife. The simplest variants of drawings - stars, snowflakes, crowns - give beautiful outlines of a cream strip. Having processed several covers in this way, you will already get a whole set of interchangeable nozzles with holes of different configurations and sizes!
You can attach the neck of the bottle to the woven bag with a needle and thread.
To do this, cut the neck slightly below the thread, make holes for the needle and thread along the edge, with which you will sew it to the product.
In a similar way, small shaped nozzles can also be made from caps for nasal spray bottles. It will be convenient for them to perform more delicate work, to apply openwork patterns.
It simplifies the production of a cap with a lock, as on bottles for mineral water for children or athletes. The shutter is easily removed from the cap, and the narrow opening itself is convenient for drawing with cream.
To make decorating baking easier and make decorations more neat and beautiful, use the following tips for applying cream patterns:
- using a pastry bag, make patterns with your left hand, and hold it with your right hand and at the same time lightly squeeze it;

- start practicing with simple drawings;
- as “strokes”, first use asterisks and dots;
- to apply dots, take a round nozzle, squeeze out a dot and quickly gently lift the bag to a vertical position, ceasing to put pressure on it;
- do the asterisks in the same way, only with a curly nozzle;
- so that the hand does not tremble from tension, substitute the left hand under the right hand as a support;
- when applying small patterns or inscriptions, hold the nozzle close to the baking surface.
Home baking is not only an interesting pastime, but also a very relevant hobby, given that the modern confectionery industry does not always use natural ingredients, high-quality safe fats, not to mention the widespread use of dyes, preservatives and other chemicals.
Therefore, if you have at least a little free time, do not regret and carve out an hour in order to find an easy and quick recipe for delicious homemade pastries. After all, there are a lot of them on the Internet now - for every taste - from traditional proven “grandmother's” recipes to fashionable, gourmet or exotic desserts.
Here, for example, is a recipe for popular eclairs:
- boil a glass of water, add a little salt, add butter (150 g) and boil everything again, gradually add a glass of flour there, stir constantly and turn off the gas after boiling;
beat 4 eggs, use a mixer to save time, add about a quarter of the volume to the dough and mix thoroughly, then gradually add the rest of the eggs in the same way, until the dough becomes thick; - squeeze the dough out of the pastry bag in lumps onto a baking sheet covered with paper, and bake the cakes in the oven at 200 degrees - 25 minutes, then another 170-180 degrees for 10 minutes;
Prepare a regular custard (or whatever you like, you can use whipped cream) and fill the eclairs with it using a pastry bag.
Prepare such a wonderful treat from fresh, natural products for your children, and their saved health will be the reward for your work. And to make them more willing to give preference to mom's pastries over store-bought ones, decorate your desserts with the help of the simple devices described above.
With experience, you will begin to create patterns that will surpass the work of professional confectioners and will surprise the most sophisticated guests.
When baking a cake or cake, we think about how best to decorate it. You can just pour it with glaze, or you can decorate it with painted flowers, patterns and petals. To create intricate cream or paste patterns, you will need a piping bag.
But what to do if there is no such bag at hand, and you need to decorate the cakes with cream or make rosettes from cookie dough right now. Do not despair, you can make a pastry bag with your own hands from improvised materials.
DIY pastry bag from a plastic bottle and a plastic bag
In order to make carved patterns from cream, you need the mass to be squeezed out of a bag with a carved tip. It must be firm and withstand any pressure placed on it, otherwise the pattern will not work. For these purposes, a plastic bottle is used.
You will need the following materials: a plastic bottle, a small clean plastic bag, a marker, scissors and a utility knife.

Stage 1
Measure 4-5 cm from the top of the bottle and mark. Make several marks and connect them with one line.
Stage 2
Unscrew the cork and remove the inner silicone layer from it, which is in each lid.
Stage 3
Make a hole in the lid with a diameter of approximately 0.5-0.7 mm.
Stage 4
On the silicone layer that you took out of the lid with a marker in the center, draw a pattern that you would like to get. Using a clerical knife, cut out the pattern along the contour. Do not hold back your fantasies, because from what cut you make, this will be the pattern.
Stage 5
Insert the silicone layer back into the lid. Once again, thoroughly wash the neck and cork of the bottle from plastic chips and dust.
Stage 6
Cut off one corner of the bag by 2 cm, put it on the thread and twist the cap so that the bag is reinforced between the cap and the thread of the bottle neck. If you fix the bag poorly, then the bottle will not hold and you will not be able to work with such a bag.
There is another option, how else can you fasten the bag and the neck of the bottle. Insert the package into it. Pass the cut corner of the bag into the neck, inserting it from the side of the cut part and remove it from the neck. Screw the edges of the bag onto the threads and screw on the lid.

In other words, the neck of the bottle will be put on the cut corner of the package, and the edges of the cut corner of the package will be turned out and fixed with a twisted cap. So, you got a pastry bag with your own hands. Cake cream or cookie dough is placed in a bag, and it will be squeezed out through the lid, acquiring the shape of the pattern that you came up with and cut out.
You can make several interchangeable lids with different patterns inside. The package in which the mass is located is disposable and is thrown away immediately after use. Next time you will need a new bag.
Using the same method, you can use a bottle with an elongated cap for easy drinking.

It can be used as a kind of pattern, wearing it on the same neck if the thread matches.
Also, the hole in the bottle cap can be made wider up to 1.5 cm in diameter, while the pattern on the silicone layer can be made larger and more complex.
DIY pastry bag made of paper

For this type of pastry bag, you will need a sheet of strong waterproof paper and scissors. A sheet of parchment paper is perfect for baking.
Stage 1
Make an even square out of the sheet and fold it in half obliquely or from corner to corner.
Stage 2
Lay the resulting triangle so that it looks at a right angle up, and with the folded part towards you.
Two sharp corners are located on the sides.
Stage 3
Now roll it up with a funnel. The image below shows how to roll properly.

Stage 4
The upper edges may interfere with the work with confectionery, so they are folded or cut off.
After filling the bag with contents, the edges (if you have not cut them off) can be wrapped inward or twisted into a spiral. In the second option, squeezing out the contents of the package will be much more convenient.
Stage 5
Cut the folded corner diagonally or give it a beautiful star or wave pattern.
Do-it-yourself pastry bag is ready. It is disposable, so at the end of the work it is thrown into the trash.
Such a bag made of paper is perfect for working with a delicate texture of cream or paste. For dense dough, use a pastry bag made of a harder material.
DIY pastry bag from a plastic bag

In order to make such a bag, you need a dense plastic bag. In terms of density, cellophane is quite suitable, from which the sleeve for baking products in the oven or a file for documents is made.
Option 1
The cellophane cloth is folded with a funnel, as in the previous version of the paper pastry bag. An acute angle is cut in the form of a pattern or a semicircular hole.
Option 2
You can also use it with a bag in which the cream is placed, and then rolled up with a funnel. In this case, the resulting sharp corner is carefully cut with scissors, through which the contents will be squeezed onto the prepared surface.
DIY pastry bag from a fragment of a used aluminum can

As materials for this type of pastry bag, you will need: a used aluminum can from a drink, a strong plastic bag and adhesive tape.
Stage 1
Wash the aluminum can from the remains of the drink and dust and cut it into pieces. Cut off the top and bottom parts from it, leaving the middle in the form of a ring from the walls of the jar. Cut the ring lengthwise. Thus, you have a metal sheet of thin aluminum.

Stage 2
Fold the metal sheet into a funnel and secure the outer edge with tape.
Stage 3
Cut out the narrow edge of the funnel with serrated teeth in the shape of an asterisk or other pattern you like.

Stage 4
Cut off the corner of the plastic bag with scissors.
Regarding the corner, the cutout should not rise higher than 2 cm.
Stage 5
Insert the metal nozzle into the bag so that it locks in and does not pull out through this hole.
A do-it-yourself confectionery bag from a fragment of an aluminum can is ready. You can fill it with dough or cream and get to work.
How to decorate a cake with a pastry syringe
Have you mastered the difficult art of baking delicious cakes? It's time to learn how to decorate them. To make your confection look perfect, use a special syringe. With the help of the nozzles attached to it, you can make a whole range of decorations - from exquisite knitting of letters to lush flower baskets.

Instruction
1. It is allowed to decorate the cake with flowers, leaves, borders, figurines, ornaments or inscriptions. All these decorations are easily done with a confectionery syringe with a set of nozzles. The kit usually put from 4 to 10 different tips. The larger they are, the wider your probabilities.
2. Before starting work, prepare the cream, whipped cream or drawing mass. Any cream is suitable for decoration - creamy, oily, protein or custard. It can be dyed with food coloring or fruit and vegetable juices.
3. Think over the design of the cake, or rather draw all the decorative elements on paper. If the cake is already baked, look around it - perhaps you will have to camouflage some areas.
4. Cover the cake with special mastic, icing or cream. Scrupulously level everything with a knife. The sides of the cake can be sprinkled with biscuit or nut crumbs or grated chocolate. Please note that cream decorations only hold well on a smooth horizontal surface. Before decorating the cake with cream, let the coating dry a little.
5. Using a teaspoon, fill the syringe with cream on? volume. Apply the cream tightly so that voids do not form in the syringe flask, on the contrary, your drawing may be damaged.
6. Before you start decorating the cake, make samples on a plate.
The beautiful frill-like borders that usually line the edge of a cake are made with the support of a beveled nozzle. A nozzle with a wedge-shaped cut is necessary when depicting all kinds of leaves. Letters and patterns are drawn with a cornet with a tight straight tip. Well, the tips with teeth form a cream in the form of flowers and stars. The size of the jewelry can be varied by pressing the syringe plunger. By moving your hand in waves and changing the angle of the device, you can make different decorations with the same nozzle.
7. Take a knitting needle or a huge needle and mark the silhouettes of the pattern on the cake. For greater comfort, hold the syringe with both hands. Gently drive the tip, adjusting its inclination and pressure. When applying small designs, hold the syringe close to the surface of the cake, working with huge motifs, raise the syringe higher.
8. After the end of the drawing, stop pressure on the plunger and make a sharp movement with the end of the syringe away from you along the drawing. Then a small tongue, formed after the separation of the cream, will lie inconspicuously.
Note!
After working with the syringe, thoroughly wash it in hot water. Don't forget to rinse all used nozzles.
Helpful advice
Please note that the relief of jewelry depends heavily on the design of the cream. The denser the creamy mass, the more colorful the decor will be. Too tender or immensely liquid mass may blur.
If you are a beginner pastry chef, then you should have an idea of what tools and equipment you may need. We invite you to familiarize yourself with the overview of confectioner's tools and accessories for decorating. Of course, not all existing confectionery equipment was presented in this review, but you will get acquainted with a set of basic ones in it.
1.
Basic tools and accessories for baking.
There are items that must be present in the kitchen if the hostess is fond of baking.
1.1 Measuring cups and spoons.
For example these:
1.1.1 Or this set of measuring utensils:
1.3 Sieve. The usual, or convenient version in the form of a mug.
1.4 Hand whisk. Even if you have a stand mixer or food processor, it's a good idea to have one for when you need extra gentle whipping or blending ingredients.
1.5 Containers for mixing ingredients. For example these:
1.6 Blender for chopped dough
1.7 Brushes. With regular bristles or silicone.
1.8 Grater for peeling citrus fruits.
1.9 Spatula.
1.10 Forms (selections) for forming cookies or cutting out various shapes from dough.

1.11 Knife for working with dough. They are also used to work with marzipan and sugar fudge.
1.12 Bakeware:
1.12.1 Forms for tarts and tartlets.
1.12.2 Trays.
1.12.3 Sets of molds for baking multi-tiered cakes.
1.12.4 Split molds.

1.12.5 Cake and muffin tins
1.13 Lattice. Ready-made pastries cool down on it.
1.14 Large spatula for cake or cakes.
2. Basic tools for working with creams and accessories for decorating with a pastry bag
Before you start decorating, you need to purchase special tools. Not all of the items listed below are required. You can get the most necessary, and then gradually increase the collection of your confectionery tools.
2.1 The rule is simple and with embossed edges.
2.2 Scrapers, plain and with raised edges.
2.2.1 Type-setting scraper. You yourself create a relief by selecting elements in one order or another.
2.3 Round and square turntables.
2.4 Confectionery spatula.
2.5 Pastry bags and nozzles.
2.6 Confectionery nail, paper, and a tool for transferring decorations from the nail to the cake. It is used when creating flowers using a pastry bag.

2.7 Containers for holding pastry bags.
2.8 Marked mat to create symmetrical, precise and uniform decorations.
2.9 Brushes, for working with dyes. Regular watercolors will do as well.
3. Devices for working with mastic, marzipan and sugar fudge
3.1 Rolling pin for mastic. There are also textured rolling pins for applying various ornaments and textures.
3.2 A device for smoothing fondant, marzipan or sugar fondant on a cake.
3.3 Silicone mat with markings for rolling out mastic and marzipan
3.4 Rolling pin with rings for rolling marzipan or mastic to a certain thickness.
3.5 Cutters (selections) for cutting out parts from mastic. For example floral elements.
3.6 Stacks (special tools) for modeling from mastic, sugar fudge and marzipan.

3.7 Plungers for creating decorative elements from mastic or marzipan. For example, this, in the form of a leaf:
3.8 Devices for modeling and giving flowers a natural shape.

4. Auxiliary materials and equipment.
4.1 Pistils and stamens, as well as decorative wire.
4.2 Stands for finished cakes.
4.3 Organizers for storing confectionery accessories and tools.

4.4 Stencils for decorating pastries.
Using butter cream for a cake is an interesting and at the same time simple, and most importantly affordable way to decorate a baked product. It can be a cake, a petit four or a whole cake.
Making cream from butter at home is more than easy and it does not require a lot of time and effort! You do not need to be an outstanding chef or pastry chef. The secret of such creams is high-quality butter with a high degree of fat content and the correct proportions of the products taken.
Italian cream on proteins and butter
What products are required:
- egg white - 100 ml;
- granulated sugar or powder - 200 g;
- boiled or filtered water - 40-50 ml;
- citric acid - a pinch;
- butter (82% fat) - 200 g.
Any protein-oil cream has a light, porous, delicate texture and is very attractive in appearance with its snow-whiteness. So, how to cook butter cream for decorating cakes and cakes with chicken egg whites step by step?

Cooking steps:
- First you need to do sweet syrup. Mix sugar, cooked water and citric acid. Boil. Boil the mixture until a mass of bubbles actively forms on the surface. Professional chefs use a special thermometer - for this syrup, a temperature of 120 ° C would be suitable. Mix the syrup and leave to cool.
- Pour the egg whites (100 ml corresponds to three C0 eggs) into a mixing bowl. Here you can use one trick - add 1-2 g of ordinary coarse salt to the proteins. Next, beat the whites until a dense white foam is obtained.
- The further action will be as follows - continuing to whip the foam, add a little syrup to it with a tablespoon or pour it in a stream. Whipping at the same time is better at low speed. Otherwise, everything around will be in small drops of sugar syrup. Now you need to beat until compact.
- The next step is to add butter. It is very important that it be well softened. Then beat it a little with a hand whisk for splendor. Another important point - proteins and butter must certainly be one better than room temperature. If these requirements are not met, the cream will not work.
- Now again at the initial whipping speed, add the oil in several passes.
- After introducing the oil, the butter cream for the cake must be beaten until smooth.
It is citric acid that gives the mass such an impeccable white color. This color-important component can be replaced with a few drops of freshly squeezed lemon juice.
The custard of such preparation has one nuance - to decorate a cake with it (biscuit, for example), the cream must be exactly at room temperature. So, if you took it out of the refrigerator, let it stand on the table before using it.
Protein-oil cream for decorating the cake can be prepared gelled. Take gelatin or agaroid. The two substances are similar, as are their uses.
If you are making a homemade buttercream cake, add vanilla sugar or extract to it for a more pleasant flavor.
Quick sour cream butter cream
Ingredients:
- sour cream (preferably fatty) - 100 g;
- granulated sugar or powder - 150 g;
- cream (or full-fat milk) - 100 g;
- butter - 100 g.
Sour cream and butter cream for the cake will be an excellent decoration for a homemade sponge cake base. This type of cream forms and holds jewelry well.

Cooking steps:
- In order for the sour cream-butter cream to turn out lush and light, the products prepared for it must be at the same temperature. Better than room. In a heavy bottomed saucepan, mix butter, cream and sour cream. Whip a little until smooth.
- Add granulated sugar or powdered sugar and mix with a spoon.
- Beat until fluffy foam at the highest degree of rotation of the whisk.
This is perhaps the easiest cream cake recipe ever. At the end of whipping, add a drop of rum, table white wine or essence to it, if desired.
Just do not take cognac for this, the cream will acquire a slightly grayish tint.
Note to the owner
Many novice housewives do not know how to use butter cream for a cake, but it's simple. To decorate all surfaces of a cake or pastry with a dense layer, you need to take a soft cream at room temperature. And if you need to make decorations in the form of flowers, ribbons or other relief patterns, it is better to cool the cream directly in a pastry bag or syringe. Professional decoration of the cake with butter cream, see the photo.

A layered flower arrangement of cream on a cake can be created using various pastry bag nozzles and a set of food coloring.
It happens that with a very short storage in the refrigerator, a layer of liquid appears at the bottom of the oil cream. This is the result of beating too hard or adding a very thin gelatin mixture. It is possible to fix this defect. Drain the liquid, and add a little more necessarily softened butter to the cream. And beat again.

Probably the easiest and most affordable butter cream cake recipe is with condensed milk. The products required for it are butter and condensed milk, taken in equal proportions. But this version is very sweet! Therefore, try not to overdo it with condensed milk. By the way, you can take it both store-bought and home-made from whole milk with sugar.
To decorate the cake with buttercream using color, it is most convenient to add one or two pinches (depending on the intensity of the shade you want to get) of food coloring while whipping. To tint the creamy mass, chocolate, cocoa or instant coffee, heated in a water bath, is perfect.
It's no longer a secret for you how to make butter cream for a cake. You can apply cream to decorate the cake immediately or cool it a little in the refrigerator. You will see examples of decorating a cake with butter cream in the photo.