Mk panel made of coffee beans. DIY coffee bean paintings
If you don't have much time to master complex crafts, try mastering paintings and crafts using ground coffee. It's simple, flavorful, exciting and very beautiful!
Everyone knows that you can create coffee, but few have heard that ground coffee is used as a material for creativity. Meanwhile, the aromatic powder is great for complementing other types of needlework, decorating figures made from coffee beans, and for independent use. We have no doubt that you will like crafts and paintings made from ground coffee; even a girl who has never had a penchant for coffee can draw them with her own hands.
Who invented drawing coffee and who needs it
Unfortunately, it is unknown who came up with the idea of painting with coffee powder. But this hobby can be put on a par with painting with salt and creating paintings from bulk materials. Perhaps the first coffee painting was given to the world by a coffee lover who did not like the taste of a new type of coffee and decided to dispose of the product in such an original way. However, the world is gradually conquering this fragrant art. Some cities already host drawing competitions, and at crafts fairs it’s easy to buy a painting or panel.

Who is this hobby suitable for? We can safely say that everyone! There are practically no costs, little time is spent, and the result almost always lives up to expectations! For example, it takes several days to create a butterfly on a napkin, but creating a coffee masterpiece will take less than an hour!
Paintings from ground coffee: features of the technique and first steps
To draw, you don’t need to buy, which we have already told readers about who are passionate about this invigorating drink. The cheapest finely ground product recommended by the manufacturer for brewing in a cup or Turk will do just fine.
You won’t need brushes to create masterpieces, but you will need to find a drawing stencil, for which a children’s coloring book or the outlines of images on the Internet will be quite suitable. Carefully cut out the image so that after filling the internal space, you get a recognizable and desired motif. To start, take something simple: a butterfly, a leaf, a flower.


Funny bear

As a basis for the picture, you can take a board, thick cardboard, glass, or plywood. Select white wallpaper or suitable paper and paste the background onto the base. After this, carefully transfer the stencil onto the paper and cover the places that need to be painted with PVA glue.
Then everything is simple - sprinkle coffee on the glued areas, let the masterpiece dry and blow off the remains. If desired, the picture can be supplemented with whole coffee beans, rhinestones, beads and other suitable elements.
Crafts made from ground coffee - simple and aromatic
Having mastered the simple technique of drawing pictures with ground coffee, you can move on to more complex crafts. Feel free to create panels on fabric, decorate napkins with spectacular designs, decorate dishes, bottles, vases, flower pots, candlesticks, and boxes. Always choose a clear adhesive that is suitable for the base material.
Coffee powder can be used to decorate Easter eggs (real and decorative), topiary balls, which are much easier to make than covering the base with beans, to create stylish valentines, and much more.

Panel on fabric
If nothing comes of drawing and decorating figures, don’t despair. You will definitely get aromatic crafts from ground coffee if you use this delicious raw material to fill miniature soft toys and aromatherapy pillows. This useful ingredient can also be used in cream making. As a last resort, you can always recycle coffee powder in the bathroom by preparing an effective body scrub using it.
Be sure to check it out and choose another hobby for your soul!
Crafts made from coffee beans are an unusual and modern creativity that has great practical significance.
In recent years, an incredibly fashionable trend called “handmade” has become a popular and exciting pastime. In recent years, skilled needlewomen have been using various materials and devices for their handmade creations, and now crafts made from coffee beans are at the peak of popularity, because it turns out that they are suitable not only for creating a fragrant drink, but also for creating equally fragrant decor and interior item.
Coffee crafts for beginners, master class
Mastering the technique of creating a masterpiece from coffee beans is not such a difficult science and anyone who has at least a little ability to manipulate objects and has a little creative imagination can do it. It's better to start with simpler crafts for beginners.
A variety of materials can be used in coffee crafts. 
 For unusualness and diversity, grains can be painted in different shades
 Creativity is a path in which initiative is not punished. Show your imagination
These could be:
- decorating a vase, jar, glass
- creating a photo frame
- decorating candles, candlesticks
- postcard
- decorative painting

 Coffee beans are a universal material
  Simple and boring household items can be transformed beyond recognition by covering them with coffee beans.
 If you decide to try to create a small masterpiece that will decorate your home, then the first thing you should do is buy the right coffee beans. For this purpose, packaged packs of coffee in opaque containers, in which you cannot see the purchase, are not suitable - it is better to give preference to stores where coffee is sold by weight.
Also, you should not buy Arabica beans, since for greater unusualness and texture, beans of different sizes are required. Therefore, give preference to the cheaper variety.
 It is better to use grains of various sizes in your work, rather than selected Arabica
 The simplest coffee crafts do not require many tools - all you need is a glue gun and a blank for decoration on which the beans will be glued.
After completing the work, it can be coated with colorless varnish.
Video: DIY crafts from coffee beans
Crafts from twine and coffee
An extraordinary vase, cup or even flower pot can be made from twine and coffee beans. The simplest option would be a decorative scented candle, which you can not only use for aesthetic purposes in your home, but also give as a gift to loved ones.

 Candles decorated with coffee beans look very original
 To make an unusual candle you will need:
- scented candle
- leg-split
- glue or glue gun
- coffee beans
- clear varnish

 Twine can be purchased at any hardware or craft store.
 Making a decorative candle is very simple, and the end result directly depends on your imagination:
- First you need to wrap the candle tightly with twine.
2. This can be done around the entire circumference of the candle or to its middle
3. After this, using a glue gun, secure the ends of the twine to the candle so that it fits tightly to its surface, without protruding or forming a void. You can also skip the glue by melting small sections of the candle and pressing the twine into the surface of the candle.
4. The candle wrapped with twine is covered with coffee beans to the middle, doing this in rows, so that the layer of twine under the beans is not visible.
5. At the final stage, the grains are painted with colorless varnish, which will provide shine and make it easier to wipe the structure from dust in the future.

 Instead of a scented candle, you can use a regular one.
 The finished candle can be decorated with beads if you want to give it a more festive look or immerse the beans inside the melted wax along the edge of the candle.
Video: Crafts from coffee and twine
Craft a coffee heart
You can please your other half by presenting her with a heart made of coffee beans. It's easy to do and doesn't require much time. For the heart you need:
- coffee beans
- A4 paper
- cardboard
- scissors
- cotton wool or cotton pads
- glue gun or regular glue
- leg-split
- brown paint
- decorative decorations: beads, lace, ribbons, bows

 Making a coffee heart is quick and easy, and most importantly, it requires a minimum of materials
 First you need to cut out the blanks. Perhaps you will be able to purchase a ready-made heart made from foam plastic at a handicraft store, then your work will be much easier. If you want to create a masterpiece entirely on your own, then you should start by creating a paper heart.

 It is necessary to cut out a symmetrical heart
 You can buy a ready-made foam heart at a craft store.
 Sequence of work:
- Fold the A4 sheet in half and draw half a heart, so that when you turn the sheet you get a whole symmetrical heart
- Attach the heart to a piece of cardboard and redraw it
- Glue a layer of cotton wool to the resulting heart or place cotton pads in balls, increasing the volume of the figure
4. After this, the heart is encircled with twine in a free order in all directions to form relief
5. Next, the heart is painted: a foam sponge is suitable for this, which is used to apply the paint using blotting movements.
6. After the paint has dried, glue the coffee beans to the heart: spread each bean with glue and place it tightly together
7. The final stage is painting the craft with colorless varnish

 The finished work can be decorated to your taste
 Craft painting made from coffee
For beginning needlewomen and crafters, creating a picture from coffee beans will be a great way to spend time. It will not only become a wonderful piece of furniture that will fit into almost any stop in your abode, but will also be a good gift for loved ones. The subject of a “coffee” painting can be very different: from a traditional steaming cup of coffee to a grandiose artistic canvas.
The plot is limited only by your imagination.

 The most common theme of “coffee” paintings is coffee itself.
 For a painting made from coffee beans you will need:
- thick cardboard
- a piece of fabric (preferably light and smooth, but if coarse burlap fits into the concept of your masterpiece, feel free to use it)
- coffee beans
- leg-split
- stencils
- picture frame
- decorative beads, ribbons or even dried leaves
- clear varnish
 If the coffee beans are not dark enough, they can be fried in a frying pan.
 The process of making a painting is not labor-intensive and requires only accuracy and creativity. By following the step-by-step guide, you can easily recreate your intended image from coffee beans:
- Cover a thick sheet of cardboard with fabric, securing it with glue on the opposite side
2. Think over the plot of the picture and use stencils to draw the image (if there are no stencils, then a simple device will replace them: print the picture onto a thin sheet of paper and, using cosmetic shadows or blush, transfer the picture to canvas)
3. After this, carefully glue the coffee beans
5. Decorate the outline of the picture with twine, attaching it to the picture with glue
6. The finishing touch: coat the coffee beans with clear varnish, and after drying, insert the picture into the frame
 To make the task easier, coffee beans can be glued directly onto the drawing.
 In order for the picture and the frame to be in the same style and color composition, it is better to choose a dark brown frame. This way the picture will create the impression of completeness and will please the eye with its aesthetics.
DIY coffee bean topiary
For those who consider paintings made of coffee and candles covered with coffee beans to be child's play, there is also a more difficult craft - topiary. This “tree of happiness,” as they call it in Europe, will become a real work of art, and the time spent on the topiary will pay off in spades when all the guests begin to admire such a sophisticated masterpiece and even envy your skill.
 Topiary is modern and fashionable
 For topiary you will need:
- coffee beans
- thick cardboard
- A4 paper
- glue or glue gun
- small jar or box, cut bottle
- clothespins
- brown paint (you can use quality paints for painting)
- thick wire
 A ready-made blank can be used as a heart
 It is most convenient to glue grains with a glue gun, but in the absence of one, you can use simple glue
 Sequence of work:
- Fold a sheet of paper in half, draw half a heart and cut it out so that when you turn the sheet you get a whole heart
2. Attach the paper heart to a sheet of cardboard and redraw it, and then cut it out with scissors
3. Glue a wire or curved wooden branch to form the trunk of the topiary
4. Using cotton wool or cotton pads, laid out in layers, create the volume of the figure by gluing them to the cardboard heart
5. Wrap the resulting heart with twine in different directions to secure the structure. Wrap the wire tightly around it until the very end.
6. Paint the resulting structure using a small foam sponge
7. While the painted tree is drying, form a pot for it: separate the wooden clothespins and cover the jar or box with them, so as to create the impression of a wooden tub. You can paint the pot any color, or you can leave it as is.
8. Cover the dried “crown” of the tree tightly with coffee beans so that they fit right next to each other and no empty gaps are visible. You can apply grains in several layers, on top of each other - such chaos will only add gloss to the craft
9. Fill the finished topiary pot with plaster and place the tree in it
10. After the plaster has dried, the tree can be decorated with ribbons, flowers and beads to your taste

 Topiaries come in many different shapes
 Coffee bean trees
If the heart-shaped crown seems irrelevant and uninteresting to you, then you can form a topiary with a spherical crown. To do this, you will need a blank, which can be purchased at a craft store, in the form of a foam ball, or any ball that you can find at home and the material of which allows you to attach it to a wire.

 Topiary with a spherical crown
 Making a spherical topiary is practically no different from a topiary with a heart-shaped crown, but the work will be greatly facilitated due to the fact that the initial stages of crown formation can be skipped and you can start immediately by painting the crown brown. Next, you need to follow the instructions outlined above.

 "Trees of Happiness"
  You can decorate topiary using all available means.
  Topiaries can be bonsai style
 Coffee beans can be used to make other trees
 Crafts from coffee and beans
By combining coffee beans with beans of different colors, you can create interesting applications, flower bouquets and paintings, as well as toy figures. In addition, these materials form interesting unique interior details that no one else will have.

 Beans and coffee go well together in a craft.
 A craft made from an elegant bottle filled with beans and coffee beans will be simple and original. To do this, you need an empty bottle of some alcoholic drink that has a bizarre shape. By filling it to the top with layers of white beans and coffee beans, you will create an unusual craft that will decorate your home or the austere atmosphere of your workplace.

 Bottles filled with grains, cereals and salt are a popular decorative element of the interior.
 Bottles are decorated with coffee beans
 Pictures made from beans and coffee beans look very colorful and aesthetically pleasing. The principle of their creation is no different from “coffee” paintings, but the difference in texture and color of the material gives a flight of fancy.

 Coffee beans and beans can be used to cover jars, vases and boxes, making them unique
 Crafts made from coffee and burlap
Using simple materials such as coffee beans and burlap, you can recreate real masterpieces of applied art. The most common type of material used is to make panels from coffee beans, because it is simple, practical and looks very beautiful.
Even a person far from this technology can easily make a small creation.

 In crafts, grains can be laid out in rows or randomly
 To make the panel you will need:
- coffee beans
- sackcloth
- leg-split
- bamboo sticks (can be purchased at a craft store)
- stencil
- pencil
- clear varnish

 Burlap is a universal material in needlework
 First of all, you should think about the plot of the panel, what you would like to depict. For beginners, it is better to choose a simpler design: a heart, a cup of coffee, some kind of inscription, an apple, etc. Having completed this task well, you can easily begin more difficult work, which will require some experience and perseverance.

 You can create entire compositions from “coffee” crafts
 Operating procedure:
- Using scissors, cut the burlap to the required size
2. Redraw the outlines of the drawing using a stencil and pencil
3. Stick the coffee beans as intended
4. Cover the grains with varnish and wait until the panel dries
5. Using twine, form a frame from bamboo and tie the panel to it, pulling the twine through the holes in the burlap
 Bamboo can be replaced with another tree, but the picture will lose a lot from this
 At first glance, many crafts made from coffee beans seem incredibly complicated, but this is far from the case. Most needlewomen who delve into this creative direction and have reached great heights of skill urge them not to be afraid to experiment and not stop even if something doesn’t turn out quite the way they wanted it to be.


After analyzing their experience, we can highlight the following tips that will help you work with coffee beans:
- Use quality material for your crafts. This does not mean that you need to buy everything expensive - much can be found at home for free.
- use your imagination and experiment, don’t try to copy other people’s work, but create something new and unusual
- learn to enjoy the process of creating a creation, then it will come from the soul and please the eye
Video: Crafts from coffee. Master class
Coffee is a wonderful invigorating drink that is known all over the world. Not every person knows that you can not only drink it, but also create interesting things, for example, as panels. Today you will learn how to usefully decorate your room and give it a pleasant, invigorating aroma. Let's get started!
You will need: coffee beans, plastic bottle, ground coffee, cardboard, glue, frame, gouache, brush, tape and decorative accessories.
Master class
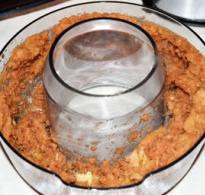
1. Take a bottle and cut off the neck and bottom. Cut the rest in half.
2. Cut a piece of cardboard into the shape of half a plastic bottle. Create a saucer out of cardboard. Connect cardboard and plastic together to form a bowl. Cover it with masking tape.
3. Paint the bowl with brown gouache.
4. Select coffee beans and try to use smoother ones. Glue the beans to the bowl. Then cover the saucer.
5. Glue the burlap to the base of the picture. Then glue the bowl onto it.
6. Create a mural to suit your unique taste. You can decorate it with a cinnamon stick, a piece of orange or lemon zest, a rose and much more...
7. To create a pattern, apply glue and sprinkle with ground coffee.
Coffee bean panel ready. Now you can decorate your interior in an unusual way, surprise others, and give a panel you created with your own hands to a loved one.
Paintings made from coffee beans appeared relatively recently, but have already gained popularity. This may be explained by the fact that coffee used to be much more expensive, and in general, it was used exclusively as a food product, and only in recent years has the material begun to be used for decorative purposes. In any case, such art looks unusual and attracts attention. We tell you all about how to make paintings from coffee beans, what nuances and options there are.
First of all, it is worth warning that coffee beans contain many phytoncides - volatile substances and aroma molecules. And it is best to hang pictures made from coffee beans in the kitchen, living room, office, but not in the bedroom or nursery, where the subtle, unobtrusive smell will be somewhat stimulating, tonic, and prevent you from falling asleep. Quite often, such art is placed in bars or coffee shops, where it looks extremely appropriate.
It is important to understand that the coffee bean is a fairly large element, so it looks most successful on a large scale, appearing only as a small particle. Decor smaller than A5 often looks too rough and eclectic, since there are few grains and they take up a lot of space. There is a way to make such cards, but in general, it is not very popular, since the grains in this case look too large.

If you are making a painting from coffee beans, its size should be at least A4, and preferably larger.
In general, making such decor is relatively easy. Even a schoolchild with minimal motor skills and glue handling skills can handle this, so this can be a good gift for mom or dad. You can produce such a unique work of art in about an hour, although much, of course, depends on the scale and complexity of the project. Alternatively, the base will need time to dry, so it may take a day or even two.
Try to work with either cleanly washed hands or gloves. This way you won’t leave marks on the canvas or stain the grain.
You will need:
- Canvas – This is most often burlap, canvas, art canvas or something similar. You can glue it to cardboard or thick paper, but in general, it doesn’t look so interesting. It is advisable to choose a fabric of a brownish or beige shade. Acid tones look out of place, too bright or dark too. The shade should be combined with dark brown.
- If the color of the canvas is too light, you can dye it with a strong coffee brew. But make sure that there is some kind of contrast, because if everything is the same shade, the picture will not be as interesting.
- Coffee beans. It all depends on the picture. If it is one color, choose the tone you like; if there are different shades, you will have to look for grains. It is important to take the same type of beans for one element, for example, only Arabica or Robusta.
Keep in mind - Arabica is usually larger and slightly more oblong, Robusta is smaller and rounder, and also cheaper, so it may make sense to choose it.
- Glue. PVA is usually suitable, but if you are doing something large-scale, it is better to choose superglue as an option for more reliable fastening, especially on burlap. But in the case of PVA, you should only need one can.
- Black marker, paint or ground coffee. Something to fill the base with. The fact is that almost any painting made from coffee beans requires sticking flat, in one layer. This means that there will be gaps between the relatively round beans and the base will be visible. To prevent this from happening, you will need to paint over the stencil or apply ground coffee to it, and then glue the beans. This way there will be no gaps that spoil everything.
- Frame. Any picture looks much better in a frame. You can take any color. You can either apply ground coffee to it, or glue grains and spices; in general, this is also room for creativity.
It's best to make a coffee bean painting in one go, so make sure you have everything ready to start creating.

When you have prepared everything, you can sit down to do it. You can find a stencil for a coffee bean painting or paint one yourself. Draw the way you like, and when you are satisfied with the result, transfer it to the fabric with a pencil.
- Paint over the background. This is done with a marker, gouache, or the layer is covered with glue and ground coffee is applied with a brush (this is the best option, the most natural). Let dry.
- Apply glue to the base with a brush. Do not bathe the beans in it (it will leave streaks), do not try to drip a little onto each bean (this will prolong the process and you will get your hands dirty).
- If the grains are too oily, rinse them, dry them with a towel and let them dry. Take the grain with tweezers or a wet finger and place it on the glue.
First make an outline, then fill it in.
If you have a combination of different tones, you can draw lines along the contour with a thin object. Then make contours separately for each shade.
- Leave the painting horizontally for a day to allow it to dry completely.
You can find many master classes on paintings made from coffee beans online; there are some very interesting ideas and options. For example, images of a cup, cat, tree, portraits.
Do not glue grains in two or three layers! If you like three-dimensional paintings made from coffee beans, look at how the author solved the problem. Perhaps salt dough, papier-mâché or something else was used.

Decor ideas
Here are just a few options you can use when creating your work:
- Use spices. Star anise (anise), cinnamon sticks, perhaps black pepper or cardamom - they look beautiful on the canvas.
- Decorate the frame. If it matches the color of the image, you can simply cover the edge with coffee beans, but it is better to cover it all with decor. As an option, apply ground coffee, and then attach grains, star anise, and cinnamon in some places.
- “Pixel” paintings in which the space is filled with white beans and coffee beans look very interesting. Just try to choose materials so that the grains are approximately the same size.
- Using superglue, you can attach a cup, spoon, or any other elements to the canvas.

After the coffee bean painting is ready, wait until it dries. Usually it takes 1-2 days, depending on the amount of glue. Shake it vigorously several times, tap it on the table, and run it with clean fingers. If any of the grains come off, reattach it with super glue.
Conclusions:
- Coffee bean paintings are a modern form of art. They look great in the kitchen, living room or office, as well as bars.
- You can make paintings from coffee beans using master classes or using your own stencil.
- Always fill the base with markers, gouache or ground coffee; without gaps, the decor will look prettier.
- Using super glue, you can attach spices, a spoon, or any small parts for decoration to the canvas.
- Coffee paintings are a great gift that will appeal to all lovers of this wonderful drink.
Takes ~3 minutes to read
A room without decorations, paintings, or souvenirs looks uncomfortable and uninhabited. The presence of cute trinkets says a lot about the owner of the home and his tastes. A room decorated in a certain direction, with a sense of proportion and in compliance with certain rules, will be beautiful and stylish. Handmade jewelry will bring pleasure, pleasant memories and pride. And if they are made from coffee beans, then the delicious aroma of coffee is added to the beauty, creating coziness and tranquility.
How to choose and arrange paintings and panels in the kitchen
By following the basic rules for placing paintings in the kitchen, a design solution is created, and not a crowd of works of art. With the help of paintings and panels, you can hide the disadvantages of the layout and show its advantages.
Vertically placed paintings visually make the ceiling higher; they are suitable for a small and narrow hallway. And horizontally elongated images expand the room.
- Large drawings need to be viewed from a great distance, so such paintings are suitable for living rooms.
- Small frescoes and engravings are placed at eye level, at a height of 1.5 m from the floor.
- Massive frames are used only in large rooms.
- If a composition is made of 3 paintings of different sizes, then attention should be concentrated in the center.
- In one room it is permissible to place works that are similar in theme, color scheme, and execution technique.
- When placing paintings of different sizes, it is necessary to take into account that a large one is never hung above a small one, and it is not advisable to place images of the same size in one line and at the same level.
- On bright walls, paintings can be mounted on a wide mat so that they do not get lost in color.
- If the panel is made of natural materials, then the background for it can be a bamboo napkin, burlap or canvas.
Techniques for creating coffee masterpieces
- Stencil– coffee bean powder and a pre-prepared stencil are used. It is applied to the base, the free parts of the pattern are coated with glue and covered with ground coffee. When the glue dries, remove the stencil. The silhouette of the design will remain in the coffee powder.
- Drawing coffee grounds– the sketch is drawn in pencil and then painted over with strong brewed coffee. Different consistencies give the desired shades. The most difficult thing in this technique is to draw without smudges.
- Use of coffee beans. This is the simplest and most common method. For crafts, buy the cheapest coffee; the beans will be of different sizes, which is convenient for work. A sketch of the design is made on the base for the panel, then it is covered with glue, and the grains are carefully placed on top. The panels are made in volume, you can use additional different materials and accessories.
Master class (photo and video)
Products made from beans and ground coffee are so diverse that it is difficult to consider them all. Each master finds his own style. There are several main directions and techniques used in our work. And everything else is a creative approach.
Crafts from twine and coffee
Original crafts and gifts can be made using twine and coffee. Wrap the vase, flower pot, and candle with twine so that there are no gaps left. Glue the grains onto the twine, creating a drawing or abstraction. Create patterns, curls, flowers from threads, paste them onto the craft, and decorate the coffee.
For such a craft, you can purchase a foam heart in special stores. This will make the job much easier. First, paint the heart brown so that the white parts do not show through, and glue the coffee beans. Then fix the aluminum wire or wooden stick in a container with plaster - this will be a stand for the heart. You can decorate with twine, coffee beans, ribbons, flowers. The heart can be suspended, then a stand and container will not be needed. It can be hung on a ribbon above the desktop, to a table lamp, or in a doorway.
Coffee topiary
The coffee tree can be made in any shape: ball, herringbone, heart. Buy the form at the store or make it yourself. Cover it with coffee beans. You can coat it with colorless varnish, this will give the product shine and strength. But the smell of coffee will disappear. For the trunk you will need any branch fixed in a flower pot or tea cup. To work you will need 100-200 g of coffee, PVA glue, hot glue, plaster. Ribbons, beads, and stones are suitable for decoration.
In such crafts, not only the image is valued, but also the opportunity to make a frame out of coffee. It can be wide, with multidirectional placement of grains, and combined with other grains. If the frame is wide, then the picture itself should be modest, consisting of an inscription, the silhouette of a cup and 3-5 grains lying nearby. Often used in paintings is a clock dial with hands frozen at the most pleasant moment of life.
A sketch is applied to the canvas. The grains are then laid out to assess what the finished painting will look like. If everything is satisfactory, then glue is applied to the silhouette and the coffee is carefully glued.
There are no restrictions when creating coffee paintings. You can come up with and depict any landscape, portrait, or animal. It all depends on the artistic abilities of the master.
Coffee bean tree
It is made in the form of panels or crafts. For the panel you need to draw a tree with a pencil. The trunk and branches are twisted from twine and glued to the base. They will create volume and relief, just like real ones. The grains represent leaves, and coins are glued to the branches among the leaves. It turns out to be a coffee-money tree.
Another option is to create a craft from a frame or ball covered with coffee. Instead of a trunk, a branch or tube is used, fixed with plaster in a tea cup, jar or pot. Decorate the cup with cinnamon tubes, vanilla stars, and dried lemon slices. This will additionally add a rich aroma.
Crafts from coffee and beans
Using a combination of contrasting tones, you can get paintings and crafts of absolutely extraordinary beauty. This contrast is obtained from the use of coffee beans and white beans. They are the same in size and texture, combined in a pattern and creating abstraction or a struggle of opposites. From coffee and beans you can create a picture or panel with the symbols of Yin and Yang, with silhouettes of white and dark cats. Save
Burlap is considered the most successful background and basis for coffee crafts. They go well together, the grains are associated with the bags in which they are brought. Therefore, scattered coffee beans on burlap are a ready-made picture. Beginners often create panels with a cup of coffee, a heart, or an inscription. It can be a simple lined silhouette, or a completely grain-covered, voluminous look with a real porcelain cup. It all depends on your imagination. A picture made of burlap can be inserted into a wooden frame, or made from coffee, gluing the beans in one or several rows.
Panel of cats
It is difficult to make a full-fledged picture from coffee beans, especially if there are no clearly defined silhouettes. When choosing a theme, many people choose the image of cats. Their image is easy to create and recognize. An elegantly elongated body, a long tail, ears - everything is quite simple to decorate with large grains, even without experience in drawing. This can be done according to the sketch, gluing them in one line, or you can completely glue the entire silhouette. The white and dark cats sitting next to each other look original. This panel will decorate any room.
Video
Coffee paintings and crafts will bring a lot of pleasure in the process of creating them. Using your talent, turning on creative thinking and imagination, working with pleasant-smelling material - all this can also be considered psychotherapy. Such a gift will bring no less joy to friends, relatives and loved ones.