Fridge magnets made from dough. Making refrigerator magnets “Winter Huts”
Do you want to learn how to make quickly, cheaply, and most importantly with your own hands, original souvenirs, Christmas tree decorations, and refrigerator magnets?
For example, this cat.
Or a monkey with a snowman.

Or a house for luck.

Look how many different things you can do!

So do you want to learn? Yes? Then let's begin! Right now. It's not difficult.
LET'S GET STARTED!
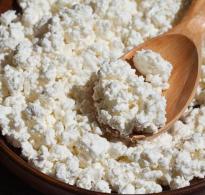
All this is done simply from salt dough . Take it regular flour . It’s better to take the cheapest one so that it won’t be expensive. The quality of flour does not affect the final product in any way. The main thing is that it is wheat.

Take salt.

The smaller the better. Even better grind the salt into powder. By the way, here is a good coffee grinder with which you can do this.
Mix salt and flour into a dough using water. Mix salt and flour in a one to one ratio. Place a glass of salt on a glass of flour. Add water as in regular dough. LITTLE SECRET!!! To make the dough better, you need to add a tablespoon to this mixture. sunflower oil and a spoonful of PVA glue,
Well, that means we kneaded it and got a bun like this.

In appearance, this dough is similar to the one from which bread is baked. It is not suitable for food because it is very, well, very salty. But it does not stick to your hands and generally has, unlike regular test in a bunch unique properties. The most important thing is that it is ideal for sculpting. After preparation, the dough must be kept in the refrigerator for a day. This is necessary so that the salt is completely dispersed. Only after this can you start sculpting.
LET'S MAKE!
So, the raw materials are ready. Now let's begin the sculpting process itself. I think when I was a child, everything was sculpted from plasticine. Everything is the same here. There is nothing fundamentally new. Take a board and sculpt. Roll “balls”, “sausages”, etc. It all depends on your imagination and your hands. Well, since not everyone was born professional sculptors, There are tools that will make things easier for your hands.. Here, for example, are stacks that can be carefully cut, shaped, etc.

A set of such tools costs 75 rubles. Sold in any art store.


Or these little devices. They can be used to make all sorts of patterns, eyes, nostrils, ears (if you are sculpting someone alive). These things are also inexpensive.

If you don’t want to buy a special tool, you can instead make do with what you have on hand in every home. An ordinary ballpoint pen, a penknife, or even better, a stationery knife will do.
And so, we sculpt. We are making mushroom houses.

Baskets with flowers.

Angels.

Teas with buns.

And a lot more stuff.

LET'S DRY!
You have put together many, many wonderful things. What's next? Further them needs to be dried. Place it on a board and dry it on the radiator.

The drying time depends on the thickness of the product. Small things dry in three days. Large and thick ones have to be dried for about a week.
You can tell when your toy is completely dry by its color.. The dough turns white when it dries. First at the edges, then more and more. When the whole thing acquires a uniform whitish tint, then it has dried. You can also determine it by hardness. A completely dry item becomes very hard.
THE WORLD IN COLORS
So. To dry, our toys are dry. But they are so ugly! White, lifeless, as if from some kingdom snow queen. But our world is a world of colors! So what? This means that our toys need to be decorated! And this is also quite simple. Even for those who got a C in drawing at school!
Let's start decorating. First of all we need brushes. At least that much!

Or at least that much.

Are you scared? Well, in vain. I was joking. In fact, all you need are these thin brushes.

And to finally reassure you, I will say that, in principle, just one thin brush will be enough for you. Something like this.
You can also use oil paints.


Well, let's decorate!


And our toys begin to smile, laugh and display all the colors of the rainbow.


Now, to prevent the paint from peeling off, all that remains is varnish them. I use this one. I don’t remember where and when I bought it.

But you can use any other varnish - it doesn’t matter at all. I think it’s even suitable for nails.
HOW TO REPAIR ?
It may happen that some of your toy accidentally breaks. Well, drop a snowman or a monkey, for example, and the head will break off. This happens sometimes because small things are quite fragile.
So, if this happens, don’t rush to cry and throw your work in the trash. Everything is fixed, quickly and easily.
Take this PVA glue.

And glue it. It sets quickly, leaving no traces of connection.
WHAT TO DO WITH THEM?
The most interesting question. What are these toys for? Well, it all depends on your imagination and your needs. You can make such Christmas tree toys. Then, during modeling, while the dough is raw, you need to make a hole, where you will then thread the thread to hang it on the tree. On New Year's Eve, such toys are very relevant. Snowmen, Santa Clauses, monkeys - after all, the year of the monkey is coming.
Small things can be refrigerator magnets. Then you need to glue a magnet on the back side of the already dried and decorated toy. Magnets are sold in craft stores. Glue with any glue. The main thing is to hold on. It can be for PVA, it can be for a moment. This is roughly how it works.

Horseshoes can be hung above the door of the house. Hearts can be hung in the car. Large toys can simply be placed on the table as souvenirs. In general, the range of applications is very wide.
If you have small children, then the main thing in modeling salt dough may not be the result, but the process itself. Children really enjoy making things like this. And at the same time, you and your child will improve your skills and become a pro in sculpting.
And most importantly, think How nice it will be to give such little things to your loved ones! Not just a refrigerator magnet, not just a Christmas tree toy, but a magnet and a toy made with your own hands. Original, unusual, existing in a single copy! When you give it, you can also joke that your gift is the most environmentally friendly it can be. And this is not just a joke! This is true! Because your gift is made from dough containing flour, salt and water. Even if you eat it, you won’t get poisoned. Try chewing on a toy from the store...
Do you like doing something with your own hands? Then . By the way, this is easier and faster than sculpting from salt dough. But no less interesting.
Thank you for reading to the end! Good luck to you! And trust your hands more than stores!

For our salt dough we need 2 tablespoons of flour and 1 tablespoon of salt, a little water and a little PVA glue. There is salt in the dough so that over time our product will not be eaten by rodents, and PVA glue gives strength.
First of all, you need to mix the dry ingredients, salt and flour, add a little water and PVA glue. Mix everything well and begin to knead with your hands. The dough needs to be kneaded so that it becomes homogeneous and plastic. The dough is ready when it does not stick to your hands. Now you can start sculpting.


Line a baking sheet with foil or baking paper. You need to sculpt immediately on a baking sheet. We roll the ball and use it into a flat cake, form ears, if necessary we help ourselves with a stack. We sculpt the eyes and nose so that the small parts adhere well to the base; they need to be moistened a little with water, and then glued. Using a stack or other stick with a sharp end, we press through the mouth, and in those places where we want to create a texture. We finish the arms, legs and sculpt a tail and sausages.


See if you need to add anything; if there are any unevenness, you can smooth them out with a damp brush. We send it to dry, put the baking sheet in a cold oven, and gradually raise the temperature to 130 degrees. Do not immediately set the temperature to high, the dough may swell. Our product should dry well, if it is a little damp inside, it’s okay, leave it at room temperature and everything will dry out, and the salt will not let it spoil.

Turn off the oven and let cool. If any edge is rough, you can sand it a little with sandpaper.
Everything is dry and we are ready to start painting the product. You can paint it with any colors. With watercolor you can achieve more transparent colors, gouache and acrylic give a dense coating. We will paint with gouache, cover the entire cat with black paint and immediately remove all excess with a damp cloth, leaving the paint in all the recesses. Don't wet it too much, let it dry. Now you can start working with color. We tint the eyes and nose, give a little color to the body, and paint the sausages. We work through everything carefully.


We paint the reverse side black and glue magnetic tape. To preserve salt dough for many years, you can coat it with varnish. That's it, our magnet is ready.

Many kids love cartoons. Almost all children want to get toys in the form of cartoon characters. But what to do if you can’t buy a toy in a store? Then you need to make it yourself! An original magnet in the shape of a character from the cartoon “Smesharikov” will delight not only a child, but also an adult! To make it you will need:
Salt dough
Acrylic paints
2 brushes (fine and medium size)
Acrylic gloss varnish
Magnet
Jar of water
Baking paper
Glue moment
1.Make a circle from the salt dough (it’s best to start right away on baking paper) and flatten it a little.
2. Roll two pieces of dough into “sausages” and make ears out of them. We bend one ear slightly. Glue the ears to the body.

3. Roll out 2 more “sausages”, which should be half the size of the previous ones.

4. We make handles from “sausages” and stick them to the base.

5.Make two balls from small pieces of dough and flatten them slightly. These will be the legs of the hero from Smeshariki.

6.Attach the legs to the body.

7.Roll out three more balls. From these we make Krosh's eyes and nose.

8.Dip the brush into water and smooth out all the joints.

9.After we have molded the base of the magnet, we need to wait for it to dry. To do this, dry the figurine in the oven for three hours (at a temperature of 70-100 degrees).

10.When the figure is dry, you need to paint it with acrylic paints. First, paint the flat side on which the magnet itself will be attached. Next, paint the front side with blue acrylic paint.

11.We paint the eyes with white acrylic, and pink- nose.

12.Draw the teeth with white paint. You must use a thin brush. Using blue paint we draw the eyebrows and the line of the mouth. Using black paint we finish the eyes of Smesharik.

13. Acrylic paint dries quickly, so after half an hour you can glue the magnet with adhesive.
Making souvenir magnets from salt dough. Master class
Yana Korsunova, 7 years old, 1st grade student of MKOU secondary school No. 1, Surovikino, Volgograd regionSupervisor: Svetlana Aleksandrovna Korsunova, technology teacher at MKOU secondary school No. 1, Surovikino, Volgograd region
Purpose: for interior decoration or as a New Year gift
Target: development of creative abilities
Materials and tools for work:
Salt, flour, water, gouache, clear varnish, magnetic tape;
- Small rolling pin, brush for wetting the dough, scissors, garlic press, small knife or stack

New Year- This is a favorite holiday not only for children, but also for adults. It’s nice to receive gifts at any age, so you can please your friends with an unexpected gift that will remind them of you for a long time. This could be a souvenir magnet or Christmas tree decoration from salt dough.
Any product made from salt dough found in the house is a symbol of wealth and prosperity in the family: bread and salt will always be on the table.
Salt dough is one of the most versatile, affordable materials that can be used in art.
Beautiful things made from salt dough - various figures, paintings, panels decorate the room and create coziness.
Durability and strength of products. You can even play with them without fear that they will lose their shape or break.
Job description:
1. Preparing salt doughThe main material for making salt dough products: flour premium- wheat, rye (gives the dough more fluffiness), “Extra” salt. The usual proportion for kneading salted dough: 2 parts flour, take 1 part salt and dilute with water to the consistency of soft plasticine. Ready dough should be elastic. We will store the dough in a plastic bag so that it does not dry out.
We will use gouache to color the dried products.
2. Modeling
Various New Year's stories for artistic modeling you can come up with it yourself, find it in children's books or on postcards. Roll out the dough into a layer 1 centimeter thick. To accurately cut out the parts of the composition from the layer, we use pre-prepared templates for these parts


We carefully lay out the parts cut out from the dough onto a thick sheet on which they will dry.
The texture in the workpiece drawing is achieved using various tools (you can use whatever you have at hand). Using a stack, we apply veins on the spruce branch and details of the product.


Nail scissors will help you make needles on the Christmas tree

If you put the dough through a garlic press, you will get spaghetti-shaped curls that can be used to make a tree crown. Wet the place where the parts connect to each other with water.


3. Processing salt dough
After complete drying, paint the product with gouache and varnish

On reverse side products are glued with magnetic tape

Salt dough magnets are ready


When you are preparing for Valentine's Day, remember that you can make a gift with your own hands, putting all your soul and skill into it. There is nothing better and more pleasant than making a gift for your soulmate with your own hands. In this master class with step by step photos, you will learn how to make your own salt dough magnets for the refrigerator for Valentine's Day.
To make magnets you will need:
One glass of flour;
- Frying pan;
- One glass of salt;
- Half a glass of water;
- A tablespoon of salt;
- Gouache;
- Glue gun;
- PVA glue;
- Rolling pin;
- Magnets;
- Brush;
- PVA glue;
- Knife;
- Toothpick.
Let's get started:
1) Knead the dough. Place the frying pan on the fire. Mix salt and flour and pour onto warm frying pan. Then, stirring constantly, pour in the water and oil. Gradually the dough will curl and take the shape of a ball. Turn off the heat and leave the dough to cool.
2) Cut it off small piece test. Roll it out with a rolling pin. Cut out a heart from cardboard or take a regular valentine, place it on the dough and cut it out. We smooth out the unevenness.

In this MK you will learn how to make several types of magnets.
First option. We make leaves from small pieces, using a toothpick we draw lines on the leaves.


Roll it up and give it the shape of a rose. We glue the roses and leaves to the heart with PVA glue.


Second option. We make letters from the dough, in our case we make the phrase LOVE IS... (as on the well-known chewing gum) and glue it to the heart.


The third option contains the first two. We make roses and letters and glue it all to the heart.


3) Leave the magnets on the battery to dry winter season or put it in the oven for two to three hours on the lowest heat.


4) Coloring. We paint with gouache or regular paints. First we paint the large parts, and then the small ones. If desired, the top can be coated with varnish for shine.


5) Glue the magnets to the hearts using a glue gun.
That's it, the magnets are ready.