Apple compote in an autoclave. Canned cherries in an autoclave in their own juice with sugar
The sterilization process consists of three periods:
- the first period is heating to the sterilization temperature (sterilization temperature for each product is indicated in the table);
- the second period is exposure at sterilization temperature (the duration of exposure in minutes is indicated in the tables);
- third period – cooling of canned food to a temperature of 40 °C.
1. Sterilization modes for canned food.
| Name canned food |
Volume cans, l |
Temperature sterilization, °C |
Duration sterilization, min. |
| Canned meat | 0,35 | 120 | 30 |
| 0,50 | 120 | 40 | |
| 1,00 | 120 | 60 | |
| Canned meat birds |
0,35 | 120 | 20 |
| 0,50 | 120 | 30 | |
| 1,00 | 120 | 50 | |
| Canned fish | 0,35 | 115 | 20 |
| 0,50 | 115 | 25 | |
| 1,00 | 115 | 30 | |
| Canned vegetables | 0,35 | 100 | 10 |
| 0,50 | 100 | 15 | |
| 1,00 | 100 | 20 | |
| Mushrooms pickled |
0,35 | 110 | 20 |
| 0,50 | 110 | 30 | |
| 1,00 | 110 | 40 |
Notes:
- to ensure free expansion of liquid in sealed jars when heated, the level of liquid in the jar should be 2-3 cm below the top edge, depending on the capacity of the jar;
- meat and fish products are not allowed to be sterilized in 2 and 3 liter jars;
- increase the holding time for old lamb and beef by 15-20 minutes;
- the duration of sterilization of products can be clarified based on your own experience in preparing canned food;
- deviation from the set sterilization temperature should not exceed + 2 °C;
- in the table, the duration of sterilization corresponds to the time the cans are kept in an autoclave at the sterilization temperature without taking into account the heating time to the set temperature;
- when producing pickled cucumbers and tomatoes, the sterilization time in 3-liter jars should not exceed 15 minutes.
When packaging and sterilizing products, it is allowed to use glass containers with “twist-off” brand lids that have been used.
When carrying out the process of sterilization of canned vegetables and fruits, packaged hot in jars, the water in the autoclave is preheated to 70-90 ° C, then a cassette with canned food is loaded into it.
2. Sterilization modes for tomato sauces.
| Name canned food |
Volume cans, l |
Temperature sterilization, °C |
Duration sterilization, min. |
| "Spicy tomato sauce" "Kuban sauce" "Black Sea tomato sauce" “Tomato sauce in Georgian style” "Summer sauce" "Astrakhan sauce" "The sauce is delicious" "Spicy tomato sauce "Delicacy"" "Kherson sauce" |
0,35 | 100 | 10 |
| 0,50 | 100 | 15 | |
| 0,65 | 100 | 15 | |
| 0,80 | 100 | 15 | |
| 1,00 | 100 | 15 | |
| 2,00 | 100 | 20 |
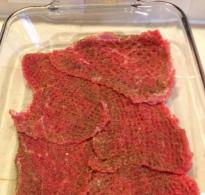
Canned meat
Cooking technology:
1. wash the lids and jars;
2. cut into pieces weighing 50-120g;
3. chop the onions;
5. mix the meat with chopped onions (if desired, you can increase the amount of onions and add carrots), salt and fat (vegetable oil);
6. place the raw materials in jars so that there is 2-3cm of space left before the lid;
7. roll up the cans;
Cooking technology:
1. wash the lids and jars;
3. cut the meat into pieces of 50-60g;
4. chop and fry onions in fat;
5. mix meat with fried onions, salt, sugar, tomato paste, red pepper;
6. put the raw materials in the jars so that there is a void of 5-6 cm to the lid;
7. roll up the cans;
8. begin the sterilization process.
Cooking technology:
1. wash the lids and jars;
2. place bay leaf and black pepper on the bottom of the jar;
3. cut the meat into pieces of 50-70g;
4. boil the meat for 10-15 minutes;
5. mix the meat with salt and place in jars so that there is 2-3 cm of space left before the lid;
6. pour broth over the meat;
7. roll up the cans;
8. begin the sterilization process.
| Ingredients | 0.5 l jar | 1 liter jar |
| Fried meat (raw), g | 400(705) | 800(1400) |
| Rendered fat, g | 70 | 140 |
| Tomato paste (12%), g | 30 | 60 |
| Sugar, g | 2 | 4 |
| Salt, g | 7 | 14 |
| Onion, g | 25 | 50 |
| Ground black pepper, g | 1 | 2 |
| Bay leaf, pcs. | 1 | 2 |
| Wheat flour, g | 15 | 30 |
Cooking technology:
1. wash the lids and jars;
2. place a bay leaf on the bottom of the jar;
3. cut the meat into pieces of 30-40g;
4. fry the meat in fat for 30-40 minutes;
5. chop the onions;
6. mix meat with salt, onion, sugar, black pepper, tomato paste and flour;
7. place the raw materials in jars so that there is 2-3cm of space left before the lid;
8. roll up the cans;
| Ingredients | 0.5 l jar | 1 liter jar |
| Raw meat, g | 190 | 360 |
| Wheat flour, g | 14 | 25 |
| Peeled onions, g | 60 | 110 |
| Fat for frying onions, g | 15 | 25 |
| Salt, g | 5 | 10 |
| Black pepper, g | 1 | 2 |
| Sugar, g | 7 | 14 |
| Peeled carrots, g | 25 | 50 |
| Bay leaf, pcs. | 1 | 2 |
| Fresh cabbage, g | 250 | 450 |
| Tomato paste (30%), g | 23 | 46 |
Cooking technology:
1. wash the lids and jars;
2. cut the meat into pieces of 30-40g;
3. chop and fry onions in fat;
4. cut the carrots;
5. chop the cabbage;
6. saute (fry in a dry frying pan until light brown) flour;
7. mix meat with flour, tomato paste, onions, carrots, cabbage, salt, black pepper, sugar;
8. place the raw materials in jars so that there is 2-3cm of space left before the lid;
9. roll up the cans;
10. Start the sterilization process.
| Components | Ratio of components in % | Quantity in cans, g | |
| 0.35l | 0.5l | ||
| Liver | 65-66 | 230 | 325 |
| Fat | 4 | 15 | 20 |
| Sauce | 30-31 | 105 | 155 |
| Net weight | - | 350 | 500 |
Cooking technology:
1. wash the lids and jars;
2. peel the pechent from the film and cut into pieces weighing 50-60g;
4. put the liver in jars and pour hot sauce so that there is 2-3cm of space left before the lid;
5. roll up the cans;
Preparing the sauce
Passed flour is carefully poured into the warm broth, rubbing the resulting lumps and stirring. The mixture is boiled in a container for 20-30 minutes until the grains disappear. Then, sequentially according to the recipe, add the remaining components of the sauce and boil again for 15 minutes.
The sauce is poured into jars at a temperature of 70-75°C immediately before rolling.
Sauce recipe
Cooking technology:
1. wash the lids and jars;
2. cut meat (beef, pork) into pieces weighing 500-700g;
3. boil the meat for 40-60 minutes;
4. fry the onion in fat until golden brown;
5. mix the meat with salt and onion and grind in a meat grinder;
6. add broth and spices according to the recipe, mix thoroughly;
7. place in jars so that there is 2-3cm of space left before the lid;
8. roll up the cans;
9. begin the sterilization process.
| Raw materials | Ingredients for making liver pate in g per 100g | ||
| with pork fat | with butter | with carrots | |
| Liver | 55 | 55 | 47,8 |
| Raw fat | 35 | - | 10,5 |
| Carrot | - | - | 13 |
| Brains are raw | 10 | 10 | 8,7 |
| Butter | - | 35 | - |
| Ghee | - | 30 | - |
| Onion | 3 | 3 | 3 |
| Salt | 1,3 | 1,3 | 1,3 |
| Sugar | 0,4 | 0,4 | 0,4 |
| Black and allspice pepper, nutmeg, cinnamon and cloves (in equal parts) | 0,2 | 0,2 | 0,2 |
Cooking technology:
1. wash the lids and jars;
2. peel the liver from the film and cut into pieces weighing 50-60g;
3. bread the liver in flour and fry for 3-5 minutes;
4. onions and carrots are fried in fat until golden brown;
5. liver, onions and carrots are chopped in a meat grinder;
6. Add melted fat or butter, salt, spices to the crushed mass and mix thoroughly;
7. Place the pate mass in jars so that there is 2-3cm of space left before the lid;
8. roll up the cans;
9. begin the sterilization process.
Parts ratio
Cooking technology:
1. wash the lids and jars;
2. Peel the kidneys from the film and cut them in half lengthwise, soak for 2-3 hours, boil, cool;
3. Cut the kidneys into 1-2 cm cubes;
4. prepare tomato sauce;
5. put the kidneys in jars and pour hot sauce so that there is 2-3cm of space left before the lid;
6. roll up the cans;
Preparing the sauce
Fat is loaded into the cauldron, then chopped onions, after frying, flour, broth, tomato paste, salt, sugar, pepper are added, then boiled, after which vinegar is added.
Tomato sauce recipe
Cooking technology:
1. wash the lids and jars;
3. boil and fry, cut into pieces 50-60g;
4. boil beef bone broth;
5. boil tomato sauce;
6. pack pieces of meat into jars, pour hot sauce over them;
7. roll up the cans;
8. begin the sterilization process.
Sauce recipe
Sauce recipe
Cooking technology:
1. wash the lids and jars;
2. prepare the carcasses, cut along the ridge, rinse, soak in a 1% vinegar solution (2:1) for 20 minutes;
3. boil and cut into pieces 35-40g;
4. prepare rice, rinse, boil in 1% salt solution;
5. boil beef bone broth;
6. boil sour cream sauce;
7. Pack pieces of meat into jars, pour hot sauce over them;
8. roll up the cans;
9. begin the sterilization process.
Cooking technology:
1. wash the lids and jars;
2. cut the lamb into pieces 20-30g;
3. fry meat, onions and carrots;
4. Boil a mixture of onions and carrots with rice, salt, fat and pepper in a cauldron for 20 minutes;
5. package the meat and mixture into jars;
6. roll up the cans;
7. begin the sterilization process.
Canned poultry meat
Cooking technology:
1. wash the lids and jars;
2. cut the chicken into pieces weighing 50-120g;
3. cut the carrots;
4. Place black pepper and bay leaf on the bottom of the jar;
5. mix the meat with chopped carrots (you can increase the amount of carrots if desired) and salt;
7. roll up the cans;
8. begin the sterilization process.
| Ingredients | 0.5 l jar | 1 liter jar |
| Chicken meat on the bones, g | 350 | 700 |
| Rice, g | 50 | 100 |
| Butter, g | 15 | 30 |
| Salt, g | 6 | 12 |
| Onion, g | 7 | 14 |
| Carrots, g | 7 | 14 |
| Black peppercorns, pcs. | 3 | 6 |
| Allspice, pcs. | 2 | 4 |
| Broth (boiled water), g | 150 | 300 |
Cooking technology:
1. wash the lids and jars;
3. fry chicken pieces in vegetable oil;
4. chop onions and carrots;
5. Boil rice in boiling water (8-10 minutes);
6. mix rice with butter;
7. Place black and allspice pepper on the bottom of the jar;
8. mix fried chicken meat with chopped carrots (you can increase the amount of carrots if desired), salt and rice;
9. place the raw materials in jars so that there is 2-3cm of space left before the lid;
10. fill with broth or water;
11. roll up the cans;
Cooking technology:
1. wash the lids and jars;
2. cut the chicken into pieces weighing 25-50g;
3. boil chicken pieces;
4. Place black pepper and bay leaf on the bottom of the jar;
5. mix boiled chicken meat with salt;
6. place pieces of meat and butter in jars so that there is a gap of 2-3 cm to the lid
7. roll up the cans;
8. begin the sterilization process.
Cooking technology:
1. wash the lids and jars;
2. cut the chicken into pieces weighing 25-50g;
3. boil chicken pieces;
4. strain the broth and add swollen gelatin, boil (at the rate of 1 tablespoon of gelatin per 1 glass of cold water, 1 glass of swollen gelatin per 1 liter of broth);
6. roll up the cans;
7. begin the sterilization process.
Cooking technology:
1. wash the lids and jars;
2. boil chicken meat, cut into pieces 30-50g;
3. prepare the sauce;
4. Place chicken pieces in jars, pour hot sauce so that there is 2-3cm of space left before the lid;
5. roll up the cans;
6. begin the sterilization process.
Preparing the sauce
Sauce recipe
Cooking technology:
1. wash the lids and jars;
2. cut the chicken into pieces 25-50g;
3. boil chicken pieces;
4. strain the broth and add the swollen gelatin, boil (at the rate of 1 tablespoon of gelatin per 1 tablespoon of cold water, 1 tablespoon of swollen gelatin per 1 liter of broth);
5. place pieces of meat in jars, pour hot broth so that there is 2-3cm of space left before the lid;
6. roll up the cans;
7. begin the sterilization process.
Cooking technology:
1. wash the lids and jars;
2. cut the chicken into pieces 30-50g;
3. fry chicken pieces in melted butter;
4. cook the broth;
6. place the chicken pieces in a jar, add the swollen rice, pour over the hot sauce;
7. roll up the cans;
8. begin the sterilization process.
Preparing the sauce
Boil chicken bone broth in water at a ratio of bones to water of 1:3. Dried flour is added to the melted butter, then broth and sugar, boiled for 2-3 minutes, served for packaging at a temperature not lower than 75°C.
Sauce recipe
| Ingredients | Content in % |
| Fried duck meat | 50 |
| Tomato sauce | 34 |
| Fried onion | 16 |
Cooking technology:
1. wash the lids and jars;
2. cut the duck into pieces of 30-50g;
3. fry duck pieces in melted butter;
4. cook the broth;
5. prepare tomato sauce;
6. peel, wash, finely chop the onion, simmer for 5 minutes in a frying pan;
7. Place onion and duck pieces on the bottom of the jar and pour hot sauce over it;
8. roll up the cans;
9. begin the sterilization process.
Preparing the sauce
Boil chicken bone broth in water at a ratio of bones to water of 1:3. Dried flour is added to the melted butter, then broth and sugar, boiled for 2-3 minutes, served for packaging at a temperature not lower than 75°C.
Sauce recipe
| Ingredients | glass jar 500g | glass jar 1000g |
| Half gutted chicken | 400 | 800 |
| Half gutted duck | 5,5 | 11 |
| Bouillon | 104 | 208 |
| Bone fat | 15 | 30 |
| Onion | 21 | 42 |
| Flour | 15 | 30 |
| Garlic | 5 | 10 |
| Red pepper | 3 | 6 |
| Salt | 5 | 10 |
Cooking technology:
1. wash the lids and jars;
2. cut the poultry carcasses into pieces of 50-70g;
3. prepare the sauce;
4. place poultry pieces in jars and pour sauce over them;
5. roll up the cans;
6. begin the sterilization process.
Sauce recipe
| Raw materials | Goose meat with cabbage | Goose meat with buckwheat porridge | ||
| 500g | 1000g | 500g | 1000g | |
| Fried goose meat | 150 | 300 | 210 | 420 |
| Stewed cabbage | 350 | 700 | - | - |
| Buckwheat porridge | - | - | 290 | 580 |
| Raw materials | Goose meat with rice | Goose giblets in tomato sauce | ||
| 500g | 1000g | 500g | 1000g | |
| Fried goose meat | 150 | 300 | - | - |
| Boiled rice | 350 | 700 | - | - |
| Boiled goose by-products | - | - | 350 | 700 |
| Tomato sauce | - | - | 150 | 300 |
Cooking technology:
1. wash the lids and jars;
2. cut the meat into pieces of 50-70g;
3. fry the meat in fat or vegetable oil;
4. stew sauerkraut with goose fat, bone broth, fried onions, bay leaf, sugar, pepper and salt;
5. cook buckwheat porridge with fat, onions, and spices;
6. cook rice porridge with fat, onions, and spices;
7. offal processing, cooking;
8. prepare broth from goose bones (yield 1:1);
9. prepare tomato sauce from broth, salt, sugar, pepper, tomato paste, fried onions, vinegar;
10. lay layers of poultry pieces, porridge, pour hot sauce;
11. roll up the cans;
12. Start the sterilization process.
Canned fish
Cooking technology:
1. wash the lids and jars;
3. fry the fish in vegetable oil;
4. Place black pepper and bay leaf on the bottom of the jar;
5. mix fried fish with salt;
6. place the raw materials in jars so that there is 2-3cm of space left before the lid;
7. roll up the cans;
8. begin the sterilization process.
Cooking technology:
1. wash the lids and jars;
2. cut the fish into pieces weighing 50-80g;
3. Place black pepper and bay leaf on the bottom of the jar;
4. mix fish with salt;
5. place the raw materials in jars so that there is 2-3cm of space left before the lid;
6. pour in vegetable oil;
7. roll up the cans;
8. begin the sterilization process.
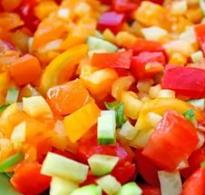
Canned vegetables
Cooking technology:
1. wash the lids and jars;
2. cut oranges, tomatoes into 8 parts, bell pepper;
7. roll up the cans;
8. begin the sterilization process.
| Components | Type of lettuce, g per 1 kg of mixture | ||||
| "Ukrainian" | "Donskoy" | "Kubansky" | "Nezhinsky" | "Tashkent" | |
| Fresh cabbage | - | - | 250 | - | - |
| Sweet red pepper | 170 | - | - | - | 219 |
| Sweet pepper (red or green) | - | 215 | 150 | - | - |
| Fresh brown or milk tomatoes (red ones can also be used) | 440 | 549,3 | 400,5 | - | 275 |
| Fresh cucumbers | - | - | - | 623,1 | - |
| Carrot | 170 | - | - | - | - |
| Onion | 115,2 | 157 | 120 | 300 | 152,8 |
| Sunflower or cottonseed oil | 80 | 55 | 55 | 55 | 55 |
| Acetic acid 80% | 4 | 3 | 5 | 5 | 3,5 |
| Salt | 20 | 20 | 15,5 | 15,5 | 20 |
| Bay leaf | 0,14 | 0,46 | 0,4 | 0,4 | 0,47 |
| Black peppercorns | - | 0,24 | 0,5 | 05, | 0,23 |
| Allspice peas | 0,23 | - | 0,5 | 0,5 | - |
| Carnation | 0,23 | - | - | - | - |
Cooking technology:
1. wash the lids and jars;
2. cut the oranges, onions into rings, tomatoes into 8 parts, bell peppers, carrots into strips, chop the cabbage;
3. Place sliced vegetables in jars in layers;
4. boil water for the marinade;
5. add and dissolve salt, sugar and vinegar in water (according to the recipe);
6. pour the marinade over the vegetables in the jar, so that there is 2-3cm of space left before the lid;
7. roll up the cans;
8. begin the sterilization process.
Cooking technology:
1. wash the lids and jars;
2. cut the eggplants into 2x2 cm cubes and fry;
3. cut carrots and bell peppers into strips;
4. cut the onion into cubes;
5. fry carrots, bell peppers and onions in vegetable oil;
6. mix the prepared vegetables with tomato paste, vegetable oil, salt, sugar, simmer for 30 minutes;
7. lay the raw materials in such a way that there is a gap of 2-3 cm to the lid;
8. roll up the cans;
9. begin the sterilization process.
Mushrooms
Cooking technology:
1. wash the lids and jars;
2. boil the mushrooms for 5-6 minutes;
3. drain the water and rinse with running water;
4. cook again in water with salt and spices for 10 minutes; add vinegar at the end of cooking;
5. package in jars;
6. roll up the cans;
7. begin the sterilization process.
Cooking technology:
1. wash the lids and jars;
2. cut the mushrooms into equal pieces;
3. Pour water over the mushrooms, add salt, chopped onion and allspice;
4. cook for 25-35 minutes;
5. prepare the marinade (add salt, sugar to the water, boil, add vinegar or citric acid at the end);
7. roll up the cans;
8. begin the sterilization process.
Cooking technology:
1. wash the lids and jars;
2. Pour lightly salted water over the mushrooms;
3. cook for 5 minutes;
4. prepare the marinade (add pepper, bay leaf, nutmeg to the water, boil, add vinegar or citric acid at the end);
5. pour the marinade over the mushrooms, boil for 5 minutes;
6. place mushrooms with marinade in jars;
7. roll up the cans;
8. begin the sterilization process.
Tomato sauces
| Ingredients | |
| Fresh tomatoes | 2770 |
| Salt | 23 |
| Sugar | 16 |
| Fresh garlic | 3 |
| Black hot pepper | 3 |
| Allspice | 6 |
| Carnation | 1,2 |
| Nutmeg | 3,5 |
| Vinegar essence 80% | 4,25 |
| Cinnamon | 1,2 |
| Ingredients | Recipe, g per 1 kg of finished sauce |
| Fresh tomatoes | 2116 |
| Salt | 23 |
| Sugar | 15 |
| Fresh onion | 88 |
| Fresh garlic | 1,3 |
| Black hot pepper | 0,56 |
| Allspice | 0,56 |
| Carnation | 1,67 |
| Mustard | 0,39 |
| Vinegar essence 80% | 5,5 |
| Ingredients | Recipe, g per 1 kg of finished sauce |
| Fresh tomatoes | 3244 |
| Salt | 23 |
| Sugar | 20,5 |
| Black hot pepper | 0,42 |
| Allspice | 0,94 |
| Cinnamon | 1,75 |
| Nutmeg | 0,5 |
| Vinegar 10% | 51 |
| Vinegar essence 80% | 18 |
| Ingredients | Recipe, g per 1 kg of finished sauce |
| Fresh tomatoes | 2450 |
| Salt | 15 |
| Sugar | 50 |
| Fresh sweet pepper | 40 |
| Fresh apples | 100 |
| Fresh onion | 30 |
| Parsley | 5 |
| Fresh garlic | 2 |
| Dill greens | 5 |
| Celery greens | 5 |
| Flour | 10 |
| Black hot pepper | 0,2 |
| Allspice | 0,2 |
| Coriander | 0,2 |
| Cinnamon | 0,2 |
| Citric acid | 1,6 |
| Ingredients | Recipe, g per 1 kg of finished sauce |
| Fresh tomatoes | 3200 |
| Salt | 27 |
| Sugar | 21,8 |
| Garlic | 0,29 |
| Carnation | 1,86 |
| Cinnamon | 1,86 |
| Allspice | 1,27 |
| Hot pepper | 0,29 |
| Nutmeg | 0,49 |
| Vinegar 10% | 75,5 |
Step 1: prepare inventory.
We sort through and inspect the jars for cracks and nicks on the necks of the jars. We are reviewing the covers so that there is no rust on them, they are not bent, and there is a rubber gasket in each cover. We wash the equipment in warm running water with the addition of any detergents. If you don't like the smell of chemicals or prefer any other detergents, you can use them, as long as the jars and lids are clean. Then we lower 8 liter jars and 8 metal lids for preservation into an autoclave filled with ordinary running water, so that they are completely immersed in it and place them on the stove, turned on at a high level. After the water has boiled, note the time and sterilize the jars along with the lids from 15 to 20 minutes. Using preservation tongs, remove the sterilized jars from the autoclave and place them neck down on a table previously covered with a waffle towel. Take a deep, clean bowl, lower it into the autoclave and scoop out some boiling water. Then we put the sterilized lids into it using lid tongs. We use the hot water that remains in the autoclave to treat all the equipment with which we will do preservation.
 Step 2: prepare the plums.
 Let's take it 7 kilograms hard plums and put them in a sink with water, closed with a stopper. We wash the fruits in cold running water to remove dirt, leaves and other substances we don’t need, let them sit in it for a while, 10 minutes will be quite enough. Then we transfer the plums into a large colander and let the remaining water drain out.
  Place the washed, clean plums in a clean, deep bowl with clean hands.
 Step 3: put the plums in a jar and fill with syrup.
 While the plums are soaking, prepare the syrup. For this type of preservation, a light syrup is boiled so that the taste of the plums is not overloaded with sugar and people who do not consume large amounts of sugar can treat themselves to a tasty winter preparation. Therefore, an ideal syrup is when there is more water than sugar, for example 60% to 30%. For our syrup we will take 4 liters of pure distilled water and 1 kilogram sugar, approximately 125 grams per 1 liter jar. With the stove turned on, place a deep saucepan with clean, purified water on high and bring it to a boil. Then add sugar to the water, turn the stove to medium level, and periodically stirring the ingredients with a wooden spatula, boil the syrup for 15 minutes, during which time the sugar will completely dissolve. While the syrup is preparing, put the plums in the jars. We turn the jars upside down and place the plums in them, having previously cut each fruit with a knife so that they do not explode during heating. Place the plums tightly in the jar.
  We place a watering can with a large neck on the surface of the jar, put it in a bowl so that precious drops of syrup do not spill, and with a clean ladle we pour hot syrup into each jar so that it does not reach the neck of the jars 2 fingers. The empty space in the jars will be filled with the plum juice that will come out during sterilization.
  We wipe the outside of the jars with a wet, clean towel so that no syrup remains on their surface, which will subsequently interfere with the sealing of the jars with lids.
  We close the jars with lids and place them on the autoclave grid.
 Step 4: sterilize and preserve the plums.
 We fill the autoclave with new running water so that it does not reach the necks of the jars filled with plums by 2-3 fingers and place it on the stove, turned on at a high level. Now the main thing is not to miss the moment, the water in the autoclave should not boil, it should heat up to about 45 degrees, just make sure that it is heated and steam is coming from it. We take the autoclave mesh by the handles, in which the jars with the preparations are located, and very carefully place them in the autoclave itself so that the lids do not fall and the precious sugar syrup does not spill out.
  We sterilize the plum in an autoclave for 20 minutes. Then, one by one and very carefully, we remove them together with the lids from the boiling water using special canning tongs. We close the hot jars with a preservation key, holding them with a waffle kitchen towel. We spread a woolen blanket on the floor, and on one of its ends we place jars with plums, neck down, helping ourselves with a towel. Cover the canned goods with the other end of the blanket so that there are no gaps and the canned plums cool down without sudden changes in temperature during 1 - 2 days. After the jars have cooled, they can be moved to a dry, dark and cool place for further storage, this could be a pantry or cellar.
 Step 5: serve canned plums.
 Canned plums are served cold on a plate for adults and at room temperature for children. They can be consumed without additives as a sweet dessert, or added to fruit salads, baked goods, and jellies. You can make caramel, jelly, and mousse with plum sugar syrup. Often this plum is added to gravy for meat dishes. I hope you enjoyed the plums in this recipe. Tasty and healthy! Bon appetit!
 - − Jars can be washed with soda; it perfectly removes grease, mold and copes with other contaminants even in hard-to-clean places.
- − Be sure to soak the plum for 5 - 10 minutes in cool water; if you bought a plum that was not sprayed with chemicals, it may contain worms. While soaking the fruits, they will float upside down, and thus you will get rid of unnecessary living creatures in your preservation.
- − If you need more syrup, you can increase the amount of water and sugar, maintaining the proportions of approximately 1:2.
- − If you want your plum to retain its round shape during preservation, instead of making a cut on its surface with a knife, you can prick it with a needle or pin. Thus, the air accumulated around its pit and inside the pores will escape through small holes, but the shape of the plums will remain round.
- − If you bought a sweet plum, the syrup in which the fruit will be preserved can be acidified with lemon juice or citric acid. But only after it is ready. In boiling syrup, juice and acid lose their properties and become bitter.
- − The time for sterilization of blanks depends on the volume of the jar and its capacity, half-liter ones are sterilized for 15 minutes, liter ones for 20 minutes, two-liter ones for 30 - 35 minutes, three-liter ones for up to 45 minutes.
- Always keep a kettle of hot water on the stove. While cooking the syrup, the water may boil away a little and there may not be enough syrup for all the jars or the drain may release little juice. In this case, you can add a little hot boiled water to the jars.
- − If you don’t have an autoclave, you can sterilize the plums in a regular large 10 liter saucepan.
Summer is the time for all kinds of fruits, this is the time when you need to stock up on vitamins. And if you love fruit jam, and you have it, but you don’t know how to cook jam in an autoclave, we will be happy to tell you.
Why is it convenient to cook jam in an autoclave?
There are several reasons:
- The jam cooks much faster;
- It will be tastier and healthier;
- You don't have to sterilize the jars;
- The twists will be stored for a long time.
Do you want to know how to make jam in an autoclave, something that will surprise your family? We have prepared for you a couple of simple but delicious recipes that will delight you and your family during the winter cold!
How to make jam in an autoclave at home?
In order to prepare jam in autoclaves, you need to use the “sterilization” or “pasteurization” mode. You need to choose one of them based on what kind of jam you want to make and what jars you have prepared for it.
You should never forget that when heated, liquids necessarily expand, so you should not put jam in the jar to the very edge, but leave a space of 2-3 cm from the neck.
Different fruit jams can be sterilized in an autoclave for different lengths of time, depending on your tastes and the type of fruit.
Jam in an autoclave: delicious and unusual recipes
Apple jam with dried fruits
You will need:
- 1.5 kg apples
- 1 cup dried fruits
- 1 glass of water
- 2 kg sugar
t °С - 100°С
- First, peel the apples and cut them into small pieces.
- Then you need to boil the sugar syrup.
- Then you need to add apples and dried fruits to it.
- After boiling, this mixture should be cooked for 5 minutes over low heat.
- Afterwards you need to leave the future jam to cool for several hours, or even overnight.
- Next, you need to boil the mixture again, and then pour it into prepared jars.
- Roll up the jars and put them in an autoclave for sterilization.
How does the process of sterilizing jam in an autoclave take place?

Stage 1: Jars of jam are heated to the required sterilization temperature (see the table).
Stage 2: Holding the cans at the desired temperature.
Stage 3: Cooling of preservation.
Seasonal pear and raspberry jam in an autoclave
For it you will need:
- 2 cups chopped pears;
- 2 cups raspberries (you can use frozen ones);
- Fruit pectin;
- 6 glasses of sugar;
- Lemon juice - 2 tbsp. spoons;
- 2 teaspoons orange zest;
t °С - 100°С
Cooking time - 15 minutes

To prepare this unusual and tasty jam, you need to mix all the ingredients in a large bowl or pan. Then you need to put the mixture and wait until it boils.
Then remove the pan from the heat, add a little pectin to the future jam, and mix everything well. Then turn on the heat again and boil the jam for no longer than a minute, stirring it non-stop.
Collect the foam and begin pouring the jam into the prepared jars, retreating 2-3 cm from the edge of the neck. Roll up the jars and place them in the autoclave.
Now you know how to cook jam in an autoclave, which means you can stock up on tasty and vitamin-rich foods for the winter! The main thing is to have an autoclave, a good mood and a little time. And if you don’t have an autoclave yet, you can always buy one in our Cropper online store.
Proper preservation of vegetables allows you to preserve most of their beneficial substances and turn the preparations into inexpensive and complete sources of vitamins and minerals. There are much more of these components in vegetables than in fruits. Home canning of vegetables in an autoclave allows you to make the preparation process quick and with minimal effort - and this applies to almost the entire range of products.
If we take into account the professional classification, in a home autoclave you can prepare natural, canned snacks and lunches, vegetable juices and marinades, and tomato-based products. Natural canned food includes those made from one or more vegetables with sugar, salt and acids, filled with water and sterilized. Snack bars include vegetable products with added vegetable oil, spices, tomato juice, and herbs. They most often undergo pre-treatment before preservation and are more nutritious.
Rules for preserving vegetables in an autoclave
Vegetables are prepared in an autoclave, in most cases following the following algorithm:
- Selection of vegetables - ripe, without rot or other defects.
- Processing – washing, sorting, peeling, cutting, cooking or other preliminary heat treatment (if necessary).
- Place clean jars of aromatics and spices in the bottom according to the recipe.
- Adding vegetables (almost always done without tamping).
- Creating a fill. This usually requires hot water (about 80 degrees Celsius) with salt, sugar and vinegar.
- Adding hot pour to jars. In this case, it is important to leave about 2 cm to the lid - during the sterilization process, the composition will expand and it needs space.
- Closing jars using metal lids.
- Sterilization of jars in an autoclave under certain conditions of temperature and pressure.
- Removing the cans after the autoclave has cooled.
General standards for sterilizing canned vegetables in an autoclave:
Recipe for canned eggplant in an autoclave

These classic canned vegetables in an autoclave are made from the following ingredients:
- blue – 3 kg;
- sweet pepper – 2 kg;
- tomatoes – 1 kg;
- onion – 500 g;
- carrots – 1 kg;
- sunflower oil – 1.5 tbsp.;
- salt – 2 tbsp.
Early eggplants are best suited for this recipe (they don’t have many seeds yet). They need to be cut into slices, salted and left in the pan for 3 hours until the juice appears. At this time, you need to chop other vegetables: grate carrots, cut onions and peppers into rings, tomatoes into quarters. Each ingredient must be fried separately in sunflower oil, and only then mixed. Place eggplants in clean jars, the next layer is vegetables, and so fill them in layers to the top. Sterilization time in an autoclave is up to 15 minutes.
Canned tomatoes in an autoclave

Preserving vegetables in an autoclave in their own juice is common - for example, to cook a tomato you need:
- medium-sized tomatoes – 12 pcs.;
- freshly squeezed tomato juice – 1 tbsp.;
- black pepper – 4-5 peas;
- salt – 1 tsp.
Wash the tomatoes and keep them in boiling water for 30 seconds to then peel them. Put pepper and salt into the jars, place the tomatoes very carefully (do not squeeze them under any circumstances!), heat the tomato juice to about 80 degrees Celsius and pour it into the jars. After the container, you can seal it tightly with metal lids. Closed jars should be placed in an autoclave and sterilized for 15 minutes. The finished product stores well and is versatile: it can be consumed in its pure form or made as a component of dishes (for example, pizza).
Recipe for canning cucumbers in an autoclave

You can make preparations for the winter in an autoclave, including cucumbers. In this recipe we will look at preparing crispy pickled fruits. For this you need:
- medium-sized cucumbers;
- salt – 5 g per half-liter jar;
- garlic cloves – 3-4 pcs.;
- fresh dill;
- black pepper – 0.5 tsp;
- vinegar – 1 tsp;
- water.
We select the proportions of products depending on the volume of cans used. Add spices to taste. For preservation we select hard cucumbers. Ideally, they should be collected no later than 24 hours before cooking. Cucumbers can be canned whole (which will keep them crisp), for sandwiches (cut into strips), or for salads (cut into rounds). The last two options practically do not allow you to achieve the required crispness, but they provide convenient use of canned food.
Add a branch of fresh, pre-washed dill to each jar. Next we add peppercorns and garlic. If desired, the recipe can be supplemented with 1 tsp. mustard seeds and a little finely chopped onion. If you like spicy dishes, add 1 tsp. crushed dry red pepper.
Next, prepare the brine. For it, it is better to take white vinegar - about 2 tbsp. Pour it into a saucepan and add a quarter glass of water, as well as salt. Bring the mixture to a boil and immediately turn off the heat. Meanwhile, we chop the cucumbers into jars, fill them with the solution, leaving 1 cm to the lid. We roll up the jars and put them in an autoclave. Sterilization time – no more than 5 minutes. at a temperature of 90 degrees Celsius, otherwise the crispness will be lost.
Recipe for canning zucchini in an autoclave
Modern recipes for canning vegetables allow you to prepare such a classic, but beloved by many, as squash caviar. For not needed:
- zucchini – 2 kg;
- sweet pepper – 500 g;
- onion – 500 g;
- carrots – 1 kg;
- sunflower oil – 0.5 l;
- sugar – 50 g;
- salt – 75 g;
- ready tomato paste – 150 g.
The zucchini needs to be peeled and cut into approximately 2 cm cubes. Chop the onion well, and grind the peppers and carrots or cut them into strips. It is better to fry the peppers, carrots and onions a little in sunflower oil. A little later, add zucchini, as well as tomato paste, salt and sugar. Vegetables need to be simmered until tender, preferably over low heat. The finished product needs to be crushed - for example, using a blender. Place the resulting caviar into half-liter jars and roll up. Sterilization time is 10 minutes at a temperature of 90 degrees Celsius.
Recipes for canned carrots in an autoclave
Recipes for preparations in an autoclave are also available, where carrots are one of the main ingredients. For example, to prepare carrots with green beans you need:
- carrots – 500 g;
- green beans – 1 kg;
- bay leaf - to taste;
- onions – 200 g;
- tomatoes – 700 g;
- sunflower oil – 200 g;
- salt – 3 tsp;
- sugar – 2 tsp.
We cut off the tails of the beans and cut them into two halves. Cut 200 g of carrots into strips, and grate the remaining 300 g. Place the beans and carrots, cut into strips, into the jars in layers, add a bay leaf.
Prepare the sauce. Chop the onion and fry together with grated carrots in sunflower oil until golden brown. Add tomatoes cut into small pieces here. Pour water into the pan so that it covers the ingredients and simmer for 5 minutes. Pour the finished sauce into jars. After the container, roll up and sterilize in an autoclave for 10 minutes.

Autoclaved carrot salad
Another recipe for canning in an autoclave using carrots requires the following ingredients:
- carrots – 1 kg;
- onions and cabbage – 1 kg each;
- sweet pepper – 500 g;
- water – 1 l;
- vinegar 9% - 1 tbsp.;
- sugar – 250 g;
- salt – 2 tbsp;
- bay leaf – 4 pcs.;
- pepper – 6 peas.
Grind the carrots on a coarse grater, chop the cabbage with a shredder, peel the onion and cut it into halves. Remove the seeds from the pepper, wash and cut into strips. Separately, prepare the marinade: add vinegar, salt, pepper and sugar, as well as bay leaf, to the water, boil and leave to cook for 10 minutes. Place cabbage, carrots, onions and peppers in layers in a jar, pour marinade on top, leaving 1.5 cm to the lid. Then we roll up the containers and sterilize them in an autoclave for 10 minutes.
At home, you can use any recipe for preparing vegetables in an autoclave and end up with tasty and healthy preparations without preservatives. To have this opportunity, it should be manufactured in an industrial environment. Our company offers proven models that are safe, reliable and convenient to use. Buy an autoclave, and canning will turn from a chore into a pleasant and quick process.
With the amount of sugar specified in the recipe, cherries canned in an autoclave are moderately sweet and not cloying. It can be eaten as an independent dessert, or used to prepare sweet dishes: layer and soak cakes, and make compote from the resulting syrup.
Recipe ingredients (for 1 0.5 liter jar):
- 250 grams of pitted cherries
- 2 tablespoons granulated sugar.

Pour cherries into the jars up to the neck (you can use either fresh or frozen). During the cooking process, the berries will “settle” up to the shoulders of the jar. Add 2 tablespoons of sugar to each jar.

Boil the lids for the jars for 15 minutes, roll up the jars and place them in a pressure cassette. The Hanhi autoclave cassette, for example, includes 5 0.5 liter jars.
Screw the cassette tightly from above using a key.
Place in an autoclave, fill with water until completely covered, close with a lid and heat on gas to 80 degrees. You can turn it off and wait until it cools down completely.
When the machine has completely cooled down, remove the jars from the autoclave. The cherries in their own juice are ready and will delight you with an excellent taste, just like other recipes!