How to cut salmon steak into fillet. How to fillet salmon
One of the holiday delicacies is salted red fish. But few people know how to salt salmon, and some even consider it problematic. However, the dish does take a little time to prepare. We offer several interesting and tasty recipes.
Secrets and rules of salting
 Salting is carried out in three ways:
- Dry, sprinkling the prepared fish with a mixture of salt and spices.
- Wet, placing the fish in a saline solution.
- Mixed, first salted using the dry method, and then soaked.
The first option is most often used.
 For a good result you need to follow the rules:
- Do not use metal utensils. Otherwise, the fish will acquire an “iron” taste.
- Don’t be afraid to oversalt, because the fish won’t take in more than it should. However, when salting a whole piece, less salt will be absorbed.
- Salt fish with skin.
- When salting a whole piece, it is recommended to make cuts so that the carcass is evenly salted.
- To ensure that the finished fish cuts well, you can put it in the freezer for a short time.
How to salt salmon at home: recipes for every taste
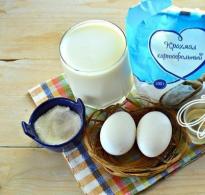
The basic recipe is simple: salmon needs to be spread with a mixture of salt and sugar in equal proportions. Next come variations in which bay leaf, spices, herbs and other components are added.
The result depends on the quality of the fish purchased. The carcass should have a smooth, elastic and shiny scaly cover, a pleasant smell and transparent eyes.
So let's get started.
Dry recipe for salting salmon at home
 This recipe is the simplest and most hassle-free. At the same time, the salinity of salmon depends on the salting time, and not on the amount of salt taken. To obtain lightly salted salmon, 8-10 hours of aging is enough, for highly salted salmon – 24-36.
Let's get started:

Homemade lightly salted salmon
 The dish is not only a fragrant holiday snack. It can also be served as a main dish with any side dish.
Salting process:
- Salmon, in the amount of 0.8 kg, should be washed and dried. Next, to taste: you can cut it into slices, after slightly freezing it, or you can pickle it in pieces.

- Peel two heads of garlic and finely chop. Wash the dill and chop finely. Take it to taste.

- Place the fish (or part of it) in a sufficiently deep container. Salt (in general, all fish will need 1-1.5 tablespoons of salt) and pepper, add a layer of chopped garlic and dill.

- Next, repeat the manipulations until you run out of food and place in the refrigerator for 2 hours.

- After removing the fish, pour 0.15 liters of vegetable oil on top.

- Place the fish in the refrigerator again, but this time overnight.

Salmon "Norwegian"
 How to salt salmon, which is distinguished by its piquancy and interesting flavor? We suggest trying the following recipe based on lemon-alcohol dressing. During the preparation process, it is preferable to use aquavit, an imported alcoholic drink. In the absence of it, you can use vodka, tincture, whiskey.
Salting Norwegian salmon:

In order not to fool your head and not waste time, you can get the zest by grating the whole citrus on a fine grater.
Salmon bellies
 Belly bellies, despite being excessively fatty, are often a delicacy for many. Salting salmon bellies yourself at home is not difficult. The main thing is not to eat ahead of time.
Salting salmon bellies:
- Abdomen should be taken 0.5 kg. You need to carefully clean off their scales and cut off their fins.

- In a container (deep enough), mix salt, peppercorns and sugar in a ratio of 2:1:1 tbsp. l. respectively. Grind 2 bay leaves there and mix well.

- Thoroughly rub the belly slices with the resulting dry mixture and place them in a container in layers.

- Cover the top with a plate of smaller diameter and place pressure (for example, a jar of water). Place the structure in the refrigerator for a day.

- Shake off excess salt from the salted bellies (if desired, you can simply rinse under water and dry on a paper towel), place in a dish, garnish with herbs and lemon and serve.

Having learned all the intricacies of how to pickle salmon deliciously at home, you will forever refuse store-bought variations. In addition, home-salted fish make sandwiches, salads, snacks, sushi and other delicacies much tastier.
I want to tell you how to cut salmon or sea trout.
Immediately after purchasing fresh salmon, I skin it and separate the meat from the bones. This makes it easier to store and use.
We buy salmon
It is best to buy non-frozen salmon, if possible, of course.
Buying ice cream is like a lottery, you never know what you will get when the fish defrosts. It is not known how it was stored and how many times it was defrosted and frozen back.

Cut off the fins and head
First of all, let's get rid of the fins so that they do not interfere with removing the skin from the fish.
Using a sharp knife, cut out the dorsal fins, the large one in the middle of the back and the small one closer to the tail.


Then we cut off the fins on the belly of the fish. We don’t throw away the fins, they will go to the ear.


After we cut off the fins, we cut off the head of our salmon. We don’t throw the head away either, but leave it on the ear.

Now comes the hard part. It is necessary to remove the skin from the fish so as not to damage the meat. With fresh fish this should work without any problems.
We use our fingers to pick up the skin where we cut off the head. With one hand we pull the skin up, with the fingers of the other we pull the meat down.

As soon as the skin begins to separate from the meat, we begin to push the thumb of the right hand between the meat and the skin. We use our finger as if using a knife and the skin easily peels away from the meat, since salmon is a rather oily fish. Under the skin she has a thin layer of fat that we tear apart with our finger.


With a little effort, one half of the fish is completely cleaned, except for the very tip of the tail.

In the same way, using your thumbs, separate the skin from the second half of the fish.


Sometimes you have to work with a knife on the abdomen. The small fingers in the picture are my son helping me. He is two years old and loves salmon very much.

When almost all the fish, except the tip of the tail, has been skinned, cut off the tail and place it on the head and fins.
Using a sharp knife, make an incision along the spinal ridge. We make the incision not exactly in the middle, but along the dorsal bones all the way to the spine.


Then we make an incision directly along the line on the side of the fish, which, as it were, separates the back from the abdomen. We make an incision all the way to the spine.


We insert our fingers into the cuts and carefully tear the fillet away from the spine. If everything is done correctly, the bones will come out of the meat and remain on the spine.

Place the fillet on the table and proceed to the second side of the fish.

We make exactly the same cuts along the ridge and on the side of the fish.

And separate the second piece of fillet from the spine. I'll show you in close-up how this happens.
Please note that the fillet is removed from the bones, which extend from the spine at an upward angle.

Separate the meat from the bones on the belly
Using a sharp knife, make cuts right along the ribs of the fish. There will be some meat left on the ribs, which is even good, since we will also put the bones on the ear along with the head, tail and fins.

I’ll say right away that I won’t tell you how to properly fillet salmon. I'll tell you how I do it. And I consciously make several mistakes for which famous chefs would slap my hands. But I cut fish for myself, and not for sale, so I can afford to do it in a way that is more convenient and profitable for me. You can cut any large red fish in the same way.
So, we buy a salmon carcass (trout, pink salmon). By the way, doing this is more profitable than buying a piece. If you wish, you can make a purchase for two. It is better to choose fish weighing 2.5+ kg.
We bring the salmon home. If it is frozen, put it in the refrigerator on the bottom shelf and defrost there. You can take it to a cool place, for example, a veranda or a bathroom, wherever you can, but the temperature should be below +10. defrosting should take place as slowly as possible.
If the fish is defrosted, then we immediately begin cleaning the scales. We do this delicately, do not squeeze the fish with our hands, its meat is tender. We rinse.
To cut salmon, take a long and sharp knife.
According to the rules, the head is cut off using the so-called triangle. We place the knife close to the gills and cut off the head along their line (diagonally) (not a single gram of meat should remain on it). So right :) I'm doing it wrong, but it's delicious.
Since I use the head and tail to prepare fish soup, I can’t offend myself and cook fish broth only on the bones. Therefore, I cut off the head, stepping back a couple of centimeters from the gills, so that a piece with fins remains on the head.
Now I cut off the tail. Again, according to the rules, only a small piece is cut off up to the anal fin. I cut with him. Moreover, this part of the fish is the driest, it is not suitable for steaks or salting, but it is perfect for soup.
Before us lies a carcass without a tail and head. So we will make a wonderful fillet from it.
Using a knife, carefully trim the meat from the side of the cut head. We make sure that the knife goes straight along the spine. We are not in a hurry, with our free hand we lightly hold the fish where we cut it.
The cut should be smooth, there is no need to saw the fish, the knife moves smoothly and evenly. Enjoying the crunch of the rib bones :) (just kidding).
We cut off the backbone from the second half of the salmon in the same way. The fish lies with its cut towards us, and we, holding the spine with one hand, smoothly pass under it with the other with a knife.
Now you need to cut off the long upper fin with the spinal bones. We do this in one motion.
They also cut off the belly (abdomen). It is believed that this part is too fatty and is only suitable for salting. I don't cut off. I like it in any form, whether salted or baked.
All that remains is to deal with the rib bones. We carefully trim them and cut them off with a very thin layer of meat, and practically without it. And also, we don’t cut the fish, but do everything in one movement, smoothly and evenly.
We arm ourselves with tweezers and take out the bones in the back. They are supported by cartilage, so they can be pulled out very easily. Although you still need to act carefully so as not to spoil the meat.
I don't remove the skin, I love it. And I cook all red fish dishes (and not only) with it. But if you are going to remove it, then you don’t have to clean the scales.
That's it, the fillet is ready. Cutting steaks.
Grasp the fish by the neck fin and cut the head in a circle under the gill bone. If you intend to use the head later, for example for soup, remove the gills - they can be poisonous.
Cut off the fin under the tail - in principle, you don’t have to do this, but it will be much more convenient to cut the fillet this way. Trim the fin on both sides so that the resulting cutout looks like a triangle.
In one motion along the spine, from the inside, separate the rib bones. Support your spine with paper towels to avoid injury from the rather sharp bones. The remaining meat from the ridge can be removed with a spoon or fork and put into rolls, soups, or simply add salt and eat.
Change the knife and trim the fillet from the top row of spinal bones. A long knife allows you to do this in one motion. Using a different knife may leave “burrs” on the fillet.
Separate the rib bones, trim and separate the meat (it is well suited for salting), helping yourself with your finger - at this point it should separate as if by itself.
Remove the bones towards the head with a tilt towards the belly (in the direction of bone growth). In this case, you need to hold the meat with your hand so as not to tear it along the fibers.
Separate the skin by placing the fillet skin side down and, holding it at the tail, lightly trim the meat. Then make a small cut in the middle of the separated piece of leather into which you can insert your finger.
Pull the skin away from the scalp and trim along the entire length at the same time. The skin is very elastic and can stretch several times. In this case, you cannot “saw” with a knife - you need to make cuts in one long movement from the “heel” of the knife to the tip.
If we buy salmon from a specialized supplier, then most likely it will be gutted. If we buy a whole carcass at the market, the question arises: how to cut the salmon yourself correctly and quickly? To do this, it is advisable to have a sharp fillet knife with a long narrow blade and use our recommendations.
Salmon cutting process
First you need to wash the fish, cut the belly from head to fin and remove all the insides. We make a cut from the head to the bone at an angle of 30 degrees on one side, then turn it over and also cut under the gills on the other.
We do not throw out the head under any circumstances; we leave it for broth or soup. In order to remove the fillet, we need to run a knife along the spine parallel to the ridge from the side of the cut off head. Salmon has less dense bones, so the knife should work like clockwork. 
Turn the fish over, place the vertebral bone down and perform the same operation with the second fillet. The remaining skeleton can be used to make fish soup, or Norwegian soup, or any fish soup you like. 
We need to remove the lower part of the salmon fillet, which is called tisha - this is the belly, the fattest part of the fish that can be salted. Then we cut off all the fins. Now we need to remove the small dorsal bones. They can be removed either by hand, if they come out well, or by using tweezers or tweezers. 
Remove the skin from the fillet. To do this, we need to cut the fish meat from the tail to the skin and draw it parallel to the skin, holding it with the other hand. In some cases, you can simply rip off the skin without using a knife. 
So, we have on the board a clean salmon fillet without skin and bones, from which we can make