How to dye eggs with parsley leaves. How to paint eggs for easter
Well, dear and beloved, are you already preparing for the feast of the Resurrection of Christ? Are you picking up recipes for Easter cakes, do you dream of curd Easter? Would you like to try something new and different this year? If there are no resources for global reforms, make some personal discoveries in the field of dyeing Easter eggs. Surely, from year to year you resort to the services of the same method of decorating eggs - so, maybe it's time for interesting achievements and interesting experiments? Let's figure out how you can paint eggs for Easter at all, and having figured it out, you will automatically find the right solution for yourself. Only - churn! – new!
How to paint eggs for Easter:
Coloring eggs with natural dyes
In the modern world, few people think about why it is worth giving preference to natural dyes, if it is much easier to go to the store, buy, pay, mix and get the result. The Pepsi generation, we grew up on the idea of “I want everything at once” and are not ready to spend even a little time if there is an opportunity to get almost the same thing, but at the same time not waste precious minutes. However, if you approach the issue of coloring eggs for Easter from the other side, you can find a lot of advantages in using natural dyes.
First and foremost, this is your health: it is clear that when decorating Easter eggs, the shell is colored, and food colorings, if they get into food, then in minimal quantities, but they do! Agree, if possible, it is worth making a choice in favor of health, neglecting issues of insignificant savings.
Secondly, natural dyes are always a miracle, magic, a mystery. Doing something with your own hands, watching with bated breath, waiting for the result and wondering what it will be - isn't this in the category of the miraculous? Do not forget that by calling the children for help, you will automatically increase the coefficient of magic: of course, sometimes small hands create unnecessary problems and troubles in the kitchen, but the happy laughter of children is worth it!
Third, natural dyes are sometimes cheaper than purchased synthetic ones - what could be, for example, more budgetary than onion peel or a couple of spoons of black tea, free birch leaves or unnecessary walnut shells?
Let's instill in children a taste for another concept: natural, natural, healthy - it's fashionable, beautiful and modern. Leading by example is the best science, so for this Easter, we’re coloring eggs with what can be found in any kitchen!

onion peel
Perhaps it is onion peel that is the most popular, simple and affordable means for coloring Easter eggs. Thanks to this simple old “life hack”, you can get a completely diverse range of color shades - from light red to deep brown.
To work, you will need wax, a candle and a special tool - a scribe, which can be replaced with any metal tube of small diameter. Draw a drawing on the egg with a simple pencil, then, having filled the wax pen, heat it over the candle and circle the ornament you have chosen with the molten mass. After that, dip the egg into a glass with dye, hold for the required time, then remove the wax with a napkin, holding the egg over the candle if necessary - in those places that were closed, the shell will remain with its natural color, while the rest of the surface of the egg will be painted.
Using the same technology, you can make multi-colored Easter eggs. To do this, after the first layer of the wax pattern, dip the egg into the lightest paint (for example, yellow), hold for the required amount of time, remove it, gently dry the egg, apply the pattern again, dip into the next most saturated color (let's say red). Repeat the operation as many times as you want to get the colors. Remove wax only after the last coat of paint.
Do not look at very complex patterns right away. This, of course, is insanely beautiful and inspiring, but it’s better to start with primitive drawings, and then, having filled your hand, move on to more complex ornaments.

Decorative polyethylene films and thermal stickers
The modern industry with the motto "quick and easy" offers a lot of "high-speed" options for decorating Easter eggs. At Easter markets, supermarket layouts and market stalls, you can find the richest selection of stickers and thermal films for decoration.
With the first ones, everything is simple to the point of primitivism: I took it off the base, stuck it on an egg, put it on a plate and began to admire the result. It would not be superfluous to mention that it is still better to color the egg beforehand - small stickers on a white background look bare and dull.
With thermal films, you will have to make a few extra gestures: wrap the egg with the proposed “bag”, put it in boiling water, take it out in a minute - under the influence of temperature, special polyethylene shrinks, tightly wrapping the egg. Ready. A huge disadvantage of this method of cooking Easter eggs is the difficulty in cleaning: the film is very strong, and in order to extract the contents of the shell, you have to resort to using a knife or scissors.
Options, of course, of dubious attractiveness and sincerity, however, it is impossible not to mention them, because they exist and, probably, still have the right to life - for working mothers and women who have almost no days off, this is a good way out. However, if you have at least 10 extra minutes, it is better to give preference to some more “warm” and “lively” option.

Decoupage and other handmade ways to decorate Easter eggs
With minimal skills and love for needlework, Easter eggs can be decorated in a completely unusual way, using, for example, the decoupage technique. To do this, the surface of hard-boiled eggs must be degreased, then, if desired, painted with any suitable paints (for example, gouache). After that, dilute PVA glue and water in a 1: 1 ratio, cut out suitable motifs from napkins, remove the top layer and stick it on the egg. After drying, the eggs can be additionally covered with a layer of glue. If you are making decorative decorations, you should work with an empty shell, and cover the finished egg with acrylic varnish.

Those who know how to hold a hook in their hands can be advised to tie the eggs with openwork "cases" - it turns out incredibly tender and cute.

However, even if you take various beads, lace cuts, sequins, colored ribbons, beautiful ropes and decorate Easter eggs with all this stuff, it will be very vintage, festive, sincere and stylish.
Christ is Risen, dear ones! Have a beautiful Easter, bright colors and good mood!

Why is it advised to paint eggs on Maundy Thursday? What natural dyes can be used? How to achieve the desired color of eggs using natural dyes? How to decorate eggs? Lady 40 plus will give advice and share her experience of beautifully painting Easter eggs and more.
How to paint eggs for Easter and why do they paint on Maundy Thursday? Because on this day you need to finish all the preparations for the day of Bright Sunday.
The Good Friday that follows, for example, forbids doing anything. On Good Saturday, it is advisable to do charity, decorate your home, think about your soul and adhere to strict fasting.
Therefore, we are preparing for Maundy Thursday to paint eggs. To do this, you need to prepare everything: buy eggs, stock up on onion peel, think over the vegetables with the juice of which we will color the eggs, put threads, rice, patches and so on in a conspicuous place.
Read this article:
We paint eggs for Maundy Thursday

Based on the wisdom of the past years and the understanding that you still need to stick to everything natural, let's give up fashionable stickers and chemical dyes. After all, you can give Easter eggs true beauty with the help of natural dyes and products.
Eggs are stored longer, and are not dangerous, and their appearance is more attractive. If you agree, then let's get started.
What you need to know when painting eggs

- Before painting the eggs, they must be washed well.
- For even application of paint on the shell, before cooking, you need to wipe them with alcohol or vodka, soapy water.
- To prevent the shell from bursting during cooking, you need to do the following:
- add salt to the water;
- pierce holes at the end of the egg;
- lay eggs in cold water, holding in a warm room for one hour.
The eggs will become shiny if, after painting, wipe them with sunflower oil.
What natural products to use when painting
There are three options for dyeing eggs using natural dyes:

Dyeing eggs in onion skins
Achievable color: yellow, brown, burgundy.
Everything will depend on what concentration of onion broth and how long we will cook them.
How to dye eggs with onion skins
- We wash the onion peel under water. Place in a bowl and fill with water. You need to cook the husk for half an hour.
- While the husk is cooking, wash the eggs in lukewarm water and soap. Then we rinse. And we wipe each with a napkin.
- The husk has boiled. We filter the broth and put on fire.
- We wipe each egg with alcohol and lower it into the broth. We cook 10 minutes.
- The eggs are boiled. Carefully remove them from the broth with a spoon and fill with cold water.
- The eggs are cold. Take them out of the water and wipe each with vegetable oil.
The beauty and brilliance of Easter eggs dyed with shells delights.
We paint eggs in a decoction of birch leaves

Achieved color: yellow and golden.
How to dye eggs with birch leaves
We wash the leaves under water. Place in a bowl and fill with cold water. You need to boil the leaves for half an hour. The resulting broth insist hour.
While the broth is infused, wash the eggs in warm water with soap and rinse.
Pat dry with a paper towel and wipe with alcohol.
Strain the broth and dip the prepared eggs into it. Boil for 10 minutes, then cool in cold water and brush with vegetable oil to make them shine.
Eggs dyed in birch leaf decoction will be sunny and warm among other eggs.
We paint eggs with the juice of vegetables and other plants

The method of coloring eggs with the juices of vegetables and plants is simple, but it allows creativity. Its principle is based on coloring or dyeing eggs already boiled.
How to dye eggs with the juice of vegetables and other plants
Let's see what shades and colors offer us vegetables, berries, plants:
- red and light red - will give blueberries, beets;
- orange - will give a bow;
- light yellow - carrots, oranges, lemons;
- yellow - turmeric roots, walnut (walnut) shells;
- light green - we get from nettle and spinach;
- green - green apples;
- blue - will give red cabbage;
- beige (brown) - coffee beans.
Eggs (boiled) are rubbed in several layers with fresh juice. Each layer must dry.
Ready-made, they are placed in a container with fresh juice and put in the refrigerator overnight.
To set the paint, soak them in a solution of apple cider vinegar and water.
Eggs can be made more interesting with the help of patterns and drawings, by the way, also created naturally:
- the eggs will be cute "speck", if we soak them in water, and then roll them in rice. Gently wrap in gauze, which will press the grains to the shell. Cook in a decoction of onion peel for about 10 minutes or more.

- eggs will turn marble , if we wrap them in dry onion peel and carefully tie them with a cotton flap. Dip the onion peel into the decoction and cook for 15 minutes.

- eggs with beautiful thick stripes obtained if we wrap them in a random sequence with multi-colored threads. There are amazing twists.

- eggs dyed in silk patches , will also attract attention and delight the eye if we wrap them in silk patches and tie them with threads. Before that, boil the eggs in water with soda. After preparation, boil them again in the same solution. After the eggs have cooled in cold water, remove the shreds. When the eggs are dry, brush with vegetable oil.

Painting eggs will be much more interesting if you do it with children.
On the feast of Easter, the Easter table, richly laden with dishes, is considered a symbol of heavenly joy. And, of course, the main treats of the meal are Easter cake and colored eggs.
How to paint eggs for Easter with your own hands
Of the natural dyes for eggs, onion peel is usually used, which is harvested after peeling the onion.
Dyeing eggs with onion skins is very easy. Fill a small saucepan halfway full of clean onion skins. Fill with water up to half. The next steps on how to paint eggs for Easter depend on what result you want to get.
- To get a reddish-brick color with artistic ocher-gold streaks, dip the eggs in cold water and boil until tender.
- If you paint eggs for Easter in an even red-brick shell color, then fill the husk with water so as to cover the husk layer by 5 cm. Boil the husk for 40 minutes. Strain the solution, cool and boil the eggs in it.
How to paint eggs with leaves
In order to make plant drawings on Easter eggs, for example in the form of leaves - put a leaf on the egg, and then the egg with the leaf in a nylon sock or gauze, twist the fabric tightly so that the leaf does not move to another place during cooking and lower such an egg into a strong solution with boiled husks.
Boil the eggs as usual, then remove the leaf and nylon toe. To create a beautiful floral ornament, you can apply a sprig of dill, parsley, leaves of indoor plants.
Dip the boiled eggs in cold water for 5 minutes. Lubricate them with vegetable oil to give shine. Arrange beautifully in an Easter basket.

How to beautifully paint striped eggs for Easter
Beautiful striped Easter eggs can be made in many ways, but first the eggs are hard-boiled and only then painted.
- Various sizes of adhesive tape, electrical tape or self-adhesive paper are glued to boiled eggs. It will be more interesting if the strip is glued diagonally. Then boil the eggs in onion skins, or dip them in paint.
- If you want to make the stripes multi-colored, then first wind the stripes. Dip the egg in one dye. Then remove the glued strips, wind the others at a different angle and dip the egg in another paint.
- Instead of strips of adhesive tape, you can use thin elastic bands for money, which are randomly wound around a boiled egg. can be wound up and down. Then the egg is dipped into the paint, the rubber bands are removed and a beautiful ornament is obtained.
More Easter Egg Decorating Ideas
You can make eggs even more decorative if you paint them with acrylic paints, felt-tip pens, markers, capillary pens. eating in this case is not recommended. They will only be decoration.
- To draw delicate spring flowers, you will need a toothpick and paints of different colors. Dip a toothpick into the paint and leave marks on the surface. Instead of a toothpick, you can also use cotton buds or a pencil with an eraser on the end (prints are made with an eraser).
Using the decoupage technique, you can also make beautiful and original Easter eggs. To do this, you will need a napkin with a small ornament and PVA glue diluted with water. We tear out floral motifs from the napkin so that there is a mossy edge. We will only need the top layer with the pattern. If the napkin is three-layer, then remove the lower layers. We put a drawing on a white boiled egg, apply glue with a brush on top. When the drawing is saturated with glue, set it to dry.

When painting with food coloring, the paint often gets through small cracks in the shell, inside, onto the egg white. Eating such eggs is unpleasant. Therefore, we recommend the following natural dyes.
- Onion peel. The intensity of staining depends on the concentration of the onion solution. The more shells, the darker the eggs will be. you can also create various ornaments by wrapping eggs with husks.
- Turmeric is a highly coloring natural spice. With its help, you can paint eggs for Easter with your own hands in yellow. Minus - dishes and hands are strongly stained.
- Beetroot will help achieve the pinkish hues of Easter eggs.
Easter composition with Easter cake
- As a stand for the composition, you will need a mirror tray, a large flat plate or a wooden board. Put a bright napkin on it.
- Tie Easter cake with bright ribbons. Serpentine can be used for this purpose. Tie the ends of the strapping with bows. Put the cake on a napkin.
- You can make egg coasters - thick strips of material 3 x 15 cm - cut out of jute cloth, fold into a ring and fix with an elastic band. Or just tie Easter eggs with a ribbon.
- Set the eggs in the stands - rings. Arrange them around the cake. In this form, Easter cake and eggs can be taken to the Temple for consecration. Before serving, decorate the Easter composition with fresh flowers: daffodils, tulips, hyacinths, willow or willow blooming soils. Add greens from periwinkle shoots, lingonberries.
On the eve of Holy Easter, believers begin preparing for the festive table: they bake Easter cakes, make curd Easter, and, of course, paint eggs. Since childhood, we have been accustomed to seeing multi-colored eggs on the table - blue, yellow, red, marble, with drawings. Eating them is always tasty and pleasant, even if on other days, there was no particular interest in this product.
AND in 2019, the feast of Easter falls. We recommend cooking for this great day, and put colored eggs on a saucer next to it. Before eating, believers usually pray, and then they choose the egg itself, and begin to beat it with the household. Whose egg is stronger and does not crack, he won. This is how the day starts and goes. Greetings, do not forget to say - "Christ is Risen." And in response you will hear - "Truly Risen."
And today, our issue is devoted to one big topic - painting eggs. And to your attention 30 ways. And if you missed it, we recommend reading it!
Our ancestors dyed Easter eggs with natural dyes such as onion skins, cherry tree bark or beets. Now there is a huge selection of food colors. But the natural product is no less in demand. There are a lot of methods and options for coloring and decorating eggs. This article was created in order to combine the most interesting and practical ideas in one.
According to an ancient legend, the block, which closed the tomb of Jesus Christ, was similar in shape to an egg. Behind this stone was hidden a Saint whose life is eternal. In the same way, a new life is hidden behind the shell of an egg ....
There are several variations of the tradition of decorating eggs for Easter. According to one of them, the Myrrh-bearing Mary Magdalene, having come to preach to the Roman emperor, brought him an egg. She was an ardent supporter of Christ and carried the story of his Resurrection. At this gift, the emperor chuckled: “Life is as eternal as this egg is red, not white.” After these words, according to legend, the egg turned red right in the hands of the sovereign.

Among the ancient Romans, the egg was considered a symbol of new life and the Sun. For breakfast, men always ate a baked egg so that the day would be blessed with good luck and success.
Another suggestion is the birth of Emperor Aurelius. The story goes that a chicken belonging to his parents, immediately after the birth of the future ruler, laid a rather interesting testicle. Its color was bright, flecked with red. Witnesses interpreted this as a favorable sign of fate. After this incident, the inhabitants of Ancient Rome started a tradition of exchanging colored eggs as gifts.

There is also an opinion that decorating eggs was practiced long before the birth of Jesus Christ. With the advent of Spring, people celebrated the beginning of warm weather and dyed eggs as a symbol of the sun and eternal life. Then it was believed that the whole world, all living things came from an egg. Since Easter comes precisely at the beginning of spring, this tradition is still kept.
How to dye eggs for easter
It is customary to color eggs on the eve of Easter. We will consider the most popular and interesting ways right now.
1. Onion peel. This is perhaps one of the most common coloring methods. The shell is painted in a pleasant, brownish color. The level of color saturation is regulated by the amount of husk;
2. Coloring with turmeric gives the eggs a bright yellow color;
Sheen shells can be given by rubbing them with sunflower oil after coloring;
3. A decoction of eggs in cranberry juice gives them a rich pink color;
4. Beige color can be achieved by boiling eggs in ground instant coffee;
5. Sprinkled eggs do this: sprinkle wet boiled eggs with rice, wrap with gauze and dip the water with the dye of the desired color;

6. By sticking a stencil with some kind of pattern on the shell, or simply parsley and dill leaves, and then painting them in the same way as described above, you can get eggs with a pattern;
7. If you put a few elastic bands on the eggs and color them, they will turn out to be evenly striped;
8. A beautiful pattern can be made using powdered sugar. Dilute it with water so that the mixture is thick enough and start creating on the shell with a confectionery syringe;
9. Very beautiful Easter eggs are obtained when working with wax. Boil the eggs first. Melt the candle wax and apply the desired pattern to the shell. Then place it in a dye solution (not hot!) and wait for the coloring. Then carefully remove the wax;

10. Zelenka. Bright and very beautiful eggs are obtained by dyeing them in this dye. It is a must have in every first aid kit.
11. Food coloring. Sold in every store. Especially the range increases before Easter.
How to dye eggs with beets
Beets are one of the simplest yet natural ways to color Easter eggs. This can be done in several ways.

- Place boiled eggs in a bowl with 100% beetroot juice. Willingness to determine by saturated color. If it takes 2-3 hours, they will be pink. If they stay in a bowl all night, they are bright burgundy;
- Peel the beets, grate fresh and pour a little water. Add 1 tsp here. vinegar and put on fire for 15 minutes. Place already boiled eggs in a hot solution and keep in it for at least 1 hour;
- A very best option is to boil the eggs together with the beets at the same time. So you get bright dyes and beets for salad;
- Grate the raw beets into a pulp and rub the boiled eggs with it. Let them stay in this state longer - so the color will turn out more saturated.

By wrapping eggs with green leaves before painting or sticking an interesting stencil, you will get original eggs.
How to dye eggs in onion skins
The basic principle of dyeing Easter eggs in onion skins is simple. To do this, onion peel is poured with boiling water and boiled for about 3 hours. Then add salt and dip the eggs into the onion water. Cook for 8-10 minutes and then dry them on a towel.
Eggs, before being sent to the pan, must be heated to room temperature, otherwise the likelihood that the shell will crack is very high. Therefore, 1-2 hours before the procedure, they must be taken out of the refrigerator.

To achieve the marble effect of staining with onion peel, it is necessary to mix it dry with small pieces of paper. Roll a raw, wet egg in them and place in a gauze bag. Further coloring is described above.

And by placing raw testicles in unnecessary lace stockings, you can get a very beautiful drawing.
Marble way of dyeing eggs for Easter
The more beautiful eggs for Easter, the happier and more successful life will be! So says the old belief. One of the most original ways of painting is the marble effect. It can be achieved in two main ways.
Onion peel and greens
You will need:
- Onion peel;
- Zelenka;
- Dishes with water;
- Stainless steel saucepan;
- Zelenka - 1 bottle;
- Threads;
- Gauze.
Grind the husk. If it is dry, then you can crush it with your hands. If fresh, then it is better to use scissors. Moisten a fresh egg and roll in it.
Make a gauze single-layer bag and put an egg in it. You can add more peels. Fasten with threads. If the husk has moved out in places, it needs to be corrected.

Place the bags in a pot of water. Add a couple of tablespoons of salt. Pour in the greens and cook for 15 minutes over medium heat. Ready eggs free from gauze and husks, rinse under the tap and dry on a towel.
Food colorings
You will need:
- hard-boiled eggs;
- Vinegar;
- Sunflower oil;
- Dyes;
- Water.
Dilute a bag of dye in 300 g of hot water and add 1 tbsp of vinegar here. Pour the liquid into a free dish so that the egg can completely dip into it.

Add 1st.l. oil and stir. Immerse the egg in the solution and twist until patterns begin to appear on it. Then take it out and dry it on a paper towel.
Coloring eggs for Easter with a lace pattern
On Easter, every housewife wants her eggs to be the most beautiful and unusual. There are a lot of ways to surprise guests today. For example, lace patterns on eggshells look extremely unusual and appropriate. And making them is very easy.

To do this, you will need lace stockings that have become unusable. For a pattern around the entire diameter of the shell, place the egg in a bag of stockings. Next, paint in the usual and convenient way for you.

You can also make a strip of material and fasten it around the egg. After dyeing, only the middle part of it will be covered with lace.
How to color eggs with beautiful drawings
Decorating eggs for Easter is a very interesting and useful activity. This can be done even with children. It's great when, on the eve of one of the brightest holidays, the whole family is gathered for such a wonderful deed.
1. Wax. Melt the wax of the candle and, while it is hot, apply the design of your choice to the shell. As soon as it hardens, place the egg in a warm dye solution for a certain time. Next, the wax must be carefully removed.

2. Using sticky paper and rubber bands, you can make a very beautiful drawing on an eggshell. Just wrap the egg in the desired sequence and paint it in the usual way. Then the auxiliary items must be removed. The place under them will not be painted, which will create a picture.

3. Leaves of fresh greens. For this fit and parsley, and dill. Choose a beautiful leaf and attach it to the shell. Place it in a gauze bag and tie it tightly. Make sure that the sheet does not move out of the intended place. Color the egg. You can do the procedure on an already painted testicle. This will make it even brighter.

4. Hand-painted. To do this, you can use any paint. Including nail polish. Choose a picture yourself, whether it's Khokhloma, flowers or funny emoticons.

5. A lighter, but no less beautiful option - ready-made films with a pattern for eggs. You can buy them at any grocery store. They are usually sold in strips. You must first cut according to the pattern, and then dip into each egg. Now they need to be placed in hot water for a couple of seconds so that the edges shrink. And voila - beauty on your table.

There are many types of such films. Starting from religious themes, ending with cartoon characters.
How to dye eggs with natural dyes
Natural is always the best. Taking care of our relatives and friends, we often tend to favor natural ingredients and dyes. So it is with painting eggs. Sometimes, looking at a colorful plate with Easter eggs, one cannot at all believe that such a rich color was achieved, for example, from turmeric. In fact, natural dyes also fulfill their mission very responsibly.
1.Tea or coffee. A rich brown color can be obtained by boiling eggs in 300 ml of strong drink.
For color durability and brightness, do not forget to add vinegar to each type of coloring with natural dyes.
2. By soaking boiled eggs in red grape juice, you will get a delicate lavender color.

3. Onion peel, as we already know, gives the shell a brown color. We discussed the methods of coloring with this ingredient above.
4. Boil violet flowers in hot water and leave the eggs in this liquid overnight. It turns out a nice blue color.
5. Yellow color can be obtained from a decoction of birch leaves. Just in these spring days, the leaves have just blossomed.
6. A strong decoction of blueberries, currants, elderberries or raspberries will give the shell the appropriate color. Eggs also need to be placed in liquid overnight.

7. Golden color gives turmeric. To do this, add 3-4 tablespoons of spices to a pot of water and bring to a boil. Leave boiled eggs here for a long time.
Options for decorating and painting eggs with natural dyes
Despite the fact that modern industry works in good faith, natural dyes are always a priority. Their only drawback is that they take a little more time to prepare the coloring solution. But the result is always excellent.
Sometimes, during cooking, the shell can crack and the paint gets inside. This will not have a very good effect on the use of the product in food. And natural ingredients are not only not harmful, but, on the contrary, are useful.
Save this photo for yourself and you will always know which dye gives this or that color.

Colored eggs can be decorated with a pattern of a thick solution of water and powdered sugar. The drawing can be applied with a toothpick or you can purchase a special kit for creativity in the store. And add a coloring pigment to the composition, the pattern can be diversified with bright colors.

You can draw on the shell with felt-tip pens. The drawing is bright and beautiful. So that it does not wear off when touched, grease the egg after drawing the pattern with sunflower oil.

Choose napkins with a beautiful pattern, cut it out and stick it on a wet egg.

And a real Faberge egg can be made from improvised means - rhinestones, sequins, confectionery sprinkles and ... cereals. It is better to attach them to a homemade paste.

Decorating eggs depends on your flight of fancy. Tell us how you decorated Easter eggs in the past? What secrets and ways do you have? Your experience is very important to us.
Beautiful way to paint eggs
Eggs with a stunningly beautiful pattern are obtained by dyeing them in silk fabric.
This will require:
- Actually, eggs;
- A quarter cup of vinegar;
- Pieces of fabric with a beautiful pattern, 100% silk;
- Pieces of white cloth;
- Scissors;
- Vegetable oil;
- Paper towel;
- Pot for cooking;
- Egg bands.

Cut the white and silk fabric into squares so that the egg and the edges can fit there, while it could be pulled off. Wet the silk patches, wrap an egg in each and fasten the corners. Now wrap it again in the same way, only in white bags (you can use old sheets as them).
Place the bags in a pot of water and add vinegar to the same. Turn on the fire and cook after boiling on a minimum heat for half an hour. Carefully remove the eggs from the pan and lay on a paper towel. Once they have cooled, you can unfold them and admire the result.
How to decorate eggs for Easter and serve beautifully
Setting the Easter table is a very pleasant and important ritual. Invariably, Easter cakes and colored eggs are at the head. You can serve them for every taste.

Kulich, lined with krashenki in a circle, not only saves space on the table, but also beautifully combines the main dishes of this holiday.

The Easter Bunny that settled on your table will not only decorate it, but will also be a symbolic sign of this holiday.

A nest for krashenok can be made from a wicker basket and ordinary straw. A simple and uncomplicated solution will perfectly complement the Easter atmosphere.

By tying each egg with a decorative ribbon in a contrasting color, you will get such beauty.

And these most delicate Easter eggs will simply amaze the guests of your house. Not only the inside is edible, but also the decorations of the shell. Just roll the eggs in granulated sugar and decorate with cream roses using a pastry syringe.
Marble way of painting eggs. Option 1
There are two main ways to marble eggs. We have considered them above. However, guided by them, you can also consider a few more options. For example, dyeing with onion peel and rice.
Ingredients:
- Some rice;
- Onion peel;
- Dyes of the desired shade;
- Gauze;
- Scissors;
- Threads.
Pour water over rice. In the meantime, chop the onion peel with your hands or scissors. It also needs to be filled with water. Gauze cut into squares 18 * 18 cm. Roll each egg in the husk and grits and place in a bag of gauze. Fasten the edges with threads. Immerse the eggs in a pot of water and boil for half an hour.

Then prepare the dye solution. You can use dyes that are sold in stores. The instruction, as a rule, is always indicated on the packaging. Place the eggs in the cooled paint for a few minutes. Then take them out and unfold the gauze.
How to dye eggs marbled. Option 2
The second method involves the use of food coloring, vinegar and vegetable oil. Boil the eggs in salted water until the yolk is hard. Only after cooking you need to start painting. Dilute the dye in a bowl of water according to package directions. The dishes must be chosen wide so that the egg can be freely placed and moved in it.

Drop a few drops of vegetable oil into a dish with a coloring solution so that oil bubbles form on the surface. It is they who determine the presence of a marble pattern. Place the egg in a container and twist in such a way that it “collects” beautiful patterns from oil drops. Now you need to wipe it with a napkin and the beauty is ready!
Decoupage with napkins
Decoupage is a great way to decorate various things and gifts without spending a lot of time on it. To decoupage Easter eggs with napkins, you only need boiled eggs, beautiful paper napkins, scissors, a brush and a paste.

From napkins, cut out the patterns drawn on it along the contour. You can also cut out a piece around it, this is called the patchwork method. Now prepare the paste. To do this, dilute 2 tbsp. water in 50 milliliters of water. Then heat the solution in the microwave for about 15 seconds, periodically opening the oven and stirring the paste.

Put pieces of napkins on the eggs and coat with paste on top. Leave them on a flat surface for half an hour to dry the glue.
How to paint eggs with nail polish
For this you will need:
- Several bottles of nail polish in different colors;
- A bowl of water;
- Toothpicks;
- Nail polish remover;
- And, of course, eggs.
Boil the eggs in boiling salted water. In a separate bowl with water, drop nail polish of several colors at once. With a toothpick or other thin object, connect all the colors, making stains on them.

Immerse the egg in water with varnish and turn it so that the paint captures the entire surface of the shell.

Lay the painted eggs on a flat surface and wait for the varnish to dry completely. Nail polish remover will help you get rid of its marks on your hands.

Grate the dyes with vegetable oil for a bright shine.
Beautiful egg stickers
On the eve of Easter, store shelves are full of an assortment of stickers for Easter eggs. Their variety is so great that it is sometimes difficult to make a choice. These stickers are very easy to use. Even kids can handle it, of course, under the supervision of adults. Eggs are better to choose the same size, then boil them until cooked. Before that, you can paint them with any dye, but this is not necessary.

Stickers must be cut along the line. Then each of them must be carefully put on the eggs. Separately, put a saucepan of water on the fire so that it is hot. Dip each egg in turn into the water. To do this, you can use a deep ladle. The edges of the sticker from boiling water immediately curl up, acquiring the shape of an egg.

The easiest option is regular egg stickers. Just paint the testicles in the usual way and decorate them with a cute sticker. They are also sold in supermarkets.

Egg coloring has its own history. Initially, our believing ancestors painted them red - the color of the blood of Jesus Christ. Over time, more and more new colors began to be used. Christ's Sunday was considered the most important holiday of the year, so the preparation for it was very intense and interesting. People developed new ways of painting and decorating.
And now, today, we have many variants of this symbolic action. In addition, talented housewives come up with something new year after year. Perhaps you have a couple of aces up your sleeve? We will be very happy if you share them with us.
Happy Easter to you!
Hello friends!
Are you waiting for the bright holiday of the Resurrection of Christ - Easter? I am very, because I fast and limit myself in meat, dairy products and eggs. But this does not prevent me from preparing for the Great Holiday. I have already started studying. And today I found and made a selection about dyeing chicken eggs.
As we already know, our Orthodox Easter falls on Sunday, April 8 this year. One of the ceremonies of the holiday, in addition to Easter cakes and Easter cakes, are painted eggs. This tradition arose a very long time ago, in the time of the first Christians. In addition, there is an opinion that a lot of eggs accumulated in fasting people in villages in chicken coops. Due to the fact that there was nowhere to put them, it became a custom to paint or paint eggs and give them to guests and neighbors on Easter.
Of course, that's how it was. But the egg has long symbolized resurgent life. The most popular dye color is red. This refers to the blood shed by Christ for the people. Therefore, it is very important to paint the eggs in different colors. But how to do it right? Let's find out!
I would also add that it is better to paint with the kids. They really like this thing. And even kids, starting from three years old, are already actively helping adults with might and main.
Basic rules for painting eggs for Easter
Before staining itself, we will read a few tips on how to do it correctly. Then it will help us to avoid some irreparable mistakes. It's better to learn from someone else's mistakes, right?
- We buy eggs with a white shell. Here it is clear even to kids that the paint fits better on a clean white surface and does not change its color. But brown, when stained, can drastically change their color. Yes, and any paint on them seems dirty.
- We wash the testicles with a sponge, you can use soapy water.

- So that the eggs do not burst and crack during cooking, it is better to get them out of the refrigerator 1.5-2 hours ahead of time. During this time they will warm up, become room temperature. Then you can start hot procedures.
- Salt, which is added to water during boiling, also saves from cracks. It takes 2 tbsp. tablespoons of salt per 2 liters of water.
- If you are going to paint in onion skins, then collect it several months in advance. The more peel, the brighter the color will be. You can also ask for the husk at any market from a vegetable seller. I don't think they will be greedy. Especially for such a sweet thing as preparing for Easter.
- To dry already painted testicles, use the paper grates in which they were bought.
It is interesting to know that eggs dyed in one color are called dyes. Artfully painted Easter eggs will be. Drapanki are painted with a scratched pattern. There are also speckles - testicles, painted in speck, with dots and stripes.
- We rub the painted testicles with vegetable oil. They are shiny, bright and beautiful.
Well, now you can definitely get down to business!
How to color eggs in onion skins so they don't crack
The easiest and most popular way to color for Easter is in onion skins. For this case, use a golden or red onion. The testicles after painting are purple-brown, yellowish and very beautiful.
Another option that saves a lot of time for hostesses. Eggs are boiled and immediately colored in a decoction of the husk.

We need:
- Pot for 4-5 liters;
- Eggs - 2 dozen;
- Onion peel;
- Vinegar - 1.5 tbsp. spoons;
- Paper towel or newspaper.
Cooking:
1. Prepare the onion peel. We wash it in running water from dust and dirt. We also take the eggs out of the refrigerator to warm up. They reach room temperature after 1.5-2 hours.

2. We take a capacious pan and put all the onion peels there. They should take up 2/3 of the pan somewhere.
Cooking utensils pick up the old, which is not a pity. Because in the process the pan gets very dirty and it will be almost impossible to wash it.
3. Fill with water so that it covers the entire husk. Pour vinegar 1.5-2 tablespoons. Or you can use 1 teaspoon of vinegar essence. Mix the water with a spoon.

4. We wash the warmed testicles with a soft sponge and laundry soap. Carefully lay them down and bury them in the husk.

5. Put the pan on the fire. When the water boils, reduce the heat and cook for 30-40 minutes. For a richer color, you can cook longer.

6. We carefully take out the finished brown eggs with a spoon and put them on the prepared paper towels. Do it carefully so you don't get burned.
7. When they have cooled down, you can rub them with a cotton swab dipped in vegetable oil. You can stick small stickers on an Orthodox theme and put them beautifully in a basket or plate with holes for eggs with Easter cake.
My testicles did not crack and turned out with an even color, and vinegar helped me with this. The most important thing is to observe the temperature; it should be the same before cooking.

That's basically it. Coloring can be complicated and make such masterpieces in the photo below. To do this, you need gauze, thread and green leaves. Parsley, dill, arugula are well suited.
Before laying in the husk, we apply a leaf of greenery to each testicle and wrap it in a small piece of gauze. Tie tightly with a thread so that the gauze tightly presses the leaf to the shell. Then we also lower them into water with husks and cook for 40 minutes.

The shell will be completely colored, except for the place where the leaf was attached. And very original eggs with an imprint of greenery are obtained. Beauty and simplicity!
Video on how to dye Easter eggs with dyes
Let's try to do the same. After all, there is nothing complicated.
We put food dry dyes and leaves into action
Let's try to color Easter eggs with commercially available food coloring, and even with leaves. Already above about the method with onion peel, I explained a little how this is done. And here I will reveal the secrets in more detail and with step-by-step photos.
We need:
- Chicken eggs are white - 2-3 dozen;
- Food colorings;
- Vinegar 9%;
- Gauze,
- Threads;
- Scissors;
- green leaves;
- Gloves.
Cooking:
1. We warm the chicken eggs to the temperature in the room. We wash them with a dish sponge and soap until clean. Then cook in slightly brackish water for 20-30 minutes in a cauldron.

2. We put jars on the table, where we will dilute the paint. We prepare scissors, pieces of gauze, threads and green leaves.
3. The leaves can be wetted. So they stick to the shell better.

4. Put on disposable gloves. They protect delicate hands from corrosive paint.
5. Dilute the paint in jars of hot water and pour in 1 tablespoon of 9% vinegar. The amount of water is usually indicated on the dye packaging. So follow the clear instructions.

6. We take out the finished boiled eggs from the cauldron and cool a little. We glue a leaf of greenery - dill or parsley. Wrap in a small piece of gauze. And at the back, we tie the ends of the fabric tightly with a thread.
7. The leaf should be pressed very tightly against the shell.

8. Dip the egg in a jar of paint for 10 minutes. You can turn it a little with a spoon for an even color.

9. We take out the finished eggs and put them on a paper egg rack. All excess colored water will drain, and the eggs themselves will dry well and at the same time will not paint each other.

And here are the finished beauties! Parsley and dill leaves are well imprinted. Now they can be rubbed with oil and sent to the holiday basket.

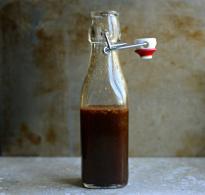
It is interesting to paint Easter eggs with liquid paint
Liquid paint is sold in special tubes. Easter eggs after such staining acquire a beautiful, pearlescent and shiny appearance. In fact, there is nothing complicated about this. And how to do it right, watch an interesting video.
Decorate eggs with natural ingredients
The last (or not) way to make krashenki is to use natural products. In fact, it is not at all necessary to buy ready-made paints. You can rummage through your lockers and find a lot of things and products that will beautifully color eggs in even, solid colors.
I also like the option of coloring with natural ingredients because we paint the testicles without any chemicals. So to speak, we get eco-paints.
We paint with turmeric
Regular ground turmeric root will help us achieve an even yellow color.
To do this, prepare the eggs, warm them. Pour 2 tablespoons of turmeric into a small 1.5 liter enameled ladle and put it on the fire.
We lay gently warm eggs and cook them for 15-20 minutes. During this time, they will be well stained in a delicate yellow tone.

We cool the hard-boiled eggs and rub a little with vegetable oil.

We got yellow. Let's move on to blue.
Colored with red cabbage
A nice blue color will help us achieve red cabbage. For coloring, we need to pre-boil clean hard-boiled eggs in a separate bowl.
We cut the head of cabbage into large pieces. Pour cold water and set to boil for 10-15 minutes.

Place hot eggs in bowls. Pour them with strained broth from cabbage and leave for 5-6 hours until a deep color. If desired, you can add vinegar to the broth. It fixes the color.
Dry the krashenki in paper towels or on a paper rack. We rub them with vegetable oil to a shine.

We use beets
Ordinary beets will help us get pink dyes. To do this, boil the eggs in a separate bowl hard boiled.
We clean the beets from the skin and rub about 200 grams per 0.5 liter of water. Fill it with hot water and put hot eggs.

To fix the color, pour in one tablespoon of vinegar. Leave for 50-60 minutes until deep staining.
We take out the dyes, dry them and you can stick different stickers on Easter themes.

Marble color with green
Well, such beauty can be made with the help of brilliant green and cut husks. Both eco-friendly and beautiful. And who asks for the recipe - shh! Don't disclose!
On this, dear readers, I end my writing. If there are other ways of coloring, you can add the material in the comments below. So you share with other readers interesting ways to color Easter eggs.
With the Coming Bright Holiday - the Resurrection of Christ! See you soon!