Make dough for bread. Preparation of sourdough on hop cones
Yeast-free baking, according to doctors, is more beneficial for the body in many respects than those mixed with yeast. However, not every recipe can exclude the fermentation component - a magnificent loaf of bread will definitely not work without it. As an alternative, experts suggest figuring out how to make sourdough. Is it really very difficult?
How to make sourdough bread
This method of imparting a porous airy structure to baked goods was used long before the advent of yeast as a culinary product. Making sourdough for bread is something that every housewife knew how to do at home several decades ago. Such a natural baking base can be made either by combining flour and water (equal ratio by volume - not by weight!), Or using lactic acid bacteria.
The process has several important features:
- It takes several days to prepare sourdough for delicious bread, the approximate time ranges from 3-7 days.
- Every day the mixture needs to be “fed” and be sure to monitor its growth.
- An unpleasant sour smell on the first day is normal, after it will pass, so do not rush to throw away the wound mass.
- For baking bread, only part of the sourdough is used - the rest needs to be covered, fed and grown.
Sourdough Bread Recipe
The classic version of such a base for homemade lush pastries is usually made on rye flour, but this is not the only method. Homemade sourdough bread can be made using beer, barley malt, potatoes. The recipe is chosen mainly according to the type of baking planned, however, it is possible to knead oatmeal-based wheat dough, from a sweet loaf, etc. However, experts advise figuring out how to prepare a sourdough with a classic rye mixture.
Yeast free
- Preparation time: 6 days.
- Servings: 4 persons.
- Calorie content of the dish: 709 kcal.
- Purpose: for breakfast.
- Cuisine: Russian.
This yeast-free sourdough for bread and buns is ideal, although some housewives even use it for pancakes. The rice base makes its smell softer, and the crumb of the finished product is very light. The only drawback of this method is the waiting time for the result. The working mass is stored in the cold, and infused - in the heat. If a crust appears on the surface during storage, it must be removed before feeding.
Ingredients:
- rice - 100 g;
- wheat flour - 8 tbsp. l.;
- water - 250 ml;
- sugar - 2 tbsp. l.
Cooking method:
- Soak rice (warm 150 ml of water). Add a spoonful of sugar, forget for 3 days. Storage is refrigerated.
- On the 3rd day, add flour (3 tablespoons).
- On the 4th day, pour in the rest of the water.
- On the 5th day, decant this mass, feed the rest of the flour with sugar.
- After a day, the bread base is ready, you can start the dough.

rye
- Cooking time: 1 day.
- Servings: 5 persons.
- Calorie content of the dish: 721 kcal.
- Purpose: for breakfast.
- Cuisine: Russian.
Due to the simplicity of the algorithm of actions and a short list of components, this recipe is popular with housewives. Such a sourdough for rye bread is prepared on kefir, which must first be left in the heat of the kitchen until it is stratified into fractions. If you use a fresh product, proper fermentation will not occur and the bread will not rise. The resulting kefir mass can be used for any baking, including pancakes and pancakes.
Ingredients:
- sour kefir - a glass;
- rye flour - 200 g.
Cooking method:
- Gently mix the components of the starter - it is better to combine them in small portions, so there is less likelihood of heterogeneity.
- Throw gauze folded three times onto the container, leave for a day. It is not necessary to mix the mass.
- After the specified period, add a couple more tablespoons of flour, wait 2-3 hours. Use as directed.

Fast
- Cooking time: 6 hours.
- Servings: 5 persons.
- Calorie content of the dish: 692 kcal.
- Purpose: for breakfast.
- Kitchen: home.
- Difficulty of preparation: easy.
The waiting time for the bread base to be ready can be reduced to a day, although some professionals consider such a starter to be weak, incapable of a good rise. For most housewives, this quick sourdough for yeast-free bread is a lifesaver that saves them time. If you don't plan on making baked goods that involve large "pores" (like ciabatta), this is perfect. If you have a bread maker, the mass will rise after 4 hours.
Ingredients:
- wholemeal flour - a glass;
- water - a glass;
- granulated sugar - a pinch.
Cooking method:
- Combine all components and actively knead - this can be done for 2-3 minutes to separate the gluten.
- Cover with a cloth, leave overnight or 6 hours (if you work during the day). When the mass bubbles, you can do the main bread dough.

Eternal without yeast
- Cooking time: 3 days.
- Servings: 5 persons.
- Calorie content of the dish: 765 kcal.
- Purpose: for breakfast.
- Cuisine: Russian.
- Difficulty of preparation: easy.
Experts call this recipe one of the simplest for beginner housewives, especially because there is no need to feed the live weight daily. This timeless starter can last a very long time if refreshed once a week and kept in the right conditions. The resulting amount of working mass is enough for 5-6 times, since it takes about 5 tbsp to make a loaf of bread. l.
Ingredients:
- flour - 210 g;
- water - 210 ml.
Cooking method:
- Combine 70 g of both components. The mass should have the density of fatty sour cream or pancake dough.
- Cover with a towel moistened with water, put in heat.
- The next day, check - if a lot of bubbles appear, feed by introducing again 70 g of the main components.
- Stir a couple of times throughout the day. The container is also kept warm under a towel.
- A day later, the sourdough should add in volume and bubble well. She needs to be fed again, again let stand for a day.

from hops
- Cooking time: 3 days.
- Servings: 4 persons.
- Calorie content of the dish: 437 kcal.
- Purpose: for breakfast.
- Cuisine: Russian.
- Difficulty of preparation: easy.
Most modern housewives do not know how to make sourdough starter for bread, but earlier this method of creating a starter for home baking was used more actively than others. In urban conditions, it is difficult to find the main component, however, if you succeed, you will forget about yeast forever - bread on this basis turns out to be incredibly lush, tender and soft.
Ingredients:
- hop cones - 225 g;
- flour - half a glass;
- distilled water - 450 g;
- sugar - 1 tbsp. l.
Cooking method:
- Pour the hop cones with water, let it boil. After cooking at medium power until the volume of liquid is halved.
- Cover with a lid and leave for 8-10 hours.
- Strain the hop broth, mix about 200 ml with flour and sugar. Mix.
- Cover with a dense natural cloth, leave warm for 3 days.

For black bread
- Cooking time: 3 days.
- Servings: 5 persons.
- Calorie content of the dish: 626 kcal.
- Purpose: for breakfast.
- Kitchen: home.
- Difficulty of preparation: medium.
For those who are looking for a scheme on how to make sourdough for brown bread, professionals advise trying to work with whole grains. The method is not the easiest, but very effective: on this basis, the bread rises especially well. You can do the same with wheat. The general algorithm does not change, only the stage of grain germination has been added. If this is too difficult, you can simply grind them and boil them with the rest of the components, and then work according to standard technology.
Ingredients:
- rye - a glass;
- water - 200 ml;
- honey - 1 tsp
Cooking method:
- Soak the washed grains, wrap the container with wool, leave warm for a day.
- If after a day they did not germinate, repeat the procedure, extending this process for another day.
- In the morning, grind rye grains with a food processor, add liquid honey. You can add a little water if the mass looks dry. Cover again and leave in a warm place overnight.
- If the sourdough has grown, you can cook the dough.

Malt
- Cooking time: 3 days.
- Servings: 5 persons.
- Calorie content of the dish: 793 kcal.
- Purpose: for breakfast.
- Cuisine: Russian.
- Difficulty of preparation: easy.
Sourdough on malt is prepared in almost the same way as for yeast-free bread based on rye, only wheat is taken here. It must first be germinated in a couple of days. The mass itself needs to be cooked, constantly monitoring its condition. If such a bread base has to continue to grow and feed, you can use ground grains, always in tandem with sugar and water.
Ingredients:
- wheat grain - a glass;
- rye-peeled flour - 1 tbsp. l.;
- water - how many grains will take;
- sugar - 2 tbsp. l.
Cooking method:
- Twist the sprouted grains through a meat grinder. Add the rest of the ingredients, pour in the liquid until a thick porridge.
- Boil this mass, cook for 50-60 minutes. Burner power is minimal.
- When the future sourdough darkens, it is left warm for 2 days. The finished product will have a leavened flavor and a lot of bubbles on the surface.

From wheat flour
- Cooking time: 2 days.
- Servings: 4 persons.
- Calorie content of the dish: 792 kcal.
- Purpose: for breakfast.
- Kitchen: home.
- Difficulty of preparation: easy.
If you are wondering how to make a sweet loaf without using yeast, you should check out this raisin sourdough recipe for fluffy and delicious bread. The crumb will be devoid of the sourness characteristic of such a dough, but it will turn out to be just as airy and will remain soft for a long time. Wheat sourdough for yeast-free bread is fed every 2-3 days.
Ingredients:
- black raisins - 5 tbsp. l.;
- wheat flour - 180 g;
- warm water - 180 ml;
- honey - 1 tsp
Cooking method:
- Steam raisins, chop. Well, if he keeps the bones in the meantime.
- Pour in honey and warm water.
- Pour the remaining dry component in portions, knead a thick dough in a jar.
- Cover, keep warm for a day.
- Mix, send back. In another day, the mass will be ready for the dough plant for delicious bread.

Monastery
- Cooking time: 7 hours.
- Number of servings: 6 persons.
- Calorie content of the dish: 1196 kcal.
- Purpose: for breakfast.
- Cuisine: Russian.
- Difficulty of preparation: easy.
A feature of this recipe is the basis in which brine is used. Experts advise taking cucumber or cabbage; it is important that it does not have vinegar in the composition. Monastic sourdough for bread without yeast is considered very slow, it is not fed daily, therefore it is stored for a long time. Often housewives make it to bake bread 1-2 times a week and in small loaves.
Ingredients:
- brine - 220 ml;
- peeled rye flour - 330 g;
- sugar - 1 tbsp. l.
Cooking method:
- Let the brine stand to warm (to room temperature), or hold in a warm, turned off oven to speed up the process.
- Mix with rye flour, be sure to get rid of the lumps that appear.
- Add sugar - it will shorten the fermentation time.
- Cover, keep warm. Keep track for 6-7 hours, periodically "upsetting". The finished mass will add a lot in volume and will have a bubbling surface.

Potato
- Cooking time: 3 days.
- Servings: 4 persons.
- Calorie content of the dish: 549 kcal.
- Purpose: for breakfast.
- Kitchen: home.
- Difficulty of preparation: easy.
The recipe for potato sourdough is very simple, but it has a characteristic feature that distinguishes it from other methods of how to make dough for bread without yeast. Such a base will not have a sour smell even on the first day, which makes it very attractive in the eyes of most housewives. The amount of flour cannot be indicated up to a gram, since it depends on the amount of broth received.
Ingredients:
- potatoes - 10 pcs.;
- wheat flour - how much sourdough will take.
Cooking method:
- Boil peeled potatoes without adding salt, pepper and other seasonings. When they become soft, strain the liquid into a jar.
- Pour flour into it until the mass is similar in consistency to sour cream.
- Cover the jar with gauze, keep it at rest for 3 days. If after this period foam appears on top, you can start the dough.

The process of creating such a basis for home baking raises many questions even among experienced housewives, so professionals give several recommendations:
- Cook in glass - do not use metal cups. Stir only with wooden spatulas.
- If you decide to bake sourdough bread, let the dough rise for 4-5 hours, otherwise the rise will not be enough. Some professionals advise to increase this time to 8 hours, or add heating of baking sheets from below (you can put them on a pot of boiling water).
- For wheat baking, it is advisable to start a whole grain-based sourdough, and then feed it with classic white flour of the highest grade.
- The strength that this mass acquires depends on its age, therefore, for baking, housewives mainly use half of the sourdough, and continue to grow the rest.
- If you're afraid the bread won't rise as it does with yeast, reduce the amount of yeast gradually.
- Storage is best done in the refrigerator (door) - so the mass will be “frozen”. Before starting work, she is allowed to warm up for several hours in order to start the activity again.
- Need to grow bread base faster? Add a spoonful of sugar / honey - it will speed up the fermentation.
- It is advisable to combine the components by eye, and not blindly following the recipe - you need to get a thick, but moving mass, in which there is no spoon.
- To raise the starter in the room, it should be at least 22-23 degrees, otherwise you will have to wait 1.5-2 days until the first bubbles appear, and the total ripening period will increase.
Video
Bread on a long dough from the refrigerator
Recipe for white bread on a long dough that ripens in the refrigerator.
Wheat bread in the oven.
Crispy crust, tender elastic crumb, rich taste and smell of bread.
To bake such bread, you need a long fermentation and little yeast. Of course, the best option is bread on the usual long dough.
Most of us do not have time for this, because with a small amount of yeast, the dough can ripen from 8 to 16 hours.
In search of a recipe for a delicious bread that smells like bread, not yeast, I discovered a way for myself when the dough rises in the refrigerator for about a day. I liked the method.
In any case, it is convenient in that the dough does not need to be monitored. This saves time. I admit that if it were warmer in our refrigerator, the dough could overripe in 24 hours. Therefore, for the first time it is worth looking after her when the term is approaching the end.
I make the dough at 10 or 11 in the morning and I have to check it the next morning at 8 o'clock. If the dough is not about to fall, let it stand all the prescribed time, and yet I will watch it once every half an hour.
The method is far from perfect, especially for a single loaf. It is difficult to measure a small amount of yeast.
Previously, for dough, I took less than half a teaspoon of yeast, and added quite a bit to the dough at the tip of a teaspoon.
Then I came up with the idea of measuring yeast with a 5 ml medical syringe. There are also 5 ml in a teaspoon. We throw away the needle and the piston from the syringe, here is the beaker with graduations. The method is described in detail.
For dry yeast "Saf-Moment" in 1 ml syringe 0.63 grams of yeast. Therefore, I indicate the amount of dry yeast in grams and ml.
The quality of the flour greatly affects the result. The bread is different. It seems to me that it is more successful for bread to use first grade flour, but I often bake with premium flour.
What kind of bread will turn out depends very much on the temperature regime. More often, a baking temperature of 230-250ºC is recommended, but I like it better when the bread is baked for almost an hour at a temperature of about 210ºC. It is my personal preference for the pulp to be drier. By trial and error, you can find the best option for you.
Unfortunately, we often do not know the true oven temperature. Therefore, I advise everyone to purchase a thermometer.
With your hands, mold a rectangular cake as wide as the length of the mold. Roll up the cake, pinch the end. Place the dough, seam side down, into the brick mold. Cover the form with cellophane with a bubble on the rise so that the dough does not dry out.
11. Put the bread for proofing in a warm place for 1 or even 2 hours until the volume increases by 1.5–2 times.
12. Before baking, you can cut the top of the bread with a sharp knife lubricated with vegetable oil. A utility knife works well for this.
Bakery products:
13. Bake in an oven preheated to 230ºC. Oven with steam - put a stable mug or bowl (metal or enameled) with a glass of boiling water on the lower baking sheet, remove the dishes with water after 30 minutes, add gas to 250 degrees and bake until cooked, i.e. until the crust of the desired color.
Baking time about 40 minutes.

14. Grease hot bread with a very thin layer of butter, cool on a wire rack. Wrap in a towel.

If you put bread in a bag without paper, the crust will become soft and will not crunch.
Bread made without yeast fermentation is the well-known Armenian thin lavash, Jewish unleavened matzah or crispbread slices. Sourdough for yeast-free bread, cooked at home, involves a fermentation reaction, so acidic bacteria are indispensable even when baking the most healthy bread. How then does bread bought in a store differ from a traditional loaf on homemade sourdough?
Starter Options
There are as many classic, original sourdough options as there are bread options, everyday and festive. And in any of the recipes, you still have to put up with the presence of sour, natural yeast, since this is the only prerequisite for the rise and splendor of the dough.
The benefits of homemade sourdough bread
A great consolation for those who believe that yeast is harmful is the fact that you can control the process of activating grown bacteria at home on your own. The technologies of industrial production of dry and pressed yeast cannot provide attention to each unit of output. It would be strange to demand from the employees of the bakery shops that they decontaminate the working premises to destroy pathogenic bacteria. Therefore, the opportunity to protect yourself from random human and industrial factors is a sufficient reason to try yourself in the role of a village mistress from the recent past.
Harm of homemade sourdough bread
The benefits of homemade sourdough for unleavened bread and unleavened breads are understandable in and of themselves, but is there any potential harm in them? As it turned out, yes, but this negative point applies only to people with serious diseases of the gastrointestinal tract. The same leaven formed during intensive fermentation, which does not allow pathogenic microorganisms to take root in the product, has a detrimental effect on a weakened digestive system, causing bloating and heartburn.
You can partially neutralize the increased acidity without compromising the development of a beneficial bacterial environment by putting 1-2 teaspoons of baking soda when kneading the dough.

Preparation of wheat-rye sourdough
Otherwise, rye sourdough for yeast-free bread is called “eternal”, since with timely feeding, a jar of odorous contents covered with a napkin can last for more than one year. With the option of mixing rye flour and wheat flour, the “life” of the sourdough is reduced, but if the harvesting is not planned for a long time, this option will result in a rich and complex taste.
In a half-liter jar, pour 1 tbsp. a spoonful of peeled rye and wheat flour of the first or second grade. Pouring water in a thin stream, mix the gruel, similar in consistency to liquid sour cream. Now it remains only to cover the jar with a cotton napkin in one layer and you can wait.
Do not confuse sourdough with sourdough - ready-made yeast is put into the sourdough when diluting the components, and they provoke increased fermentation with sugar or honey, and then with flour. In sourdough for yeast-free bread, rye or any other, only a suitable nutrient medium is formed, and live bacteria in the flour or coming from the air complete the process on their own.
The next day, a characteristic sour smell will appear from the jar, and its contents will be saturated with oxygen bubbles and rise almost one and a half times. As soon as this happened, again you need to mix two types of flour into the composition, this time 3 tbsp. spoons of each. The new stage of fermentation will reach peak activity within 2-3 hours, which will mean that the sourdough for unleavened bread is ready.

Preparation of rye sourdough
The rye sourdough recipe for yeast-free bread is the variant used to make monastery breads, famous for their long shelf life and softness. Real bread, according to local bakers, should be prepared on a five-day sourdough, but even after the finished loaf is taken out of the oven, it is not cut on the table, but wrapped in a towel and removed to “reach” for another day. When tapping on the crust of such bread, a sonorous sound is heard, and when cutting off a slice, the table is not littered with crumbs - only then, under these conditions, the bread can be considered real.
How to prepare a yeast-free bread sourdough that meets all these requirements? Firstly, using not purified or boiled, but settled water, in which you need to dilute 100 g to a density of sour cream of medium fat content. A napkin to cover a jar of sourdough is pre-moistened, and then the container is covered and cleaned in heat.
On the second day, the appearance of bubbles is normal - there may not be very many of them, but in any case, the sourdough is replenished with another 100 g of rye flour and a small amount of water to maintain the same consistency.
On the third day, the sourdough for yeast-free bread is formed by the last addition of flour (100 g) and is removed for the last time for a day. On the morning of the fifth day, the foundation can already be used. To do this, the entire amount of foamy liquid must be divided in two, and the part that remains in the jar, cover with three-fold gauze and put in the refrigerator, and use the set aside for the test.

Preparation of sourdough on raisins
Half a glass of soft white raisins should be crushed in a mortar or rolled out with a rolling pin in a bag to break its integrity. Put the raisins in a deep plate, pour half a glass of water, add the same amount of rye flour and mix everything well with 1 teaspoon of natural honey. The mixture will be thick, you do not need to thin it specifically.
Transfer the mass to a glass jar, cover with two-layer gauze and leave warm for a day. On the second day, the fermented sourdough is filtered, squeezing out all the liquid from the raisin gruel, and 4 tbsp. spoons of rye flour and add tepid water to the consistency of drinking yogurt.
On the third day, the starter can be used. In that half of the base, which will be stored in the refrigerator, add another 4 tbsp. spoons of flour, then covered with gauze and removed, and the other half is used for dough.
Preparation of raw sourdough on grain
Sourdough on grain is prepared in two versions - raw and custard. Raw sourdough is rich in live bacteria, and the value is preserved in it in full, but the sourdough made according to the second method is stored longer.
How to make sourdough for yeast-free bread on grain using the raw method? First you need to decide what kind of bread you plan to bake - dark or white. For dark bread, you need to take rye grains, for white - wheat. You can cook both options in different dishes, and subsequently use them alternately or even mixing with each other.
Pour 1 cup of sorted and well-washed grain into a glass jar and shake several times so that the wet grains do not stick together. For better germination, you need to arrange condensate in the jar, for which the container is placed in a bag, tied up and put in heat for a day.
The next day, the bag is removed and the grain is washed again under running water. If all the grains are swollen and sprout, you can start preparing the sourdough, if not, repeat the steps with the package and leave the jar warm for another 6-8 hours. After that, the swollen grain is laid out in a container for a blender and crushed at medium speed to a slurry - it is not necessary to achieve uniformity.
In a deep plate, the resulting slurry is combined with 2 tbsp. spoons of peeled rye flour and 1 teaspoon of natural honey, transfer the mass to a jar, cover with a napkin and clean for another day. In the future, the mixture is treated similarly to the previous recipes - some are removed in the cold, some are used immediately.

Preparation of sourdough starter on grain
The custard recipe for yeast-free sourdough for grain bread partially repeats the one described above - the grain is germinated, crushed, mixed with flour and honey, but then diluted with a small amount of water until sour cream is thick and put on a small fire for 25 minutes. Cool the mixture by wrapping the saucepan in a towel, and then divide in half.
Preparation of rice sourdough
Rice can be used both whole (not steamed) and sliced. Rinse 100 g of grain under running water and put in a jar. Pour 150 ml of slightly warmed water there, add 1 teaspoon (with a slide) of sugar and remove the jar covered with a napkin in a dark, cool place for three days.
On the evening of the third day, add 1.5 tbsp. tablespoons of wheat white flour and 0.5 tbsp. spoons of sugar. On the fourth day, mix the foaming mass and dilute it with 100 ml of heated water, at the end add 1 tbsp. l. flour.
On the fifth day, the sourdough is filtered, carefully squeezing through cheesecloth, add 1 teaspoon of granulated sugar and half a glass of flour. After 4 hours, the starter can be used. It is with this rice sourdough that practically non-stale buns, the most magnificent pancakes and sweet pies are obtained.
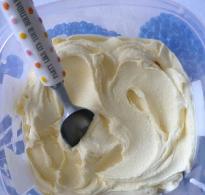
Preparation of sourdough on hop cones
Contrary to popular belief that the sourdough on hop cones turns out to be "drunk", such a base is no different from the already described recipes for yeast-free sourdough for bread. Some of the ethyl alcohol is actually released during fermentation, but during heat treatment, the substance evaporates without leaving traces.
In the evening, pour 1 tbsp into a thermos. a spoonful of hop cones, brew them with a glass of boiling water and leave the infusion in a closed thermos until the morning. The next day, strain the liquid into a 2-liter glass jar, add 1 tbsp. a spoonful of natural honey, stir everything intensively and, gradually falling asleep rye flour, bring the workpiece to the density of sour cream of medium fat content. Cover the jar with gauze and keep warm.
In the morning, it will be possible to note the released foam on the sourdough and an unpleasant smell from the jar - this is normal. You need to mix in the mass of another 2-3 tbsp. tablespoons of flour and leave again for a day. On the fourth day, the procedure is complicated by the addition of heated water - it must be poured in at least half the volume of the entire mixture, and then thickened with flour, returning the mass to its previous consistency. The fifth day is a repetition of all the actions of the 4th day.
Finally, on the sixth day, the longest starter is considered ready and can be used.

Homemade sourdough preparation
Opara helps acidic bacteria to enter into full force, become more active, so making real homemade bread without sponge is impossible. If you are used to focusing on the weight of raw pressed yeast, then a piece of 40 g replaces 1 cup of finished sourdough. The same amount of sourdough is similar to 3 teaspoons of dry instant yeast.
To prepare the dough, a full glass of sourdough is poured into a wide bowl, a mass of 400 ml of heated water is diluted and flour is added in small portions, trying not to miss the moment when the dough begins to resemble village sour cream. Then the bowl is covered and cleaned in heat for 8-10 hours.

Homemade sourdough bread
During the night, the dough rises and falls several times - gaining strength. When kneading dough, it should be borne in mind that bread made from rye flour is, of course, healthier, but much “heavier” and sometimes may not be completely baked. Therefore, 20-30% of rye flour, before adding it to the dough, it is advisable to replace it with the same amount of wheat, first or second grade.
Separately, in a cup, you need to combine 100 ml of warm water with 1 teaspoon of salt and 1 tbsp. a spoonful of sugar or honey. When the granulated sugar is dissolved, the mixture is poured into the dough and knead well with a wooden spoon. Now the turn of fantasies has come - you can add any spices to your taste, nuts, sesame seeds, bran, oatmeal, seeds, sprouted grains to the future dough. The benefit of yeast-free sourdough bread is that it retains its properties in almost any culinary experiment. Be sure to pour 3-5 tbsp into the future dough. tablespoons of vegetable oil. The main thing is to mix everything well and sift the prepared flour directly into the bowl.
Rolling out dough
They don’t talk about live yeast dough - they knead it, they “roll it out”. They generously sprinkle the table with flour, spread the entire sticky heterogeneous mass on it, and in a clockwise direction begin to roll it around with both hands, then crushing it, then again forming it into a ball. You should not oversaturate the dough with flour - it should stop sticking to your hands, but nothing more.
The formation of simple bread happens like this - we take the ball in our hands and squeeze the dough inside the ball around the entire circumference - we get such a hemisphere that needs to be placed in a greased frying pan. Now the future bread should stand warm for about two hours.
After the oven has warmed up a little, put a bowl of water on the bottom rack, closer to the back wall. Then close the door and wait until the oven warms up to 230 0 C.
When the bread is in the oven, 40 minutes are detected, after which you can try to evaluate the readiness with a wooden skewer.
Cooking yeast-free sourdough bread in a bread machine will save you from a long dough rolling procedure and the need to wash a lot of extra dishes, and thanks to a smart appliance, you can try a great many recipes for your favorite bread.
The best way to make yeast dough for rolls and bread (dough method) is 3.Yeast dough - 3
The third part of the Marlezon ballet. And the last one.
Although in the original version, if my memory serves me, the ballet was danced in two parts. But I may be wrong, because Dumas read only as a child. I tried to re-read it five years ago - I couldn't. Why would that… But I digress as always, sorry.
And today we will not talk about dancing kings and queens and jumping dartagnans, but about sponge dough.
The sponge dough is long. I'm warning you right now.
Yeast in sponge dough is put much less than usual. Previously, in the villages, when bread was made, they always left a piece of old dough in the dishes, and they made dough on it, adding only a drop of fresh yeast for top dressing. And this tub, in which the dough, in a rustic way - sourdough, was set, never washed. They kept every drop of the yeast medium - even in the form of pieces of dough dried along the walls.
The sponge dough, I repeat, is long. But on the other hand, a natural fermentation process takes place, and from this the finished bread does not go stale longer. There were no bakeries. Kneaded with hands. And they baked not once, but for a week of bread. And even for longer - in winter, they took out the finished bread into the senki and froze it. How else. You can't get enough if the oven is hot every day.
Now it's basically useless. It is unlikely that anyone is going to bake bread for a week ahead. But suddenly come in handy. And then experimenting with tastes is never harmful. And the taste of the dough dough is many times better than that of the quick doughless one.
So, we bake bread and baguettes.
Pour half a liter of water into a bowl. The water should be warm, but not hot. 30-40 degrees. Add 2-3 tablespoons of sugar and half a pack of dry yeast. I mean a standard pack of 12 grams. You can replace dry yeast with live yeast, 30 grams of live yeast will be enough. 

##
Stir yeast in water with sugar. Pour in half the flour. 
In general, a kilogram of flour is needed for half a liter of water. But the dough starts up and stands on half the flour. Opara is a liquid dough.
Mix flour with water. 
I always immediately dilute salt with a small amount of water in a glass or bowl and put it next to the dough. I baked unsalted bread a couple of times - and taught myself to put salt nearby so as not to forget when the dough is ripe. 
I cover the dough with a film and calmly forget about it for three to four hours. 

Sometimes the dough needs more time. You can start it in the evening.
The steam rises slowly. 


But it becomes ready only when it rises to its maximum height and begins to sag in the center. Do you see a crack in the center and the dough began to settle inward? This is the very moment when the dough is ready. Right now you need to start the dough. 

If you let the dough stand longer, it may turn sour.
First pour in the diluted salt. 
Then pour in the remaining half a kilogram of flour. And stir it with the brew. 

Stirring flour with dough is much more difficult than kneading the dough with all the flour at once. But don't be afraid. At that moment when it seems to you that the dough is too steep - add vegetable oil. Approximately 50 grams of oil. 

The dough should absorb all the flour along the sides of the bowl. 
Transfer it to the table, cover with cling film and leave for 20 minutes. 
And then knead well again - until even, without lumps. 


Transfer the dough back to the bowl, cover with cling film and let rest for 30-40 minutes. 

Then punch down the dough again. 

and leave it back for an hour, so that it finally fits. .JPG)


After that, the dough can be considered ready. It is porous, squeaks when punched. .JPG)
It turns out approximately 1.6 kilograms of dough from these products.
Cut off a kilogram of dough, roll it so that a flat surface is obtained on top. 

Lightly flatten and transfer to an oiled heavy-bottomed pan (or simply place on a baking sheet). .JPG)

Divide the remaining 600 grams of dough into three equal parts. 

Make baguettes.
In order for the baguettes to keep their shape, they are shaped like rolls. That is, a piece of dough is first rolled into a cake, then rolled into a tight roll. And then roll out thinner, from the middle to the edges into a thin sausage. 


Transfer to a baking sheet. 

And with a sharp knife make cuts obliquely. When making cuts, do not be afraid, do not be delicate, do not pull the dough behind the knife. Strong and fast - one or two and you're done. 


Cover with foil and loaves and bread. Someone recently complained that the rolls dry out during proofing. Under the film, they will not be covered with a dried crust. Even in our kitchen, with the stove constantly on, they do not dry out under the film.
Proofing time for baguettes from sponge dough - 1 hour. 


After that, bake them for 15 minutes in an oven preheated to 200 degrees for exactly 15 minutes.
Do not shorten the proofing time - otherwise your baguettes will tear in the oven. 

Bread needs a little more time to rise. I advise you to cut the bread dough with a knife, and leave it for proofing for another half an hour after the baguettes go into the oven. 


Then put the bread in the oven. Bake for 15 minutes at 200 degrees. Then, without removing the bread from the oven, reduce the temperature to 150 degrees and bake for another 30 minutes. 
We checked the readiness of bread on the scales in the bakery. If we put 750 grams of dough into the bread form, then the finished hot loaf of bread should already weigh 110 grams less. If the scales showed a little more, the loaf went back into the mold and into the oven.
I also checked this loaf of bread on the scales, and the result did not deceive me - it's ready! 
I smeared the hot crust with a brush with plain water. It seems to me that from this the crust becomes tastier. 

And I check good bread like this - I take it and press it strongly with my hand. She flattened and let go. 
And if the bread takes its original shape - flattens out and rises back - then the crumb is perfectly baked. 
Well, I'm not going to tell you how delicious it is. Try it yourself. Moreover, it is so simple - that it does not happen easier. 

Sourdough is baked in different ways. Each housewife has her own recipe. I will share my experience. I have been baking on sourdough recently, but quite successfully (the whole family likes bread and my other pastries) I would be glad if you share your experience with me.
In the evening (for the whole night) I put the dough on sourdough. I stir 0.5 cups of sourdough in water at room temperature in a large container. 
It is better to get the starter from the refrigerator in advance so that it “wakes up” (2 hours before). I take water depending on the desired amount of dough. For a "classic" pie tin, 400 ml of water is enough for me. 
I add flour so that the consistency of the dough is like thick sour cream. 
I put the container in a very warm place (in my apartment this is the oven, which I turn on for 1 minute). In the morning, the dough should bubble up. I stir the dough and set aside 0.5 cups of sourdough for the next time, “feed” the new sourdough with flour to the consistency of thick sour cream and put it in the refrigerator. 
If I bake simple lean bread, then I add to the dough (only after I set aside a new sourdough (!!!) 2-4 tablespoons of olive oil, salt and sugar / honey (I first dilute it in a small amount of water). 
You can add cumin, coriander, bran or other "fillers". I add flour in sufficient quantities so that the consistency of the dough becomes very thick (a spoon hardly interferes). 
I cover the dough, put it in a very warm place for several hours. When the dough has risen, I add a little more flour, knead with my hands, let the dough rise again, 
I put the dough in a mold and bake at 200C for about 60 minutes. After baking, I wrap the bread in a towel "to rest" for several hours.
If you need a rich dough, then in the morning I add 250 ml of milk at room temperature (or a little warmer), flour to the consistency of thick sour cream and put it in a warm place for an hour. An hour later, I add butter (previously melted and cooled), vegetable oil, salt, sugar / honey (previously diluted in a small amount of water), eggs, flour in sufficient quantities to the consistency of a "standing spoon". 
I put it in a warm place for several hours. When the dough rises, I add flour, knead, let it rise again, 
shape and bake.
P.S. 1. I recommend getting a "reserve" jar of sourdough, as I forgot several times to set aside the sourdough for the next time (if you added salt or sugar or butter to the dough, then it can no longer be used as a sourdough for the next time). What helped me in such a situation was that I had several reserve jars of sourdough.
2. For pastry, use only the highest grade flour.