Salt dough painting step by step. How to make a DIY salt dough painting
A bewitching look panel made of salt dough will decorate the interior of a living room, nursery or living room. Dough is an ancient symbol of prosperity, comfort and family hearth. In Slavic culture, there are many examples of its unusual use, in addition to traditional cooking. The ability to apply dyes, the addition of many decorative elements and durability are only a small part of the advantages of the material.
The artistic composition is chosen taking into account the architectural and aesthetic features of the room. In a well-lit room, a salt dough panel should be 1 - 2 tones darker, otherwise it falls out of sight. You need to take into account the color prevailing in the interior. This includes not only furniture and curtains, but also many small details. Be sure the artistic composition is consistent with the prevailing style. The materials used are selected taking into account the prevailing temperature regime and the chosen style.
- It is not recommended to hang a stucco image in direct sunlight or over a heat source;
- After applying each layer of paint, you need to wait 10-15 minutes;
- The colors used are not too bright in order to maintain the harmonious compatibility of the elements;
- The color of the frame is selected to match the image.

Dough has gained particular popularity among designers due to environmental safety, plasticity and the ability to give it the required shape. With proper kneading, salt dough does not stick to your hands.
How to make a panel with your own hands from improvised means:
We make a panel of salt dough for the kitchen
The kitchen is a place associated with eating and a luxurious table. That is why, for decoration, it is better to do something closely related to this. The tradition of using flour for decorative purposes comes from Germany. There, such unusual material was and remains the main one for many.
To create a composition, you will need to find the following ingredients in advance:
- 1 glass of fine salt;
- 2 cups flour with a "hill";
- 125-160 gr. water;
- 1 st. a spoonful of dry wallpaper paste;
- 1 st. a spoonful of any hand cream;
- 1 st. a spoonful of unrefined vegetable oil.
All ingredients are thoroughly mixed in a deep container. In order for the decorative image to be durable, it is necessary to pay increased attention to the quality of the flour. Too thick or sparse mixture will equally badly affect the quality of work.
To give the composition a pleasant aroma, step-by-step execution includes several additional elements: cumin, nutmeg, cinnamon, pepper. Once the basis for work is ready, you can proceed to create the necessary forms.

To make houses, a tree or a Christmas tree with your own hands, appropriate molds for baking will help. For modeling, a large smooth surface is used, which is then easy to wash. It is convenient from the point of view of the possibility of creating unusual geometric shapes. Fantastic flowers and animals are made from two parts. The base is molded only by hand, the upper parts are made using molds.
Check out some creative wall panel ideas on this page:
Salt dough panel, master class: modeling secrets
Difficulties for beginners arise at the stage of modeling and choosing the base. In the second case, photos of finished works will help. If this did not give the desired stimulus to the imagination, then there is always the opportunity to attend a master class. Here you not only observe the direct manufacturing process, but you can always ask questions of interest.
Having formed the image of the future picture, you need to transcend to the creation of its outlines. Masters advise using dough, the consistency of which resembles plasticine.
- The size of the composition is determined by aesthetic preferences;
- The larger the canvas, the larger molds are needed;
- For the living room, images of the hearth and family are suitable, then it would be appropriate to hang something gastronomic in the kitchen;
- Representatives of the flora are suitable for a living room or office space, for example, sunflowers or roses, if we are talking about an interior in a classic style;
- For a children's room, cartoon cats or a funny monkey, complemented by decorative elements, are suitable;
- In the room of an elderly person, daisies are appropriate, bringing a feeling of youth and lightness.
If necessary, you can make a mold of the required shape and size yourself. To do this, you need to draw a contour on a sheet of thick cardboard with a pencil, and then carefully cut out the area. In order to make the three-dimensional image seem natural, 3-4 layers of the same material are superimposed on top of the figure cut out from the dough.
We make a winter panel from salt dough
Seasonal holidays and the approaching seasons to a certain extent influence the choice of topics for panels. For example, the New Year requires something snowy. To work, you will need a reed plate, gouache, confetti, dough and a direct sketch. Pictures are selected taking into account aesthetic preferences. A loop is made from ½ of the plate. Gouache must be given the desired color depending on the parts of the composition.
The Christmas tree is molded by hand or using a mold. Twigs are formed with a toothpick or a needle.
The further procedure looks like this:
- A winter panel requires a stylish frame, which is also decorated with confetti and sparkles;
- It is necessary to blind the required number of firs;
- A house is formed from brown dough, and a roof from blue;
- Recheck the selected dimensions;
- The upper part of the plate is painted purple, and the lower part light blue;
- Fix the house on the plate with glue;
- Confetti will add a New Year's mood to the image.
How to make a decorative panel from natural materials:
Salt dough panel in a photo frame: pictures and instructions
The technique for making compositions from dough includes the formation of crafts in a photo frame. She cannot boast of size, but the effect will be noticeable. Pictures with small flowers, such as lilies or violets, are preferred. For retro-style rooms, a slightly split image is suitable. It will bring the spirit of antiquity.

Before doing the work step by step, attention is drawn to some nuances.
Ideas for composition
- For a nursery, mini fish or cartoon characters are suitable;
- The living room will be decorated with flowers;
- Berries are suitable for the kitchen.
Do-it-yourself panel "Rowan" from dough (video)
Salt dough compositions are a decoration for home and office space. The manufacturing process is simple and fast, so it is accessible to beginners. Gouache is used to give the dough the desired color. The required shape of the dough is given by molds, some of which are easy to make on your own. The theme of the composition is chosen taking into account the place of its future location.
Examples of salt dough panels (photo)


Olga Poverinova
All children, without exception, love to sculpt from plasticine. But, unfortunately, plasticine crafts have a very short lifespan. What if you want to keep the memory for many years? In this case, you should pay attention to beautiful crafts made from salted test. Surely, everyone has heard that from a specially prepared test very beautiful, and most importantly, durable products are obtained.
Salty modeling dough, recipe:
Wheat flour, preferably the highest grade - 500 grams.
Table salt, necessarily finely ground - 200 grams.
Cold water - 200 grams.


Talking about how to make salty dough, you can’t help but talk about how to knead salty dough. But the batch test plays almost as important a role as its composition. Pour into mixing bowl test the required amount of table salt, then pour it with water and mix until completely dissolved in water. After that, stirring constantly, pour the flour into the water. Mix thoroughly dough until then until it stops sticking to your hands and becomes cool and elastic. If you are cooking dough in advance, and not immediately before sculpting, store dough in a plastic bag to prevent it from drying out.
This salty recipe test for crafts, it is most optimal for classes with the smallest children who may decide to try the finished product by mouth. All components are absolutely harmless to the child's body and will not bring any harm. And the consistency test very convenient for work.
Masters people often ask how to dry salty dough. The most optimal option for drying puff test is roasting in the oven. The ideal temperature for firing is 100 - 120 degrees.
Manufacturing salty crafts test- a very exciting activity that draws not only children, but also their mothers. The best salty crafts test will complete your collection. Plus, they make great gifts for family and friends. Spending a long time with their children creating them, the mother has a wonderful opportunity to develop in the baby such qualities as perseverance, attention, fine motor skills and imagination. But a happy, harmoniously developed child is the best gift for any mother.
I sculpted from salt dough flowers, painted already dried products with gouache.

The background can be chosen for every taste and color. I, with the help of the same gouache, picked up such a background. "Vase" from salt dough.


Then we cover painting varnish. (I have a car, spray in a can)


Related publications:
 New Year's time is a time of miracles, magic and fulfillment of desires. New Year's Eve is the most fabulous time of the year. But the New Year mood itself.
 Working with salt dough stucco painting
 I’ve been thinking for a long time what parents can be interested in, it immediately came to mind “It will be salty dough.” T. Since the master class was held in February, we decided.
 Purpose: to involve parents in joint co-creation with children, to acquaint parents and children with one of the technologies for making New Year's.
 Purpose: to involve parents in joint co-creation with children, to continue to acquaint parents and children with one of the manufacturing technologies.

From salt dough, you can make not only different individual figures, but also quite large three-dimensional paintings. Of course, molding such a panel takes much more effort and time, but the result is worth it - such a panel will decorate the interior of your home or become an excellent hand-made gift. Today we will tell you how do-it-yourself paintings are made from salt dough, a master class of one of which we will provide in this article.
salt dough recipe
To make salt dough, you will need the following:
- 2 cups sifted flour.
- 1 tablespoon vegetable oil.
- 1 cup fine, non-iodized salt
- 1 incomplete glass of water.
Mix all the ingredients, put the bag with the dough in the refrigerator and leave it for 1 hour. After the specified time, remove the dough and start sculpting.
Important! If after modeling you have unused dough left, then you can save it. To do this, put it in a plastic bag or tightly closed plastic container, leave it in the refrigerator. If after that the dough becomes wet, then knead it well, add flour and knead again.
Three-dimensional picture from salt dough “Swans”
To make a three-dimensional picture from salt dough with your own hands, you need to follow the following instructions:
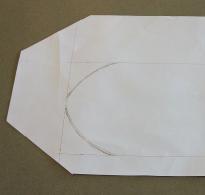
- First of all, cut out a template of the main details of the future picture from tracing paper or paper - we have swans. Then knead the dough according to the above recipe, roll it out on a special board, silicone mat or just foil.
- Outline the contours of the future drawing on the test - this can be done directly through the paper using any sharp object: a needle, an awl or a compass.
- Remove the template and start working with the dough itself - draw the main lines, which can be of different depths and thicknesses.
Important! For such work, it is convenient to use manicure tools.
- In the place where the swan wing will be located, mark a small piece of dough for volume and carefully glue the wing there.
Important! It is very easy to glue elements from the dough together - for this it is enough to use plain water and a brush.
- To make the swan more fluffy, prepare short and long feathers for it. Small feathers are diamond-shaped, fluffy look they can be given with a knife or stack for modeling.
- Blind two birds that will look at each other, for this second swan, depict in a mirror image.
- It's time to make roses for the picture from salt dough with your own hands. To do this, roll a sausage out of the dough, and then cut it into small pieces - there should be exactly as many of them as there are flowers you are going to place on the panel.
Important! Of course, it is desirable to make an uneven number of them.
- Form the center of the flower by rolling the dough into a ball and making an indentation in the center with your finger. Now you can make the petals - to do this, roll out each piece and give it an oval shape with jagged edges. Then wrap the middle of the flower in turn with petals from different sides, gradually increasing the size of the bud.
Important! Please note that the more petals, the more magnificent the roses come out. However, you should not make them too large, otherwise they will look too cumbersome, while the swans should remain the figure in the foreground.
- Leaves for flowers simply cut out according to the template and outline the contours of the veins on them.
- First, dry all the individual finished details of the picture in the oven, and when they dry, paint them with acrylics, watercolors or gouache.
- At the end, glue the swans and flowers in the center of the picture on the base of your choice, arrange everything in a suitable frame.
Important! If your painting will not fit under glass due to its volume, it is advisable to varnish it. So you give the craft a glossy shine and protect it from dust.
footage
Making wonderful pictures from salt dough with your own hands is not difficult at all. To do this, just prepare the dough according to the recipe and give free rein to your imagination. As a result, you will get a wonderful home decor item or a great gift for your friends.
From salt dough, you can make not only separate diverse figures, but also quite large paintings. Of course, a three-dimensional salt dough picture takes much more time and effort, but the result is worth it - such a craft will decorate your interior or become a good hand-made gift.
Master class "Sculpting a three-dimensional picture from salt dough"
- First of all, we cut out a template of the main elements of the future picture from paper or tracing paper - in our case, these are swans. Then you need to knead the salty dough, roll it out on a special board, silicone mat or foil and outline the contours of the pattern on the dough. This can be done directly through the paper with any sharp object: a needle, a compass or an awl.
- Next, we remove the template and work with the dough itself: we direct the main lines, which can be of various thicknesses and depths. It is convenient to use manicure tools for such work.
- In the place where the wing will be located, for volume, place a small piece of dough.
- And carefully glue the wing into place.
- It is very easy to glue elements from salt dough together: for this, it is enough to use a brush and plain water.
- To make the swan more fluffy, we will prepare long and short feathers for it.
- The small feathers are shaped like diamonds and should be given a fluffy look with a knife or modeling stack.
- This is how the first swan should turn out as a result of your efforts. Blind two birds from the dough that look at each other - for this second swan will need to be depicted in a mirror image.
- Let's start making rose flowers for the picture. Roll the dough into a sausage and cut it into small pieces - there should be as many of them as you plan to place flowers on your product. Of course, it is desirable to make an odd number of them.
- We form the middle of the flower by rolling a ball out of the dough and making a recess in its center (with a finger or a pencil).
- Now you need to make petals - for this we roll out each piece of dough and give it the shape of an oval with jagged edges.
- Then we wrap the middle of the flower in turn with petals from different sides, gradually increasing the size of the bud.
- Please note that the more petals, the more magnificent the roses for the do-it-yourself dough painting are. But you should not make them too large, otherwise they will look too cumbersome, while swans should remain the foreground figure in this picture.
- Leaves for flowers simply cut out according to the template and outline the contours of the characteristic veins on them.
- The long flowers that you see in the picture (later we will paint them yellow) are the easiest to make: they are molded from small balls of dough, the middle of which is pressed through by some corrugated object (for example, the back of a felt-tip pen cap).
- And we perform the finishing touches - we make carved leaves of dough of different sizes.
- All individual finished elements for a salt dough picture should first be completely dried in the oven. When dry, paint them with acrylics, gouache or watercolors. If your painting won't fit under glass, it's a good idea to lacquer the salt dough elements to give them a glossy sheen. At the end of the work, glue the swans and flowers on the base of your choice and enclose the picture in a suitable frame.


As you can see, making a picture from the dough is absolutely not difficult. You can come up with any theme for your
21.12.2017
Pictures from salt dough step by step. How to make a picture of salt dough with your own hands.
Finally, it has become warmer, and I want flowers to bloom, an alluring aroma in the air, a warm sun and a good mood. For now, I suggest you make a good mood at home. Today I have prepared for you a master class on creating the Queen of Flowers, namely roses. Let's do picture from salt dough "Roses"size 30*40cm with three beautiful large roses.
Now I'll show you how we make the leaves. We take the dough, roll the ball, then a droplet and press this droplet on the surface with our fingers.

Now with a stack we will make a strip in the middle of the stack.

We will also make a strip and get a leaf.

Now we put our leaf on the palm of our hand and roll the edges with a stack, making them more delicate and thin.

Now that the procedure for getting the leaf is clear, let's start attaching them to the composition.

For the pains of the strength of the volume of the petals, we add small pieces of dough in the right places, on which we will then glue the leaves.

This is how you can see how I lay out the leaves on a piece of dough, bending them and making them voluminous with the help of pieces of foil that I put under the bottom.

There are never many leaves, I thought, and I glue them all with the help of some water.

Now let's move on to the second heart-shaped sticks.

Here is the distance between our craft elements.

It is approximate, at the right time we can move and correct the molding. Now let's move on to sculpting the roses themselves. We take a piece of mass and katam from it a drop of medium size.

Now we make a ball, which we knead with our fingers into a circle, do not forget to thin the edges of the petal of the future.

Now we take our droplet and wrap a circle around it.

Glue the second same petal on the back side.

Now we swing the petal in the palm of our hand, thinning only the upper part.

For faster sculpting, roses can also be used in a row of 3-4 overlapped petals.

Here we put a droplet with two petals on the edge and twist a row of petals.


you can take on the rest of the petals, which will be initially collected on the surface.

We roll larger petals and lay them on the work surface with an overlap, immediately make bends and put foil in the right places.

Also, while the finished petals are a little weathered, you can build up our middle with more petals.

We will make this rosette turned a little to the side, so we only lay out 3 petals on the surface and build up on one side, on which the turned rose will be, glue everything together.

This is how our rosette lay down so easily and wavy. Now, from under the bottom, add one petal at a time, holding with your fingers and placing foil.

Now let's move on to the second rose. We also make a bud and build up the petals. This time I made a more prominent middle.

We put pieces of foil and lay out the petals, grabbing the leaves a little on the surface.

Here is approximately sent the first row of petals.

Now we lay out the second row of petals a little in a checkerboard pattern, helping with foil.

We start the third row standing a little.

Here you can see closer that the petals are almost standing.
![]()
Now we try on our middle, if there are no holes, you can insert it, if there is still a void somewhere, you need to attach the petals.

Here we have such a rose.

I left my roses like this overnight and the dough dried up a little, removed the foil.

Now let's make the leaves. Leaves are also best done in the palm of your hand. We roll a drop and roll it with a stack or fingers in the form of a leaf.

We thin the edges with a stack with a round tip or any small ball or bead.

Now, with a stack, we draw lines from the end to the middle of the leaf and we get such an interesting leaf.

Now glue the leaves near the rose.

Now let's move on to the third rose. We take the petals and lay out a circle with them much larger than on the second rose.

Here is the first row completed.

Here are half of our picture.

And the second row of petals is ready.

We fasten the third row by laying foil.
![]()
Now it's more to the middle, glue smaller petals.

Here you can see that our petals are already standing.
![]()
We will insert a piece of foil into this flower in the middle.

And roll up a big drop.

Attach the petals.

Insert a small amount of dough into the middle of our future rose and smooth it out.

Now let's try our middle.

It can be seen that our middle has risen and filled everything well.

This is how we did the flower sculpting robot. Now we are waiting for the base to dry.

While the flowers are drying, you can attach the leaves.


I made more petals separately and left them to dry separately. Why did I do this, but in order that if during drying and assembling the composition a hole would turn out or something would be missing, it would be possible to attach a leaflet and everything would be in harmony.

Now you need to make dew on flowers and leaves. You can not do it, I did it for the experiment. We just roll a small ball, which we press a little with our finger to the table and gently attach it to an already dried leaf or petal with the help of water.


Now that our flowers are dry, we can start painting. We paint with gouache. Mix red with white and color the roses.

We try to capture all the areas both on the leaf and under it.

Here is our one rose painted.

Now, with a semi-dry brush, apply white paint to the tips of the rose and blend.

Making a smooth color transition.

All the flowers have been dyed.

The leaves interfered with my coloring, I just pushed them away, since they were not glued to our flowers, they just lay next to them. Now paint the leaves with green paint.

In the middle of the leaf we make a white strip with a dry brush.

And let's loosen it up. On the edges we make shading with black or greener paint.


We spread our painted leaves to the base.

Here is our composition.


For the period of the formation of the picture, I changed it 2 times (meaning the leaves in places).

Now let's paint the dew drops in the same color and give them a highlight with white paint.


Let's not forget about the droplets on the leaves.


Now we cover the dew drops with nail polish.

Now let's take a sheet of wallpaper, preferably loose, and buy a frame with a back. We wrap the base of the picture from salt dough with wallpaper.

And we press the frame. On the finished base, carefully glue the parts with PVA glue.


All articles on the site are copyright, copying is strictly prohibited. With partial citation, a direct indexed link to the Masterclasses website is required.
If you like our site, express your "thank you" by clicking on the buttons below:
Modeling figures from salt dough or dough plastic is a very exciting activity that does not require special skills and special financial investments. Salt, water and flour are the main components for this type of needlework. The dough turns out soft and pliable, allowing you to make wonderful crafts even for beginners.
First, you can sculpt the simplest figures, then try to make more complicated products: small souvenirs, dolls, and even three-dimensional paintings. Having gained a little experience and applying creative imagination, you can make real works of art! In addition, by doing various crafts with your children, you will not only teach them to creative work and develop fine motor skills, but also enjoy precious minutes of communication.
Our master class and a few will help you complete simple crafts, and the necessary tips will make this creative process as fruitful and exciting as possible.


There are a lot of recipes for modeling from salt dough. Depending on the scale of crafts, salt, flour and water are mixed in various proportions, and additional ingredients are added to the dough, among other things: glycerin, glue, vegetable oil, starch and even hand cream. For beginners, it is recommended to make dough according to the classic recipe. To do this, flour and salt are mixed in equal proportions with the gradual addition of cold water. For example, 200 g of salt and 200 g of flour will require 125 g of water.

Tip for beginners!
- Flour should be ordinary rye or wheat without the addition of baking powder and other components.
- Salt is best taken fine-grained and in no case iodized. For better dissolution of salt, some needlewomen add a little water to it before mixing it with flour.
- In order for the dough to be homogeneous, it is recommended to use a mixer.
- To please the children already in the process of modeling and give the product color, you can add food coloring to the dough.
- For better adhesion of the individual parts of the craft to each other, moisten them with a brush.
- It is best to dry the product in an oven preheated to 50-60 degrees. Depending on the size of the craft, this procedure can take about 1 hour or more.

Master class on making flour salts
In addition to flour, water and salt for the master class, you will need the following devices:
- modeling board;
- a small rock;
- small knife;
- a toothpick or ballpoint pen for small holes and patterns;
- water tank;
- brush and paints;
- coating varnish.
Depending on what figures you will make, you may need cookie cutters, beads, buttons, leaves of various shapes to create prints.
- From the finished salt dough, roll out a layer half a centimeter thick.
- Use cookie cutters to cut out the desired number of shapes. With a toothpick or a rod from a pen, make holes in the figures in order to thread loops of ribbons into them. Decorate crafts using beads, buttons, or tree leaves as prints.
- Preheat the oven, cover the bottom of the baking sheet with tracing paper or special baking paper.
- Put the figures on a baking sheet and bake in the oven until the dough hardens.
- Place the flour salters on a flat surface and paint with paints of your choice.
- To give finished products shine, cover them with varnish.


A salt dough painting can be impressive and interesting with a little effort. Its creation is a very exciting activity, it will bring a lot of positive impressions and will not let you get bored, and the result will delight you even more. The recipe for salt dough is simple and straightforward, everyone can handle it. And below you will find a complete step-by-step guide to creating your first DIY salt dough painting.
Due to its volume, flower arrangements made from salt dough look very beautiful. Daisies, roses, tulips, poppies, gladioli, sunflowers - pictures with their images will remind you of spring days and summer sun even during winter frosts and delight you with their brightness and freshness. Making them is much easier than you think, and our beginner's instructions for creating a salt dough picture with flowers will definitely help you with this.
salt dough recipe
Salt dough can be dyed with dyes during cooking or painted on the finished product, it depends on your own wishes. In our master classes, we will use both options.
We will need the following ingredients:
- 200 ml water
- 200 gr flour
- 200 gr salt
- tablespoon vegetable oil (optional)
Mix water with flour, add salt to the mixture, add oil if desired, put the resulting dough in the refrigerator for a couple of hours. The oil will add elasticity to the dough.
If you want to immediately color the dough, then you need to divide it into parts and mix each of them with gouache or food coloring of the desired color. Please note that when dried, the salt dough turns a little pale. You can mix colors and add them to the dough in different amounts to achieve different shades. It's very exciting, try it!

Master class - painting with sunflowers
Sunflowers are cheerful summer flowers, a symbol of the sun and life. They can become a bright accent in your interior, create a special atmosphere of warmth and comfort. To sculpt a picture with sunflowers you will need:
- cooked salt dough
- stacks or spokes
- dense fabric
- frame
Walkthrough
- Remove the glass from the frame, cover it with a cloth and glue it. Insert back, secure with cardboard.
- Roll up a ball and form a cake out of it. Press its center a little. Moisten with a little water and sprinkle with poppy seeds. You can simply make a lot of small indentations with a stack, imitating the core of a sunflower. If you want to make several sunflowers, then prepare the desired number of such blanks.
- Next we make petals, about 20 pieces for each flower. We make a column (“sausage”) from the dough, roll it into a thin elongated petal, and then draw grooves on it using a stack or knitting needle. Please note that the petals of the bottom row are larger than the top row.
- By the same principle, we sculpt sunflower leaves. They should be quite large and wide, look at what they look like in the photo. We also push the veins with the help of a stack.
- You can dry the parts in the air or immediately bake in the oven at a minimum temperature. Keep in mind that thin petals and leaves will dry faster than a bulky core.
- Finished hardened parts now need to be painted. If you sculpted from already colored dough, you can paint only the cores to secure the poppy and give it realism. To do this, the part is first painted brown, and then in the very center add a little yellow. The leaves turn dark green, and the petals are bright yellow or slightly orange.
- Think about how the details will be placed in your picture. Let's start gluing them on.
- Glue the cores first. Then we place the bottom row of petals, leaves and the top row of petals.
- Finished work can be varnished.
If desired, the work can be diversified with other wildflowers, add details. Look at the photo, what paintings with sunflowers you can do with your own hands.

Master class - salt dough roses
Rose is the queen of flowers, so in our master class we cannot ignore her. Salt dough roses require a little more perseverance and skill to make, but the result is fantastic. You will need colored dough, glue, stacks and a stick for the blank, which will hold the bud.
- Each petal is molded separately. To do this, take pieces the size of the core of our workpiece and roll out thinly.
- The petals are alternately glued to the workpiece, covering each other. Each petal must be glued 1 mm higher than the other. Starting from 2-3 rows, the edges of the petals need to be slightly bent to the side to allow the flower to open.
- We form the petals of the last row so that they have a recess at the bottom. Glue them so that they cover the bottom of the flower.
- Then we hang the roses to dry. When they dry out a little, they can be turned over and put on a leg, for example, in a piece of foam or a vase, and dried in this position.

More Salt Dough Painting Ideas
Having mastered the technique, you will be able to create stunning paintings from salt dough. Not only flowers, but also many other images look impressive in this three-dimensional technique. For inspiration, we invite you to look at photos of some of the works.

Related videos
In order not to miss anything and better understand the process, you can watch our video master class. It is suitable for beginners, but more experienced masters will draw useful tips from them.
materials: board, watercolor and gouache paints, brush, salt dough, PVA glue, colorless varnish, knife, stacks, gold stained glass outline.
Mukosol is an ancient Arkhangelsk craft, which is at least four hundred years old. The wives of the Pomors gave figurines of salt dough to their husbands who went fishing. These funny toys warmed the souls of sailors and saved them from hunger more than once when the food ran out.
2. Prepare salt dough.

Useful advice


Get a voluminous flower.


You can compare with the sample on the postcard.
I give you flour salt to have bread and salt.

10. Possible options for work:


11. Works of students.

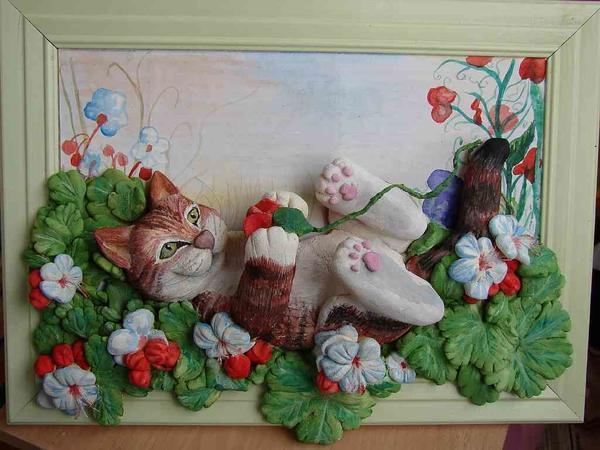
Working with salt dough Stucco painting "Cat"
Target: to teach how to make a stucco picture from salt dough according to the plan, to design the work.
Application: The material is designed for children in grade 4, making birthday gifts, decorating the interior of the room.
Equipment: board, watercolor and gouache paints, brush, salt dough, PVA glue, colorless varnish, knife, stacks, gold stained glass outline.
Step by step workflow
If you like to sculpt, then you will be interested in this master class. In it, I propose a technique for making a stucco picture from a recently popular material - salt dough. It is very easy to make it. knead like a regular dough and work wonders! Handmade gifts and souvenirs have always been highly valued in the world, because they keep a piece of your hands, they are original and unique.
From such salty dough they made funny figurines, amulets for houses. It was believed that any such craft in the house is a symbol of wealth, prosperity and prosperity in the family.
Mukosol is an ancient Arkhangelsk craft, which is at least four hundred years old. The wives of the Pomors gave figurines of salt dough to their husbands who went fishing. These funny toys warmed the souls of sailors and saved them from hunger more than once when the food ran out.
1. Transfer the drawing you like to the board.
2. Prepare salt dough.
salt dough recipe: 2 cups of sifted flour, 1 cup of fine salt (not iodized), 1 incomplete glass of water, 1 tablespoon of vegetable oil. Mix all the ingredients, put in a plastic bag and leave in the refrigerator for 1 hour. After that, you can sculpt from the dough.
Useful advice. If you have leftover dough after modeling, you can save it by putting it in a plastic bag or in a closed plastic container in the refrigerator. If after this the dough becomes damp and becomes wet, it must be kneaded well, add a little flour and knead again.
3. We will create a stucco picture. We will have a nose, ears, eyes, tail, paws, cheeks of a cat and a basket of roses. We start with the bangs of the cat. We take the dough, knead it in our hands and sculpt a cat's bangs from it into the desired shape. In order for the dough to stick well on the board, we wet the place under the dough with PVA glue. After drying, the glue becomes invisible. To give irregularities on the dough, use a knife.
4. In the same way we sculpt all the details of the cat.
5. We begin to sculpt roses. You can make them flat by twisting the flagellum in a spiral.
We get them like this. You can flatten the dough sausage, roll it up like a rose.
Get a voluminous flower.
6. From the strips of dough we will form a basket for flowers. With a knife we will make strips to give the shape of weaving a basket. Let's make flower petals.
7. The craft dries in room conditions for 2 - 3 days.
8. Let's start coloring. We paint the craft with watercolors and gouache paints. We use a golden stained-glass window to decorate flowers.
9. We cover the craft with varnish. Lacquer not only gives shine and completeness to the product, it protects it from moisture and crumbling. For varnishing products use a transparent varnish. Be sure to varnish the painted products - under the protective layer of varnish, the paints will not crumble, crumble, stain your hands and fade.
How does osteochondrosis of the legs manifest itself and how is it treated?