How to cut chicken correctly. How to cut up a chicken
Every poultry farmer has to face the question: how to cut up a chicken carcass. For many, only the speed of the unpleasant process is important. Few people think about the correctness of actions. Meanwhile, competent processing has many advantages.
Before hitting store shelves and tables, a chicken carcass goes through several stages of preparation. The following are produced sequentially:

Why is it so important to learn how to properly cut up a chicken?
The quality of carcass processing directly affects the taste of the meat. If the intestines or spleen are touched during gutting, the organ fluid will flow out and be absorbed into the pulp. Such chicken will have an unpleasant odor and bitter taste.
In addition, professional cutting skills allow you to use parts of the carcass as economically as possible. Knowing the nuances, it is easy to make preparations for a soup set, meat for frying, baking, salads, separate fillets for minced meat and pieces for feeding animals. For farmers, this is also an undeniable plus, since semi-finished products sell better than whole chickens.

Proper cutting is also rational from the point of view of allocating space in the refrigerator and freezer. The carcass takes up a lot of space, while even pieces are easily laid out like “Tetris”.
Finally, an organized, streamlined process takes less time and stress. Perfected movements are performed quickly, a minimum of waste eliminates lengthy cleaning.
Preparation for cutting
Before starting work, you need to prepare tools and space. Gutting is a rather dirty process, so it is preferable to cover the surface of the table, surrounding equipment and furniture with oilcloth. It is advisable to protect your clothes with an apron and put on cellophane or rubber gloves on your hands.
For the operation you will need:
- board. It is better to use an option made of flexible or hard plastic. Wood absorbs all odors and juices, and glass may not withstand pressure. If you choose a wooden option, you should wrap the device in cellophane or use a board exclusively for cutting meat;

- dish or pot. The removed giblets or finished pieces will be placed in the container. To make cleaning easier, you can immediately line them with cellophane;
- knives. There are special knives for gutting and cutting with a curved end. If this is not available, you can get by with wide and narrow knives made of thick steel and with a strong handle;

- cutting fork. Allows you to remove the heart, lungs, liver, intestines, crop, and stomach from the carcass without damage. The action occurs with a minimum of effort, unnecessary movements and dirt;

- kitchen scissors. Good for cutting tendons of wings and legs. Replaced with a knife.

This set is considered ideal, but you can get by with a couple of knives of different sizes. Tools must be well sharpened and washed before starting work.
When the tools are collected, the final stage of preparing the carcass is carried out:

Evisceration
Preliminary operations are completed. You can begin direct gutting. It is advisable to carry out the process as soon as possible after plucking. This way it will be possible to avoid rotting and fermentation of waste residues in the gastrointestinal tract. The step-by-step process for processing chicken is as follows:

This is where the gutting ends. Processing of food giblets is carried out. Fat and arteries are cut off from the heart and lungs. The liver is freed from the spleen. The stomach is incised, everted, and the contents and inner layer of rough skin are removed. The resulting products are washed with running water.

A lighter version of gutting can be done using a carving fork. After removing the anus, crop and intestines, it is inserted into the carcass. It is important not to damage the organs. All connections will be cut off by the sharp edges of the device, the insides will remain in it, they will be easy to remove. With good skill, all films and “fastenings” can be cut with a thin, sharp knife. Then turn the chicken over a plate and shake lightly. The giblets will fall out on their own.

There is a trick for cases where the bird is not originally intended for cooking or selling whole. In this version, the process is accelerated by cutting off the legs and opening the abdomen immediately after amputation of the anus. The body will open completely and it will be easier to remove the entrails.
Video - Gutting a chicken or rooster in 8 minutes at home
Cutting chicken at home
The term “cutting” refers to the final processing of the carcass with cutting into pieces. This operation can be carried out in various ways depending on the purpose.
What's the best way to disassemble a bird?
The method for disassembling the carcass depends on the plans for the meat. The whole chicken can be grilled, oven-baked, or boiled. For other cooking methods, chopped versions are used. Different parts are suitable for different dishes, so choosing the type of parsing is a crucial step:
How to cut up chicken without waste
First of all, the carcass is washed under water and dried so that it does not slip in your hands. Then place it breast side up on a cutting surface. The following actions occur step by step:
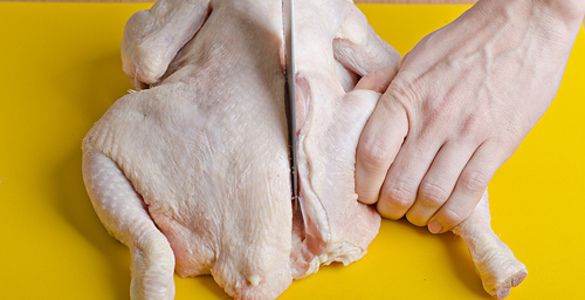
Step 1. Make cuts at the junction of the thighs and torso. Holding the leg, the leg is pulled back to separate the joint, slightly turned inside out and the final cut off from the body is made. This stage can be supplemented by separating the thigh and lower leg. The joint of the joint is felt with fingers and cut with a knife.

Step 2. Cut off the wings. Pull and turn them out in the same way as chicken legs. When the humeral cartilage comes out, chop it off from the carcass. The final sharp element can be cut off along the cartilage or left.

Step 3. Cut the breast lengthwise. Remove the fillet from the bone using a blade. You will get two pieces of pulp and a back connected to the ribs.
Step 4. Cut the spine down the middle. Cut off the ribs from the back. The step is optional; it is made if necessary to obtain smaller parts.
Step 5. Remove excess fat from the resulting chicken elements. Also done at personal discretion.

The result is:
- breast fillets, thighs, drumsticks and wings - for frying, boiling, stewing, baking;
- back, ribs, wing tips - for cooking broth;
- fat - for frying.
Video - How to cut chicken without waste
How to cut a chicken carcass into 8 parts
This cut includes 8 pieces. It is considered a classic. It can be modified by cutting the breast into 10 parts. The ideal tools are a sharp knife and kitchen scissors.
Step 1. Find the joint of the hip joint in a carcass lying on its back and carefully cut through the flesh. Then insert the knife into the joint of the cartilage and cut it. Or pull the thigh with your hands until the bone pops out of the joint.

Step 2. Turn the chicken onto its stomach. Make an incision along the flesh of the thigh along the back. It should go around the entire perimeter of the thigh.
Step 3. Separate the drumstick and thigh at the knee joint. A clue to the correct location of the incision is the fatty stripe at their border.

Step 4. Cut off the wings. Feel the joint between the carcass and the wing under the breast. Point the knife directly at the joint. The separation will take place without any extra effort.

Step 5. Remove the breast. For this operation it is better to use scissors. This way the cut will be as neat as possible. Place the carcass on its side. Cut through the border of the back and breast along the fat strip from beginning to end. Repeat on the second side.


Step 6 Remove the sternum bone. Turn the breast skin side down. Make longitudinal cuts on both sides of the cartilage. The meat will come away from it. Through the resulting incisions, grab the bone with your fingers just above the junction with the cartilage. Pull forcefully. The hard elements will leave the soft fillet.

Step 7 Cut the resulting breast vertically into two parts. It is most convenient to do this from the skin side.

The result is 8 pieces:
- 2 breasts;
- 2 hips;
- 2 drumsticks;
- 2 wings.

The back in this version is considered a waste, but it can be used for cooking broth.
How to cut chicken into equal portions
For such cutting you will need to fill your hand. It may not work out the first time. Only persistent training will ultimately allow you to achieve even, beautiful pieces.
Step 1. Place the carcass on its back. Cut off the legs at the cartilage joints. The process will become easier if you press the leg against the work surface, make an incision in the flesh and slightly turn the thigh out. The cartilage will open and it will be easier to find the place of articulation.

Step 2. Cut the drumstick from the thigh at the bend.
Step 3. Divide the remaining carcass into 2 halves. A pair of vertical incisions will be required along the spine and sternum (on either side of them).
Step 4. Cut the pieces obtained in the third stage horizontally in the center into 2 parts each.

The result will be 8 pieces, almost identical in size:
- 2 drumsticks;
- 2 hips;
- 2 lower breast halves;
- 2 upper breast halves with wings.

This treatment looks especially impressive when grilled or frying in a pan. The bones with pieces of meat remaining in the waste are suitable for broth.
Separating meat from bones is useful when preparing minced meat, meat rolls, and semi-finished products from the pulp (breast and thigh fillets). It is important not just to be able to cut meat, but to maintain a presentable appearance of the pieces. The highest aerobatics is considered to be removing bones from the entire carcass without damaging the skin. Farmers supplying chicken products to restaurants may encounter this unusual order. Such skill is appreciated and is an undeniable advantage for the seller.

For such processing, the knife must be as sharp as possible. It is advisable to sharpen it specifically for this purpose. The tip needs to be thin. Scissors will also come in handy.
Public method
| Description | Photo |
|---|---|
| Incise the skin vertically along the entire back. You can start in the same way with the breast, but this increases the risk of tearing the carcass. The bones in the dorsal part are located very close to the skin and, when pressed, easily damage it. |  |
| Using gentle movements of the knife, begin to peel the meat from the skeleton. The direction of movement is from the tail from bottom to top. Break the ischium, hip and wing joints. Expose the ribs. Help yourself move the pulp with your hands. |  |
| Release the femur completely. To do this, trim the veins in a circle and move the meat with your fingers. |  |
| Maintaining the connection between the thigh and the body, scrape off the flesh with a “stocking” to the outer cartilage. Upon reaching the bottom point, cut the upper joint. |  |
| Turn out the resulting stocking. Repeat all steps on the second side. |  |
| Trim the ribs with scissors. Remove the fork and keel bones, trimming the remaining joints. |  |
| The wings remain on the carcass directly with the bones or are cut from the skin in an even strip. The process is complete. |  |
Private method
| Description | Photo |
|---|---|
| Through the lower hole in the carcass (through which gutting is also carried out), cut the tail and expose the ischial frame. |  |
| Make an incision with jerky movements up to the upper femoral cartilage. For convenience, tuck the skin and pulp a little during the process. Break the joint with a blade at the junction. |  |
| Trim the veins around the entire circumference of the ham bone. Break the maple joint at the point of contact with the shin. Repeat the above on the other side of the carcass. |  |
| Trim the meat from the ribs to the neck, continuing to tuck the skin with the flesh already removed. |  |
| If there is a neck, pull it out with a sharp movement of your hand. Cut the breast fillet from the carcass and break off the wing joints. Remove the fork bone. |  |
| Peel the flesh of the drumstick around the circumference, cutting the ligaments. Cut off the bone before the cartilage. |  |
| Take out the skeleton. Turn out the skin and meat. |  |
The closed version is ideal for stuffing a carcass. Using the above diagram, you can peel meat from chopped pieces. The only difference is that you don’t have to worry about the integrity of the skin.
Video - Removing bones from chicken
Video - How to remove bone from chicken leg
Secrets of successful chefs
All chefs have their own tricks when cutting poultry. According to world-famous masters, it is useful to pay attention to the following details:

Do you raise chickens and constantly deal with their slaughter, plucking and other not very pleasant things? Do you know that the quality of chicken meat depends on how well you process the carcass? No?! Then read all about how to gut and cut a chicken correctly further in the article and watch thematic photos and videos.
What comes before cutting?
Chicken cutting involves the final division of the bird carcass into portioned pieces. Depending on the size of the pieces you need, there are two methods. According to the first method, you need to cut it sparingly into smaller pieces and in common people it is called “waste-free.” The second method is to cut the chicken into equal parts. Both methods will be discussed step by step in the diagram, photo and video later in the article.
Now let’s talk about the stages that go into chicken cutting, namely slaughter, plucking and gutting the carcass. Methods of slaughter and plucking will be discussed in other articles. But let us remember the main nuance that will make all further work easier. So, the most important thing is to properly prepare the bird for slaughter, namely a strict diet for at least half a day. Then the chicken's crop and cloaca will be emptied and there will be no unnecessary fuss with them during gutting.
Evisceration
So, we have a killed and plucked chicken that needs to be cut, and for this it first needs to be gutted. All you need is knowledge of what and how to do, a sharp knife and steady hands. If you are not sure that you can handle it, it is better not to take it on. Since in case of damage to the intestines or something else, you risk spoiling delicious chicken meat. Below is a short video on how to gut a chicken at home.
- First you need to cut out the anus. To do this, take a knife and cut it in a circle. The main thing is not to pierce anything unnecessary.
- Now we make a shallow incision from the cut out anus to the keel of the bird. Again, the main thing is not to hurt the intestines. If you are afraid of touching it, then the skin can only be cut near the anus towards the keel, after which it can easily be torn further by hand.
- Now we prepare the dishes for waste and internal organs.
- Carefully pay attention to the intestines and anus. At the same time, we cut out the stomach and liver. With the liver you also need to be very careful not to touch the spleen. We remove it from the already cut liver.
- Now you need to pull out the goiter. If you prepared the chicken for slaughter correctly, the crop will be empty and pulling it out will not be a problem. Otherwise, before gutting, we cut the skin on the neck and empty the bird's crop. You also need to cut the skin if the crop does not want to be pulled out or when using a slaughter method that does not involve cutting off the head.
- Now you can cut out the genitals (ovaries in hens or testes in cockerels) and the heart.
- The final stage of gutting will be a thorough rinsing of the carcass with cold water.
How to disassemble a bird?
If you don’t know how to properly cut a chicken, then, as mentioned above, two methods are perfect for this. Both the first and second methods of cutting chicken will not pose any difficulties when doing it at home. As for which option to choose for you, we can’t advise you here. Both methods are good and quick to implement, so give preference yourself, and below are cutting diagrams for both options.
Option one
This method will allow you to quickly and economically cut a whole chicken carcass into pieces. At the same time, the work can be easily done at home with an ordinary kitchen knife. Below is a detailed description of the process with thematic photos and videos.
- First, separate the chicken legs. To do this, we place the carcass on its back, pull back the leg and cut the skin between it and the body. As soon as you reach the joint, you need to stop, grab your leg with one hand and turn the joint outward. Next, we separate it with a knife and completely cut off the leg. We do the same with the second leg.
- Now we divide each leg into two parts: the lower leg and the thigh. We place the leg with the skin on the table and separate it along the flexion joint with sharp pressure from the knife. We do the same with the second leg.
- Cut off the wings at the shoulder joint.
- Next, you need to cut the carcass into breast and back. To do this, we insert a knife inside the carcass and pierce it. Now, slowly, towards ourselves, parallel to the spine, we divide the carcass in half.
- Now completely separate the back from the breast. Then we additionally cut the back and breast in half.
Option two
This method will be useful to you if you need to cut a whole chicken into pieces that are approximately equal in the amount of meat. It is also easy to do at home using improvised means, and thematic photos and videos will help you with this.
- First you need to prepare to cut out the legs. To do this, we make cuts on the back of the chicken, below the shoulder blades. Then we make 2 more cuts on both sides along the ridge towards the tail. This will help us easily remove the meat from the bone, which is called an “oyster”.
- The “oyster” bones are located in small depressions along the ridge on the back side. Carefully separate them with a knife. When they stick to only the skin, cut off the legs.
- The legs are cut out as in the first option, but in addition the “oyster” is captured.
- Let's start cutting out the wings. To do this, turn the carcass upside down and make an incision between the spine and one of the shoulder blades. Now the blade is separated, and then everything is repeated with the second wing. Upon completion, the spine is completely separated.
- At this stage you need to separate the breast and wings from the skeleton. To do this, we cut the carcass from the inside along the spine.
- Now we cut off the wings from the breast so that we get 3 equal pieces - 2 wings and a piece of breast.
The final stage of any cutting method is thoroughly washing the resulting parts. These options for disassembling chicken are the main ones. But no one forbade you to come up with your own version based on the above and your own needs.
Photo gallery
Video “Cutting a carcass into 8 parts”
For those who choose chicken on store shelves, I advise you to choose chilled chicken, but not frozen. The fact is that the shelf life of chilled chicken is 3-5 days. If the chicken has not been purchased by this time, it is frozen, which significantly extends its shelf life. But we know that now this chicken is no longer of the first, but of the second freshness. In addition, the chilled chicken can then be frozen in the freezer itself. And if the chicken is first defrosted, cut up, and then re-frozen, its taste will deteriorate significantly.
Let's start with the legs. The leg needs to be pulled towards the body and cut through the skin with a knife, and then the meat to the knee joint.

Next, the thigh needs to be turned to the side so that the two bones are separated. Cut off the leg from the body. Repeat the same with the other leg. Now you need to separate the thigh from the leg, straightening each leg and cutting it at the junction of the bones.

As a result, you should get the first 4 pieces.

Using a knife, cut the ribs down the middle and separate the breast and wings from the bottom of the chicken. A guideline for the incision site can be a fatty streak in the form of a line that visually separates the back and chest.

Where this vein ends, we act “by eye” and by touch. As a result, we should have two parts: the chest and the back (from the “butt” to the neck inclusive)

Some housewives also serve the back on the table, but I advise you not to waste time on trifles. This part of the chicken is too bony; it is unlikely that any of the guests will be very happy if they get this piece. It’s better to boil the back and get a wonderful chicken broth.
Place the breast on a cutting board, skin side up, and cut off the skin at the neck area.

Now the breast needs to be cut into two halves.

At the same time, I use a knife and fingers to remove the cartilage that runs down the center and add it to the back in the “soup set”. Part of the upper ribs also goes there.
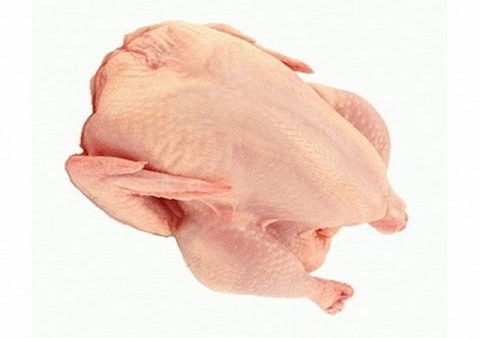
Now in stores, chicken meat is sold already cut: legs, wings, fillets - choose what you like. But if you are raising chickens yourself, you will have to learn how to gut and cut them yourself. Yes, and disassembling a purchased carcass into portioned pieces at home is more economical. Want to know how to properly cut up a chicken? Then quickly read our article.
In order for poultry meat to reach the dinner table, it must go through several stages: slaughter, plucking, gutting, cutting. And only then comes the stage of preparing delicious dishes. Having a bird on your farm, it is advisable to be able to pluck and gut it correctly. We hasten to reassure those for whom this topic makes their knees tremble: it’s not at all difficult to do, you just need to get used to it.
Why is evisceration such an important process? The thing is, if you touch the intestines, the taste of the chicken will deteriorate. We will tell you further how the chicken is gutted, but for now, watch the video (author: Khutorok private farm).
Before gutting a chicken or rooster, prepare your work area. To prevent chicken cutting from ruining your kitchen furniture, cover the table with oilcloth or paper, and prepare dishes for the giblets. Now you can begin to free the carcass from the insides.
Let's look at this process step by step.
- Before gutting, you need to remove the crop: then the contents of the abdominal cavity will be easier to get. Make an incision in the skin around the neck and remove the crop through the resulting hole. The esophagus and larynx will extend along with it. This process is shown more clearly in the video. If everything is done correctly, then things will go very quickly.
- Now you need to cut out the tail. This should not be done quickly, but carefully so as not to hurt the insides. Make a cut in a circle, then pull the back of the chicken to remove the contents.
- To make gutting easier, you can make a cut from the back hole along the body, and then tear the skin with your hands. Then the internal organs will be visible to you.
- Carefully remove the intestines and remember: you must not damage them, otherwise the chicken meat will have to be thrown away for obvious reasons. The intestines need to be pulled out, holding the tail.
- The next thing to do is remove the gallbladder. It is very easy to identify this organ: it is green. The gallbladder also needs to be removed carefully so that the bile does not leak onto the chicken.
- Remove all films with a knife and make small incisions in those places where the organs adhere to the abdominal cavity. After this, turn the carcass over a basin or bag: the excess contents of the chicken will fall out there, all you have to do is cut off the intestine as deeply as possible.
- Take out the liver, stomach and heart: these giblets will be useful to us, the rest can be safely thrown away. You also need to remove the lungs from under the ribs and cut off the genitals under the tail. They will also go in the trash. At this point, the gutting stage is complete, all that remains is to rinse and cut up the chicken carcass.
If you are cutting chicken at home for the first time, you can make this process even easier. At the very beginning, separate the legs and make a cut as shown in the photo. Then the chicken carcass will be open, and gutting it will be much more convenient. But this method will not work if you need to bake or boil the whole bird.
Cutting up the chicken
You can bake a whole chicken for a holiday table or family dinner. But more often in the kitchen you need pieces of chicken, from which you can prepare many dishes. Next, we'll talk about how to cut up a chicken so that it's quick and economical. For general clarity, you can use the instructions from the video (by Edim TV).
- Place the whole chicken so that the breast is on top. Grasp the chicken leg and pull it to the side. Now you need to cut the skin in the place where the inner thigh connects to the torso.
- Now you need to separate the joints of the bones. Turn the leg out, holding the carcass with your other hand. Once the femur is out of the socket, the stem can be easily removed using a knife.
- If desired, you can divide the leg into two parts: drumstick and thigh. As in the previous point, you need to feel the joint and cut along it.
- It's time to separate the wings. You need to feel the joint that connects the body and the wing, and make an incision in this place.
- Place the chicken on its side to remove the breast and back portions. There is a fatty stripe on both sides along the body, and this will become the incision line. Cartilage and ribs are hidden underneath, so cutting will be easy. You need to cut from the back to the front.
- Now we have the back, which is useful for broth, and the breast on the bone. To separate the fillet, you need to feel the cartilage in the middle and cut it out. Then turn the breast over, lift the flesh with your fingers and carefully remove it from the bones.
We hope you can now cut up chicken without any difficulty. Below are detailed photo instructions to make the process of cutting a carcass even clearer.
How to economically separate meat from bones?
If you want to make a chicken roll or prepare ground chicken, you will need to separate the meat and bones. At first glance, there is nothing difficult about this, but if you do not have experience, cutting chicken can take a lot of time.
- Place the chicken breast side down. To remove the spine, make two longitudinal cuts on each side. During the process, trim the meat with a knife so that nothing remains on the bone.
- Remove the spine and make cuts around the bone that holds the breast. You will also need to cut off the cartilage near the shoulders, after which the bone will be removed without any problems.
- Now you need to get the femur. First, cut off the small bone that connected the leg to the body. Then use your fingers and a knife to free the second bone from the pulp.
All that remains is to trim the wings and you're done. Now we have a whole boneless chicken. If you do not need to leave the carcass whole, then use the following video tutorial (by Super Bluda).
Don't worry if you don't get the meat off quickly the first time. As in any business, it requires skill, which comes with experience. But minced meat prepared at home will probably be better than store-bought. And whole boneless chicken can be used in various recipes: rolls, stuffed carcass or just fried flesh will suit your taste.
Secrets of famous chefs
Professional chefs know many secrets of food preparation and cooking, including how to easily cut up chicken. We will share some tricks with you. The chef of the EdaHDTelevision channel will tell you about the subtleties of cutting chicken for rolls.
A good working tool plays a big role in the cooking process. So, to cut a chicken carcass you need to take a large knife, but it will be more convenient to separate the flesh from the bones with a small but sharp knife. Also, many culinary professionals use kitchen scissors with a serrated blade to cut chicken.
When cutting the chicken yourself, you will save a considerable amount of money, since if you buy the same parts separately, their cost will be much higher. How to properly cut up a chicken yourself?
Before cutting a bird, it must be gutted. Let's figure out how to gut a chicken.
How to properly gut a chicken
First you need to buy a chicken. It is better to buy chilled poultry rather than frozen. This is due to the fact that the shelf life of chilled chicken is only five days. After this they are frozen. And everyone knows that when frozen, a product loses its taste. Therefore, it is better to buy chilled poultry, cut it up and, if necessary, freeze it. And when buying a frozen bird, you will have to defrost it, then cut it up and re-freeze it.
- Using a knife, carefully cut out the bird's anus. You need to cut in a circle.
- Now make a cut down to the keel.
- Remove all internal organs.
- Remove the crop. To do this quickly, do not feed the chicken before slaughter. If the goiter is complete, you will have to make an incision in the neck.
- Cut out the genitals.
- Rinse the carcass with water.
- Now you know how to gut a chicken.
How to cut a chicken into pieces.

That's it! The bird is butchered. This made eight pieces of chicken: two wings, two thighs, two drumsticks and two pieces of breast. The remaining bones can be used to make soup.
How to cut chicken for roulade
Every novice housewife wants to learn everything and chicken roll is no exception. How remove pits chicken for a future roll?

If the chicken more than three kilograms, then the breast needs to be cut off. Divide the breast into small parts and place in the middle of the future roll. Salt and pepper the meat, sprinkle with seasonings, and you can add stuffing. This is not for everybody! Roll the meat into a roll, tie it with thread and put on a net.
Prepare the necessary dishes so that the roll can fit in it. Pour olive oil, the roll should be completely covered with it. Fry the roll on all sides. Add wine; it should fill one-fourth of the dish. Wait for the wine to evaporate
Chop a small onion and add it to the container with the roll. Add peppercorns and aromatic fresh herbs there. Add a little broth, cover the dish with a lid and leave to simmer for an hour and a half.
Take out the finished roll, let it cool, and put it in the refrigerator for a while. After this, the roll can be cut into pieces. Warm it up before serving.
Closed cutting method.
There is also a closed method for separating bones from a carcass. This method suitable for stuffing chicken.