Armenian cake "Mikado" is real. Mikado Cake Recipe
Recipes for making cakes at home with photos
8-12
2 hours 30 minutes
350 kcal
5/5 (1)
Many of you have watched The Last of the Magikyans. In this series there was an episode where one of the main characters was preparing her husband's favorite cake "Mikado". According to the series, cooking often ended in failure.
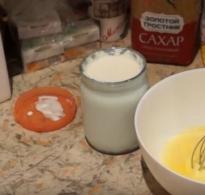
Inventory and kitchen appliances: heat-resistant saucepan, whisk, mixer, stove, three bowls, rolling pin, baking sheet, tray, cling film.
Required products
To prepare a biscuit cake "Mikado" according to the classic recipe, you need:
The cream requires other ingredients:
Features of product selection
It is advisable to take not store-bought sour cream and butter, but homemade products. You can make them yourself. If this is not possible, medium-fat sour cream and butter from the store will do.
I use cane sugar, although regular is desirable in the classic version of the recipe.
It is believed that chocolate increases sexual activity.
How to make a Mikado cake: a step by step recipe
Let's start cooking the Armenian Mikado cake according to the classic recipe with a photo.
Stage 1.
Soft butter must be beaten with a whisk.  Then beaten eggs are added there, then sugar is sent to this mixture.
Stage 2.
Pour sour cream into another bowl and add soda. Then add this to the egg and oil mixture. There we begin to gradually pour the flour. 
Stage 3.
Let's start kneading the dough. If the mixture is too sticky, add a little more flour.  Cut the finished dough into 13 pieces. We spread them on a tray and cover with a film, after which we put them in the refrigerator.
Stage 4.
Roll out the chilled piece of dough with a rolling pin to the size of the baking sheet. Each cake should be pierced with a fork. Then we send it to a preheated oven (200 ° C). Each cake is baked for seven minutes. Be careful, the cakes should be brittle with an orange blush. 
Stage 5.
Ready cakes are laid out on a convenient board or plate, you can cut the edges so that they are even. 
cream recipe
A delicious Mikado cake cannot do without a real Armenian cream, so I offer you a recipe for cooking.
Stage 1.
 First you need to mix all the ingredients. We need a deep bowl and a mixer. The mixture must be well beaten so that lumps do not form.
At this stage, we finish, since the cream is ready for us. Let's start decorating.
How to decorate and serve a cake
Each cake must be smeared with cream and put in the refrigerator for a day so that it is well soaked. Cake, if desired, can be smeared with cream in a circle. 
The top cake can be anointed chocolate glaze. The recipe is the following:
- Melt the chocolate in a water bath, gradually adding the butter.
- We heat the cream in the microwave and pour it into the chocolate without removing the bowl from the water bath.
- Mix the whole mixture well until smooth.
Coat the cake with chocolate icing. Top with fresh strawberry halves. You can also grate the chocolate and chop the nuts, then mix the ingredients in a bowl, and sprinkle the top layer of our delicacy. 
You can serve the cake with tea, coffee, juice or compote.
- It is better to cut off excess pieces of cakes with a long sharp knife, periodically dipping it in hot water.
- When rolling out the dough, it is better not to put pressure on the rolling pin so that it does not tear, and so that there are no different thicknesses in different places.
- Be especially careful with soda. If you add too much, then the product will turn out dark, with an unpleasant odor and taste.
- I also recommend adding citric acid when adding soda. It is better to dilute it in advance in water and gradually add it to the dough with soda, stirring often.
- Before rolling out the dough, dust the board or table with flour to prevent it from sticking to the surface.
- It is better to bake the cakes one at a time so that they are all baked evenly.
- It is better to grease the cake with cream when the skins are still warm, so they are better saturated.
- To evenly distribute the glaze over the surface of the cake, use a knife, which should be held under running hot water in advance.
The first cake was made in the 15th century in Italy.
Video recipe for making Mikado cake
From the specified amount of ingredients, a cake is obtained in the form of a square with a side of 30-32 centimeters, in which there are 6-7 cakes. It is easily cut into 30-35 pieces. Or a cake in the shape of a rectangle with sides of 30-40 centimeters. It usually contains 5-6 cakes, and the pastry itself is easily cut into 50 pieces.
Ingredients
- Chicken eggs 3 pcs.
-
 Sugar 200 g
 -
 Butter 600 g
 -
 Sour cream 200 g
 -
 Baking soda 1 tsp
 -
 Wheat flour 5 cups
 -
 pinch of edible salt
 -
 Vanilla sugar 4 sachets
 -
 Boiled condensed milk 2 cans
 -
 Bitter chocolate 1 pc.
 -
 Vegetable oil for lubrication
Cooking
The basis of the cake is thin sand cakes, which are soaked in cream with boiled condensed milk. Sweet pastries are airy and very lush. By the way, depending on preferences, the dish can be made either brittle and crispy, or soft and crumbly.

Let's start cooking by preparing all the required ingredients. Chicken eggs, butter, condensed milk, sugar, vanillin, flour, soda, sour cream and a little salt will be needed.

Now you can start creating the test. You will need a small basin or a large pot. There you need to send sour cream and soda. The latter does not need to be extinguished.

Set the container with sour cream and soda aside for 10-15 minutes, stirring gently from time to time.

At the same time, take butter (200 grams), put it in a separate container, add sugar, 1-2 packs of vanilla sugar (or a pinch of vanillin) and salt.

Now beat the mass until smooth. Act carefully.


The result should be a lush, but very delicate creamy mass.

Sour cream by this time should already be tender and slightly lush.

Add sour cream to butter and sugar.

Gently beat the mass with a mixer or an ordinary whisk until smooth.

Now pour about 3.5-4 cups of flour into the container.

Do it gradually. Stir constantly with a regular silicone spatula.

The result should be an almost homogeneous mass, which is already difficult to mix with a spatula.

Now it's time to sprinkle the table or board with flour and put the dough on top.

Start kneading with neat, gentle and even gentle movements. Try to collect the dough in a lump. At this stage, you need to knead about half a glass of flour into the dough. It is not necessary to knead the dough for too long, and you should not act vigorously either. It is enough to collect the product in a smooth ball. It is not worth interrupting the dough with flour, it should remain plastic and dense so that it can be easily rolled out by adding more flour.

Roll the dough into a sausage, which should be carefully cut into six equal parts.

Roll each piece into a ball and sprinkle with flour. If necessary, the number of balls can be further adjusted, focusing on the chosen shape (square may need seven, and five may be enough for a rectangular one).

Then cover all the pieces of dough with plastic wrap or an ordinary bag so that they do not dry out ahead of time.

Now take a baking sheet. Turn it upside down. It is in this position that we will bake cakes for two reasons. Firstly, the blanks are fragile and delicate, it is not always possible to get them from the baking sheet without damaging them. In this case, they will simply slide onto the table. Secondly, it is convenient to roll out the cakes on an inverted warm baking sheet, making them thin and preventing the likelihood that they will tear. To do this, turn on the oven at 180-200 degrees and send a baking sheet there to heat.

At the same time, take one ball (do not get the rest from under the film). Start rolling. It's very simple. It is enough to hold the rolling pin twice - and you get a still dense layer. Sprinkle flour as needed to keep the dough from sticking to the rolling pin. The result should be a layer that is slightly smaller than the pan in size.

Now take the heated tray out of the oven. It should be warm but not hot (let it cool down a bit). Next, moisten a brush or an ordinary paper napkin in vegetable oil and grease the baking sheet. Then dust it with a little flour. Take a sheet of dough and transfer it to a baking sheet. Work quickly, but carefully so that the dough does not tear. It needs to be placed right in the center.

Now gently roll out the dough with a rolling pin all over the baking sheet. The edges can be distributed manually, but without much effort. You have to act softly.

By the way, you can do without a rolling pin at all, working with your hands. This is very simple, as the dough stretches easily on a warm baking sheet. It is necessary to press without much effort so as not to tear the layer.

Work from the center to the edges, ensuring that the thickness of the formation is the same. You can dust the top of the dough with flour if it sticks to your hands.

The result should be a blank for the cake, the thickness of which is not more than 1-1.5 millimeters. If the dough is translucent, it's okay, it's allowed. If fingerprints don't really appeal to you, use a rolling pin to gently go over the dough. Using a knife, trim the edges (do not cut off anything, but lightly pat, achieving evenness of the edges).

Now make a few punctures on the future cake with a fork. This will prevent the dough from bubbling while baking. There should be about 10-15 punctures.

Now you need to send the cake on a baking sheet to an oven preheated to 180-200 degrees. The cake should be baked in 10-12 minutes. If during the baking process the dough still bubbles (this can be seen at 5-7 minutes of baking), then make a few more punctures with a fork in the place of the bubbles.

Watch it during the cooking process: if the dough does not brown for a long time, then the temperature can be slightly increased, if the baking process is too fast, on the contrary, lower the temperature a little. You need to bake the cake until it becomes rich golden. Be careful that the color does not get very dark, as this will indicate that the edges are burnt. After 9-10 minutes after the start of baking, when the cake is browned, but still pale, you can take it out of the oven.

Separate the cake from the baking sheet with a long knife. Act carefully.

Repeat the procedure on all sides of the cake. This is done so that the bottom does not burn. Then send the cake back to the oven to finish baking.

After the specified time, the cake is ready. Pay attention to the photo. It should be a rich orange color with a slight brownish tinge.

Now lower the cake onto a flat (this is important) surface. Act carefully. The soft crust will slide off easily. If you did not separate the cake from the pan with a long knife during cooking, do so now and lower the cake.

After 2-3 minutes, the cake will cool down, slightly settle and harden. Please note that it is very fragile. It is necessary to act very carefully in the further assembly of the cake.

While the first cake is cooling, start baking the second. To do this, similarly, slightly roll the test ball into a plump layer, grease a warm baking sheet with vegetable oil.

Then dust the baking sheet with a little flour.

Place a layer of dough on a baking sheet and again thinly roll out or spread with your fingers over the surface. Trim the edges with a knife. Make a few punctures and send the cake to bake.

Proceed similarly with all cakes. In about an hour and a half, they will be ready.

Stack them on top of each other.

Now you need to start preparing the cream. Take the oil (400 grams) and beat it well with a mixer or whisk. The oil should become fluffy and white. The whipping process should last about 10-12 minutes. Only in this case it will be possible to achieve a gentle and lush cream, and the oily aftertaste will completely disappear.

Gradually you need to add boiled condensed milk. You need to pour in about 1-2 tablespoons, continuing to beat. Also add 1-2 packs of vanilla sugar (or a pinch of vanilla).

When ready, the cream should acquire a pleasant orange hue. It should be thick, uniform and lush.

Conditionally divide the cream into sectors depending on the number of cakes and start spreading it on dough pieces. Set aside the most beautiful and even cake. He will be the top. Take one cake and grease it with cream.

You should get a uniform and not very thick layer.

Take the next cake. Lay it on the cream and press it with your hands. Be careful not to damage the cake, as it has not yet been soaked with cream, so it is fragile. Lubricate the second cake with cream.

Continue assembling the cake, pressing down on each cake before spreading. Lay the last cake upside down. So it will be smoother. It is not necessary to lubricate it with cream yet. Press down the last cake with your hands along the center and edges. Then send the cake under load for 1-2 hours. It is enough to put a large cutting board on top and place a not very heavy load on it.

After the specified time, remove the load and brush the top layer with cream.

It remains only to sprinkle the top of the dish with grated chocolate. A bar of chocolate should be grated on a coarse grater directly over the cake or on a plate, and then carefully poured. No additional decor is needed. The baked goods look very impressive.
Cake "Mikado" is the national cake of Armenian cuisine. It turns out sweet, chocolate and very tasty. The whole point of the cake is that the cakes should be thin - they are baked in the oven or even in a pan, and they should also be well soaked in cream.
As for the cream, there are two types of cream recipes for this cake, some Armenian housewives make cream with condensed milk and heavy cream, while others put condensed milk and cocoa in the cream.
The cake is served on the table in the form of diamonds. Some restaurants serve Mikado cake like a cake.
So, to prepare the classic Armenian Mikado cake, we need sour cream, condensed milk, sugar, butter, egg, flour, cocoa, soda and vinegar.
To begin with, add soda slaked with vinegar to sour cream.

Mix everything thoroughly and set aside for 5-7 minutes.

Add sugar to room temperature butter.

Mix everything thoroughly and add the egg.

Mix until smooth and add sour cream.

Mix everything and add the sifted flour.

Knead the dough so that it does not stick to your hands. The dough should be soft. Put in the refrigerator for 30 minutes.

Cream for Mikado Cake
Add a tablespoon of cocoa, sugar and a little water to the butter.

We put on a small fire so that the butter melts. Put the rest of the butter in another bowl, add condensed milk and cocoa to it.

Mix everything thoroughly.

Add the hot mixture to the resulting mixture.

Mix everything again and put in the refrigerator while we bake the cakes.

Let's get to the crusts. Take the dough from the refrigerator and divide it into 10-12 identical cakes.

We take one ball and roll it out directly on parchment paper. I baked on foil, for some reason it’s more convenient for me.

We will bake cakes on the other side of the baking sheet. Since they are then easier to remove, and they will not break.
We bake the cakes in the oven at 200 degrees for 2-2.5 minutes - until golden brown.

Let's start assembling the cake, or rather the blanks. On a warm cake, apply 1 tablespoon of cream, evenly distributing it over the entire surface of the cake.

We do this procedure with all the cakes, we also lubricate the top cake with cream.

Grate dark chocolate and sprinkle over the cake.

Let the cake stand at room temperature for 3-4 hours at room temperature and send it to the refrigerator overnight. Some Armenian housewives do not put the cake in the refrigerator. So do not be afraid - it will not deteriorate. When time passes, we take out our workpiece and cut off the edges.


Put the cake on a plate in the shape of a star. Armenian cake "Mikado" is ready. Bon appetit!!


"Mikado" is a cake with many layers, originally consisting of 10-12 cakes, between which there are separate layers of cream. In different variations of the Armenian cake recipe, different types of such creams are offered. For example, in one recipe you can find cream only with condensed milk, and in another - cream with cream.
We are also interested in the Armenian Mikado cake recipe, so we will prepare a delicate chocolate cream. One of the delights of the dessert is that there is not a single ingredient in its recipe that is hard to find for us. Therefore, preparation for cooking will be quite fast.
Ingredients
Servings: 8
- For cakes
- Butter 180
- Salt 1 pinch
- Sugar 200
- Soda 1.5 tsp
- Sour cream 250 g.
- Eggs 4 things.
- Cocoa 2 tbsp
- Flour 800
- For cream:
- Butter 300
- Condensed milk 2 banks
- Chocolate 100 g
per serving
Calories: 349 kcal
Proteins: 6 g
Fats: 21.8 g
Carbohydrates: 32.9 g
1 hour. 10 min. Video recipe Print
Mix granulated sugar with eggs into a homogeneous mass. Add melted butter, salt and baking soda. Beat with a mixer or whisk.
Here we add slaked soda and sour cream. We mix everything.
Add cocoa and mix again.
After thoroughly mixing the mixture, pour the sifted flour into it. You can knead the dough. It should have a specific structure, be plastic and oily.
While the dough is in the refrigerator, prepare the cream. Mix the second part of the prepared butter with condensed milk. At the same time, we take up chocolate. Melt the delicacy in a water bath, and then slowly introduce it into the cream mixture. Chocolate cream is ready. Stir the cream well with the new product and put it in the refrigerator for a while.
With a knife, cut the dough into 10-12 equal pieces. We roll out each piece on a board and use a plate to make even blanks for baking.
We pierce each cake with a fork in several places. Baking cakes in the oven, the temperature of which should be at least 200 degrees, lasts about 5-6 minutes. Ready-to-cake cakes are usually round in shape, about 24 cm in diameter, and also have a golden hue.
Let the cakes cool completely. Now we begin the process of assembling the Mikado cake. Starting with the first cake, grease each next with cream, laying one cake on top of the other. After you collect everything, do not forget that the top and sides of the cake also need to be greased with cream. We give the Mikado cake a classic shape.
The original Mikado cake is necessarily sprinkled on top and on the sides with grated chocolate. The finished dessert should stand and soak with cream at room temperature for at least 2 hours. Top with chocolate shavings or chocolate topping. After that, the cake is sent to the refrigerator for 8 hours and the cake is ready to eat.
Mikado is an Armenian cake that many housewives love to cook. This cake is very famous in its homeland, which contributed to its rapid popularization in other countries. However, in Russia, a cake prepared according to the original recipe is quite difficult to find. Most patisseries offer only various modifications of the original dessert.
Starting the cooking process, remove the butter from the refrigerator. Prepare all foods. To make the cake as close to the original as possible, use chocolate with a high level (75%) cocoa content, and sour cream - 20% fat.
In this article we will talk about such a dessert as the Mikado cake. We propose to study the Armenian recipe for this delicacy in detail in our article. There are many different cooking methods. Their essence is as follows: thin cakes are baked in the oven (sometimes even in a pan), then soaked in cream. There are many options for preparing the cream: you can make an impregnation on heavy cream, on sour cream, make custard or cream on It is the last type that will be included in the following
"Mikado". Armenian recipe
Cooking will take you about two hours. It will take a dozen or one and a half thin cakes and there will be nothing superfluous. So, Mikado cake, recipe with photo.
Required Ingredients
For cakes:
- 2 eggs;
- half a glass of sugar (about 100 grams);
- half a package of sour cream (about 100 ml);
- soft butter (about 100 g);
- wheat flour 3 cups (+ a little more for dusting);
- half a spoonful of soda.
For cream:
- a large package (400 g) of sour cream;
- half a can of condensed milk (boiled).
Additionally:
- sweet tooth can add sugar to the dough or cream, thereby adapting the cake recipe to their taste preferences.
"Mikado": Armenian recipe and step-by-step cooking technology

1st step
Grind sugar with melted butter. Beat in eggs, add sour cream and soda. Mix all ingredients thoroughly. Gradually add the sifted wheat flour. It may take you a little less than 3 glasses. Be guided by the consistency of the dough: it should be a little softer than dumplings. Put it in the refrigerator for half an hour.
2nd step
Divide the cooled dough into 12-15 pieces, each of which is thinly rolled out. Add flour if needed. It is best and most convenient to roll out the shortcakes on the dough. You can cut the dough to size both at this stage and at the stage of cake formation. Baked cakes are more convenient to give the desired shape. Before sending the dough to the oven, it must be pricked in several places with a fork.
3rd step
The temperature is 190 degrees, the time is 3-4 minutes for each cake - these are the parameters that the Mikado cake recipe provides. Armenian guarantees an excellent result. If you adhere to the technology, the delicacy will turn out to be tender and very tasty. Be sure to make sure that the cakes do not burn. After baking, cut each layer according to the desired pattern (you can use a large plate). Do not throw away the trimmings, they will come in handy for sprinkling the cake.
4th step
After all the cakes are baked, you need to prepare the cream. The Mikado cake recipe (Armenian recipe) involves soaking cakes with sour cream and boiled condensed milk. These ingredients should be well mixed. The consistency of the cream should not be liquid or too thick. It lays down well on the dough, does not flow out. They need to grease each cake.

5th step
Leave the cake to soak at room temperature for 3 hours. Then move it to the cold. The finished dessert is very tender. Moderate sweetness (if you used the indicated amount of ingredients), a cream that is harmonious in taste, thin cakes are the main advantages of this treat. You can also cook the dish in the form of rectangular cakes. Decorate the dessert according to your taste. You can sprinkle with the remaining crumb (it is crushed with a rolling pin) or grated chocolate. Happy tea!