Cheesecake is the most delicious recipe. The easiest cheesecake recipe
Cheesecake- a classic dish of American cuisine, which has firmly entered the menu of cafes around the world. It is quite simple to prepare, and the result is an incredibly tasty and tender dessert. We will make classics of the genre - Cheesecake New York. Shall we try to cook?
The hardest part about making cheesecake is finding the right cream cheese. According to authentic recipes, Philadelphia cheese is used. The main disadvantage of this cheese is that it is now very difficult to find in stores in Russia. In search of analogues, I tried many different cheeses and settled on the Danish curd cheese Arla Natura Creamy. But at the present time, again, it is not available in Russia, so you have to buy Russian-made curd cheeses, of which there are only one or two on the shelves and that’s it. For example, Bon Cream Creamy cheese turns out very well, and it’s also one of the most budget-friendly options at the moment. I also think Almette Creamy and Hochland Creamy would be suitable.
No processed cheeses, cottage cheese, sour cream or Mascarpone are suitable. And even more so Cream Bonjour and other less healthy cheeses. We're not making a casserole.
Total preparation time for cheesecake: 8-10 hours (including its “ripening” in the refrigerator)!
Ingredients
- shortbread cookies 300 g
- butter 100 g
- cream cheese 600 g
- sugar 150 g
- eggs 3 pcs.
- cream 30-35% 200 ml
Instead of heavy cream, you can use 20% cream.
The amount of ingredients is calculated for baking in a mold with a diameter of 20-22 cm; for a mold with a diameter of 26 cm, we increase the amount of ingredients by 1.5-2 times, unless, of course, you like a low cheesecake. If you are going to prepare a cheesecake version without sides, only with a shortbread base, then use 150 g of cookies and 50 g of butter.
The final weight of the cheesecake is approximately 1.5 kg.
Preparation
We take out all the necessary products (eggs, cheese, cream and butter) from the refrigerator in advance and leave them to “warm up” to room temperature.
After 30 minutes we take up the base - a sand layer. To do this, take any shortbread cookies you like. White, dark, with nuts - any. I used baby biscuits that contain butter rather than margarine. It's a small thing, but nice. You can do it yourself.
Preparing shortbread crumbs. To do this you need to grind the cookies. The easiest ways are a blender or food processor. The method is a little more complicated: crumble and roll the cookies placed in the bag with a rolling pin. 
At this point, our oil has melted on its own, has become plastic and is ready for further work. I do not recommend melting the butter, as it is distributed in the sand crumbs in the form of drops, is poorly retained and will leak out during baking.
Combine crumbs and butter. You should get a loose mass. 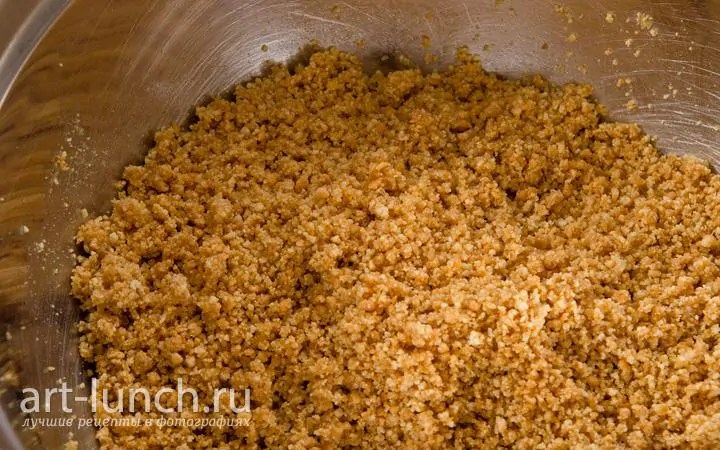
Now pour our mixture into the mold. It is best to use a springform pan; I have a pan with a diameter of 24 cm. The bottom can be covered with baking paper - it will be easier to remove the cheesecake. We compact an even layer with something flat - for example, the bottom of an aluminum mug. You can make it with sides, or without, I love it when the cheesecake has a side. Place the finished base in the oven for 5-10 minutes, preheated to 180-200°C. After this, remove from the oven and leave to cool. 
Now for the cheesecake itself. Mix the curd/cream cheese and sugar well until smooth. The easiest way to do this is with a mixer. But! We just need to mix evenly, not beat! So we do everything at minimum speed, otherwise bubbles will appear and our cheesecake will look like holey cheese. 
Add eggs one at a time. Mix the mixture very well after each addition of the egg. Let's take our time. We try not to beat the mixture too much - if the mixture is oversaturated with air bubbles, the cheesecake may swell and crack during baking. Therefore, now we work not with a mixer, but with a spatula or whisk. 
And at the very end, add the cream (no need to whip it) and mix gently again. Pour the filling into the mold with the base. 
Lightly tap the mold on the table a couple of times (this way we will avoid bubbles and unevenness of the dough, since those bubbles that are close to the top border of the cheesecake will come out). 
Next we will bake the cheesecake. All sorts of different recipes on the Internet suggest wrapping the pan in foil, pouring water into the pan and essentially baking it in a water bath. This is done so that the cheesecake does not rise too much and does not crack. But in the end, we only have a wet base and difficult preparation. We will bake like this: first put the oven in a preheated 200°C oven for 15 minutes, then reduce the temperature to 110°C and cook the cheesecake for about an hour. It all depends on some features, for example, the diameter of your mold. Here's how to guide yourself: the center of the cheesecake should jiggle a little (if you move the pan), but not be too liquid. It took me 15 minutes + 1 hour to bake the cheesecake in a 24 cm pan. I usually place the baking sheet a little closer to the bottom of the oven. If you are afraid that the top of your cheesecake will burn, then prepare a sheet of foil in advance so that if something happens, you can cover the top of the pan. Cheesecake loves to be watched while it's in the oven, it's important not to neglect it. You don’t need to monitor it all the time, but once every 5-10 minutes you should look through the glass at the condition of the cheesecake. If towards the end of cooking the top of the cheesecake begins to lift and crack, this is a clear sign of over-baking.
But that's not all. It is also important to refrigerate the cheesecake properly. If you take it out of the oven quickly, it will probably crack. Why do we need cracked cheesecake?! The cheesecake needs to be cooled in several stages. Immediately after turning it off, it must be left for 40-60 minutes in the oven with the door ajar, then kept for half an hour at room temperature. Next, you need to run a knife along the walls of the mold, and after that put it in the refrigerator. Gradual cooling greatly reduces the risk of cracks in the cake! 
Cheesecake New York It turns out very tender and homogeneous. The texture is like a very soft curd mixture. To get the full flavor, the cheesecake should be in the refrigerator for at least 6-8 hours; I always leave it overnight and the morning will be happier with a great dessert for coffee. Here you can again train your willpower. The peak of taste occurs on the third day, this is no joke. We must assume that after turning off the oven, the cheesecake cooking process is not over. When cooled and in the refrigerator, the cheesecake continues to cook, but in a slightly different sense from our usual understanding.
If desired, you can place pieces of juicy ripe fruit or berries on the cheesecake. Or serve it classic - pure cheesecake with a mint leaf and a little strawberry sauce. Bon appetit! 
By the way, there is another option to cook if you really really want chocolate to lift your sad mood. But if you are too lazy to bake cheesecake or don’t have an oven, then pay attention to the recipe. 
30.07.2019
Who doesn't love cheesecakes? Everyone loves cheesecake! Tender and fluffy or creamy and moist, with filling and frosting or nothing at all - there is so much variety that it is impossible to list all the types of cheesecakes. Americans are proof of this - each state has a special cheesecake recipe, and the Cheesecake Heaven restaurant serves 90 types of this dessert. We offer to get acquainted with the most interesting types and, of course, cook them at home.

What is cheesecake
It's very simple. Cheesecake is a dessert based on soft cheese or cottage cheese (or a combination thereof) with the addition of eggs, sour cream or cream, flour or starch, and sometimes milk. There are many variations of cheesecake - chocolate, with fruits and berries, with jelly or caramel toppings. There is room for your imagination to run wild.There are two cooking methods - with baking and without baking. In the first case, the cheesecake is baked and allowed to harden in the cold, and in the second, the mixture is mixed with gelatin and also placed in the cold.
Cheesecake can be made with any base - baked crust or pressed cookies. You can prepare dessert without a base if you want to emphasize the curd or cheesy taste.
Baked cheesecake is considered a classic American dessert, while “cold” cheesecake is considered a classic British one and is more reminiscent of a cheese and curd soufflé.

History of cheesecake
America is considered the birthplace of modern cream cheese-based cheesecake. But the roots of the dessert are European.Ancient Greece. The cottage cheese was mixed with honey and flour and kneaded until creamy. Then baked, cooled and served cold. Please note that the basic principles have not changed.
Then the cheesecake came through Ancient Rome, where they began to add egg yolks to dessert - for a more dessert taste.
The cheesecake smoothly transformed into European version, popular until the 18th century. The classic Old World recipe looked like this: cut soft cheese into small pieces, cover with milk for three hours. Then mix well, add eggs, butter, sugar and bake.
After the 18th century. By this time, Europeans began to use beaten eggs - this made the cheesecake tender, airy and dessert-like.
USA. It was in America that a modern version of the dessert appeared - instead of soft cheese or cottage cheese, they began to add fatty cream cheese to it. In 1872, a New York dairy farmer tried to replicate the French cheese Neufchatel. Instead, he got what is now called Philadelphia cream cheese.
And in 1929 The owner of the diner, Arnold Reuben, came up with a recipe based on Philadelphia cheese, beaten eggs, sugar and cream. This is how the modern New York cheesecake was born.

Types of cheesecakes
American classic cheesecake. A combination of cream cheese, eggs and sugar. Korzh - sweet crackers or any other cookies (usually shortbread).Cheesecake New York. Based on a cream cheese base with the addition of cream, eggs and extra egg yolks - adding a denser texture and richer flavor. Traditionally, New York cheesecake is cooked in the oven at high temperature and then at low temperature. This is necessary due to the large proportion of cream cheese. You can learn more about this wonderful delicacy in the article Originally from the USA: New York Cheesecake, or in search of a lost recipe. You can find many New York cheesecake recipes on the Internet. I will not pretend to be authentic and yet, I sincerely recommend preparing the classic version. I'm sure you'll like it!
Pennsylvania cheesecake prepared from soft, fatty cottage cheese, into which yolks, flour and starch are mixed, and then whites are added, beaten with sugar to stable peaks. It looks like a fluffy casserole, but you can vary the taste: add lemon zest, vanilla extract.
Sour cream cheesecake appeared in the USA around the middle of the 20th century. It still has cream cheese, but uses sour cream instead of cream. The main advantage of this type is that it can be frozen for a long time without destroying the structure. Try his version - chocolate cheesecake recipe.
Italian (Roman) cheesecake combines honey and ricotta along with flour. Traditionally it is wrapped in bay leaves. Some recipes suggest using palm leaves.
French cheesecake very light, with the addition of gelatin. Usually this is a low pie. The light texture is possible thanks to cheeses from the southern provinces of France.
The site has a small collection of cheesecakes that need to be baked. Let me list them: Snickers Peanut Cheesecake
Very unusual and delicate texture Mazltov Cheesecake
Cheesecake without baking- a UK classic. It's more like a tart. No eggs are used here. The ingredients are simply mixed together, then the gelatin is added and refrigerated. It is prepared with the addition of completely different types of cream cheese and cottage cheese.
Hi all. Today I will share with you a recipe for classic New York cheesecake. This delicious dessert came to us from America, where creamy curd cheese was actually invented. There are a great many options for cheesecakes, but I’ll probably start with the classics.
I love cheesecakes not only for the incredible bliss of its taste, but also for the fact that you can easily change the original composition of the ingredients. Don't you have any cream? No problem, replace them with sour cream or milk! No lemon? Yes, please make it without it, add more vanilla sugar and you will have vanilla cheesecake! No cornstarch? Take flour or do without this ingredient altogether (although the structure will change a little, but the taste will remain the same).
Perhaps the only thing that remains unchanged is cream cheese. Although, if you take cottage cheese instead... but no, it will already be a casserole! By the way, in one of the following articles I will share with you a recipe for an incredible dietary casserole, don’t miss it!
How to make classic New York cheesecake? Recipe step by step with photographs.
Ingredients (for a 26 cm pan):
- 380 gr. shortbread cookies
- 100 gr. butter
- 800 gr. cream cheese
- 200 gr. powdered sugar
- 200 ml. cream with fat content from 30%
- 3 eggs
- 15 gr. corn starch
- 10 gr. vanilla sugar
- juice of half a lemon
- lemon zest
- pinch of salt
Preparation:
First, let's start preparing the base. Today it will be made from shortbread cookies, you can take absolutely any cookie, from primitive Jubilee cookies to some with seeds and nuts, or you can even take children’s cookies, they do not contain margarine. The number of cookies depends on whether you want to make borders or not. This time I made it with sides, for a 26 cm mold it takes me a pack of 380g cookies, if I make it without sides then I think 250g. will be enough.
Let's turn the cookies into crumbs; the easiest way to do this is in a blender; if you don't have one, you can simply crush them with your hands or use a rolling pin.

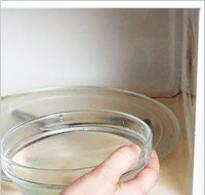
The butter must be melted. I do this in the microwave, it literally takes 30 seconds.

Combine our cookies with butter and rub with your hands until combined.

Let's prepare our form. By the way, we need a detachable mold, mine has a diameter of 26 cm. You definitely need to line the bottom with paper, otherwise you won’t be able to pull out our finished dish later. We place the cookies in the mold, press them down well, it is most convenient to do this with the bottom of a faceted glass, form the sides if you want to do this with them.

If you are not sure about the quality of your mold, then it is better to additionally wrap the bottom with foil from the outside. After several experiments, I recommend that everyone do this, since not a single form held up, everything was a little bit, but it leaked. This is an example of how to wrap the bottom in foil.

Place our base in a preheated oven for 10 minutes at 200 degrees.
After the base is baked, we need to cool it. I usually put the mold on the balcony, and while our cookies are cooling, I prepare the filling.
The cream cheese must be taken out of the refrigerator in advance, otherwise it will be difficult to work with. In my case it is Violetta. You can take any that you sell in the store - Hochland, Almette, Philadelphia, but I’ll just say right away - this is not processed cheese, but curd cheese! The cheese must be mixed with powdered sugar, vanilla sugar, starch, salt and lemon zest.

I warn you, this is very difficult to do, since the cheese still has a slightly hard structure. And here is the main mistake of many - you cannot mix with a mixer, otherwise the mass will begin to whip, air bubbles will appear, and our cheesecake structure will be disrupted. Everywhere they say to mix with a silicone or wooden stick, but this is very difficult. Mix with your hands, firstly, the warmth of your hands will make the cheese more plastic, and secondly, this is the only way you can achieve the perfect combination of ingredients.


Also mix everything.

Pour our mixture onto the cooled base.

And put it in the oven. I bake first for 10 minutes at 180°, then lower the temperature to 100-110° and bake for another 1 hour 20 minutes. You can check the readiness of the cheesecake by twisting it a little; the center should shake a little.
After that, I turn off the oven, open the door slightly and put a matchbox in there, so my cheesecake cools there for another hour. And only then do I take it out of the oven. It sits on my table for a couple of hours, and then I put it in the refrigerator.
It is with this baking scheme that I have never had cracks appear, and I always do without a water bath! Unfortunately, if you have a gas oven, you may still need a bowl of water. Just don’t put the cheesecake itself in this container, just place the bowl on the bottom of the oven, so the cheesecake won’t get soggy.
The cheesecake needs time to brew, paradoxically, but it only gains its flavor on the third day. Unfortunately, by this time I only have a small part of it left.
The cheesecake is so soft in texture that you enjoy every little piece. You can decorate it with fresh berries or sweets on top, you can pour it over it, this time I left it “naked”.
Here's what I got.

And here's a cross-section.

Do you still think that cheesecake is difficult to prepare and can only be enjoyed in a cafe? Try my recipe and you will understand how much time you wasted before seeing it on your table. I assure you, he will firmly take a place in your heart.
P.S. As promised, I will list point by point what needs to be done to avoid cracks on the cheesecake.
- The ingredients should be at room temperature; take them out of the refrigerator an hour or two before cooking.
- Mix all the ingredients with a spatula or your hands, do not use a mixer!
- If the base is baked, it must be cooled to room temperature.
- We observe the temperature regime. Each oven fibs a little, if your crust is too brown, then lower the degrees, or bake with the top covered with foil.
- Cracks most often appear from temperature changes, so it is necessary to cool it smoothly, first we leave it in the switched off oven for an hour with the door ajar, then it cools on the table for a couple of hours and only then we put it in the refrigerator.
- After the cheesecake is baked, it is not ready yet! He needs at least 10-12 hours to get into the desired shape. Let me remind you once again that the peak of its taste occurs only on the third day.
- Try following these recommendations first, and if that doesn’t work, then try the advice about a water bath.
By the way, he appeared, just look how beautiful he is.

Have delicious desserts. See you soon.
Cheesecake is a sweet cheese pie served for dessert. It is prepared in many cafes and restaurants. At the same time, there is no single recipe for traditional American cheesecake, because each pastry chef prepares it in his own way: some use sour cream to prepare the glaze, others use cream, and some prefer to add condensed milk. Some people prefer Mascarpone cheesecake, others prefer Philadelphia or Ricotta. Therefore, everyone who decides to cook a classic cheesecake has their own recipe. But whatever the recipe, the dessert turns out not only beautiful, as in the photo, but also delicious.
Cheesecake is a pie whose main ingredient is soft cheese or just cottage cheese.
Many housewives are sure that it is almost impossible to prepare this dessert at home, because the cheesecake recipe is complicated. It would be a misconception to think that only professional pastry chefs can prepare this pie. In fact, if you follow the recipe exactly, you will end up with a wonderful classic cheesecake. It is also called "New York".
“Cheesecake” literally translates as “cheese pie.” The name itself suggests that the pie contains cheese. But not every cheese is suitable for cooking. What cheese is used to make New York or classic cheesecake?
To prepare New York cheesecake, like any other dessert, we need soft cream cheese; it has a creamy consistency and a very delicate taste. But you should not use processed cheeses. They are completely out of place here.
Yes, cream cheese is very similar in texture to cottage cheese. But you can’t replace it with regular cottage cheese. After all, any curd product will give the dish a sour taste. Still, some housewives replace expensive cheeses with cottage cheese when preparing this pie.
Philadelphia cheese is best for cheesecake. It is made from sour cream and cream. This cheese is very tender and pleasant to the taste.
You can replace Philadelphia with Mascarpone cheese if the recipe allows it. Mascarpone has a consistency similar to heavy cream. You can find its photo and description of the composition on the Internet. Using this neutral-tasting cheese, you will be able to prepare a very delicate classic cheesecake. In addition to cheesecake, Mascarpone is used to make tiramisu, a famous Italian dessert.

It is better to buy cheese for cheesecake in briquettes.
It is better to purchase cheese packaged in a briquette. Those cheeses that are sold in tubes have already been whipped. And during the cooking process you will have to beat the cheese again, which will lead to excessive airiness. This is extremely undesirable for our dessert.
Making a traditional pie
This dessert is popular all over the world. It is not surprising that housewives want to cook it at home. So, in order to prepare 8-10 servings of real New York cheesecake, you will need the following ingredients:
For the base:
- cookies or crackers (for example, “Yubileinoe”) – 300 g;
- sugar – 4 tbsp. l.;
- butter – 150 g.
For the filling:
- Philadelphia cheese – 450 g;
- egg – 5 pcs.;
- flour – 3.5 tbsp. l.;
- sugar – 1.5 cups;
- zest of half a lemon;
- vanilla sugar – 1 tbsp. l.
- sour cream – 2 tbsp;
- sugar – 0.5 tbsp;
- vanilla – 0.5 tsp.
The recipe is as follows: first, grind the cookies using a meat grinder, blender, or simply with your hands, mix them with sugar and butter until a homogeneous mass is formed. We compact the resulting mass tightly into a springform pan. This will be the base for the cheesecake. The base must be baked in an oven preheated to 180 degrees for 10 minutes, and then cooled. There is no need to remove the base from the mold.

The base for the treat is ready for baking
Mix Philadelphia cheese at room temperature with sugar, lemon zest and juice, salt and vanilla. Beat the resulting mass with a mixer at low speed. Without stopping whisking, add flour, then eggs.
The resulting homogeneous mass must be poured into a mold with a base, having previously greased the edges of the mold with oil. Place the mold in the oven for one hour. Then cool for 10-15 minutes.
While the dessert is cooling, prepare the glaze. To do this, mix sour cream, vanilla and sugar in a blender. Spread the glaze over the surface of the New York cheesecake and bake for another 7-10 minutes.
After finishing baking, carefully remove the cake from the pan. Before serving, pour syrup over and decorate with berries. In order to decorate the dessert in an original way, you can view some photos with examples. New York cheesecake is ready!
Nuances of preparing cheese dessert
Baking a New York dessert, or any other, at first glance is very simple, because when studying the recipe, you do not notice any difficulties. But there are a number of nuances that must be taken into account in order for the cheese dessert to turn out not only amazing in taste, but also beautiful, as in the photos with which the Internet is replete.
Firstly, the cake should never rise during the baking process. To do this, it is better to beat all the ingredients with a fork or whisk by hand. If you still decide to use a mixer, then beat the mixture at the lowest speed. This way less air will get into it.

Surprise your friends and family - bake a cheesecake!
The cheese should only be beaten once. When adding ingredients later, it is best to simply stir until smooth. This way you will avoid excess air getting into the cheese mass.
To make the dessert beautiful and not crack on top when cooling, you need to bake it at a low temperature. It is best to place the cheesecake pan in the oven in a container of water. By creating a water bath of sorts, you can prevent the bottom and edges of your cheesecake from burning.
Water should be poured into this container to fill exactly half the mold. Under no circumstances should it get into the pie, otherwise the dessert will be ruined. It’s good if the shape with water is larger in diameter than the shape with cheesecake. The distance between the walls of these two forms should be at least 3 - 5 cm.
Cracks can also appear due to too much baking time. The cake is considered ready when its edges have hardened sufficiently and the center trembles a little when shaken. It is at this stage that the oven should be turned off and the cake itself should be left in it for another hour. After this, the center of the cheesecake will no longer look damp, but cracks will not appear on the surface.
If you couldn’t avoid cracks on the surface of the pie, don’t worry, they can be easily hidden. Decorate your pie with jam and fruit and the cracks won't show.
Greetings, dear friends and guests of the culinary site Home Restaurant! I dedicate today's recipe to all fans of cottage cheese and cheesecake desserts. As you may have guessed from the name of the recipe, we will prepare cottage cheese cheesecake. After publishing the recipe for the classic New York cheesecake from you, dear friends, on the social networks VK and Instagram, there were a lot of suggestions and requests to make cheesecake from ordinary cottage cheese, since not all housewives can afford Philadelphia cheese.
Therefore, today I will tell and show you how to make cottage cheesecake from ordinary cottage cheese, which you can buy in any store at home, as expected, with baking in the oven.
Homemade curd cheesecake recipe, down to the gram
Expectations VS Reality
I won’t promise you that cottage cheese cheesecake in the oven will turn out identical to the classic Philadelphia cheesecake, because it’s not. Cheesecake with cottage cheese is... not at all similar to cottage cheese casserole, Lviv cheesecake or cottage cheese pudding.
Homemade cottage cheesecake is a complete dessert with a delicate creamy taste and soft structure. But don’t expect too much from this dessert, much less compare it to the classic New York cheesecake.

I made the recipe and proportions for the curd cheesecake myself, so please don’t judge too harshly, since I don’t have a pastry chef diploma yet
Do you know what the main advantage of curd cheesecake is over its classic brother from the Big Apple? There are no “harmful” cracks in cottage cheese cheesecake! Therefore, if you are still in doubt about whether to make curd cheesecake at home or not, feel free to put on your aprons, take your phone or tablet to the kitchen and go ahead and prepare a delicious dessert!
Products for 20 cm mold:
For the cheesecake:
- 600 gr. cottage cheese
- 160 gr. powdered sugar
- 2 eggs
- 1 tbsp. starch (25 gr.)
- 125 gr. cream, min 30% fat
For the base:
- 100 gr. shortbread cookies
- 50 gr. butter
For decoration and serving:
- fresh or frozen berries
- fresh mint
Technology: step by step
First, prepare the shortbread base for the curd cheesecake. Grind the cookies in a blender into fine crumbs.

Mix the shortbread cookie crumbs with melted butter.

And mix until smooth.

Using a glass, compact the resulting mass evenly along the bottom of the springform pan. I use a non-stick cheesecake pan, so I didn't line it with baking paper this time.

Baking the sand base
Place the mold with the sand base in an oven preheated to 160 degrees for 15 minutes. Grill position in the middle, heat: top and bottom.
Remove the pan with the sand base from the oven and let it cool completely. Then we wrap the mold with foil so that when baking the curd cheesecake in a water bath, water does not get into the mold with our dessert. I recommend using a single piece of foil, folded in thirds.

Preparing soft curd cream
Mix powdered sugar and starch in a separate bowl.

In a large bowl, combine cottage cheese, cream and eggs. I first beat the eggs with three tablespoons of powdered sugar so that the curd mass is easier to blend with a blender.

Using an immersion blender, turn the curd and cream mass into a homogeneous puree.

Then add powdered sugar and starch.

And mix thoroughly, achieving maximum homogeneity.

Place the resulting curd mass into the prepared pan with a sand base.

How to bake curd cheesecake in the oven
Place the pan with the curd cheesecake in another spacious pan with high sides for a water bath. We set the oven heating only from below to 160 degrees. Without convection and other blowing functions.
Place both cheesecake pans on the middle rack of the oven on a rack. Pour boiling water into a large mold, which should reach 1/3 of the level of the cheesecake mold, as in my photo.

Close the oven and bake our curd cheesecake for 60 minutes. For a small cheesecake in a 20 cm pan, 60 minutes is more than enough. If you are preparing a cheesecake in a large 25-26 cm pan and a double portion, then the baking time should be increased to 1.5 hours.
It is advisable not to open the oven, but if you are very interested, then you can take a look with one eye; this cheesecake will still not have any cracks.
After baking, leave the cheesecake in the oven with the door ajar for 1.5 hours. Don't expect a quivering center in this cheesecake - there won't be one. Focus on the dense surface of the dessert along the entire diameter of the mold.
Next, we take out our almost finished curd cheesecake at home according to the classic recipe, and leave it to cool at room temperature. As in the classic recipe, I covered the cooled cheesecake with cling film and kept the dessert in the refrigerator for 8 hours.


How to make a presentation beautiful?
Decorate the finished cottage cheese dessert with fresh or frozen berries and mint leaves. Cut into portions using a wet knife and enjoy the delicious curd dessert!
Curd cheesecake in the oven with cookies
4.8 (95.56%) 18 votes