The simplest cake without dough. A few more recipes for Easter
Although now there are quite a few truly believing people left, we all love to celebrate many Orthodox holidays in the old fashioned way. Easter occupies a special place in our lives. On this day, not only colorful dishes and richly laid tables make people happy, but also specially prepared Easter cakes, which hardly anyone cooks on other days of the year.
The main secret of a truly rich, tender and tasty treat is that you should approach its preparation only with a pure soul, good mood and good thoughts. It’s not for nothing that before embarking on the culinary sacrament, our ancestors, and my grandmother, read the “Our Father” prayer, which removes all filth from the human soul.
I don’t know how, but the dough always feels that a person is offended or not in the mood. That’s why sometimes you wait and wait, but it doesn’t rise. Or it turns out not the most successful. And it’s unclear what the reason is - after all, it always worked before.
Therefore, we smiled at ourselves, forgave everyone and everything, and with cheerfulness and faith in success we begin to prepare an Easter delicacy with which we will delight our family and friends.
Easter cake without dough according to my grandmother's classic recipe
Today we will prepare a holiday cake, just as my grandmother prepared it. She turned out excellent. And she always told me that the secret to her amazing baking was homemade ingredients. You've probably already noticed that homemade eggs and milk and butter always produce baked goods with a richer taste and color.
Now, of course, not everyone has the opportunity to purchase them, but everyone can choose fresh products and good oil.

It is very important that all components of our future creation are warm, or at least at room temperature. Otherwise, due to temperature differences, the yeast may not give the desired effect. Or the dough will fall sharply, or the baked goods will not increase and will turn out compressed or “heavy,” etc.
We will need:
- Flour – about 2 kg (depending on the quality of flour).
- Warm boiled homemade milk – 0.5 liters.
- Homemade chicken eggs – 10 pcs.
- Live yeast – 100 gr.
- Granulated sugar - 2.5 cups.
- Butter 82.5% – 300 gr.
- Sunflower oil – 1 cup.
- Raisins – 1 glass.
- Vanilla sugar – 20 gr.
- Powdered sugar – 1 cup.
- Colored sugar sprinkles - optional.
- Lemon – 1/2 pcs.
- Table salt (not iodized) - ½ tsp.
Preparation:
1. Since we will not prepare the dough separately, we will still have to “do a little magic” with the yeast so that it begins its magical effect.

To do this, cut a hundred-gram briquette of live yeast into small pieces and add a glass of sugar. And also mix both products well together. This procedure will allow the yeast to “bloom” and enter into the reaction we need with the sweet medium.
Then set the cup aside for about 5 minutes while we work on the other ingredients.

2. Carefully break the eggs and separate the yolks from the whites. For a rich color of the dough and a more elastic and at the same time crumbly dough, we only need yolks.
In principle, you can use 6 regular eggs (along with whites) instead of 10 yolks. It's up to you. But grandma always used only homemade egg yolks in this recipe. And somehow I don’t want to deviate too much from her “secret” technique.

3. Pour the yolks into a large bowl and cover them with the remaining one and a half cups of sugar. Also add salt. Grind the sugar-egg mixture thoroughly to form a viscous yellow sweet mass.

4. Pour slightly warmed milk into a deep saucepan. It should be slightly above room temperature so that the sugar-yeast starter can then “ferment” well.
It is not advisable to heat milk more than 30 degrees, because high temperature kills yeast, which gives the dough airiness.

5. Cut off the tops of the vanilla sugar packets and pour it into warm milk, shake lightly.

6. Pour in the sugar-yolk mixture in a gentle stream. The milk will immediately begin to acquire a beautiful yellowish tint. To prevent the yolks from setting due to warm milk, it is advisable to immediately stir the poured mass so that it mixes evenly with the milk.

7. Now it’s time for the sugar-yeast mixture. After standing, the yeast completely dissolved in the sugar and the result was a slightly brownish, viscous substance, like jelly. We also pour it into the milk-sugar-egg solution in a stream.

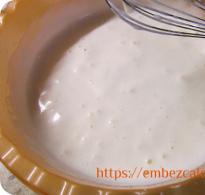
8. Mix the resulting “sourdough” well with a paddle. The yeast should immediately react and a small foaming cap will begin to form on the surface, as happens when making dough.

9. In a separate bowl, lightly melt the butter. Remember that it should not be too hot, so as not to kill the yeast and “cook” the eggs.
If you accidentally overheat, it is better to first cool the oil to room temperature, and then pour it into the pan with the previous ingredients.

10. Sift the flour well. It’s even better to do this twice so that it is loosened and saturated with air as much as possible. The more “compressed” the flour, the worse the dough will be.

11. In small portions we will add approximately half of the total volume of flour, all the time stirring the dough with a paddle so that no lumps form and the consistency becomes thicker gradually.

12. Then we need to pour in the sunflower oil and mix thoroughly again so that it combines with the dough and there is no peeling on the surface of the mixture.

13. Pour most of the remaining flour onto the work surface of the table, make a small depression in it and place the resulting relatively viscous dough into it and knead it thoroughly so that it absorbs all the flour and turns out soft and tender.

Why is it not advisable to pour all the flour onto the table at once? Because in different regions of the country, flour differs in the quality of its gluten and, depending on this, the dough can take either only 1.5 kg of flour or all 2 kg. In the Altai Territory, this recipe usually requires about 1.8 kg of flour.
14. Knead the dough thoroughly until it begins to easily come off your hands. Many housewives claim that it takes at least an hour and a half to knead truly Easter dough. But in fact, the amount of time it takes you is enough for the dough to stop sticking to your hands and the table.

15. Without haste, sharp claps or blows, roll our rich, tender dough into a ball shape.

In general, while working with the dough, you should not make any noise, rattle, open windows, listen to loud music or stamp your feet, because this will cause the dough to begin to sag and may then not rise again.
16. Return the spherical, kneaded, semi-finished pastry to the pan and “seal” it on top with cling film. We place the pan itself in the warmest place in the kitchen or wrap it in a warm blanket or jacket. Let the ball rise for about an hour and “spread” throughout the pan.

17. Place the pan with the “rising” contents on the table again and very gently, using your fist or fingers, lower the risen dough right in the center so that excess air comes out without sudden movements.

18. Lightly dust the table with flour so that it does not “clog” the dough, and with special tenderness knead it again for 5-10 minutes.

19. Re-roll the dough ball and leave it to rise again in a warm place. This may take from one to one and a half hours.

20. During this time, we carefully sort out the raisins and remove all the twigs and tails so that they don’t end up on our teeth while eating. Fill with warm water for 15 minutes so that the raisins can spread out slightly and increase in volume a little.
Usually this should be done with a very “shrunken”, dried out quiche. But if the raisins are freshly harvested and soft enough, then you don’t need to soak them. Then drain the water and let it dry.

21. While the dough and dried fruits reach the desired state, we prepare the molds for baking Easter cakes. If you have springform pans, then simply coat them lightly with a piece of butter so that the surface is coated with a whitish layer.
If there are no special forms, then ordinary tin cans, and even iron mugs, glasses and square solid forms are ideal instead.
But ordinary oiling will not be enough for them, because the cakes may stick to the walls and then you will have to remove them with a knife. And it will definitely damage the beautiful sides and bottom of the baked goods.
Therefore, it is advisable to make a parchment cutout according to the shape of the bottom of the iron mold used, and after coating it with oil, place it inside at the very bottom. And also cover the sides from the inside with an insert of oiled parchment, protruding slightly above the sides. Then it will be enough just to pull a piece of paper and the cake will come out of the mold after baking.

22. To prevent our filling (raisins) from leaving the dough around itself during baking, experienced housewives usually sprinkle it with flour.

In addition to raisins, you can add lemon or orange zest, chopped nuts, chopped candied fruits or any other dried fruits.
23. Scatter floured raisins on the table and place the finished dough on top of them. Knead thoroughly so that the filler is redistributed throughout the baking.

24. Very carefully, with our hands, we tear off pieces of dough and fill the prepared forms with it by about a third, so that we have enough space for it to “proof” in the form. This action may take another 15-25 minutes. The contents of the forms should increase and fill approximately ¾ of the volume.

25. Place our molds with contents in a preheated oven (180-200 degrees) on a baking sheet or wire rack and leave to bake for about 25 minutes.
Yeast dough should not be placed in an unheated oven because it may settle and not rise again. And instead of an airy delicacy, we will get hard lumps with which “you can knock down crows” (that’s what my grandmother said).
Also, under no circumstances open the oven until you see that the cakes are baked and have acquired a beautiful crispy crust.

26. In order to make sure that the cakes are really baked, you need to pierce the center of the cake with a long stick and, pulling it back, make sure that there is no sticky dough.

27. Trying not to get burned, we take our molds with the finished baked goods out of the oven and let them cool a little. Then remove the molds and remove the parchment.
It is best to place the finished Easter cakes directly on the bottom, because if you put them on their side, you will need to periodically roll them from side to side, otherwise they will “lay down” the crumb and lose their beautiful, even shape on the sides.
Still warm creations can be placed on a clean waffle towel so that the bottoms do not get wet when cooling on a smooth table or board surface.
These are also grandma's culinary secrets.

28. In the meantime, while the sweet holiday baking is cooling, you can very easily and simply prepare snow-white glaze. After separating the yolks, we were left with unused whites. Take 2 egg whites and mix with powdered sugar.

29. To make the glaze soft and not crumble, add about one and a half teaspoons of freshly squeezed lemon juice and beat until stiff peaks form with a whisk or mixer.

30. Turn the cooled cakes upside down and simply dip them into the glaze to form a beautiful white cap. If you are not a fan of this method, you can use a spatula or brush and coat the top of the muffin with it.

31. To make Easter cakes look even more festive, you can sprinkle them on top with colored sugar sprinkles or colored powdered sugar - that’s what your imagination tells you.
So, in a fairly simple way, we prepared amazingly tasty and beautiful Easter cakes.

When the house smells of baking, it is filled with warmth and comfort. In such a house there are fewer quarrels and more mutual understanding. Therefore, Easter cakes must be baked. Even if you don’t bake baked goods in everyday life, at least bake for this bright spring holiday!
Bon appetit and happy holiday of the Resurrection of the Lord!
I stole this recipe for butter dough from the book “Crust and Crumb” by Peter Reinhart, and I liked the result so much that I recommend this Easter cake with raisins to all novice housewives, beginners and those who doubt: “Will I succeed in the cake?”
- Firstly, we make Easter cake according to this recipe using dry yeast (sometimes beginners get lost and don’t know where to buy raw yeast or are afraid of them, considering them to be living and capricious creatures).
- Secondly, the dough does not need to be kneaded for an hour by hand (as in ordinary recipes we can find the phrases “knead the dough for Easter cake for half an hour/hour”) I had a situation where I practically didn’t knead the dough, but the Easter cake turned out to be layered, fluffy and didn’t crumble too much. Miracles. And thanks to Peter)
- Thirdly, having prepared this dough once, you can use the recipe for any baking in the future. This versatile recipe is useful for cinnamon rolls, poppy seed buns, and pretzels. Success always inspires! Having received an excellent result and the praise of everyone who tasted your cakes, you will want to please your loved ones again and again.

Ingredients
For the dough:
- Premium flour - 100 g;
- Dry yeast - 2 teaspoons (you can use 20 g of wet yeast);
- Curdled milk or milk at room temperature - 230 g;
For the test:
- Opara;
- Premium flour - 550 g;
- Sugar - 80 g in the original recipe, I increased it to 200 grams;
- Salt - 1 teaspoon;
- Eggs - 4-5 eggs (228 g), eggs should be cold;
- Unsalted butter at room temperature - 110 g.
Additives to the dough as desired:
- Finely chopped dried apricots - 1/2 cup;
- Raisins (light or black) - 1/2 cup;
- Rum or concentrated orange juice -1/4 cup;
- Vanilla extract - 2 teaspoons;
- Sliced almonds or walnuts - 1 cup;
Icing for Easter cakes:
- Protein - 1 pc.;
- Powdered sugar - 120 g;
- Lemon juice - 1 tbsp. spoon.
How to cook Easter cake
Rinse the raisins. If you have other additives, they also need to be rinsed. Then pour in warm water for 10 minutes (to make the raisins softer). Instead of water, you can pour in rum or cognac. 
Preparing the dough
Pour the yeast and flour into the kneading bowl. 
Add milk (or yogurt). I added milk to the cake batter, but Reinhart, the author of the recipe, recommends using sour milk, which gives the cake a better flavor. 
The milk should not be hot. At temperatures above 40 C, the yeast dies.
Stir the dough well. Try to break up the yeast as best as possible, but you won’t get a completely smooth mixture. 
Cover the bowl with the dough with cling film and leave to rise in a draft-free place at room temperature. I put it in a switched off oven or any kitchen cabinet where there is free space. 
The dough will increase in size by about 1.5 times.
Easter cakes with raisins can be an excellent addition.

Preparing Easter cake dough
Take a large bowl.
Breaking the eggs.
Reinhart's recipe indicates the weight of the eggs (228 g), and for him this weight corresponds to 5 eggs. I got 4 eggs of this weight. You can weigh the eggs (without the shells!) on a kitchen scale, you probably won't need more than 4 eggs either.
Add salt (1 teaspoon). 
Sugar (200 g). 
The original recipe only had 80g of sugar (it wasn't sweet at all), so I increased the amount of sugar to 200g the second time I made this recipe.
Add butter (110 g), softened at room temperature, to the Easter cake dough. 
Stir the butter with a fork, trying to achieve homogeneity (it won’t be completely smooth, this is normal). 
Pour the dough into the dough. 
Now you need to add flour (550 g). It should be sifted. When we sift the flour, it is saturated with air, which makes the Easter cake dough airier and more porous. We add the entire volume of flour not at once, but in parts. Add a little - stir, add - stir. 
We begin to knead the dough, first with a spoon, then with our hands. Peter Reinhart does this in a food processor for 8 minutes. He recommends kneading with your hands for no more than 15 minutes. 
For better adhesion to the dough, you can roll the raisins in flour. 
When the dough is almost kneaded, add raisins. Knead further, trying to evenly distribute the raisins in the Easter cake dough. 
For more convenient kneading, you can transfer the dough to a surface sprinkled with flour. To prevent the dough from sticking to your hands, put a little vegetable oil in your palm.
After kneading the dough, cover it with cling film or a towel. Place in a place without drafts until the dough increases by 1.5 times.
It took me 1 hour to rise the dough at room temperature.
All forms in which Easter cakes will be baked must be greased with vegetable oil. 
Place a circle of parchment on the bottom of each pan. First trace each shape on a sheet of baking paper, then cut along the line. 
Sprinkle greased Easter cake pans with flour. 
Baking Easter cakes
Knead the risen dough. 
Lubricate your hands with vegetable oil and tear off pieces of the dough of the size you need. Roll into a ball shape and place seam side down in the molds. 
The dough should fill the mold 3/4 full. 
Cover the molds with the dough with a towel or cling film and place in a place without drafts until the dough doubles in size. It usually takes 60-90 minutes to rise the dough in the molds. 
Preheat the oven to 170 C.
Place the risen cakes in the oven and bake for 20-40 minutes (depending on the size of your pans).
The tops of the cakes bake much faster than the middle, so 15 minutes after the start of baking, cover the cakes with a sheet of foil (mirror side up).
We check the readiness of the Easter cakes by using a dry wooden splinter, which we use to pierce the Easter cakes in the highest place.
Remove the freshly baked cakes from the oven and let them stand in the pans for 10 minutes, then remove them from the pans onto a towel. 
Place the cakes on their sides, turning them over from time to time to avoid dents.
Cover the top with a towel over your head too. 
Easter cakes are ready to be glazed. 
How to prepare icing for Easter cakes
Separate the white and yolk. 
We begin to beat with a mixer until the protein mass becomes white foam. Then add powdered sugar, pour 1 tbsp. a spoonful of lemon juice (for shine) and whisk again until you get a thick, shiny glaze.
You will be interested to know all the secrets about. Let the icing for the Easter cakes turn out wonderful.

Attention! New recipes for delicious Easter cakes have appeared on the site! , (Follow the links, all recipes will open).
Cover the cooled cakes with glaze. 
The glaze will take approximately 1 hour to harden. 
Easter cakes with raisins prepared according to this recipe are delicious immediately after baking (they do not need to be infused), and the next day they are also very tasty and aromatic. The dough is airy, layered, porous. 
From the specified amount of ingredients I got 4 Easter cakes (the children asked me to cut one Easter cake while it was still hot, so it doesn’t appear in the last photos). Three small Easter cakes and one larger one. 
Another option for a delicious Easter cake is cream cake. I recorded a detailed video recipe for you and posted it on our YuoTube channel, I wish you pleasant viewing!
Happy Sunday!
I will be glad to answer all questions that arise during preparation!
I'm waiting for your cakes, attach a photo to the comments (it's very easy to do). If you post photos on Instagram, please indicate the tag #pirogeevo or #pirogeevo so that I can find your photos on the Internet.
If you study the recipes for Easter baking, you can conclude that basically about 10 chicken eggs are placed in the butter dough for Easter cakes. But one day the recipe for “Humble Easter” caught my eye. The author did not explain why it was called that, most likely due to the fact that only one egg is placed in the dough. And if you look at it in detail, the portion of dough is small, only 350 g of flour is taken. The highlight of the recipe is that the cake is prepared without dough, quickly and easily!
The dough with raisins turns out tasty and sweet. Glaze without chicken proteins, with milk and sugar. Many mothers are looking for just such a recipe so that Easter cakes can be given to small children without fear. I have surprised my family more than once with such a treat, try it too.
Easter cakes: how to cook for Easter quickly and easily

Ingredients:
For the test:
- 350 grams of wheat flour (preferably premium);
- 100 grams 82% butter;
- 200 grams of sugar;
- a pinch of salt;
- 100 ml warm, slightly warmed milk;
- 1 fresh chicken egg;
- 20 grams of fresh (pressed) yeast;
- 100 grams of seedless raisins.
For the glaze:
- 2-2.5 tablespoons of milk;
- 100 grams of sugar.
Cooking process:
Heat the butter until warm on the stove or in the microwave, and slowly combine with the flour.

Add a pinch of salt and then add sugar for sweetness.

In addition to taste, sugar and salt play a special role when resting the dough. Salt will help the gluten swell. And thanks to salt, the dough will not be dry, since it retains moisture in it. But don't overdo it, otherwise the yeast won't ferment.
Be sure to dissolve the compressed yeast in lukewarm milk and pour it into the dough.


Beat a whole egg and add it to the quick Easter dough.


Be sure to add raisins prepared in advance, because they are so sweet in Easter cakes! Leave the dough completely alone and let it rise. When it has doubled in volume, place it in the cake pans, filling the volume halfway.
Tin molds should be lined with oiled paper.

Bake quick cakes in a preheated oven, temperature 180°. A small cake in the pan will bake for about 35 minutes. When it turns golden brown, check its readiness with a toothpick. If there are no pieces of dough on its surface, then the paskas are ready.

The humble single cake needs to cool before you decorate it with frosting.

The glaze is very easy to prepare. Grind the sugar into powdered sugar and pour milk into it.

The Easter glaze turns out to be sticky, all that remains is to apply it to the tops of the Easter cakes.

The advantage is that it does not crack, it does not need to be whipped for a long time, like egg white glaze.
Pour milk glaze over quick cakes and immediately decorate with sprinkles so that they stick securely and do not fall off.


It is better to bake Easter cake a few days before the holiday. Freshly baked, it is moist, since there is still enough baking in it, despite the fact that there is one egg in the dough.

If every year on the eve of Easter you buy ready-made Easter cakes, because you are sure that this baking will not work in your kitchen, then, most likely, our article today will radically change this “tradition”. In it we have collected the simplest and most delicious recipes for Easter cakes with step-by-step photos and videos that even novice cooks can master. In addition to quick recipes with dry yeast, below you will find dough options for Easter cakes without dough and yeast, including for a multicooker. We hope that after this article, the Easter cake, a simple recipe for which you can choose from the options presented below, will “succumb” to your culinary skills and will delight your family with its amazing taste on the holiday table. So quickly discard stereotypes about super-complicated dough and study our simple recipes for Easter cakes!
Easter cake - a simple recipe for beginners with step-by-step photos
Easter cake, a simple recipe with step-by-step photos that we suggest you master first, is ideal for beginners. The fact is that this recipe, in terms of the set of ingredients and cooking technology, is very close to the classic version of Easter cake. But at the same time, this Easter cake (a simple recipe for beginners with a photo below) can be prepared much faster and without repeated kneading of the dough. All the details for preparing this simple Easter cake are below.

Necessary ingredients for Easter cake recipe for beginners with photos
- premium wheat flour - 1.5 kg
- pressed yeast - 100 gr.
- milk - 750 ml.
- sugar - 500 gr.
- butter - 250 gr.
- eggs - 10 pcs. medium or 7 pcs. large
- salt - 1/2 tbsp. l.
- vanilla sugar - 10 gr.
- raisins - 250 gr.
Step-by-step instructions for a simple Easter cake recipe for beginners

A simple recipe for delicious Easter cake without yeast and without dough, step by step
The following simple recipe for a delicious Easter cake does not require any yeast or dough. Let's say more, it doesn't even contain eggs, but this in no way affects its delicate texture and delicious taste. Take this simple recipe for delicious Easter cake without yeast and without dough, and surprise your guests with amazing Easter cakes!

Necessary ingredients for a simple recipe for delicious Easter cake without dough and yeast
- kefir - 300 ml
- flour - 350 gr.
- butter - 100 gr.
- granulated sugar - 150 gr.
- baking powder - 4 tsp.
- vanilla sugar - 1 package
- zest of one lemon
- pinch of salt
Step-by-step instructions for a simple delicious Easter cake without yeast or dough
- Sift the flour - this will make the cakes more tender and airy. Add baking powder and sift again.
- Melt the butter in a water bath, add the zest of one lemon, vanilla sugar and regular granulated sugar. Mix everything until the sugar grains dissolve.
- Pour kefir into the oil mixture and mix.
- Wash the raisins, dry them and sprinkle with flour. Add raisins, then add flour in portions and knead a homogeneous thick dough, similar to rich sour cream.
- Using a wooden spoon, scoop the dough into baking pans, filling them halfway. By the way, the molds should be greased with butter so that the beans come out better after baking.
- Place the cakes in the oven (180 degrees) for 35-40 minutes, depending on the size of the molds. We add glaze, powdered sugar or chocolate to the finished cakes.
Delicious Easter cake: a simple recipe with cottage cheese and dry yeast
The following simple recipe for delicious Easter cake is based on cottage cheese, milk and dry yeast. Light curd dough is ideal for delicate Easter baking. Find out how to make a very tasty Easter cake using a simple recipe using cottage cheese and dry yeast below.

Necessary ingredients for a delicious Easter cake according to a simple recipe with cottage cheese and yeast
for test:
- cottage cheese - 200 gr.
- milk - 200 ml
- dry yeast - 2 tsp.
- butter - 50 gr.
- eggs - 2 pcs.
- sugar - 125 gr.
- flour - 600 gr.
- raisins - 100 gr.
- salt - 0.5 tsp.
for glaze:
- lemon juice - 1 tsp.
- milk - 2-3 tbsp. l.
- powdered sugar - 150 gr.
Instructions for a simple recipe for delicious Easter cake made with cottage cheese and dry yeast
- Grind cottage cheese with eggs, sugar and melted butter. Salt and mix well.
- Add yeast to warm milk and mix. Combine milk and curd mass together.
- Wash the raisins and mix with a spoonful of regular flour - this is necessary so that the berries are well and evenly distributed over the dough.
- Add raisins to the liquid base and begin adding flour in small portions, kneading a thick dough.
- Cover with a towel and leave warm for an hour and a half. Then lightly knead the dough and again wait 40 minutes for it to rise.
- Place the finished dough into molds, filling them 3/4 full, and bake at 160 degrees.
- Prepare the glaze: mix powdered sugar with milk and lemon juice, grind until smooth. Cover the already cooled cakes with glaze.
A very simple recipe for Easter cake in a slow cooker, step by step
A multicooker can significantly save time when cooking, including when preparing Easter cake according to the following very simple recipe. This version of the dough is very quick, as it is prepared without dough and long kneading. Therefore, if you have a miracle helper in the kitchen, then be sure to adopt the following simple recipe for Easter cake in a slow cooker.

Necessary ingredients for a simple Easter cake recipe in a slow cooker
- flour -0.5 kg
- water - 200 ml
- butter - 150 gr.
- eggs - 3 pcs.
- sugar - 180 gr.
- dry yeast - 11 gr.
- powdered milk - 1 tbsp. l.
- vanilla sugar
- pinch of salt
- candied fruits to taste
Step-by-step instructions for a very simple Easter cake recipe in a slow cooker for Easter
- Pour water into a saucepan and add dry milk, mix and heat to 30 degrees.
- In a separate saucepan, melt the butter.
- Pour milk into a large container and add yeast, stir.
- Separately, beat the eggs with salt into a light foam.
- Add the cooled butter, sugar and eggs to the milk, mix and gradually add flour, kneading a liquid, homogeneous dough.
- All that remains is to add chopped candied fruits and, for example, nuts to the dough. Mix everything with a mixer fitted with spiral attachments.
- Place the dough in the multicooker bowl and select the “Warming” mode for 5-7 minutes. Then, without opening the lid, leave the dough for another hour.
- After proofing, turn on the “Baking” mode and the time is 55-65 minutes. Decorate the finished cake with protein glaze and candied fruits.
Delicious and simple recipes for Easter cakes with dry yeast, video
Among the delicious and simple recipes for Easter cakes with dry yeast, there is one that is really worthy of your attention. Easter cake, a simple recipe for which you will find below, is ideal for beginners even though it contains yeast and dough. Also, this delicious and simple recipe for Easter cake with dry yeast (video below) can be used in a slow cooker or bread machine.
Making Easter cake is a difficult and troublesome task. Not every housewife can find time to knead dough and bake. Moreover, Easter is a special dish. In addition to certain culinary actions, you also need to put your soul, your energy into the cake, at each stage you need to perform not just mechanical actions, but pamper the dough, caress it. A woman, especially a working woman, does not always have time for this. But even if you really don’t have time, then it’s still better to make Easter cake with your own hands than to buy it.
If you prepare the dough using the straight method, it will take less time and will be less troublesome than preparing the dough. In this case, the yeast must be fresh and of high quality. Let's prepare a delicious, unpaired Easter cake with poppy seeds.
Taste Info Kulichi
Ingredients
- 500 g flour (plus 1-2 tbsp for sprinkling),
- 20 g yeast,
- 3 eggs,
- 300 ml milk,
- poppy seed - to taste (I took 3 tbsp),
- 0.5 tsp vanillin (can be replaced with vanilla sugar),
- 6 tbsp. Sahara,
- 30 g butter,
- 1-2 tbsp. sunflower oil,
- 0.75 tsp salt,
- ready glaze,
- sprinkles

How to cook simple Easter cakes without dough with poppy seeds
For Easter cake we will prepare the highest quality products - fresh yeast, premium flour, it is better to use homemade eggs, if possible. Live yeast can be replaced with pressed yeast in appropriate proportions.
Heat the milk until warm (not hot), dissolve salt, sugar and yeast in it.

Since we cook in a quick, straight-forward way, it will take us less time than usual and we mix all the products without interruptions.
Let's add eggs. Set aside one egg white to prepare the glaze.

Be sure to sift the flour. This will enrich it with oxygen and the dough will be fluffier. First, let’s not add all the flour.

Let's knead. We ended up with a viscous mush.

Place this paste on the table, sprinkle it with flour.

Knead the dough, adding flour as needed. We try not to add too much flour so that the dough does not become heavy.

Add melted butter to the dough. This will make kneading easier and the dough will stick to your hands less.

Knead the dough well so that it comes away from your hands.

Place the dough in a deep bowl and leave for 2 hours to mature.
The dough for Easter cakes without dough turns out soft and not tough.

Punch down the ripened dough and add poppy seeds to it. Poppy seeds, in fact, can be added earlier during mixing.

Grease the baking molds with sunflower oil. Fill the forms halfway or one-third.

Let's wait until the dough rises in the molds. Today I will be covering the beads with icing, so there is no need to brush them with egg on top.

Teaser network
We bake straight cakes by preheating the oven to 180 degrees for about half an hour, but keep an eye on the condition of the baking; it may take more or less time depending on the size of your molds.

Remove the cooled Easter cakes from the molds.

Since today I am offering a quick version of Easter cake, I will make the glaze from a store-bought mixture. It's very fast, convenient and always works. In addition to the powder, we will need the egg white that we set aside earlier.

Using a mixer, beat the egg whites into a foam.

Add powder and beat again.

Today I have finished lilac glaze. You can buy white frosting and use food coloring to color it any color you like.

Grease the top of the cakes with glaze.

Easter cakes with poppy seeds are ready. If you wish, you can decorate them with mastic decorations, confectionery sprinkles, etc.

Despite the fact that our recipe is not complicated, Easter cakes look festive and elegant.