Easter themed puff pastry craft. Crafts from dough for Easter
Website: Testoplasty - crafts from salt dough
Easter is coming! Another spring holiday. It is customary to celebrate the end of Lent not only with Easter cakes and colored eggs. Believers decorated their homes with flowers and spruce wreaths, figurines of birds and animals. Including, of course, molding from salt dough. And I propose today to create easter decoration in the form of an angel holding a painted egg.
I suggest making the figurine itself from baked dough, and painting the egg with bright colors.
Using a stencil, we cut out the base of our angel.
The thickness of the rolled out dough is approximately 3-4mm. Don’t forget to smooth out all the corners and uneven edges after cutting.
Although for the strength of our future Easter decoration I added wallpaper glue to the batch, I propose to strengthen it with additional reinforcement. For this I used ordinary toothpicks.
Attach the legs and make the toes in a stack. Don't pay attention to the fact that there are only four of them. :-) Our Easter decoration is a symbol, and realism is not the most important thing in it.
Now let's start decorating the wings. In fact, not everything is as complicated as it seems at first glance. Look carefully at the photographs.
Now we will make the bottom of the skirt.
Pay attention to the imitation of folds.
To make the dress look more voluminous, add crumpled foil (see photo).
Now cut out a trapezoidal piece from the thinly rolled dough. Again, imitating the folds of the dress, we will lay it out, decorating the bottom with another frill.
When creating the hands, I used blunt end thick brush and pressed indentations in the sleeves.
I made the hands themselves from teardrop-shaped blanks, dividing their thick parts into fingers in a stack. By the way, there are four of them too!
We make a collar from a round cake.
To create an ornament, you can use many objects that are completely unsuitable for these purposes! For example, an ordinary screw pressed into the dough will give us a circle with a cross in the middle. A button with an interesting texture can be glued to the end of a carpentry wooden cap. In general - use your imagination!
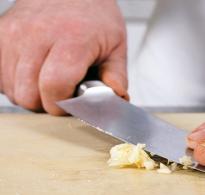
We also make the details of the face symbolic. To create hair we use a garlic press. Don't forget to also use a ballpoint pen to make a couple of holes in the wings. Then we will pass a cord through them, on which our Easter decoration will be attached.
All! Now we send our angel to the oven to dry.
After about three hours, you can accentuate the relief with a coffee solution. Let's glue the braid, and tint individual elements of the ornament with gold paint and varnish. But, no flowers! Baked dough, as a rule, two-color. And here’s another reason: we’ll make the Easter egg that the angel is holding in his hands colored.
By the way, we will dry it (so that, God forbid, it doesn’t crack) naturally. Longer, but more reliable! Please note that we place the egg on a special stand, putting it on a toothpick. With this option it will be more convenient to paint. And you don’t have to worry about the hole that appears in the egg. This will be the side to which we will glue the egg.
Holy Easter is one of the most anticipated holidays of the year. Both adults and children look forward to it. And the main reason for this is not only the religious significance of this day, but also delicious treats which every family prepares on this important day.
We would like to offer you a master class on making dough crafts for Easter with your own hands.
Easter basket
To make an Easter basket from yeast dough, you need to take the following baking ingredients:
- fresh yeast – 2.5g
- warm water – 1/2 cup
- milk – 1/2 cup
- eggs – 1-2 pcs (one for dough, one for greasing)
- sugar – 1/4 cup
- salt – 1/2 tsp.
- olive oil – 1/4 cup
- flour - 4 cups
By using step by step photos It won’t be difficult to make such an interesting craft from dough for Easter.
Let's start:
1. In a glass bowl (preferably with deep edges), you need to combine milk with water. Mix two tablespoons of water with milk and add yeast. Stir thoroughly and leave to brew for a few minutes.
2. Beat the egg, add the resulting mixture of milk, water and yeast, then add olive oil, salt and sugar. Mix thoroughly until smooth.
3. Add flour to the resulting mass. First you need to add half a glass, mix, then gradually add the remaining amount of flour.
5. The next step is to twist ready dough into rollers. Heat-resistant material should be used as a weaving form. glassware or a cake pan. And before you start applying the dough, you need to wrap it in foil.
7. Apply the resulting strips evenly to the mold, connecting at the top. On average, there are 14-15 flagella per form. Now you need to put something heavy and round on top of the strands to make the bottom (you can take a glass bowl)
9. In a separate bowl, mix one egg, a tablespoon of milk and a little olive oil. Lubricate the entire dough basket with this mixture.
10. Place the basket on a baking sheet covered parchment paper into the oven, preheated to 180-190 degrees. Bake for 20 minutes. The dough should take on a golden brownish appearance.
11. When you remove the basket from the oven and remove it from the baking sheet, there will be a mark of dough and utensils on the paper. You should make a braid of the same size along it. This will be the edging for our Easter basket. To make a handle you will need wire. We measure the required length, wrap the wire with foil, and wrap the dough on top.
12. We don’t wait for the dough to rise, but immediately put it in the oven.
13. We attach the finished edging with toothpicks, and insert the handle in the same way.
The Easter basket is ready! Now you can decorate it with a napkin, ribbons and put Easter cakes and other Easter treats in it.
Easter craft made from salt dough: painted eggs
To prepare these crafts you need to take the following ingredients:
- flour – 2 cups
- salt – 1 glass
- water – 1 glass
- acrylic paints or gouache
- egg-shaped mold
- tassels for decorating with ornaments
- hanging tape
If you don't have a suitable mold, you can easily make it yourself. You need to cut off the strip plastic bottle and secure with tape, giving it an egg shape.
Let's start making crafts from dough, photos will help us with this:
1. In a deep dish (bowl), mix salt, water and flour, knead the dough.
2. Roll out the resulting salt dough to a thickness of 1-1.5 cm.
3. Using egg-shaped molds, “squeeze” eggs out of our dough.
4. Using a rod from an old felt-tip pen or pen, we make holes for the ribbon in the resulting molds.
5. Place the resulting eggs from the dough on a baking sheet covered with parchment paper for quick drying. Place in the oven over very low heat, remember to leave it slightly open so that the dough does not bubble.
6. After the crafts have dried and cooled, we decorate them as desired. Leave to dry.
7. Take a long ribbon of red or white flowers- symbols of Easter, and we pierce them through the holes in our colored eggs.
We made a wonderful craft from salt dough for Easter in the form of a garland.
Easter crafts made from salt dough can decorate the Easter holiday in the best possible way, making it warm and joyful. An Easter egg made from salt dough on a stand will best help convey the mood of this have a wonderful holiday. Dough crafts do not require much time to make, and the pleasure of modeling and coloring is simply indescribable. The kids are delighted, and so are the parents!
Crafts from salt dough: DIY Easter eggs
The master class of this craft will allow you to cope with the task without difficulty.
You can, of course, roll the entire egg from the dough. It will just take a very long time to dry, it will be quite heavy and may crack and swell when drying. Salted dough gives a good result if its thickness in the product does not exceed 7 cm.
Therefore it is best to do easter eggs– dummies on a frame. IN in this case the best option is an empty eggshell. To prepare it, you need to make two small holes in a raw egg with a sharp object - maybe a darning needle, or the tip of a knife. The inside of the egg is blown onto a plate to be used as food.
Now you should start preparing the mass for modeling. Cup regular flour(without impurities), half a cup of finely ground salt is poured into a bowl and mixed. Water is added little by little to the mixture and everything is mixed immediately. Then the dough is kneaded on the table. It should have the consistency of dumplings.
An empty shell is placed on the rolled out pancake.
Then the entire frame is wrapped in dough, the seams are smoothed out with fingers dipped in water, and the surface is leveled by rolling the egg on the table. At one end, you should make a puncture in the dough shell in the place where the shell has a hole, otherwise during baking, the air that has increased in volume from heating will cause an unsightly swelling.
From a thinly rolled piece for modeling mass, letters, flowers, berries, leaves are cut out with a sharp knife - everything that the master’s imagination suggests. Having moistened with water the side of the future bas-relief with which it will be attached to the main part, the sculptor carefully applies the applique in the right place. Using fingers dipped in water, carefully smooth out the seams so that there are no cracks.
You can emphasize the border of the bas-relief using a knife. The point should be applied with the flat side - the sharp part should be directed directly to the line where the bas-relief rises above the plane.
You can bake an egg in regular oven, but it is preferable to do this in the microwave. The mode should be set to “defrost”, time – 1 minute. This will be a test firing. To prevent the egg from becoming deformed, it is best to place it in a cup with flour. Then, at the point of contact with the plane, dents do not form on the egg.
After checking, you can putty: use pieces of soaked dough to fill the resulting unevenness and cracks. If, after all, swellings have formed, they can still be cut off with a knife or scissors so that the “repair” area can be covered with a wet mass.
Now you can “burn” the egg in a microwave oven in the usual way, but it is better to do this in several steps for 2 minutes, checking the result each time.
After “baking” the egg is painted with watercolors, acrylic paints or gouache. After drying, you can coat the product with regular colorless wood varnish or spray it with hairspray.
Modeling on the theme “Easter” involves making an egg stand. It is most convenient to perform the stand in three stages. First you need to form a cup. For this, the master can take a plastic cap from an air freshener or dichlorvos. First you need to lubricate it with oil: Vaseline, sunflower, margarine. Then you need to carefully cover it with a thin layer of rolled out dough and smooth out the joints.
After spreading the dough in an even layer, you need to cut off the excess with scissors. The lid should protrude slightly above the dough. It is possible to make a “roller” along the edge of the “glass”; you can decorate the stand with a bas-relief.
The “cup” can now be placed in the oven with the bottom up. After 1 minute of “baking” in the “defrost” mode, the part is removed from the cabinet, and the mock-up lid is easily removed.
The leg rolls out of small piece dough, attach the moistened end to the bottom of the cup, the attachment point is smoothed with wet fingers. The part is again placed in the oven, which is turned on to “defrost”. Place the part with the leg up and “bake” for a minute.
For stability, a piece of dough covered with dough should be attached to the leg of the stand. metal cover. Don’t forget to moisten the attachment point and carefully smooth the seams! It is better to dry the product upside down for the first time.
After the last baking (at normal temperature), the stand-glass is painted with watercolors, gouache or acrylic paints and varnished.
This decoration can last as long as you like: a year, two or longer. But you need to remember that this product is fragile and should not be dropped. And it is not recommended to wash the egg with the stand with water.
Master class on how to prepare salt dough and make crafts from salt dough for the holiday.
Are you ready for the Resurrection of Christ? A funny souvenir will give your loved ones a festive mood on the bright day of Easter.
Materials: flour; water; “Extra” salt; paints: watercolor, gouache; knife; rolling pin; shaped roller for dumplings; plastic yogurt cups; brush; foil; varnish for woodworking.
DIY salt dough crafts
1. First, knead the dough. The simplest and reliable recipe is as follows: 2 cups of flour, 1 cup of “Extra” salt and 200 ml of water. Add water gradually until a plasticine-like mass is formed. If the dough crumbles, add water, if it sticks to your hands, add flour. During the modeling process, keep any excess dough in a plastic bag.
2. Carefully cut off the “sides” of plastic yogurt cups with scissors.
3. Roll out the dough into a thin layer, trim the edge and attach a cup (blank) to “wrap” it with dough.
4. “Wrap” the cup (blank) in the dough, bending the upper edges inward.
5. Use a knife or a stack to push the relief pattern over the entire surface of the future basket.
6. Roll out the dough for the bottom of the basket, place the resulting piece on top and trim off the excess dough. Decorate the bottom with a shaped sausage squeezed out of a syringe.
7. Place foil inside the created basket.
8. Now let’s prepare a handkerchief on which the egg will lie. Roll out the dough, trim the edges with a shaped roller - and apply a pattern with the imprint of a designer part (or a button).
9. Place the handkerchief on top part baskets, carefully making a depression in it.
10. Roll a sausage for the bunny’s legs and attach to the bottom of the basket, after moistening the attachment point with water. Insert a toothpick into the intended attachment point of the torso to the legs. Roll a ball for the body, flatten it and attach it to the legs. Insert half a toothpick into the upper body to secure the head.
11. Dress up the bunny. Roll out a long strip for the skirt, cut one side with a knife and the other with a curly roller.
12. Place the skirt in pleats at the waist, pressing down the attachment points with the stack.
13. Make the bunny's paws. Roll out two large paw droplets, flatten them and apply veins in the places of the pads with a knife. Attach the legs to the shins.
14. For the front legs, roll two sausages, flatten one edge and cut into fingers with nail scissors. Attach it to the body at the collarbones, and place the paws on the basket.
15. Make the collar on the dress in the same way as you did the skirt. Use a syringe to decorate the top of the collar with ties.
16. Roll a ball for the head, give it a cone shape, and then make indentations in it for the eye sockets.
17. Attach the head to the body. Roll a small ball for the face. Use a stack to push down the places of the jowls, nose and mouth. Blind and attach the eyes.
18. Make ears. To prevent them from falling over and to hold well, insert part of a toothpick into them. Attach them to your head as well.
19. Style your hair using “noodles” by squeezing out the dough with a garlic press.
Preparing salt dough crafts for decoration
20. Dry the bunny for 5-7 days, and then paint it with watercolors, gouache or acrylic paints and open it with waterproof wood varnish. Make a pysanka and put it in the basket.
You can make an Easter chicken in the same way as the Easter Bunny.