How to decorate a cake with an edible stamp. What is sugar photo printing? How to make photo printing on a cake yourself at home? What is edible paper made from?
Today, cakes are not just a sweet and tasty dessert. This is a real work of art. Pastries decorated with fondant, a variety of confectionery flowers and patterns, and the latest hit - a photograph on the cake. A sweet cake with a photo will be an excellent gift for any occasion. And making it is not as difficult as it seems. The main thing is to have a little patience.
Photo by Shutterstock
Cakes decorated with photographs appeared not so long ago and immediately became very popular. After all, they are very original and memorable. As a rule, they are most often made to order, but if you wish, you can cook them yourself.
How to make a cake with a photo
First, bake the cake. He can be absolutely anything his heart desires. After you assemble it: smear it with cream, decorate the sides and prepare the surface for applying the photo, you can proceed to the most difficult part of the task - making the photo.
For this you will need: - photograph (original); - food printer; - food paints; - food paper; - scissors; - glaze for fixing; - brush for applying the photo.
Choose the photo you would like to decorate your cake with. It can be either someone's portrait or an entire family photo. You can also place a photo of a character from a cartoon, movie or book on your cake. If you are not entirely satisfied with the photo, first process it in a special computer program. Alternatively, you can add your own details to the photo - frills, flowers, butterflies, etc. Usually the number and meaning of decorations depends on what event you are preparing it for.
Next, you need to adjust your photo to the size of the cake. After all, it should not go beyond the limits, otherwise a harmonious image will not work. Moreover, such a task will not present any particular difficulty. After all, modern technologies make it quite easy to calculate and adjust everything.
If you wish, you can even create a whole collage from different photographs. Just be careful that the picture does not go beyond the frame
All that remains is to print your masterpiece. To do this, insert food paper into a special printer (this is the kind that can be eaten). It comes in rice, waffle or vanilla. Add food coloring to the printer. Remember that the more of them (different colors) there are, the more colorful and brighter the cake will be. That's it, print your photo.
Correct the finished image - trim off the excess edges with scissors. Then place the photo on the cake. Everything needs to be done very carefully so as not to smear the paint with your fingers.
Prepare icing that will add a special shine to the photo and securely attach it to your sweet cake. This glaze is prepared from ordinary edible gelatin. Melt it until liquid in a water bath. And you can apply it to the cake to give it a glossy shine. Remember that the layer must be very thin. You need to apply two layers of glaze.
When you prepare gelatin for glaze, be sure to keep in mind that it must be continuously stirred so that all the grains of gelatin melt and the mass itself turns out homogeneous. Otherwise there will be bumps and defects on the cake.
A cake with a beautiful image or your photo is the best birthday gift. Many years ago this seemed impossible, but modern technologies make it possible to create such works of art. Many people don't know whether photo cakes are edible or just decorations. In fact, you can eat the photo cake. The photo is based on edible paper and food coloring, which do not affect the taste of the dessert in any way.
How they take photos on cakes
The photos on the cake are taken using a special printer. Thanks to a special program installed on your computer, you can print photos using food coloring on edible paper. At first glance, this cake seems unsuitable for eating. But the picture does not affect the taste in any way, and the dye and paper do not harm human health. Typically, the paper product is based on rice or waffles, which do not have a pronounced taste and are completely edible. The same method is used by https://myata.in.ua
How to make a cake with a picture

The device is loaded with natural food colorings. They are the ones who take the photographs. But the printer is quite expensive, so you should only buy it if making such cakes is a business; for a home party it would be more profitable to order a cake. You can visit a pastry shop, bring a picture on a flash drive and ask the employees to print the image on the cake. The children will be delighted.
Typically photographs are used for flat types of cakes. Then the image will look beautiful. It is very difficult to print a picture on Sphere or Millennium.
Such tori are suitable not only for birthdays. They can be ordered for the following holidays:
- Outlet. Group photographs are usually taken.
- Wedding. Cake with a photo of the heroes of the occasion.
- Other holidays, for example, March 8th. It is appropriate to make a picture with flowers here.
The process of making a cake with a picture

The algorithm for creating a cake with a photo is as follows:
- The cake is being baked. It can be anything, the number of cakes, the size of the dish and the ingredients do not in any way affect the use of the photo. The cake is decorated with cream, and the surface is prepared for applying the photograph.
- Now you need to prepare a special printer, edible paper and food paint.
- A photo is selected. In addition to this, you will need a brush to apply the picture, icing to fix it and scissors to cut out the paper.
- The photo is adjusted according to the size of the cake. It should not go beyond the boundaries of the dish, otherwise it will turn out ugly. You can adjust the photo on your computer.
- The printer is now refilled with paper and inks. The more colors, the brighter and more colorful the dish will be.
- The photo is printed.
- The finished image is corrected - unnecessary edges are cut out with scissors. The finished photo is placed on the cake.
- Now the glaze is ready. It will add shine to the photo and secure it on the dessert. It is prepared on the basis of edible gelatin. It is heated in a water bath until it becomes liquid. Apply to the cake with a brush. The layer should be thin. Apply 2 layers, one on top of the other.
A cake with a picture or image of a person is a real work of art, and a good present for any occasion. You can order such cakes from specialized pastry shops or make them yourself (if you have a printer and all the necessary ingredients).
03.10.2018
Photo printing is one of the most popular ways to decorate desserts today. Most often, such pictures can be seen on cakes or cupcakes, less often on rolls, pancakes and rolls. The benefits are obvious. Firstly, it is very beautiful and original. And secondly, you can make a personalized gift and print almost any photo, be it a cartoon character, a club emblem, or even a photo of the birthday boy himself.
Process of making sugar picture
To make a picture on a cake you will need only two things:
- food paper;
- special printer.
There are different types of edible paper - sugar, rice, waffle, fruit and berry, vegetable or glazed. But they all rely on three main ingredients: water, rice flour and salt. But then, depending on the type of paper, additional ingredients are added, such as starch, sugar, vegetable oil, molasses, palm oil, food additives, stabilizers, emulsifiers, etc. Such paper can be purchased at any confectionery store.
As for the printer, standard models, of course, will not work here. You need a special machine that is suitable for sugar paper and uses food coloring instead of regular ink. Here you need to understand that keeping such a printer at home if you use its services extremely rarely is impractical. It is better, if necessary, to contact a specialized laboratory.
And the most important thing is to choose a drawing. Finding the right picture on the Internet is not a problem now, you just need to choose the highest quality image. And then use Photoshop to adjust it to the size of the future dessert. You can do this yourself, or again turn to professionals who will select the drawing and edit it to the desired parameters. That, in fact, is all you need to know about how to make a sugar picture.
Drawings on sugar paper dry quite quickly. Some people advise putting the sheet in the freezer immediately after printing and keeping it there for no more than a minute. Others prefer to dry at room temperature. This takes a little longer, but the risk of damaging the image is completely eliminated, since it does not withstand the cold well. And if you keep it in the freezer, the drawing may crack.

By the way, the sugar pattern can also deteriorate from constant contact with air. It will dry out and begin to crack. You won't even be able to trim it later, as the entire surface will be too brittle. So how to store a sugar picture? Experienced confectioners, after the image has been printed and dried, put the paper away in a regular stationery file. You just need to properly secure its open part with tape. In this form, already printed sugar paper can last up to 3 months and will not lose its appearance.
And one more piece of advice. If you need to translate a printed drawing, it is better to do it in something hard so that the paper lies flat and does not wrinkle. And when you pick up the file, do it as carefully as possible and better hold it by those parts where there is no image, or by the sides. Otherwise, the heat from your fingers may smear the paint.
If you need to trim a printed design (for example, there are free margins or the size is too large, or you need a curly image), use the sharpest possible objects. Experienced confectioners even keep a medical scalpel in their arsenal for such purposes. They are very comfortable to work with, as it fits well in the hand. You can also use a regular kitchen knife, but only a small one.

If you need to cut out a round design from an A4 sheet (and this usually happens for cakes and cupcakes), a sharp wheel will work well. True, for a more even result, it is better to rotate not the tool itself, but the surface on which the drawing lies. This is probably all you need to know about how to cut out a sugar picture.
This is the final stage of any preparation. And at the same time the most responsible, because it would be a shame to ruin everything at the final stage.
It is best to apply sugar paper on a mastic, flat surface. To do this, just grease it with decor glue and carefully transfer the design. It is advisable to first make some markings on the surface of the cake in order to accurately hit the center. Otherwise, you may not be able to move the drawing.

If the surface of the dessert is creamy, as is often the case with cupcakes, then the confectioners use a special lining made of mastic. It is cut out exactly to the size of the design itself, coated with decorative glue, and then the image is placed on it.
Well, one more piece of advice. When placing the sugar design on the cake, it is a good idea to hide the edges as they will still show cutting marks. In this case, any cream is ideal - it will add taste and neatness.
Nowadays you won’t surprise anyone with an edible stamp on a cake. Technologies have advanced so much that images can be applied to gingerbread cookies, chocolate, and meringue. For beginners, this is simply a salvation. Without special culinary skills, you can decorate a cake no worse than that of a professional pastry chef. However, the more fans there are of waffle and sugar pictures, the more often the same questions are asked. In this article we will answer everything in as much detail as possible!

What is edible photo printing?
Edible photo printing is an image printed on a special food printer, on sugar or wafer paper with edible ink. To be honest, most people print on a regular modified Canon or Epson printer, but it is very important that these are completely new devices that have never been printed with conventional ink. Printing ink must be food grade only and have all required certificates.
Sugar or waffle picture for the cake?
Sugar paper costs several times more than wafer paper. Does it mean that it is better, or is it not worth overpaying and you can get by with a “waffle”? Let's figure out what's what and in what cases which paper is better to choose.
Sugar paper- dense, almost opaque, elastic. The image on it is of the highest quality. If we talk about taste characteristics, sugar paper has a sweetish taste with a slight vanilla tint.
The quality of paper may differ from one manufacturer to another, which significantly affects printing. There is a denser, less whimsical, but long-absorbing paint (because of this, marks from the rollers may appear). There is a very thin one, very sensitive to moisture and condensation, but with excellent color rendition and the final image is almost free of defects. We talk about this in more detail in the article.
Since the paper is soft, it does not require additional coating with decor gel. The sugar picture dries quickly. We recommend printing on it no more than 3 days before use.

Wafer (rice) paper- thinner than sugar, has a porous structure, fragile and brittle. Wafer pictures for cakes can be printed on two types of paper:
Soft, thin, easily bendable, translucent. Such paper will not withstand continuous and bright filling, will swell, and is not suitable for all types of coating. However, this is a great option if you need to make small decorative elements: flowers, leaves, sails, butterflies, etc.

Dense, less translucent, fragile, almost unbending. It is already difficult to carry out figured cutting (of the same butterflies) from such paper. Suitable for printing images with a dim background or without a solid fill. Compared to the sugar picture on the cake, it will look duller.
Wafer paper is tasteless. A decorative gel coating is required, which makes the paper soft and adds shine.

Thus:
- If you want the edible picture on the cake to be a bright, juicy, full-fledged photograph, you need sugar paper.
- If you want to put a picture not on mastic or butter cream, but on a cheesecake, jelly cake, delicate cream - sugar paper has maximum strength.
- If you are printing a small image that you plan to cut out, thin wafer paper will do.
- If the image has a dim background or no background at all; If you need muted colors, thick wafer paper will do.
- If you are printing a figured topper or medallions on cupcakes that need to hold their shape well, then you need to use thick wafer paper.


If you want to use an edible stamp for gingerbread or candy, then sugar paper is more suitable.


What sizes are sugar and waffle pictures printed on a cake?
Edible pictures for cakes are printed on sheet A4 (21*30 cm), or A3 (29*42 cm). White margins around the edge are 1 cm.
The size of the printed image can be smaller, round, or a collage of several objects. This does not change the price of an edible picture; you pay for 1 sheet, regardless of what is depicted on it.
If we talk about cupcakes, then most often they order pictures with a diameter of 6 - 6.5 cm. There are 12 such circles placed on a sheet.

What additional ingredients and equipment are needed to apply a sugar or waffle picture to a cake?
It is advisable to cover the waffle picture on both sides with transparent (in both the case of mastic and cream coating). It will make it soft, shiny, brighter. The sugar pellet should be coated with gel on the reverse side if you are laying it on mastic. Whether to cover the sugar side with gel is at your discretion. When applying a sugar picture to butter cream or chocolate ganache, you don’t have to cover it with gel at all.

How to transfer an image for printing
You can send your image by email [email protected] in advance or bring it with you on a flash drive (for residents of Chelyabinsk).
How long does it take to print a sugar or waffle picture on a cake?
Printing speed is comparable to that of a conventional color printer. If you visit our store, we will print the image in front of you.
Attention! We print pictures in advance only for regular customers. In other cases - either by prepayment (to a Sberbank card or Yandex money) or with you.
How to store sugar picture on a cake?
- After printing, the sugar image for the cake will be packaged in a sealed bag to prevent drying out, which makes the image hard and brittle.
- A sugar picture can be stored in a bag for 2-3 days, then it begins to dry out and loses its properties.
- Store in a dry, dark place, at temperatures up to 25 degrees. Avoid bending and direct sunlight.
- You can’t store it in the refrigerator!
- If you want to cut/cut out the printed material, do it immediately before placing it on the cake, otherwise the paper will begin to crumble from drying out and become brittle. A special protective layer is attached to the sheet; it is better to cut with it and then remove it.

How to store a waffle picture?
Store in a dry, dark place, at temperatures up to 25 degrees. Avoid bending, direct sunlight, water, and condensation.
Color rendition
This is a very important point that you should pay attention to when ordering an edible picture.
1. The image on your monitor and ours may differ
2. The printer “sees” color in a third way
3. Printing is on edible paper, with edible ink. They have completely different properties. It is basically impossible to achieve the effect of cool typography and photo paper.
When asking to print a picture without you and without first checking the color, you should be prepared for the fact that the finished picture will differ from what you expected. Claims regarding color in this case will not be accepted.
- If it is important for you that the color and brightness of the picture be the way you imagine it, ask the manager to do a color test on the back of the used sheet. This is especially true for bright pink pictures and passport photos.

On what surface can a waffle or sugar picture be applied?
Mastic
- butter-containing cream (butter + condensed milk, butter + chocolate, butter + curd cheese)
- protein butter cream
- protein cream
- chocolate ganache
- chocolate
- icing for gingerbread
- isomalt (caramel)

If you still have questions, ask them in the comments!
Using edible photo printing is a very effective and easy way to decorate your birthday cake. A cake with your photo or your child’s favorite character will be a spectacular highlight of the holiday. Let's talk about what it is, where to buy it and how to use it.
What is edible photo printing?
Just as in a regular printer a picture is printed on paper with ink, you can print any edible picture on a special printer. Of course, the ink and paper used are different from those used for regular printing. Food dyes are used, i.e. suitable for human consumption. Paper can be of different types: sugar or wafer. Differences between printing on sugar and wafer paper:
- Printing on wafer paper is significantly inferior in quality to printing on sugar paper. For my cakes I most often use sugar paper, the pictures are clear and bright.
- Printing on wafer paper is 2-3 times cheaper than printing on sugar paper. Prices for a candy store in Moscow: 150 rubles. for waffle paper and 350 rubles for sugar paper per A4 sheet.
- The taste is different. Wafer paper is tasteless, neutral, sugary sweet.
- When placing the sugar picture on the cake, you need to spread the gel only on the bottom, at the point of contact with the cake. The waffle picture needs to be covered with gel on both sides.
- Accordingly, the waffle image on the cake will shine due to the gel, while the sugar image will remain matte.
Where to buy edible photos?
This question seems difficult only at first glance. Of course, buying a food printer for home use is an unwise solution. But in Moscow there are several confectionery stores that print photos on edible paper. For those who do not want to look for addresses and travel to these stores, there is an option to order a picture via the Internet. By searching in search engines or on social networks, you can find communities and private traders who provide this service and will be happy to send you an order to any city via mail. By the way, prices for private sellers are slightly lower, even taking into account shipping.
A partner of my site is a group in contact "Edible pictures to order." Excellent print quality, good prices, mail delivery. When ordering in this group, enter the code word "Decor-cake" and receive a 3% discount. I try to find the best deals for readers of my site and specially negotiate discounts for you 🙂 If you don’t get a discount, write to me, I’ll sort it out 😉
We will also need decor-gel or bril-gel. It can be purchased in specialized stores, but sometimes such a gel is also found in regular supermarkets. It's called "neutral gel", made by Parfait.
Step-by-step photos of the process of placing a sugar picture on a cake.
1. To decorate the cake with an edible picture we will need:
- lined, fondant-covered cake;
- a printed sheet with the required picture;
- brush, stationery knife;
- decor-gel or bril-gel.
2. If our cake is not A4 size, then we need to cut out the fragment of the picture we need with a stationery knife.
3. Spread a thin layer of gel on the reverse side of the picture.
4. Apply the picture to the cake, smooth it with an iron or your hands.
Everything is ready! All that's left is to add decorations. A cake with a picture becomes a real masterpiece without much effort.
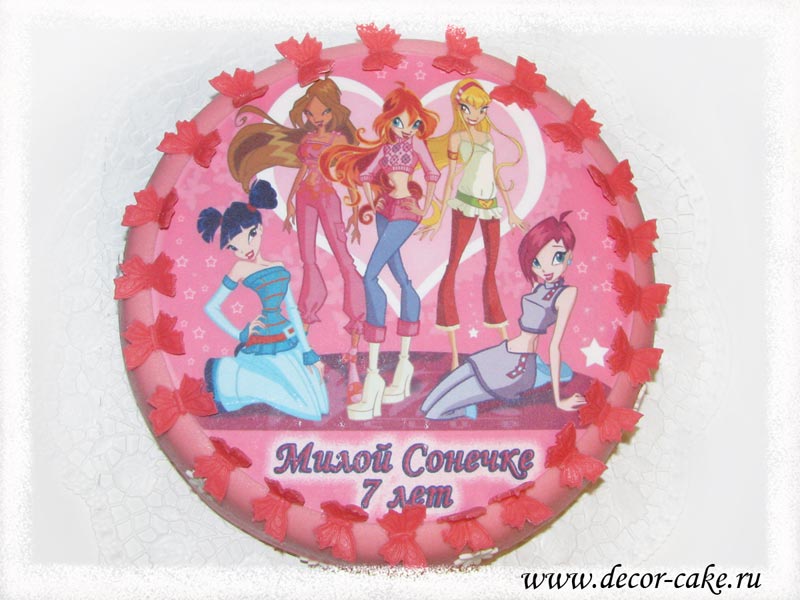
Example of a cake with Winx photo printing:
When using waffle paper during the laying process, there is one difference: the gel must be applied not only from below, but also from above.
I also want to note that you can put a picture on a cake without mastic. But the surface must be flat and smooth.