How to paint eggs for Easter with your own hands. Various decoration ideas
Easter has its own customs and traditions, one of which is the painting of eggs. The article will be useful for both adults and children. Easter eggs are a symbol of a great holiday. Mistresses are in awe of painting eggs, and many tend to come up with new patterns.
The tradition of painting eggs for Easter
There are several versions of the origin of this tradition.
Version 1.
When Jesus was resurrected, Mary Magdalene came to the emperor with the news. Since a gift was needed for such a trip, she took a white egg with her. She said to the emperor, "Christ is risen." The emperor did not believe such news and said that it was as implausible as the fact that the egg turned red. And miraculously, the egg immediately turned red.
Version 2.
Hens in Lent lay eggs non-stop. The owners were afraid that they would spoil. Therefore, we decided to dye fresh eggs red.
Version 3.
When Jesus was a baby, painted eggs were a form of entertainment for him.
What eggs to paint for Easter?
At Easter it is customary to paint chicken eggs: no matter the color or size.
IMPORTANT: For even coloring, wash the eggs thoroughly with vinegar and soap. Otherwise, the paint will take unevenly.
What colors are used to paint eggs for Easter?
Previously, eggs were dyed only red.
Now for the Easter holiday you can find a wide variety of options for painting eggs:
- painting in one color: yellow, green, blue, orange. In fact, the color can be whatever is closer to your soul.
- painting in several colors: many patterns, drawings

How to dye eggs red?
Color the eggs traditionally Red color will help:
- Food colorings
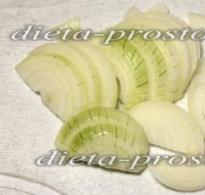
- onion peel
- Beet. Boil an egg along with a whole beetroot. Boil until you get the desired color. You can simply grate a boiled egg with beetroot broth or beetroot, grated

How to dye eggs with onion skins?
- Take a pot filled to the top with onion skins
- Fill with water not to the very edge
- Put to boil for 45 minutes. Boiling time depends on the desired paint color
- Let the potion cool down
- Put the eggs in the husk and cook for 10-15 minutes after boiling
- Boil until you see the desired color
IMPORTANT: Eggs must be completely submerged in water. Turn them over for even coloring.

Food coloring for Easter eggs
Eggs can be dyed with natural and non-natural food coloring.
WITH non-natural dyes everything is clear: go to the store, buy the food coloring of the desired color, dilute the dye in water, put the egg in the water with the dye until the desired color is obtained.
IMPORTANT: Staining with these dyes usually produces a more uniform color. But from this there is a feeling of unnaturalness.

WITH natural the dye issue is more complex. Many natural dyes can be used depending on the desired color of the final egg.
Yellow.
Turmeric will help color the egg yellow. Painting technique:
- In 0.5 liters of water, add 2 tbsp. turmeric, 1 tbsp. table vinegar
- Put the eggs in the water
- Cook until ready

Pink color.
The pink color of the eggs will be given by cranberry juice, in which the boiled eggs lie down until the desired color is obtained.

Dark brown color.
Boil eggs in strong black tea.

Blue color.
Blue color will help to get red cabbage:
- Finely chop 2 cabbages
- Pour 0.5 liters of water into a saucepan
- Add 6 tablespoons to the water. table vinegar
- Pour in the cabbage
- Leave overnight to infuse, after mixing
- In the morning, put boiled eggs into the infusion until the desired color is obtained.

Easter egg painting
Egg painting will look equally good on both pre-dyed eggs and natural colored eggs.
Painting with a permanent marker.
An easy way to paint Easter eggs for those who can draw.

Painting with paints.
For painting, you only need paints and brush thin. Paints can be used the most simple acrylic.
IMPORTANT: With this method, you can decorate the egg with your child and make a painting that you like.

Painting with powdered sugar.
- Prepare the powdered sugar
- Add as much water to it as needed until a thick homogeneous mass is obtained.
- Apply the pattern with a confectionery syringe with a sugar mixture
- Let the egg dry
Wax painting.
- For painting with wax, you will need wax pencils or wax paints.
- Choose the tool you will use to paint: knitting needle, needle, awl, copper wire
IMPORTANT: The copper wire will keep the wax hot for a long time, allowing you to draw more lines at a time.
- Heat the wax up to 65 C
- Dip the tool in wax and apply the pattern

If you do not have the makings of an artist or cannot come up with the desired pattern, use stencils.
- Print a stencil
- Pick up paints and apply them with a sponge or brush
- Attach the stencil to the egg
- Blot with a sponge or brush over the stencil
- Remove the stencil and dry the egg

How else can you paint eggs for Easter?
Colored floss threads.
Wrap the egg completely with different colored floss threads and boil the egg hard.

Beautiful napkins.
- Buy beautiful napkins with a pattern suitable for the holiday
- Cut out the elements you want to transfer to the egg
- Prepare gelatin according to package instructions.
- Dissolve the gelatin granules by heating it
- Apply the cut out pattern to the boiled egg
- Brush over the prepared gelatin
- Align the pattern from the center to the edges

Paper.
- From paper, cut out figures, stripes, patterns
- Attach paper of your choice to the egg
- Wrap the egg tightly with nylon or gauze
- Dip in the desired dye. If necessary, cook in dye.
- Waiting for the egg to dry completely
- Removing paper


Silk.
- Cut a piece of silk in your desired color
- Wrap an egg in it
- Wrap over with gauze or nylon and secure
- Pour water into a saucepan and 3 tbsp. vinegar
- Boil wrapped eggs in water with vinegar for 20 minutes after boiling

- Roll wet egg in rice
- Wrap with gauze
- Dip in dye
- After staining, open the gauze and let dry.

marble effect.
First way.
- Choose two dyes that match in color (preferably light and dark)
- Paint an egg in one of them
- Pour the second into a bowl and pour a few tbsp. vegetable oil (depending on the volume of water)
- Mix water with oil
- Dip the egg completely once into the water so that it catches as many fat bubbles on the water as possible.
- Blot with a tissue
- Let dry


Good day everyone! The upcoming Easter holiday, Holy Sunday of Christ, is one of the most beloved Christian holidays. Solemn, bright and joyful, it symbolizes the salvation of the world and the soul, the possibility of eternal life. Easter comes at the end of winter, when nature wakes up. For Orthodox Russians, Easter is associated not only with the end of Lent and the Easter festive church service, but also with a special Easter table. For experienced housewives, the preparation period is already in full swing. Recipes are collected and carefully rewritten, dyes for eggs are selected.
Colored eggs are an invariable attribute of the approaching Easter. They decorate the table, give them to each other with the words “Christ is Risen!”, and we can no longer imagine this bright spring holiday without painted eggs.
The tradition of painting eggs appeared in ancient times, long before the advent of Christianity, and carries a mythical and sacred meaning. Our distant ancestors believed that it was from the egg that the world hatched. He was given sacred properties. It served as a talisman, helped in the treatment of infertility, guarded the house and family.
Previously, Easter eggs were painted exclusively in red, as it symbolizes the blood shed on the cross, but then they moved away from strict canons. Nowadays, it is possible to color and decorate eggs with various colors, methods and techniques. It all depends on the tastes and preferences of people.
Have you already decided what and how you will decorate your Easter eggs? Today I want to invite you to consider some options for painting these holiday attributes and I hope that you will find something new and interesting for yourself.
If you have children, be sure to include them in this process. This is both useful and entertaining and learning at once.
How to paint eggs for Easter with your own hands?
On the eve of the great Easter celebrations, beautiful and symbolic attributes of this bright spring holiday - Easter eggs - are traditionally made in almost every home. Making them beautiful with your own hands is not as difficult as many might imagine. To paint eggs, you can buy special food colors, decorating kits, paints or markers for painting, stickers, thermal stickers, napkins, or use the recipes of our great-grandmothers, the gifts of Mother Nature, that is, natural dyes.
The most common coloring method is using special food coloring. To do this, you just need to buy the dyes that are suitable for you, which are sold in any supermarket, and, following the instructions, make everything a reality.

When using this method, be aware of the following tips and warnings:
- Be careful when dyeing eggs, as dyes are difficult to remove from clothing.
- The longer you keep the eggs in the food coloring solution, the brighter they will turn out. Start with a few minutes, then increase the staining time. This will be a great experiment for kids!
- In order to make it convenient for you to dip the eggs into the dyes, use a kitchen whisk. This simple idea will help you and your kids keep their hands and clothes cleaner.

There is another interesting way to dye eggs using food coloring and wax. The bottom line is that you rub some part of the egg with wax, dip it in the dye and it is colored only in the part where there is no wax. In this way, similar patterns can be created.
 Those who know how to draw well can paint with edible paints or permanent markers. Moreover, the painting will look great both on krashenka and on just boiled eggs.

The most elementary and not time-consuming way to decorate Easter eggs is with regular or thermal stickers. To do this, you just need to purchase stickers, put them on boiled eggs and dip them in boiling water for a few seconds.

The most common way, perhaps, remains painting with natural dyes. You can take the following cheat sheet as a basis.

We will discuss the methods of dyeing eggs in more detail below, but now I would like to give you some tips on preparing them for dyeing.
- In order for the eggs not to burst during cooking, they must be taken out of the refrigerator for an hour so that they reach room temperature.
- Before painting, dyes must be washed with soapy water or alcohol, then the paint will lie evenly.
- In the water or solution where the eggs will be boiled, add a spoonful of salt. So even from a cracked shell, the contents will not pour out.
- If you want your dyes to have a shiny appearance, rub them with vegetable oil after dyeing.
After you have prepared the material and chosen the most suitable method for yourself, you can begin to create a masterpiece.
Step by step painting in onion skins
The most traditional and proven method of painting eggs over the years is considered to be a decoction of onion peels. The more raw materials you can collect, the brighter the finished color will turn out. For a beautiful rich red-brown color of eggs, you need to collect the husks from 6 large onions. If you do not like such a rich color, you can collect less husks and then the finished product will turn out to be light yellow or light brown. It all depends on the variety and color of the onion peel. I will show you how to achieve a rich red-brown color.

1. Fill the husk with water and boil for 20 minutes, then strain - that's the solution for staining.

2. Add to the cooled broth 2 tbsp. l. vinegar, dip the prepared eggs there and cook for 7-10 minutes. Please note that the egg must be completely immersed in the liquid and it must not boil.

3. Carefully remove the eggs with a spoon and place them on a paper towel to cool. Cooled and dry krashenki can be greased with vegetable oil.
4. If the resulting color seems insufficiently saturated to you, return the eggs to the broth and hold them there until the desired color is obtained.
In onion peel with patterns
This method is for those who want to get a little creative with their dyes. We will use the same decoction of onion skins, but we will use flowers and herbs as stencils to create beautiful drawings.
For a more golden color of the finished product, I recommend using red and yellow onion skins.
You can use anything to create designs: from dill leaves, parsley, ferns, to flower petals or flowers. The possibilities are endless.

For coloring eggs we need:
- Red and yellow onion peel - from 6-7 onions
- Vinegar - 2 tbsp. l.
- Water - 2-3 tbsp.
- Herbs and flowers
- Nylon stocking
Stages of work:
1. Cut the nylon stocking into 15 x 15 cm squares.
2. Wet small sprigs of dill, parsley, blades of grass or flowers and apply them to the eggs. Then carefully place each egg in a separate nylon blank, wrap tightly and tie the ends with threads.

Soak the onion skins for a few hours or overnight in cold water before you start boiling them. Thanks to this, the eggs will color faster, and the color will be more beautiful and bright.
3. In a container with pre-soaked onion peel, add vinegar and put on fire. Bring to a boil and simmer for about 10 minutes.
4. Add prepared eggs to boiling water and boil for 8-10 minutes. After this time, the eggs can be laid out on a napkin or you can leave them to cool in the onion broth overnight for a richer color.

5. As soon as the eggs have cooled, you can cut the nylon bags, remove all twigs, leaves, flowers and wipe them with a paper towel. To add shine, you can rub them with sunflower oil.
Original marble eggs for Easter
There is an opinion that dyed eggs in onion skins leave no options - there is only one color. But as practice shows, even in onion skins you can paint with a twist. Now I want to show you this marble method.

1. For a marble Easter egg design, you need to take several large onion scales, wet them with water and wrap each egg with them.

3. Carefully place our blanks in nylon bags, tighten tightly and send to cook.

As a result, the egg will be colored non-uniformly, and the folds of the onion peel will form a pattern similar to marble.
Marble eggs in onion peel and brilliant green
Marble eggs according to this recipe are very beautiful, original in design and shiny. They are made easily and from affordable means. Most importantly, they are harmless, as onion peel and medical greenery are used. Such marble beauties will be a wonderful decoration of the festive Easter table.
In order to color the eggs, we need:
- onion peel
- Egg - 5 pcs.
- Bowl of cold water
- Salt - 1 tsp
- Zelenka - 20 ml.
- Scissors
- Threads
- Nylon stocking or piece of gauze
- Sunflower oil
Stages of work:
1. First we need to cut the onion peel into small pieces. This is very easy to do with scissors.


3. We tightly wrap the eggs in gauze or nylon blanks and fix them with a thread. We put the prepared products in a saucepan with cold water so that they are completely covered with water. Add salt and send to cook on fire. From the moment of boiling, cook for 5 minutes.

4. 5 minutes after boiling, add brilliant green and cook for another 10 minutes. Drain and rinse each egg with cold running water. Remove the gauze and husks from the cooled eggs. Lubricate dry cooled eggs with sunflower oil using a cotton pad. This is how beauty should be.

How to dye dyes with natural dyes?
Every housewife before Easter is sure to color the eggs. This centuries-old tradition is now taking on new forms, but more and more often we are returning to the old ecological and safe grandmother's methods of dyeing. Natural dyes surround us and are present in the kitchen of every housewife. The main thing is not to be lazy and prepare the right paint given to us by nature. What can be used? At the beginning of the article, I gave you a small cheat sheet, and now I propose to understand in more detail.
In the video, each proportion is for 3 eggs. I hope you liked these natural dyes and you can easily recreate them.
We paint eggs with beets at home
Have you tried dyeing Easter eggs with natural products that you have in your pantry or kitchen? If you are looking for a safe, easy and fun way to color eggs for your holiday table, I suggest you try this method in different interpretations.

1. Peel and cut the beets into small pieces. Pour in water, bring to a boil and boil for 15-60 minutes until you get the desired color of the broth. Cool it to room temperature, strain through a sieve and add vinegar. Vinegar is added at the rate of 1 tbsp. l. for 1 glass. Place the egg in a glass of dye and refrigerate until the desired color is achieved.
For this staining method, it is best to use a white egg.

2. We clean fresh beets, pass through a juicer or rub on a coarse grater and squeeze through cheesecloth. After our juice is ready, add 1 tbsp. l. vinegar and dip a chicken egg into it for 4-5 hours. If after this time the color is not beautiful enough, you can hold it for a few more hours.

3. Chicken egg, brought to room temperature, pour cool water, add 0.5 tbsp. l. salt and put grated beets on top. To preserve the best color, you can add 1/3 tsp. vinegar. We send our broth to a small fire and cook for 1-2 hours.

4. We rub the peeled beets on a coarse grater, wrap hot boiled eggs in it and wrap them in a paper towel. We put it in the refrigerator for the night, and in the morning you will get such a beauty.

Decoupage eggs for Easter with napkins
Decorating Easter eggs is one of my favorite pastimes, because here the flight of fancy is not limited. Currently, there are a huge variety of ways to color, decorate, decorate, paint Easter eggs. Now I want to show you a very simple way to decorate, which takes no more than five minutes. Plus, it requires zero artistic training and always turns out!

To decorate Easter eggs with napkins, we need:
- Chicken boiled egg
- Paper napkins with a beautiful pattern
- Egg white
- tassel
- Scissors
Stages of work:
1. I tried different ways of decoupage with paper napkins and by trial and error I realized that it is best to cut each picture separately. In this case, you will not form bubbles and folds when you stick them on the egg.

2. If you have multilayer napkins, you only need to glue the top layer with a pattern. Attach the workpiece to the egg and coat with protein on top with a brush. In order for the pattern to lie flat, smooth it gently with your fingers. Do not overdo it so as not to tear the part.

3. After you have decorated all the eggs, leave them to dry. Now you have Easter decorations with designs that look like they were painted directly on the egg!

Painted pysanky in fabric
Did you know that eggs can be dyed with silk or chiffon fabric with a bright pattern? I bring to your attention another quick and very beautiful way to decorate Easter eggs. They turn out to be so bright and unique that even exhibit them at an exhibition.

The finished product is more successful and more beautiful when dark blue, purple and red colors are present on the fabric patterns.
The interesting thing is that you never know how much color and pattern will be imprinted on the egg during the dyeing process. Sometimes patterns that you may think are amazing will look ugly on the finished product and vice versa.
In order to create such masterpieces, we need:
- 100% silk fabric
- Scissors
- Cotton thread or rubber bands
- White cotton fabric
- Vinegar
Stages of work:
1. First of all, we need to prepare the fabric in which we will wrap the eggs. To do this, we measure and cut silk and cotton fabrics into flaps measuring 18 x 18 cm. We tightly wrap a raw chicken egg in each flap and bandage it. Make sure the front of the pattern is on the inside, not the outside!

2. After you have wrapped the eggs in silk cloth, they must be wrapped in cotton cloth and tied up.

3. Put these little beauties in a saucepan, fill with water, add 1 tbsp. l. vinegar and cook for 20-30 minutes. Vinegar promotes better staining. The longer you boil the eggs, the brighter the drawings will turn out.
4. After the eggs are cooked, they must be removed from the water and cooled naturally or under cold running water. You can remove the fabric from the cooled eggs.
If you have chosen light and dark patterns for coloring, then it is better to color them separately. Otherwise, the finished crumbs will have the effect of a “dirty” pattern.
See what beauty can turn out thanks to this uncomplicated method!

Original methods from improvised means
Every year we want to try some new ways of dyeing Easter eggs to surprise our family and friends and to please the kids with an interesting dyeing process. Let's look at some interesting decor options with the help of improvised means.
1. For this method, we need: boiled eggs, shaving foam, food coloring, wooden sticks and a cardboard box or other container to create the base. Squeeze the shaving foam into a container, spread it over the surface with a stick, drip dyes on top, spread it with a stick, creating a pattern, dip the egg into the foam, put it on a napkin and leave for 15 minutes.
 Then we wipe the eggs with a paper napkin and get the original marble attributes of the Easter feast.

2. This coloring option will appeal to children who love to draw and create crafts. For this we need: boiled eggs, paper towels and colored wax crayons.

3. Older children can be offered to paint eggs with acrylic paints.

4. For fans of cartoon characters, you can create such funny minions. To do this, you will need the appropriate food coloring, a black marker, black thread, and eyes that you can buy at a craft store.

5. And for fans of ninja turtles, such wonderful crumbs will be an excellent option.

6. This simple and time-saving method will help you create beautiful lines on Easter eggs. To do this, you need to prepare food coloring, elastic bands of different thicknesses and paper napkins. Wrap the egg with rubber bands as shown in the picture below and dip in the dye you need until it is completely colored. Place the egg on a paper towel and leave to dry. When the paint is completely dry, the rubber bands can be removed. You should get such crackers.

7. Decorating Easter eggs with natural, ecological products, unlike artificial ones, guarantees that the product will be edible. In addition, the costs for this need the most minimal. Pour water into three saucepans, bring to a boil, drop a bag of a different kind of tea into each of them and leave them for 30 minutes. After 30 minutes, take out the tea bags, add 1-2 tsp. vinegar in each container, dip one open egg there and put it in the refrigerator overnight. The next day you can admire the work done.

That's all I have today. I tried to find for you as many options for dyeing Easter eggs at home as possible and I hope that this article will be useful to you. Having this basic knowledge in stock, you can always supplement it using your imagination.
And now I want to wish you good health, happiness and congratulations on the upcoming Easter holiday!
Good afternoon, dear friends, the bright holiday of Easter will come very soon. And you will need to decorate the table with Easter cakes and eggs. If we figured out a little with Easter cakes, then we don’t have eggs yet. A note on how.
And so now let's talk about how to paint eggs. Eggs have been painted, painted and decorated for Easter for a very long time, but the real dawn and the flight of thought can only be realized today, when a lot of all kinds of food colorings have appeared.
In this article, we will analyze several surefire ways to beautifully paint eggs for Easter. And of course, you need to prepare early, as you need to collect all the ingredients. For example, in an apartment there is not always a box with onions and it is not so easy to collect onion peels in the right amount. In general, we will analyze everything in detail later.
Once, while looking through my wall in VK, I came across such a post about painting eggs with natural dyes. All dyes are natural with no added chemicals. And the colors will pleasantly surprise you.
I’ll tell you a little more about the use of natural or natural dyes, but a little later, but for now we’ll analyze a small reminder about determining the freshness of eggs.  Well, we checked the eggs for freshness, what did you get, leave the results in the comments. And we move on to food coloring. Which are sold before Easter at every turn.
These are the four packages you will find inside the main package.  Small sachets can contain either tablets or liquid. Of course, it is better to wear gloves when working with these paints. No, not because the paint is harmful, but so as not to get dirty.
We select the first few beauties from boiled eggs, dilute the paint according to the instructions. One can for each paint.
Most of the instructions are similar on my bags, the instructions said that boiled eggs should be washed well in a soda solution (1 tablespoon of baking soda for half a liter of water). Dilute paints only in warm water. Half a glass of water is enough for 1 paint, but you will also need to pour in a tablespoon of 9% vinegar. Prepare the dye and dip the egg into it for 5-6 minutes. Carefully remove the field with a spoon and put it on a plate to dry. 
Just like you, I am a real creative person and it occurred to me to mix paints to get a new color. For example, if you mix blue and yellow, you get a turquoise color. Try it and you might succeed. Or maybe you want to mix other colors. Write in the comments under the article what happened to you.
After the paint dries, it will no longer get so dirty. And you can try to decorate the eggs with beautiful stickers. Thank God they are also not a problem to buy. 
And if you want to make an egg not of one color, but of several. Try to dip the egg into the paint not completely, but only a small part of it. 
Wax can be used to paint half eggs. We wax the part of the egg that we will not paint. We dip into the paint and under the wax the shell does not change color. This will make it easier for you to make colorful eggs. 
If there are children in your family, be sure to invite them to help with painting the eggs. But do not leave them all the same, this is the kitchen.  And this is how you can paint eggs with a regular whisk.
  Try putting eggs (boiled) in a colander, and drop it into the water with a few dyes and mix with a spatula. The output is all intricate colors.
  You can also wrap a boiled egg in a regular paper napkin and drip paint from several sides. Then leave the egg in a napkin for 5-10 minutes so that the paint is properly eaten into the shell.
  This is what beauty can be. Almost a marble egg without much effort.
  You can decorate an egg for Easter without dyes. It is enough to take a special thermal film, put it on an egg (boiled) and lower it for 5-7 seconds. in boiling water from high temperature, the film narrows and takes the shape of an egg.
  As you can see, there is no particular difficulty here. Everything is easy and simple, and you don’t need to dirty your hands, and you also need to dilute the paint with a film of boiling water and that’s it.
Dyeing eggs in onion skins
This is the oldest and most insatiable traditional method or way of dyeing eggs. Our grandmothers used to paint like this even under the king of peas.  The colors are natural and no chemicals. Despite the large abundance of dyes, everyone in every family dyed and will dye eggs in onions every year, as this is part of a tradition that no one wants to give up. But there is one minus for painting eggs in onions, you will need to select a pan, since the dishes can also be stained.
For a good saturated color, we take 3-4 parts of the husk to one part of the water. Just coloring eggs in onions is not about us. You need to do it creatively. So read on. 
For creative coloring of eggs, take the following:
- 1 tablespoon of salt.
Nylon stocking.
Greenery leaves (dill, parsley, dandelion, cilantro, etc.)
Skein of thread.
Vegetable oil.
Painting process.
We take raw eggs, since you need to cook in the husk for at least 40 minutes.
Attach a leaf to the egg. Cut off a piece from the stocking and carefully place the egg into the stocking. We press the leaf to the egg and wrap the stocking with threads. It should turn out something like this. 
We fill the husk with water and put it on the stove.  Add salt and when the water starts to boil, lower the blanks into the husk.
  Cook for 30-40 minutes. Then we take it out and if there is a second batch, cook the second one, and let the first one cool down for now.
  Once the eggs have cooled slightly, remove the stockings, remove the leaves and rub the eggs with vegetable oil. After that, the testicles will acquire a beautiful shine.
  You can also use this method to dye eggs in food coloring.
How to paint eggs so that they are marble
If you want to surprise old housewives or girlfriends with your painted eggs, then we look longer. So eggs are very rarely painted by anyone, everything is done according to the classics and no one wants to bother further, but there is practically no trouble here.
Required.
- Eggs.
- Onion peel.
- Zelenka.
- Water.
- Pot.
Painting process.
The method is similar to the classic, but with a few additions. 
We take a raw egg, dip it in water and roll it over the onion peel so that it sticks to the egg. Then wrap it in a stocking or bandage. Pour plain water into a saucepan, add a spoonful of salt and put on the stove. As soon as the water starts to boil, lower the eggs, pour in the brilliant green and cook the eggs for 30-40 minutes. After we drain the water, cool and remove everything that is not needed.
This is what I did, and it should be the same for you.  The drawing is just extraordinary. And what is most interesting, there are no 2 identical eggs, all are different.
Coloring eggs with natural products
Well, now let's turn to natural dyes. which are found in food. 
It is important when using such paints to add a little vinegar. It will fix the colors and make the colors more saturated.
1. Color eggs with turmeric. She will give you yellow. How to dye eggs with turmeric will be discussed below.
2. If you want to dye eggs bright orange, then carrots will help you. We take carrot juice and dip an egg into it. The saturation of the color will depend on the time that the egg has lain in the carrot juice.
3. Have you ever dyed eggs in beetroot juice? I recommend to try. True, the process is too long. You need to keep the boiled egg in beetroot juice for at least 8-10 hours. But only you will have raspberry eggs. 
4. Another long way to dye in red cabbage. We also squeeze the juice and keep boiled eggs in it for 8-10 hours. 
5. Doge tea and coffee will help us color the eggs. Brew the tea stronger and hold the egg in the brew for 2-3 hours. Then take out and get tea-colored eggs. By the way, you can paint not only in black tea. 
You can make a beautiful green color for this, take a bunch of spinach, cut it, put it in a pot of water. We put on the stove and cook the eggs in it until the desired color is obtained.
That's what you can achieve with patience. As an author, I boast of my achievements. 
Emerald eggs for Easter
Consider this option for coloring eggs. The video shows all the steps, it is possible that this particular method will be more understandable to you.
How to dye eggs without dyes using turmeric
 No wonder this method of coloring is gaining popularity. After all, the result is so good that you can’t even believe that this is all a natural color.
For 250 ml of warm water, stir 1 tablespoon of turmeric, let the turmeric dissolve for 2-3 minutes and put on fire. Throw in the eggs and cook for 30-40 minutes.  Also, before throwing eggs, you can apply the technique with stockings or husks.
Dyed eggs in fabric
We continue to create and continue to be weird, now we will try to paint eggs with a tie. No, of course, we won’t spoil the whole husband’s favorite tie, just take and cut off a small piece.))) For this method, any colorful silk fabric can also be used, you can also take colorful cotton. 
We take a beautiful piece of fabric, wrap an egg in it and wrap it with threads. Next, lower it into a pot of water and cook for 15-20 minutes. Do not forget to add 1 tablespoon of vinegar to 1 liter of water. The result surprised even me. 
Instead of fabric, you can take any material with a mesh and wrap an egg in it. We cook such eggs in any dye and get unusual results. 
Painting eggs for Easter in a napkin
The technique is quite young and little known. For me, it looks more like a hand-made full-fledged craft for the holiday, not jelly for painting an egg.
You will need the following set:
Eggs.
Napkins.
PVA glue
Tassel.
Scissors.
Production process.
A pattern is cut out of a colorful napkin. The napkin is disassembled into layers. 
Apply a layer of glue to the egg with a brush. Then the cut out pattern is carefully applied. 
Top the drawing with a thin layer of glue. You can put several patterns on one egg. After you need to let the glue dry.  It turns out very beautiful. I remind you that we paint boiled eggs.
We paint eggs from improvised means at home
As you know, Easter cakes are decorated with icing and beautiful topping, and why not decorate eggs with this topping.  This is not tricky, and the results will surprise you perfectly. In order to glue the topping on the egg, you don’t even need special glue, all the same eggs will help us.
We take the protein, dip the boiled egg into it, grease it well from all sides, then dump it in the powder.  You can also use clerical glue, but you should not eat it anymore, since the glue will easily penetrate to the edible part of the egg through the pores in the shell. Of course, when using this technique, you can decorate eggs not only with powder, but also with various cereals.
  For example, look at what a fun egg you get if you use cereal.
Well, if we were carried in this direction, then eggs can also be decorated using nail polish. True, you need to work with gloves so as not to get your hands dirty. Take a glass of water, pour some varnish of different colors, draw a small pattern and dip an egg into it. But I remind you once again to eat such eggs is not recommended. 
Try coloring the eggs with markers. Water-based markers work very well for this purpose. And if you show a little imagination and draw eyes on the eggs, you can create a whole army. 
If you are interested in the idea with eyes, look for them on store shelves.  You can buy ready-made eyes and use them to create these minions. Look how cute they are right?
So I think now you are completely ready to paint eggs for the Easter holidays. Congratulations on the upcoming Bright Sunday of Christ. Christ is Risen!!!
Hi all. April 28 is coming soon. It is on this day in 2019 that all Orthodox celebrate Holy Sunday. It's time to think about how to beautifully paint eggs for Easter.
It is customary to exchange krashenki with each other on this holiday. And of course, everyone else cooks traditional holiday dishes - they bake and make.
There is one fun tradition on this day, or rather even a game - to beat eggs. The loser is the one whose egg is cracked. Why is this being done? Here is one version.
An egg that breaks carried evil in itself and it must certainly be punished - eaten. A strong egg brings blessings and prosperity to the house, it must be kept in the closet until the next Easter day! Such an egg can protect against diseases and evil eye throughout the year, since it was not in vain that various fortune-telling was performed on them, amulets were made, and terminally ill patients were cured with their help.
I googled and found so many easy and fun ways to dye Easter eggs. Some I didn't even know about.
Today I have made for you a selection of the most interesting, in my opinion, ways to paint and decorate them. I hope you enjoy them too.

But first, let me give you some useful tips.
Remove them from the refrigerator in advance so that they reach room temperature, at least 2 hours.
- For painting, choose white.
- Before cooking, wash them under running water, dry with a cloth (microfiber dries well) or a paper towel. It is also advised to wipe with alcohol or vinegar.
- In order for the eggs not to burst during cooking, add salt to the water (1 tablespoon per 1.5 liters)
- Choose a pan so that they lie close to each other so that when boiling, the shell does not crack against a neighbor.
- When cooking, the water should cover them, keep an eye on this.

Now let's move on to painting.
The classic way in onion skins
This is perhaps the most famous and traditional method. Plus it's budget friendly.
Accumulate more onion peel, the color of the eggs will be brighter.
1. Pour the husk with water and put on fire, after boiling, cook for about an hour.

2. Then we let the broth cool and brew, after that we get rid of the husk, you can pour water through a colander into another pan.

3. Put eggs in this broth and cook for 10 minutes.

4. Then we transfer them to cold water and let them cool.

5. Rub the finished dyes with vinegar so that they do not lose their color and with vegetable oil for shine.

Easter eggs with marble pattern
Very beautiful eggs are obtained if they are painted with this method. There is nothing complicated here. You just need to have onion peel, gauze and thread on hand.
1. First you need to finely chop the onion peel and leave it on a plate.

2. Soak the eggs in cold water and roll in the husk when wet.

3. Then we wrap it in gauze and tie it with a thread. Cut off the end so it doesn't get in the way.

4. Put them in a pot of water to cover the top, add salt and cook for 10 minutes after boiling. Then add a bubble of brilliant green there and cook for another 10 minutes.

5. When they are cooked, let them stand for another 10-15 minutes, and then pull them out and clean them of gauze and husks under cold water. Wipe dry and brush them with vegetable oil for shine. We get this beauty.

Green leaf pattern
Another simple but original way to paint Easter eggs. Here we need a bunch of parsley and dill, onion peel, nylon (old tights or socks are great) or gauze and thread.
1. Do not forget to take the eggs out of the refrigerator in advance and prepare the onion peel decoction as described
2. Moisten the egg and attach a leaf of greenfinch to it. Wrap tightly with nylon and tie with a thread. Do this with the rest as well.

3. Put a decoction of the husk and cook for 15 minutes. Do not remove immediately, let it stand for 10 minutes more. Then remove and free from nylon and greens, rinse in cold water and brush with oil. Beauty in the face.

Coloring eggs with rice
It is done in the same way as above. Just roll it in rice groats.

Then also wrap with nylon and cook in a decoction of onion peel.

We free from gauze and rice, rinse, lubricate. This is how they turn out.

We paint in beetroot broth
In this way, you can get eggs of a rich red color.
Description:
- Clean and cut the beets into pieces. Boil it in a small amount of water for 15-20 minutes.
- Drain the broth into another pan, add vinegar there, put the eggs there and cook for 10 minutes. Eggs should be completely covered with beetroot water.
- After the eggs are cooked, let them stand in beetroot water for another half an hour or more, the longer they stand, the color will be more saturated.
- Then rinse them and dry them with a towel.

Red cabbage staining technique
Thanks to this method, our coca will be a beautiful blue color.
1. We need 1 head of red cabbage. It needs to be finely chopped and boiled for half an hour. Then it should cool down and after that we drain the broth into a separate bowl, add 5 tbsp. tablespoons of vinegar.
2. Put boiled eggs there and leave for 2-3 hours. The intensity of the color depends on how long you keep them in the decoction.

Video lesson - 3 original ways to paint eggs
In addition to natural dyes, there are many ways to decorate Easter eggs.
I found a very interesting video with three original coloring methods.
So, with the help of ordinary white napkins, food coloring, nail polish and patterned napkins, you can quickly and easily decorate our products.
Decoupage eggs in vintage style
Very interesting are the eggs in the style of "Vintage" with the help of chopped newspaper and beautiful napkins.

Coat the eggs with glue, you can use ordinary PVA, or you can use egg white, and stick newspaper pieces in several layers. Let it dry.

Cut out the pattern you like from napkins and stick it on top of the newspaper. Can be varnished on top. Let it dry and that's it.

You can also decorate with lace, ropes and buttons.

Coloring with a marker
There is no limit to our imagination. But everything is so simple - you take a boiled egg and paint it with a permanent marker.
It can be like this.

Or like this.

I hope I have helped you with some new ideas on how to color eggs for Easter this year. I've already made up my mind, how about you? Write in the comments which method you chose.
Don't forget what else needs to be baked. I look forward to visiting you again. Have a nice day. original
Meat dishes. And one of the most important treats for this day is, of course, eggs - a symbol of birth. And any hostess, in order to surprise everyone, painted testicles according to a non-standard solution - with imagination.
And how beautiful to paint eggs for Easter with your own hands? Here you will see how you can decorate Easter eggs in an unusual and original way at home - not like everyone there! Marble, iridescent, classic in onion peel, without dyes, using food and natural dyes, rice or cloth (decoupage).
Everyone treated each other with these symbols and said “Jesus is Risen!”, and heard in response - “Truly Risen!”. "Krashenki" (the so-called colored eggs) we fight. But before that, we admire them - how beautifully decorated they are!
How to beautifully paint eggs for Easter with your own hands: general rules
There are no clear rules on how to paint eggs for Easter, but there are still recommendations that must be followed. They are proven by experience - by trial and error. Therefore, I trust them and fulfill them. And I advise you!
- Eggs must be at least room temperature before boiling. Therefore, if the eggs are in the refrigerator, then you should get them in advance. This is necessary so that the shell does not crack during cooking.
- In order for the egg to color evenly, it is necessary to wash it. Do not just rinse with water, but with a dish sponge, and preferably with soapy water.
- After washing, degrease. You will need vodka or alcohol. Then wipe dry.
- In order for the egg to shine with a healthy look after painting, it must be coated with vegetable oil. Thus, a gloss will appear on the shell.
Now you are ready to decorate Easter eggs with your own hands. The material is ready, now it's time to start painting. Follow the clear instructions and you will get the most beautiful Easter eggs.

Onion peel is a traditional classic natural material for dyeing Easter eggs at home. Colors come in various shades. It depends on the volume of the main ingredient and how long the eggs stay in it - from light beige to dark brown.
Also, along with onion peel, various additives are used: brilliant green, dyes, lace, create patterns.
The classic version of painting eggs in onion skins
This method is the most popular. Because it has been used for decades. The more peel, the darker and richer the color.
Remove the eggs from the refrigerator and leave for 2 hours to bring the temperature up to room temperature.
At this time, pour onion peel into the pan, pour water and cook for at least half an hour. Let it brew for 30-40 minutes.
Then add a spoonful of salt to the broth and place the testicles there. Cook the dog of readiness. Remove carefully and cool in cold water. You can strain the onion broth, and only then cook in it.
If the eggs have not acquired the desired effect, then place them back and bring them to condition.
Be sure to wipe dry and lubricate with vegetable oil so that gloss appears.
To get a bright red and brown color, you need a couple of kilograms of onions for a dozen eggs.
How to dye eggs marbled with onion skins

For this method, you need to prepare the main material: cut the husk and paper randomly into small pieces.
Moisten the eggs with water and roll in the husk with paper.
Prepare gauze or nylon stocking. Cut them so that one testicle fits. Tighten tightly and tie with a thread. The denser, the sharper the pattern.
Place onion peel and eggs in a saucepan, salt and cook for 30-40 minutes.
When ready, cool in cold water and remove the gauze or stocking.
Dry and coat with vegetable oil.
Marble Easter eggs - a method in onion peel and greenery

Quite an original way and many people like it. It turns out an unusual marble color.
Dip the eggs soaked in water in the onion skins. And as in the previous version, we wrap it with gauze or nylon. We pull the ends with a thread.
Pour water into the pan and pour in a whole vial of brilliant green.
We place the eggs. They must be covered with water. Bring to a boil and cook for another 10 minutes.
Carefully take out and under the tap. Remove the gauze and rinse again.
Dry and polish with vegetable oil.
How to dye patterned eggs with onion skins and rice

With the help of rice, we can get the so-called "specks" - when the shell is painted as if in a speck.
Moisten eggs with water and roll in rice.
Wrap with gauze and tie the ends with thread.
Place in a prepared saucepan with water and husks and cook for a little more than half an hour.
After the time has elapsed, cool, remove the gauze, dry and grease with oil for a gloss effect.
You will also be interested in what to cook delicious for Easter:
- Juicy and tasty rustic potatoes
How to paint eggs for Easter with your own hands without dyes with a pattern

In order to get Easter eggs with a pattern, there are several options. The patterns come out lacy, iridescent and abstract.
For all methods, the main ingredients and recipe are the same. The difference is that as objects we will use improvised means found at home. With their help, paint the eggs in the desired pattern.
DIY Easter Egg Patterns: General Rules
We will need:
- onion peel
- Sprigs of dill, lettuce, basil, celery and others (any, at your discretion),
- Gauze or nylon tights,
- Threads, electrical tape, fabric and rubber bands,
- Various cereals (their seeds),
- Vegetable oil,
- Salt.
Cooking:
- We cook the coloring solution.
- We decorate Easter eggs.
- We fix the pattern with gauze or nylon.
- We cook in the mixture.
- Cool, remove fasteners and wash.
Coloring eggs with cereal grains
The painting technology lies in the fact that the testicles must be moistened and rolled in grains of cereals - either one variety or all in a row. It turns out here is such an uncomplicated pattern. Various cereals are suitable: sesame, buckwheat, rice (we have already said above how you can paint in the form of “specks” with the help of rice) and others.
Patterns with fabric
This is also an unusual way of coloring eggs. It consists in the fact that the product is tightly wrapped with a fabric pattern inside. Any fabric can be suitable, both old and new, specially purchased for this purpose.
Well, if you use lace instead of a fabric with a pattern, then a very beautiful lace pattern will remain on the shell.
Patterns on Easter eggs using stencils
This guys is a really easy way. Buy a stencil or cut yourself out of paper. Glue on a wet shell, wrap with gauze and boil with a coloring solution.
Uncomplicated ornaments are obtained. You can pick up drawings of animals and flowers, but whatever. Everything is in your hands and your imagination!
Patterns with greenery:
For this case, we need celery and basil leaves (maybe you have other types). Dill can also leave a nice pattern. We glue it to the testicle with the front side, wrap it around with nylon and tie the ends. We cook in dye.
Insulating tape, threads and rubber bands
It is also a suitable material for decorating Easter eggs. We wrap the thread in a chaotic or vice versa in a predictable way around the egg. The electrical tape should be cut into thin strips and also applied with a thread. Stationery rubber bands - they can be wrapped randomly crosswise.
These methods listed above must be applied to already boiled eggs. And also to get colorful. First you need to dip in one color, hold to dry and then in another color.
Now just before Easter, you can find a lot of tools for Easter decoration in shops and supermarkets. I have come across food coloring, shrink wrap, rice napkins for decoupage, and much more, no less interesting.
Today we will talk about natural dyes and their help in dyeing eggs at home. It is always more pleasant to do it with your own hands, especially if there are children nearby.
Natural dyes speak better than artificial ones. I would not say so and there is nothing chemical in them. They are as harmless as natural ones. And the color palette is richer. Another minus naturalki - time. To prepare a saturated coloring solution, it will take from 2 to 10 hours.
Consider several popular options for natural dyes for coloring Easter eggs. Let's figure it out.
Natural vegetable dyes for Easter eggs and how to dye them

- Onion peel. We already know about her, she sets the shell from light yellow to dark brown. I like the second shade. How to paint, we explained in detail and step by step above (you can return if you started from this point).
- Beet. Beetroot colors the eggs in various shades of red, pink and burgundy (purple in some cases). How to paint: grate the beets (you can do it whole, but it will take longer), boil the beetroot juice. Add a spoonful of salt and a spoonful of vinegar, place the eggs and boil hard.
- Red cabbage. This version is dominated by blue. How to color eggs: finely chop the cabbage, pour boiling water and vinegar (a couple of spoons) and leave for 8-10 hours. Then place the eggs and leave until the color is fully saturated.
- Turmeric. Love golden eggs. Here's the dye. The turmeric will color the eggs a sunny golden color. Pour 100 grams of ground turmeric into boiling water, add raw eggs and continue to cook until tender. Leave it like that until the morning.
How to dye eggs rainbow colors

You can also paint eggs for Easter with paints that are sold in the store in the form of food coloring. There are from 4 to 15 colors - a rich palette. So something beautiful will turn out! The main desire and patience!
How to paint - read the instructions, and you will not be mistaken.
When using several colors, eggs in iridescent color are obtained. Just dip the eggs in the beauty not to the end: not a third or half. And let it dry before painting with another paint.
Everyone will be surprised by this type of painting - very beautiful, unusual and original!
You will be interested in:
- Greek salad new
Paint Easter eggs with varnish or vegetable oil
I don’t know about you, but this method is new to me and I really liked it. It is suggested to use vegetable oil as a working tool, along with dyes and colored nail polish.
It turns out not only rainbow and marble eggs, but also abstract and symmetrical. Due to the even distribution of paint in both cases, an unusual symmetry is created.
Coloring eggs marbled with nail polish

In this case, we need ordinary eggs with a white shell (although not necessary). Drip nail polish into a container of water in the center. You can alternate colors.
Right in the bowl with a toothpick, draw everything that comes to mind: abstraction, flowers, waves, cobwebs. Put on gloves and dip the egg in this colorful liquid, and then the other side.
If you don’t want to bother with gloves and dipping, then just draw directly on boiled eggs.
How to dye eggs for Easter without dye: DIY decoupage
Now in our time, people are increasingly trying to pursue their hobby. There are new masters of their craft, new directions. Decoupage in the general concept is one of the most popular areas of the crafts fair.
This is the art of creating something stunning out of nothing! They decorate everything that is possible, old furniture, clothes, photos, crafts, including eggs. And by the way, not only for Easter, but also for the sake of creativity. In addition, this is another way to dye eggs without dye!
Video - Decoupage eggs with napkins
Tip: choose wipes with a small pattern, as the surface of the testicles is small.
In order for the decoupage of eggs for Easter to turn out so neatly and beautifully, care, attentiveness, patience and a little bit of skill (experience) are needed. You can practice, you even need to! The video shows that the most common egg white was used as an adhesive.
In any case, if you really want something, you will definitely succeed!
Video - Decoupage eggs in gold color
And here is another video and a master class for you on how to paint an egg golden. This gilding technology is actually as safe as it is without dyes.
Why paint eggs for Easter?

Somehow I never thought about why eggs are painted for Easter. They paint and paint, give and give - so what? Became interesting.
It turns out there is a legend.
Saint Mary Magdalene gave an Easter egg to the Roman emperor. The egg was dyed red. And according to church tradition, the stones on Golgotha turned into red eggs on the day of the Resurrection of Christ.
According to another version, the emperor, having accepted an ordinary testicle and doubting that Jesus was Risen, said: “Just as an egg cannot turn red from white, so the dead do not rise!” And at that very moment, the egg turned red. Taken aback by what he saw, the emperor exclaimed: “Truly Risen!”
Since then, it has been customary to paint eggs for Easter and give them to say - "Christ is Risen!". And they answer - "Truly Risen!"
Here's a master class for you:

Creative and original solution. Call your kids and get started. There is nothing difficult in this.
You will need:
- beautiful with a pattern and patterns pieces of fabric,
- white cloth,
- vinegar,
- water pot,
- the eggs themselves
- desire and time (20 minutes).
1. Now we cut the fabric into shreds approximately along the side lengths of 18 centimeters, as in the video.
2. We wrap each egg first in a colored cloth, and then in a white one.
3. We put the original bags in a saucepan. Fill with water and add 3 tablespoons of vinegar. We cook for 15 minutes.
4. Let's cool and Vo-alya - the beauty is indescribable! Can it still be so beautiful somewhere?
Short video:
Easter eggs from beads video tutorials
Three very useful and simple, and most importantly without water, clear lessons and a master class from Shurochka:
Summing up, we can safely say that you now know and know how to paint eggs for Easter with your own hands at home. With such a variety of options, it is simply impossible that something will not work out.
My children have already decided to cook Easter eggs in golden color - it painfully reminded them of a fairy tale about the Ryaba chicken. And I think you need to try several options so that the festive table looks really fabulous with an abundance of various decorations.
Good to your home, mutual love, peaceful sky and well-being! So that there is no grief and sadness in your life, so that illness and failure pass by! Happy holiday to you, Happy Easter! Christ is risen!